
Written By: Dean Shali
Fact Checked By: Sabré Cook
Reviewed By: Tamara Warren
Do you know that: Position of the puncture matters more than its size, as even few millimeters of small nail is enough to slowly drain the air from a modern tubeless tire.
As well as, it is true that older tube-type tires actually fails in quick fashion, but now-a-days tubeless tires are designed with an airtight inner lining and a tight seal against the rim; which actually allows them to lose air gradually instead of suddenly that gives you time to act but also makes the damage easier to ignore.
Plus, there’s research and industry data that consistently shows that underinflated tires that reduces fuel efficiency, that even increases the stopping distance and accelerate the tread wear as well.
But the think is: many people thinks that every puncture is “EQUAL”, but even a small hole in the tread area can often be safely repaired, while the damage to the sidewall or larger tears can make the tire literally unsafe even if it still holds the air.
That’s why, in this guide you’ll learn How to Repair Tubeless Tire Puncture so that you can make a smart decisions that ultimately saves you money and lowers the risk on every drive as well.
Understand, How Tubeless Tires Work
Instead of utilizing a separate inner tube, a tubeless tire functions by retaining air directly within itself, thereby making the entire system simpler and more reliable.
The interior of the tire features a specialized rubber lining that prevents air from escaping easily; when the tire is mounted onto the wheel, it forms a robust seal that keeps the pressurized air contained within.
This design helps the tire remain inflated for longer periods and minimizes the likelihood of sudden air loss.
Furthermore, because there is no inner tube to generate friction, less heat is produced, which enhances safety and extends the lifespan of the tire.
Understanding this fundamental operating principle clarifies why small punctures behave differently in tubeless tires compared to older designs.
1. The Airtight Seal Between Tire and Rim
The most critical component of a tubeless tire system is the strong, airtight connection established between the tire bead and the wheel rim.
The bead is the edge of the tire that sits snugly against the rim; when the tire is inflated, the internal pressure pushes the bead outward, creating a firm seal that prevents air from escaping.
For the system to function correctly, this seal must be clean, properly seated and free from any form of damage.
Even a minuscule gap, caused by dirt, rust, or improper installation, as it can lead to a gradual loss of air pressure.
Therefore, to ensure the tire remains completely airtight and secure while driving, proper installation and maintaining a clean rim surface are absolutely essential.
2. The Role of the Valve Stem and Inner Lining
The valve stem is a small yet vital component that facilitates the inflation of the tire and ensures that the air remains contained within; It contains a small valve core that opens to admit air while the tire is being inflated and closes instantly to retain the air inside.
If the valve stem is loose, broken, or worn out, air can leak out, even if the tire itself is in perfect condition.
Inside the tire, the inner liner plays an equally crucial role; it acts as a barrier that prevents air from gradually seeping out through the rubber.
This layer is specifically engineered to be far less porous than ordinary rubber, thereby helping the tire maintain its pressure over time.
These two components, the valve stem and the inner liner, work together as a cohesive system.
They share a single objective: to ensure that, under normal circumstances, the air contained within the tire does not escape.
3. Why Does Air Leak Out So Much More Slowly From Tubeless Tires Compared to Tube-Type Tires?
Air leaks slowly from tubeless tires because they feature a “self-sealing” system and lack an inner tube.
When a sharp object such as: a nail, punctures the tire, it often remains embedded within the tire’s rubber.
This effectively plugs the puncture to some extent, thereby slowing down the rate at which air escapes.
Even if the nail is subsequently removed, the tire’s thick rubber and inner liner tend to contract slightly around the puncture site.
This further slows down the air leakage.
In contrast, air escapes very rapidly from tube-type tires.
This is because there is a risk of the inner tube rupturing; once a puncture occurs, the air escapes almost instantaneously.
As air pressure in tubeless tires decreases gradually, drivers have ample time to recognize warning signs such as: a drop in air pressure or subtle changes in handling.
This enables them to easily take the necessary measures before the situation becomes dangerous.
Know, Common Causes of Punctures in Tubeless Tires
A puncture in a tubeless tire typically occurs when a sharp object pierces the tire’s thick rubber tread, creating a small hole through which air begins to leak gradually.
Although tubeless tires are designed to be robust and resistant to damage, they are still subjected to the harsh conditions of daily road use.
The risk of a puncture depends on your driving habits, the quality of the roads you travel on and how well you maintain your tires.
Understanding the root causes allows you not only to fix the problem but also to prevent it from recurring, thereby saving you money over time and enhancing your safety.
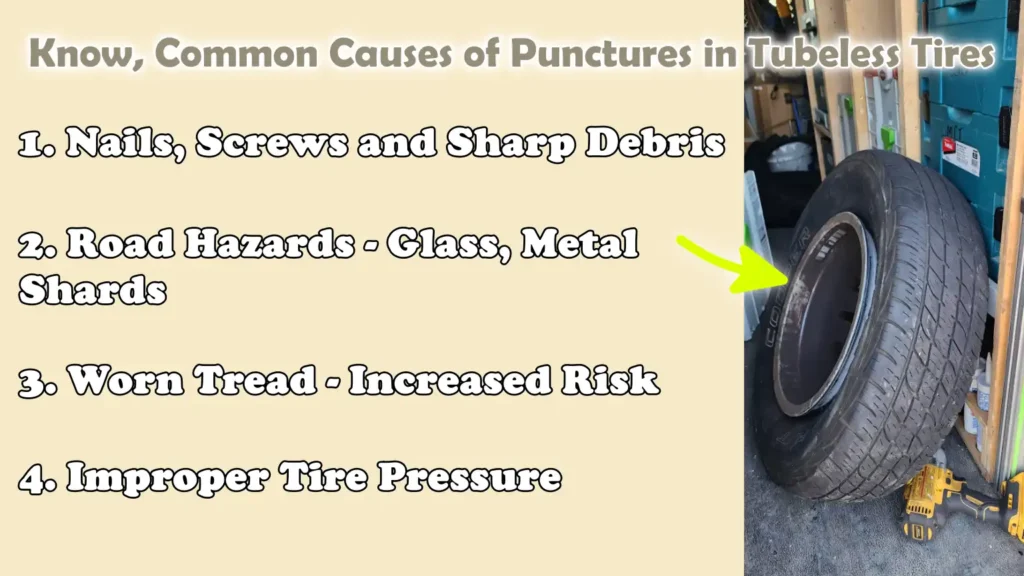
1. Nails, Screws and Sharp Debris
One of the most common causes of punctures involves nails, screws and small sharp objects scattered across the road, particularly near construction sites or on highways.
These objects are often slender yet strong enough to pierce the tire tread, embedding themselves deep within the tire as the vehicle rolls over them.
In many instances, these objects remain lodged inside the tire, causing a slow air leak; nevertheless, the structural integrity of the tire is still compromised.
The danger lies in the fact that drivers often remain unaware of this issue and continue driving until the tire pressure drops significantly.
Regularly inspecting your tires for embedded objects allows you to identify and address these issues before they escalate into serious problems.
2. Road Hazards – Glass, Metal Shards
Broken glass, metal shards and other sharp debris scattered on the road constitute another major cause of punctures, particularly in urban areas or on poorly maintained roads.
The edges of these objects are often so sharp that they slice through the rubber surface of the tire.
Unlike nails, these objects do not always remain embedded within the tire, meaning that air can escape very rapidly.
Driving at high speeds over such hazardous objects significantly increases the likelihood of sustaining deep cuts or multiple small punctures.
This risk can be substantially mitigated by remaining vigilant regarding road conditions and avoiding road debris whenever possible.
3. Worn Tread – Increased Risk
As a tire wears down over time, its tread becomes thinner, rendering it less effective at shielding the tire’s inner layers from sharp objects.
A worn tire retains less rubber to absorb shocks, allowing even small fragments on the road to easily penetrate the tire and cause a puncture.
Furthermore, worn tread (the tire’s outer layer) compromises the tire’s grip on the road, thereby increasing the risk of the vehicle skidding into hazardous areas where debris may be present.
Monitoring tire tread depth and replacing tires once they become worn is the most effective method for preventing punctures and ensuring safe driving.
4. Improper Tire Pressure
Improper tire pressure, whether too low or too high, plays a significant role in increasing the risk of punctures.
When a tire is underinflated, it becomes softer and more pliable, allowing sharp objects to penetrate the rubber more easily.
This also generates excessive heat within the tire, which gradually weakens its structural integrity over time.
Conversely, if a tire is overinflated, it becomes excessively rigid; this diminishes its ability to absorb shocks and heightens the risk of damage from sharp edges or potholes.
Maintaining the correct pressure recommended by the manufacturer ensures optimal tire performance and significantly reduces the likelihood of sudden punctures.
Know, Signs That Shows a Puncture in Your Tubeless Tire
A tubeless tire typically does not fail abruptly; instead, it provides clear warning signs that something is amiss.
Due to its design, air usually escapes gradually in most cases, meaning you often have ample time to notice the changes before the situation becomes hazardous.
Paying attention to these early indicators allows you to address the issue promptly, prevent further damage to the tire and maintain safe driving conditions.
Knowing what to look for is crucial, as many punctures are minor and not immediately visible, yet they can still impact performance, fuel efficiency and overall safety.
1. Gradual Loss of Air Pressure
The most common and reliable sign of a puncture is a slow and steady decline in tire pressure over time.
You may notice that you need to inflate your tires more frequently than usual, or that a specific tire appears slightly deflated compared to the others.
This occurs because a small puncture allows air to leak out gradually rather than escaping all at once.
Driving on low pressure can lead to uneven tire wear, reduced road grip and increased fuel consumption as the tire generates greater rolling resistance.
Regularly checking your tire pressure with a gauge allows you to detect this issue early, before it causes more serious damage.
2. A Visible Object Embedded in the Tire
Sometimes, the cause of a puncture is clearly visible such as: a nail, screw, or sharp piece of metal embedded in the tire’s tread area.
These objects often remain lodged in the tire after penetrating it; while this may result in a slow air leak, it nonetheless compromises the structural integrity of the tire.
Even if a tire appears to be fully inflated, you should not overlook any potential issues, as these could shift or dislodge while driving, leading to a rapid loss of air pressure.
Carefully inspecting your tires, specially after driving on rough or debris-strewn roads, as it can help you identify these problems and take corrective action before the situation worsens.
3. Hissing Sounds or Air Leaks
A hissing sound emanating from a tire is a direct indication that air is escaping through a puncture.
This sound may be faint and is often easier to detect in a quiet environment, such as when the vehicle is stationary.
In some instances, if you place your hand near the damaged area, you may even be able to feel the escaping air.
This typically signals a significant leak that requires immediate attention.
Applying soapy water to the tire’s surface makes it easier to pinpoint the leak, as bubbles will form at the exact spot where the air is escaping.
Locating the precise source of the leak is a crucial step before attempting any repairs.
4. TPMS Warning Light – If Applicable
Many modern vehicles are equipped with a Tire Pressure Monitoring System (TPMS), which alerts you when the air pressure in one or more tires drops below a predetermined level.
When this warning light illuminates on your dashboard, it often serves as an early warning sign of a puncture or a slow leak.
Although the system does not identify the specific cause of the leak, it enables you to take immediate action before the tire pressure drops to a dangerously low level.
Ignoring this warning can compromise vehicle handling, increase braking distances and heighten the risk of tire failure.
Checking your tires as soon as the light comes on ensures that you can detect and fix the problem before it impacts your safety on the road.
Can You Repair Tubeless Tires Yourself?
You can repair punctures in many tubeless tires yourself, but only if the damage is minor, straightforward and located in the appropriate section of the tire.
Tubeless tires are designed in such a way that small holes in the tread area can be sealed using a plug; this restores air pressure and, if executed correctly, ensures safe driving.
However, repair entails more than merely stopping an air leak; it also involves maintaining the tire’s structural integrity so that it can withstand speed, weight and heat.
Therefore, before attempting to repair a tire yourself, you must understand the limitations of safe repair practices.
A thorough inspection of the tire should always be the first step, as attempting to repair the wrong type of damage can significantly increase the risk of tire failure while driving.
1. Situations Where Self-Repair Is Safe
Attempting a DIY repair is generally safe when the puncture is small, typically caused by a nail or a screw, and is located within the central tread area of the tire, where the rubber is thickest and specifically designed to withstand pressure.
The hole should be clean and distinct, not jagged or irregular, and there should be no visible signs of internal damage, such as bulges or cracks.
In such instances, a proper plug repair can effectively seal the hole and restore the tire’s air-retention capability.
It is also crucial that the tire has not been driven for an extended period with low air pressure, as driving under-inflated can compromise the tire’s internal structure, even if the puncture appears minor from the outside.
2. Situations Where Repair Is Not Recommended
There are specific types of damage where repairing a tire is unsafe, leaving replacement as the only viable option.
In such situations, the structural integrity of the tire becomes compromised to an extent that it cannot be effectively repaired using a standard plug or patch.
Attempting to repair such damage may temporarily halt the air leak, but it fails to restore the structural integrity essential for safe driving, particularly at high speeds or when carrying heavy loads.
Sidewall Damage
Damage to a tire’s sidewall cannot be safely repaired, as this section is highly flexible and undergoes constant flexing while the vehicle is in motion.
Unlike the tread area, the sidewall lacks sufficient thickness or structural rigidity to securely anchor a repair plug.
Even a minor cut or puncture in this area can enlarge over time, posing a risk of sudden tire failure.
For this reason, any damage to the sidewall should be considered critical and the tire should be replaced rather than repaired.
Large Punctures
If a puncture hole is excessively large, it cannot be properly sealed using a standard repair plug.
A large hole diminishes the structural strength of the surrounding rubber, making it difficult for the repair material to remain securely in place under pressure.
Even if the leak appears to be sealed initially, there remains a risk of repair failure as the tire heats up or comes under stress during driving.
In such instances, replacing the tire remains the safest and most reliable solution.
Multiple Punctures in Close Proximity
When multiple punctures occur in close proximity to one another, the structural integrity of that specific section of the tire is significantly compromised.
Attempting to repair each hole individually does not restore the tire’s original structural strength, thereby increasing the risk of tire failure when that specific area is subjected to load.
This type of damage often occurs when driving over sharp objects or rough terrain.
If punctures are clustered in a single area, it is generally advisable to replace the entire tire rather than attempting multiple repairs.
3. Safety Considerations
When deciding whether or not to repair a tubeless tire yourself, safety should always be your top priority.
A proper repair should not only stop air leakage but also ensure that the tire retains its ability to function correctly under actual driving conditions.
After the repair, the tire should be inflated to the correct pressure and carefully inspected for leaks.
It is also prudent to monitor the tire over the next few days to ensure that its pressure remains stable.
If you have any doubts regarding the quality of the repair or the condition of the tire, having it inspected by an expert remains the safest option.
Tools
| Tools | Why It Is Needed | How to Use It |
|---|---|---|
| Tubeless Tire Repair Kit – Plug Kit | This is the main kit, containing the basic tools and repair plugs necessary to fix a puncture. With its help, you can seal the hole and restore air pressure without having to remove the tire from the wheel. | Before beginning the work, open the kit and lay out all its contents. Follow this sequence: First, clean the puncture hole; next, insert the plug; and finally, securely seal the puncture. |
| Reamer Tool | This tool is used to clean the puncture hole and slightly enlarge it, ensuring the plug fits correctly and creates a robust seal. Without this step, the repair will fail to contain the air. | Insert the reamer into the puncture hole and move it in and out several times. This clears away debris and smooths the interior of the hole, thereby improving the plug’s grip. |
| Insertion Tool | This tool assists in pushing the rubber plug deep into the puncture, ensuring it remains firmly anchored in place and prevents air from escaping. | Thread the rubber plug through the eye of the insertion tool, then forcefully push it into the hole until only a small portion of the plug remains visible on the outside. Carefully withdraw the tool, leaving the plug embedded inside. |
| Rubber Plugs – Repair Strings | These are adhesive rubber strips designed to fill the puncture hole and create an airtight seal. This is the actual component that prevents air leakage. | Use the insertion tool to drive the plug into the tire. Once inserted, allow it to settle firmly within the hole and then trim away any excess material protruding from the tire’s surface. |
| Tire Inflator or Air Compressor | Following the repair, it is essential to reinflate the tire to the correct pressure level to ensure that it can be safely put back into service. | Connect the inflator to the valve stem and continue adding air until the recommended pressure level is reached. If available, always verify the pressure using a gauge. |
| Soapy Water – For Leak Detection | This simple method helps you pinpoint the exact location of the puncture, as bubbles will appear at the spot where air is escaping. | Apply soapy water to the surface of the tire, particularly around the area where a puncture is suspected. Watch for the formation of bubbles; these indicate the precise location of the leak. |
| Pliers – To Remove Object | Pliers are required to safely extract nails, screws, or other sharp objects embedded in the tire. It is crucial to remove the object before commencing the repair work. | Grip the object firmly and pull it straight out. As the object is extracted, air may escape suddenly and rapidly; be prepared for this. |
How to Repair Tubeless Tire Puncture – Easy Method
Repairing a tubeless tire puncture is a practical skill that can save both time and money; however, it must be performed with great care to ensure that the tire remains safe for driving.
The objective of this process is not merely to stop the air leak, but to seal the puncture in such a way that the tire can withstand the pressure, weight and heat generated during normal use.
Each step serves a specific purpose; skipping any part of the procedure or rushing through it can result in an improper repair that may fail later on.
By following the correct procedure and understanding the rationale behind each step, you can repair a puncture effectively and reliably.
1. Locate the Puncture
The first and most crucial step is to pinpoint the exact location of the puncture, as attempting to repair the wrong spot will not resolve the issue.
Carefully inspect the tire’s tread area (the surface of the tire), as most punctures occur here where the tire comes into contact with the road surface.
Look for signs such as nails, screws, or small cuts in the rubber.
If the puncture is not immediately visible, apply soapy water to the tire’s surface and observe closely for the formation of bubbles; the appearance of bubbles indicates that air is escaping through the hole.
Taking the time to accurately locate the puncture ensures that the repair will be effective and helps prevent recurring air leak issues.
2. Remove the Object
Once the puncture has been located, the next step is to remove the object that caused the damage to the tire.
Use a pair of pliers to firmly grip the nail, screw, or debris and pull it straight out of the tire.
It is essential to remove the object in a single, steady motion to avoid unnecessarily enlarging the hole.
As soon as you pull the object out, air will begin to escape rapidly; be prepared for this.
This is normal, as the puncture hole is now fully exposed.
It is essential to completely remove the object so that the puncture repair materials can properly seal the hole.
3. Enlarge and Clean the Hole
After removing the object, it is necessary to use a reamer tool to clean and slightly enlarge the puncture hole.
This step might seem anti-intuitive, but it is crucial because it prepares the surface for a strong and secure seal.
Insert the reamer into the hole and work it in and out several times to remove any internal debris, loose rubber, or dust.
This process also ensures the hole has a uniform shape, allowing the repair plug to fit correctly.
A clean and prepared hole significantly increases the likelihood of a long-lasting repair.
4. Insert the Plug
The repair plug is the component that seals the puncture and prevents air from escaping.
Load the rubber plug into the insertion tool so that it is centered and ready to be inserted into the hole.
Then, forcefully push the tool into the puncture until the majority of the plug is inside the tire, leaving only a small portion protruding outside.
This protruding section helps ensure that the hole is completely filled and sealed.
Once inserted, carefully pull the tool back out, but leave the plug in place.
The tight fit of the plug within the rubber creates an airtight seal.
5. Trim the Excess Plug
After inserting the plug, a small portion of it will remain protruding from the tire’s surface.
It is essential to trim this excess material so that it sits flush with the tire’s tread (surface).
Trimming it flush with the tire’s surface ensures that the contact between the tire and the road remains even, making driving significantly easier.
Over time, this excess portion of the plug will naturally wear down and blend seamlessly with the tire’s tread, rendering the repair less visible.
6. Reinflate the Tire
Once the puncture has been sealed, it is essential to reinflate the tire to the correct pressure to ensure it functions properly.
Using a tire inflator or air compressor, fill the tire with air until it reaches the specific PSI recommended by the vehicle manufacturer.
Maintaining the correct air pressure is crucial, as both underinflated and overinflated tires can negatively impact vehicle handling, fuel efficiency and safety.
Maintaining the proper pressure ensures that the repaired tire performs as expected under normal driving conditions.
7. Check for Air Leaks
The final step is to ensure that the repair was successful and that no air is escaping.
Apply soapy water once again around the repaired area and observe carefully to see if any bubbles form.
If no bubbles appear, it indicates that the seal is secure and the repair is effectively containing the air.
If bubbles are still visible, the plug may not have been inserted correctly and you may need to repeat the process.
Checking for leaks ensures that the tire is safe for use and minimizes the risk of future issues while driving.
Know, Some Alternative Repair Methods for Tubeless Tires
When a tubeless tire sustains a puncture, fixing it solely with a plug is not the only available option.
Depending on the type, size and location of the damage, other repair methods may also be employed.
Each method functions differently and offers varying levels of strength and durability.
Some repairs are designed to provide long-term security, while others serve merely to get you back on the road temporarily.
Understanding these alternative methods helps you select the appropriate solution and avoid unsafe repairs that could fail under pressure or at high speeds.
1. Tire Patches – Internal Repair
A tire patch is a repair method applied from the inside of the tire, after it has been removed from the wheel rim.
This method is considered more robust than a simple plug because it seals the puncture from the inner liner, the area subjected to the highest air pressure.
The damaged area is cleaned and a rubber patch is firmly pressed onto the inner surface using a specialized adhesive.
This creates a strong bond that prevents air from escaping.
Internal patches are frequently used in professional repair shops because they provide the tire with greater structural integrity compared to repairs performed solely from the outside.
However, as this method requires removing the tire and utilizing specialized tools, it is typically not performed as a quick, roadside emergency repair.
2. The Combination Patch-Plug Method
The combination patch-plug method is one of the most reliable repair techniques available, as it repairs the tire simultaneously from both the inside and the outside.
In this process, a plug is inserted through the puncture hole, while simultaneously, a patch is applied to the inner surface of the tire.
This two-pronged approach completely seals the air passage and reinforces the damaged area from both sides.
Because it provides a more comprehensive repair, it is often recommended for punctures that are slightly larger in size or located in areas subject to high stress.
This method is typically employed in professional workshops and, when executed correctly, is considered a long-lasting solution.
3. Tire Sealant – Temporary Solution
Tire sealants are liquid substances injected into the tire through the valve stem; they are designed to temporarily seal small punctures.
As the tire rotates, the sealant spreads internally and flows toward the puncture site, where it coagulates or forms a seal to prevent air leakage.
This method proves useful in emergency situations where an immediate and proper repair is not feasible.
However, sealants are not a permanent solution, as they do not fully restore the structural integrity of the tire and can sometimes make subsequent proper repairs even more difficult.
They are best utilized solely to reach a safe location or a repair shop; they are not suitable for long-term driving.
Understand, When to Replace a Tire Instead of Repairing It?
Not every puncture in a tubeless tire can be safely repaired, even if it appears minor from the outside.
A repair is effective only if the tire’s internal structure is robust enough to withstand air pressure, road heat and the stresses faced during daily driving.
In some instances, the internal damage is so extensive, or located in a critical area, that replacing the tire remains the only reliable option.
Understanding when not to attempt a repair is just as crucial as knowing how to fix a puncture, as it directly impacts driving safety, braking control and overall tire performance.
1. Punctures in the Sidewall
If a puncture or cut occurs in the tire’s sidewall, the tire should always be replaced rather than repaired.
The sidewall is the flexible section of the tire that constantly flexes while the vehicle is in motion; it lacks the internal structural rigidity required to securely hold a plug or patch in place.
Even a minor repair performed on this area is prone to failure under pressure, as the continuous flexing weakens the bond of the repair.
Damage to the sidewall is considered structural damage, meaning the tire’s integrity has already been compromised; continued use significantly increases the risk of sudden tire failure.
2. Holes Exceeding the Permissible Limit
There is a specific maximum size limit for punctures that can be safely repaired in tires; if a puncture exceeds this limit, a repair is no longer considered reliable.
A large hole compromises the structural integrity of the surrounding rubber, preventing any plug or patch from forming a proper seal while the vehicle is in motion.
Even if the tire initially holds air, the repair may fail once the tire heats up or is subjected to heavy loads.
In such instances, replacing the tire is the safer option, as it fully restores the structural integrity of the tire; conversely, relying on incomplete repairs can prove hazardous over time.
3. Repeated Damage in the Same Area
When a tire sustains multiple punctures in close proximity to one another, or suffers repeated damage at the exact same spot, the structural integrity of that specific section becomes significantly compromised.
Each repair impacts the strength of the surrounding rubber and over time, the tire loses its ability to distribute internal air pressure evenly.
This creates a weak point that is highly susceptible to failure, particularly under stress or at high speeds.
Even if each individual puncture appears minor, their cumulative effect renders the tire unsafe for continued use.
In such situations, the only way to ensure the tire’s structural soundness and safety is to replace it.
4. Tire Age and Tread Wear Limits
Even if a puncture appears repairable, it is often advisable to replace tires that are old or excessively worn.
Over time, exposure to heat, sunlight and road friction causes the rubber to naturally degrade, diminishing both its flexibility and structural integrity.
Worn tread also reduces road grip and increases the risk of further damage from road debris.
When a tire is nearing the end of its useful life, repairing a puncture cannot fully restore its safety standards.
In such cases, replacing the tire ensures superior performance, enhanced road grip and a significantly reduced risk of sudden tire failure while driving.
Know, Post-Repair Safety Tips
After repairing a puncture in a tubeless tire, the job is not considered truly complete until you have verified that the tire is safe for normal driving.
Although the repair restores air pressure, it does not immediately guarantee that the tire’s structural integrity will hold up perfectly under real-world road conditions.
The rubber surrounding the puncture requires some time to set and the plug or patch must remain firmly in place despite the heat, pressure and movement generated during driving.
This is why the first few minutes, and the first few miles, following a repair are critical.
During this period, driving cautiously and performing a few basic checks helps ensure that the repair was successful and minimizes the risk of sudden tire failure.
1. Drive Slowly for the First Few Miles
Once the tire has been repaired and reinflated, it is essential to drive at a reduced speed for the first few miles.
This allows the repaired area to gradually adapt to the heat generated by driving and the fluctuations in internal pressure.
Driving at high speeds can place excessive stress on the repaired section, particularly if the plug or patch has not yet fully bonded with the surrounding rubber.
Driving slowly also gives you time to notice any unusual vibrations or changes in handling that could indicate the repair was not performed correctly.
This precautionary measure helps ensure that you are fully confident in the tire’s safety before resuming driving at normal speeds.
2. Re-check Tire Pressure
After the repair, the tire pressure should be checked again to ensure that air is not leaking out.
Even a properly executed repair can occasionally loosen slightly, leading to a minor drop in pressure.
By using a pressure gauge, you can verify that the tire maintains the air pressure recommended by the vehicle manufacturer.
Maintaining the correct tire pressure is crucial, as under-inflation leads to uneven tire wear, reduced fuel efficiency and compromised vehicle handling while driving.
Re-checking the pressure after driving a short distance ensures that the repair was successful and that the tire is functioning correctly.
3. Avoid Driving at High Speeds Initially
Driving at high speeds generates excessive heat and pressure inside the tire, placing undue stress on the repaired area.
During the initial period following a repair, it is safer to avoid high-speed driving until you are fully confident that the tire is holding air properly.
Accelerating too quickly can weaken a new plug or patch before it has had a chance to fully set in place.
By driving at a moderate speed, you reduce the stress on the tire and allow it to gradually return to its normal operating condition without any unnecessary risk.
4. If in Doubt, Have It Inspected by a Professional
If you have any doubts regarding the quality of the repair or the condition of the tire, it is always safer to have it inspected by a professional.
A trained technician can examine the tire from both the inside and the outside to ensure that the repair was executed correctly and that there is no hidden damage.
This becomes even more critical if the puncture was large, located near the edge of the tire tread, or if the tire was driven for some time while under-inflated.
A professional inspection provides peace of mind and helps prevent issues such as sudden tire failure while driving.
Estimated, Cost of Tubeless Tire Repair
The cost of repairing a tubeless tire depends on whether you choose to fix it yourself or visit a professional service center.
In most cases, tubeless tire repair is considered one of the most economical aspects of vehicle maintenance, as it often involves merely a small puncture in the tire’s tread area.
However, the final cost also depends on the type of damage, the tools required and whether the tire needs a simple plug, a patch, or a complete replacement.
Understanding these variations in cost helps you make a practical decision that strikes a balance between safety and budget, without compromising on driving performance.
1. Cost of DIY Repair Kits
Do-It-Yourself tubeless tire repair kits are typically the most economical option and are readily available at most auto supply stores.
These kits generally contain basic tools such as a reamer, an insertion tool and rubber repair plugs.
Their cost is low because the materials used are simple and they are designed for quick, roadside repairs rather than for providing long-lasting, professional-grade service.
Once purchased, a single kit can be used multiple times for minor punctures, making it a cost-effective choice for drivers who prefer to handle minor repairs themselves.
However, despite the low initial cost, it is crucial to use these kits correctly; improper repairs carry the risk of recurring air leaks or creating unsafe driving conditions.
2. Cost of Professional Repair
Opting for professional tubeless tire repair is more expensive than using DIY methods, as it involves labor charges, diagnostic checks and, in some cases, techniques that require removing the tire from the wheel to perform internal repairs.
A technician inspects the tire for hidden damage, verifies that the puncture falls within the limits of safe repair and employs more robust techniques such as: internal patches or combination repairs.
This process enhances both safety and durability, which is why it costs more than a simple plug kit.
Pricing may vary depending on the location, the type of tire and the severity of the damage; however, it is generally more economical than replacing the entire tire.
Professional repair is often recommended when safety is paramount or when the extent of the damage is not immediately apparent.
3. Cost Comparison – Repair vs Tire Replacement
When comparing the cost of repairing a tire against the cost of replacing it, there is a significant difference between the two.
Repairing a puncture is generally much cheaper, as it involves fixing only the damaged section, whereas replacing a tire entails purchasing a completely new one.
However, when a tire is damaged to such an extent that safe repair is no longer possible such as: in cases of sidewall damage or very large punctures, replacement becomes mandatory.
Although replacing a tire involves a higher upfront cost, it provides you with a brand-new tire that is fully structurally sound and built for longevity.
If your current tire is worn out or nearing the end of its lifespan, replacing it may prove to be the more economical option in the long run.
Understanding when to opt for a tire repair versus when to replace it helps you avoid unnecessary expenses while simultaneously ensuring safe driving.
Read More:
- How to Locate a Nail in a Tire
- How to Fix Slow Tire Air Leak
- How to Detect Tire Sidewall Damage
- How to Check Tire Tread Depth at Home
- How to Bleed ABS System Properly
- How to Replace Rusted Brake Lines
- How to Inspect Brake Lines for Rust
- How to Flush Contaminated Brake Fluid
- How to Check Brake Fluid Contamination Level
- How to Fix Brake Bias Issues
- How to Test Brake Proportioning Valve
- How to Replace a Brake Light Switch
- How to Diagnose Brake Light Switch Failure
- How to Fix Intermittent ABS Activation
- How to Clean ABS Wheel Speed Sensor
- How to Diagnose ABS Sensor Wiring Issues
- How to Test Electronic Brake Module (EBCM)
- How to Fix Parking Brake Dragging
- How to Adjust Parking Brake Cable
- How to Check Parking Brake Cable Tension
- How to Fix Brakes Dragging While Driving
- How to Diagnose Brake Dragging Issue
- How to Fix Internal Master Cylinder Leak
How to Prevent Punctures in the Future?
To avoid punctures in tubeless tires, simply steering clear of sharp objects on the road is not enough; it is also essential to maintain your tires in a condition that allows them to withstand damage more effectively.
Most punctures result from a combination of road hazards and poor tire condition such as: low air pressure or worn treads.
By adopting a few simple maintenance habits, you can significantly reduce the likelihood of sudden air loss, extend the lifespan of your tires and maintain safe driving performance over time.
Preventing a puncture is always easier and less expensive than repairing or replacing one; therefore, regular maintenance is a vital component of vehicle safety.
And, there’s research that confirms that even minor punctures in tubeless tires can gradually affect the vehicle stability and braking performance as well, that’s why it is really important to repair that small leaks early rather than ignoring slow air loss, as it literally degrades the performance long before a full flat tire occurs.[¹]
1. Maintain Proper Tire Air Pressure
Maintaining proper tire air pressure is one of the most effective ways to prevent punctures and extend tire life.
When a tire is underinflated, it becomes softer and flexes excessively under the weight of the vehicle, making it easier for sharp objects to penetrate the rubber.
This also generates excessive heat while driving, which gradually weakens the structural integrity of the tire over time.
Conversely, overinflating a tire makes it excessively rigid, thereby reducing its ability to absorb shocks caused by potholes or road debris.
Maintaining the pressure recommended by the manufacturer ensures that the tire remains balanced, robust and better protected against the everyday hazards of the road.
2. Inspect the Tread Regularly
Regularly inspecting your tire treads helps you identify early signs of wear and potential damage before they escalate into a puncture.
The tread is the outermost layer of the tire that comes into direct contact with the road, serving as the first line of defense against sharp objects.
As tires wear down, this protective layer becomes thinner, allowing nails, shards of glass, or metal fragments to penetrate the tire’s interior more easily.
Regular inspections allow you to promptly identify signs of uneven wear, minor cuts, or objects lodged within the tires.
Timely detection of these issues can prevent slow air leaks and protect the tires from sustaining more severe damage while driving.
3. Avoid Driving On Debris-Strewn Roads Whenever Possible
Road conditions play a crucial role in tire health and avoiding areas where debris is clearly visible can significantly reduce the risk of punctures.
Construction sites, poorly maintained roads and road shoulders are often littered with sharp objects such as: nails, broken glass, or metal fragments.
When driven over, particularly at high speeds, these objects can easily embed themselves in the tire tread (surface).
While it may not always be possible to completely avoid such roads, exercising caution and choosing clear paths whenever feasible can significantly minimize the likelihood of damage.
Driving with vigilance is a simple yet effective way to keep your tires safe.
4. Rotate Your Tires Regularly
Regularly rotating your tires ensures that all tires wear evenly, thereby extending their overall lifespan and reducing the risk of punctures caused by weak spots or uneven tread surfaces.
Without rotation, variations in weight distribution and driving conditions can cause some tires to wear out faster than others.
Uneven wear can cause the tread surface to thin, making these areas more susceptible to damage from sharp objects.
Rotating the tires at regular intervals ensures uniform wear across all four tires, thereby enhancing their durability, stability and resistance to road-related damage over time.
Conclusion – How to Repair Tubeless Tire Puncture
So, with this guide you have clearly understood that not all punctures are equal, but you need to address them as well.
It constitutes a serious issue because it involves more than just the loss of air; it harbors a hidden danger, a risk that manifests when you continue driving on a compromised tire without fully grasping the severity of the damage.
In many instances, if a puncture is detected early and repaired correctly, it remains a simple and resolvable issue, particularly when the puncture is located within the tire’s tread area and the structural integrity of the tire remains intact.
However, that very same tire can become unsafe if the damage is overlooked, if it is repaired improperly, or if the puncture occurs in an area unable to withstand internal pressure such as: the sidewall or a heavily worn section.
The bottom line is that every puncture tells a story, it reveals the tire’s usage history and its true internal condition.
While proper repairs can restore a tire to a usable state, they cannot magically transform an old or severely damaged tire into a brand-new one.
This is precisely why recognizing the signs of a puncture, employing the correct repair methods and knowing exactly when to replace a tire rather than repairing it, are all steps of equal importance.
Regularly inspecting your tires, maintaining proper air pressure and taking immediate action the moment an air leak is detected, these collective measures can prevent most serious problems before they even begin.
Now, you can comment for more information regarding this guide on How to Repair Tubeless Tire Puncture.
Frequently Asked Questions
FAQ 1: How can I tell if my tubeless tire has a puncture?
Answer: You can usually detect a puncture in a tubeless tire by observing a gradual loss of air pressure over time, even if no external damage is initially visible. In some cases, you may spot a nail, screw, or sharp object embedded in the tire’s tread (the surface of the tire that makes contact with the ground). Other common signs include the tire appearing slightly deflated compared to the others, a ‘hissing’ sound caused by escaping air, or a warning light illuminating on your dashboard (if your vehicle is equipped with a Tire Pressure Monitoring System). The most reliable way to confirm a puncture is to check the tire pressure using a gauge and carefully inspect its surface.
FAQ 2: Can a tubeless tire puncture be safely repaired?
Answer: Yes, most minor punctures located within the tread area of a tubeless tire can be safely repaired, provided the tire is otherwise in good condition. A proper repair, typically involving the use of a plug or patch, as it can effectively seal the hole and restore normal air pressure. However, safety depends on the location and severity of the damage. If the puncture is located on the tire’s sidewall, is excessively large, or involves multiple points of damage situated close to one another, repairing it is not safe and the tire should be replaced. A correctly executed repair should effectively stop air leakage and restore the structural integrity of the tire.
FAQ 3: How long does a tubeless tire repair last?
Answer: A properly executed tubeless tire repair can last for a long time, often for the entire remaining lifespan of the tire, provided the damage was minor and located within the tread area. Its durability depends on the quality of the repair, driving conditions and how well the tire has been maintained following the repair. If the repair was performed incorrectly, or if the tire was driven with low air pressure before the repair had properly set, the repair may not last very long. Regularly checking the air pressure after a repair helps ensure that the tire remains safe and stable.
FAQ 4: Is it safe to drive immediately after a tire repair?
Answer: It is generally safe to drive after a proper repair of a tubeless tire, although you should exercise caution initially. It is advisable to drive for a short distance at a reduced speed to allow the repaired area to properly set under normal pressure and heat conditions. After driving a few miles, you should re-check the tire pressure to ensure that the tire is holding air properly. If everything appears normal and there are no signs of air leakage, you may continue using the tire as you normally would.
FAQ 5: What size punctures in a tubeless tire can be repaired?
Answer: In most tubeless tires, small punctures in the tread area caused by a nail or screw can be safely repaired. If the hole is small and clean-cut, a plug or patch can usually seal it effectively. However, repairing larger punctures is not considered safe, as they compromise the structural integrity of the tire. The safe limit may vary depending on the tire’s design and the manufacturer’s guidelines; however, if the damage is excessive or irregular, it should not be considered repairable and the tire should be replaced.
FAQ 6: Why is the tire still losing air after the repair?
Answer: If the tire continues to lose air even after a repair, it usually indicates that the seal was not applied correctly or that there is another internal issue. It is possible that the plug was not inserted properly, the puncture hole was not cleaned thoroughly, or there is another puncture located nearby. In some cases, air may also be leaking from the valve stem or the rim seal. To pinpoint the exact location of the leak, it is essential to re-examine the tire using soapy water or have it inspected by a specialist.
FAQ 7: Can I use a sealant instead of getting the puncture repaired?
Answer: Tire sealants can be used as a temporary measure to stop air leaks in emergency situations, but they do not provide a permanent solution for a puncture. Sealants work by filling small holes inside the tire, but they cannot fully restore the structural integrity of the tire. They merely help you reach a repair shop safely. For long-term use, it is always advisable to have the tire repaired using a proper plug or patch rather than relying solely on a sealant.
References:
[1] Trends in Tire Pressure: An Analysis of Time-Series TPMS Data
https://saemobilus.sae.org/articles/trends-tire-pressure-analysis-time-series-tpms-data-2016-01-1574

Hello Folks, Dean Shali here to help you out to solve the problems with your lovely vehicle, as i have lots of experience and knowledge about automotive industry as i woks directly with the customers and repair vehicles and i love to help the people to keep their cars safe and running smoothly.