Written By: Dean Shali
Fact Checked By: Sabré Cook
Reviewed By: Tamara Warren
Most of the time tire problems don’t just start with a “BANG”, even they begins with something you can barely see like: a nail smaller than your fingernail can slowly take control of your tire’s safety in most brutal slow death.
As well as, there’s studies and road safety data that consistently shows that underinflated tires is caused by the slow leaks actually reduces fuel efficiency, increases stopping distance and significantly raises the risk of the tire failure at the high speeds.
Along with this, this problems literally turns into dangerous one when you actually delay to notice that small nail or object.
Because, a nail which is as small as a few millimeters have capability to creates a gradual air leak that even weakens the internal structure of the tire over he period of time that even causes: excessive heat buildup, uneven wear and loss of tire grip as well.
Also, it is true that most of the drivers only relies on the visible damage or dashboard alerts, but you need to understand that despite of having tire pressure monitoring perfectly fine but it often trigger only after the pressure has already dropped below that safe levels.
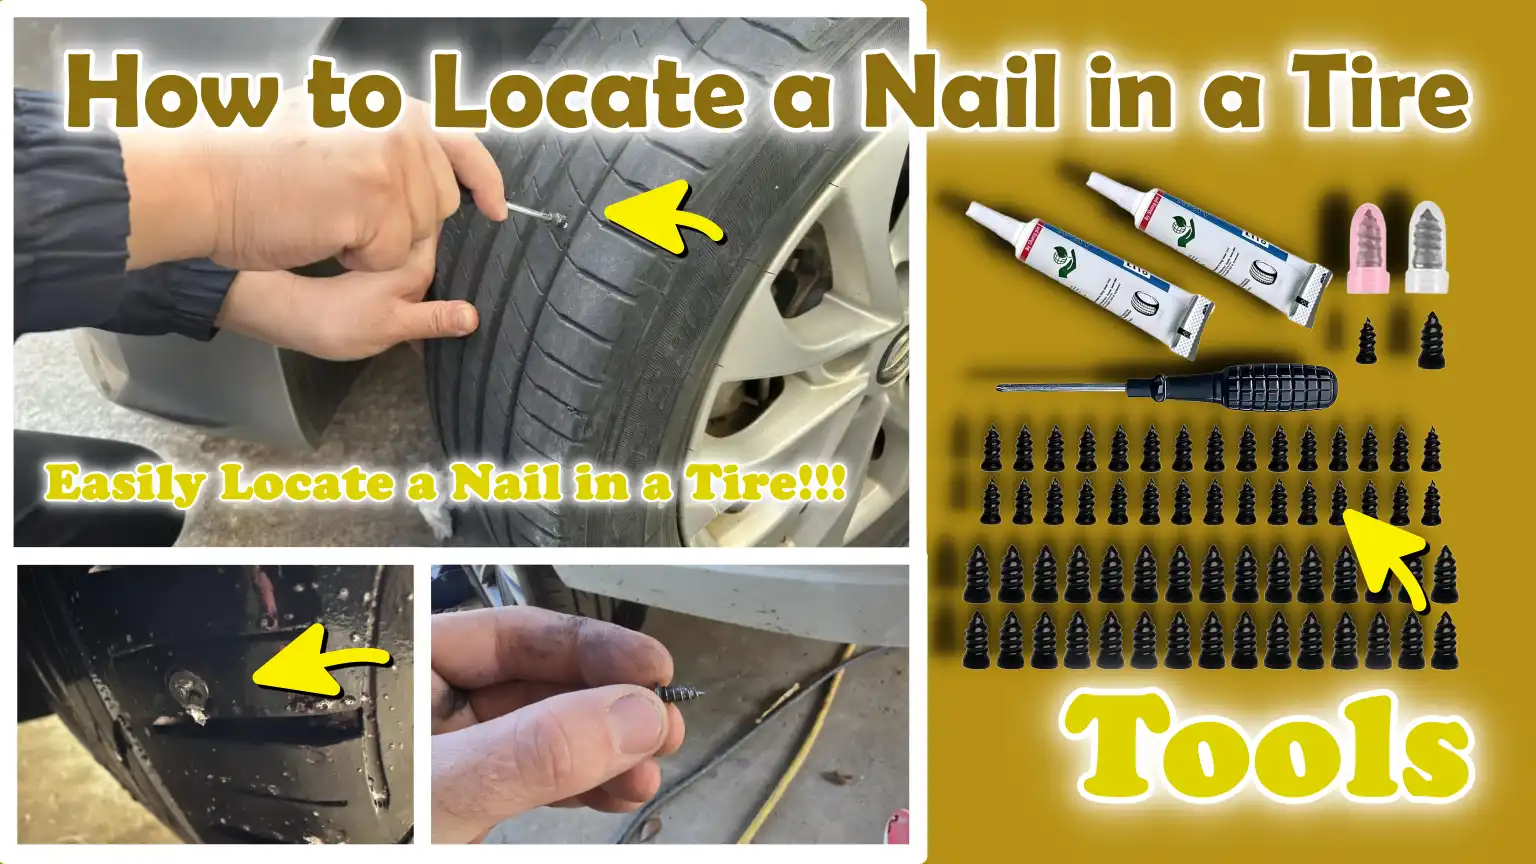
So, this actually means that the real advantage lies in the early detection of that dangerous object, that’s why in this guide you’ll learn How to Locate a Nail in a Tire so that you can find out hidden issues and notice even slight pressure loss, minor handling changes or faint air escape as well.
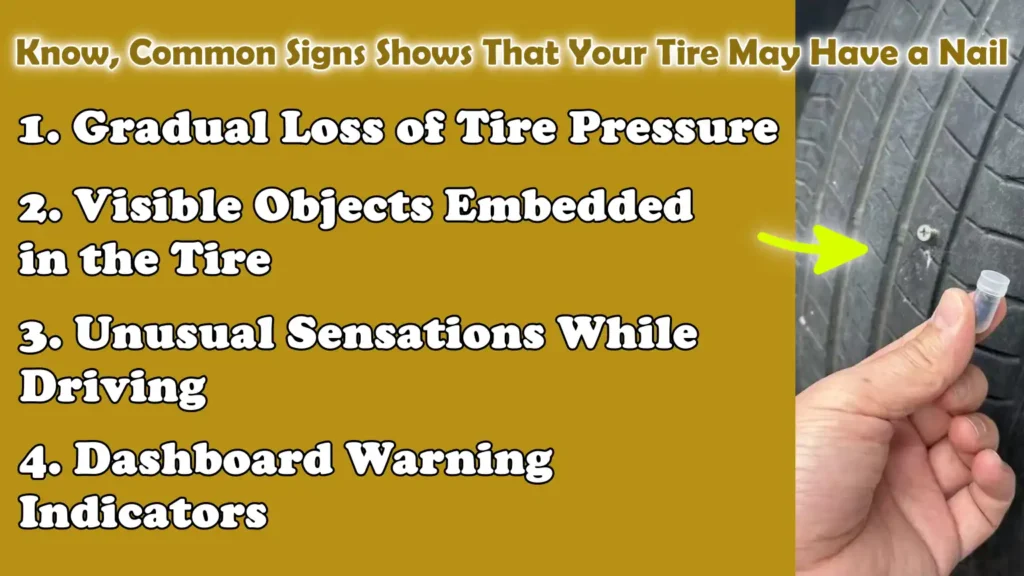
Know, Common Signs Shows That Your Tire May Have a Nail
A nail in your tire rarely causes an immediate, major malfunction; this is precisely why it is so easy to overlook.
In most cases, it creates a small puncture that allows air to leak out gradually.
This slow air leak affects your tire’s performance, your car’s handling on the road and even your driving safety.
Modern tires are designed to operate within a specific pressure range; even a slight drop in pressure can reduce tire traction, increase braking distances and lead to uneven tire wear.
The best way to avoid major complications is to recognize early warning signs, as a small, overlooked puncture, if not repaired in time, as it can ultimately cause extensive damage to the tire.
1. Gradual Loss of Tire Pressure
The most common sign of a nail in your tire is a slow and steady loss of air pressure.
Unlike a sudden blowout, where air escapes rapidly and the tire goes completely flat within minutes, a slow leak may take several hours or even days to become noticeable.
You might find yourself needing to inflate your tires more frequently than usual, or you may observe after parking that one specific tire appears slightly flatter than the others.
This occurs because the nail creates a tiny hole in the tire, allowing air to escape little by little.
Over time, driving on underinflated tires generates excessive heat within the tire’s internal structure and compromises its integrity, potentially leading to even more serious problems down the road.
It is important to understand the distinction between a slow air leak and a sudden tire blowout; a slow leak provides you with the opportunity to take necessary action in time, whereas sudden blowouts often occur when the tire has already sustained significant damage.
2. Visible Objects Embedded in the Tire
Occasionally, a nail or another sharp object is clearly visible, particularly when it is lodged in the tire’s tread (the part that makes contact with the road).
You might spot a small piece of metal or a dark speck on the tire’s surface that looks out of place.
However, identifying every nail is not always easy.
Often, nails become embedded so deeply within the tire’s deep tread grooves that they are difficult to spot with a cursory glance.
Dust, road grime and the tire’s tread pattern can also obscure such objects; for this reason, it is essential to inspect your tires with great care and meticulousness.
In some instances, the nail is so small or embedded so deeply that its presence is detected only through a drop in air pressure, the object itself remains invisible.
This highlights the fact that if one relies solely on a visual inspection without conducting further tests, tire damage can sometimes go undetected.
3. Unusual Sensations While Driving
If a tire has been punctured by a nail, you may notice changes in the vehicle’s handling while driving, even if these changes are initially very subtle.
As air pressure decreases, the tire loses its ability to maintain its proper structural integrity, resulting in inconsistent contact with the road surface.
This change may manifest as a slight vibration, particularly at higher speeds, or a sensation that the vehicle is pulling slightly to one side.
You might also notice that the steering feels less stable, or that the vehicle is not responding as smoothly as it typically does.
These changes occur because maintaining the correct tire pressure is important for ensuring the vehicle handles and controls in a balanced manner.
Even a slight imbalance in the weight distribution across the tires can alter the driving experience, making it feel different and less reliable.
4. Dashboard Warning Indicators
Most modern vehicles are equipped with a ‘Tire Pressure Monitoring System,’ commonly referred to as TPMS.
This system alerts you when tire pressure drops below a safe threshold.
If a tire is slowly losing air, perhaps due to a puncture caused by a nail, this system may illuminate a warning light on your dashboard.
This light serves as an indication that one or more tires require attention.
However, it is important to understand that the TPMS does not detect the nail itself; rather, it detects the effect of the nail, specifically, the resulting drop in tire pressure.
In many instances, the warning appears only after the tire pressure has already dropped significantly.
This implies that the underlying issue may have been present for some time.
For this reason, drivers should not rely solely on the warning system; instead, they should treat it as a cue to conduct a more thorough, close-range inspection of their tires.
Combining TPMS alerts with regular visual inspections and manual pressure checks constitutes a far more reliable approach to detecting and resolving any issues as promptly as possible.
Tools
| Tool | Why It Is Needed | How to Use It |
|---|---|---|
| Flashlight or Inspection Light | A nail can be very small and difficult to spot, specially in low light conditions or when it is lodged deep within the tire’s tread grooves. Good lighting helps you identify shiny metal objects, tiny punctures, or wet spots caused by leaks. | Hold a light source close to the tire and slowly sweep it across the tire’s surface. Pay close attention to the tread grooves and rotate the tire gradually to ensure that no section is missed. Inspect the tire from various angles to catch any glints or shadows cast by metal objects. |
| Spray Bottle With Soapy Water | Bubbles form when air escaping from a puncture comes into contact with soapy water. This is one of the easiest and most reliable methods for detecting hidden leaks that might not otherwise be visible. | Mix a small amount of soap with some water and spray it evenly over the tire’s surface. Watch closely for small bubbles forming or expanding. If bubbles appear at a specific spot, that is where the air is leaking. |
| Tire Pressure Gauge | A nail often causes a slow air leak. By using a pressure gauge, you can determine if one tire is losing air faster than the others, which also helps you assess the severity of the leak. | Remove the valve cap and press the gauge firmly onto the valve stem. Read the measurement and compare it against the recommended tire pressure for your vehicle. Check all the tires to see if the pressure in any one of them is significantly lower than the others. |
| Chalk or Marker | Once you have located a nail or a leak, it can be difficult to remember that specific spot while moving the tire or preparing for repairs. Marking the location helps you clearly identify that specific area later on. | Once you locate a leak or a nail, draw a circle or mark around it. Make the mark sufficiently clear and visible so that it remains easily identifiable, even if the tire shifts or gets wet. |
| Gloves for Safety | Tires may contain sharp objects such as nails, wires, or debris. During the inspection, gloves protect your hands from cuts, dirt and grease. | Put on gloves before touching the tire or examining it closely. Use gloves to prevent injury while rotating the tire, inspecting the grooves, or handling any sharp objects. |
How to Locate a Nail in a Tire – Great & Easy Way
Finding a nail in a tire is not a matter of luck; rather, it requires careful and systematic observation, the use of simple tools and an understanding of how air leaks occur.
Most punctures occur in the section of the tire that comes into contact with the road (the tread area) and many of them are so small that they are not visible at first glance.
A proper step-by-step approach helps you inspect every part of the tire, pinpoint the exact location of the leak and ensure that no hidden damage goes unnoticed.
When executed correctly, this method not only helps you locate the nail but also protects you from further tire wear, unsafe driving conditions and expensive repair bills.
1. Park the Vehicle in a Safe Location and Inspect the Tire
The first step is to ensure that your vehicle is parked in a safe and stable location before beginning any inspection.
Always choose a level and solid surface, as uneven ground can cause the vehicle to shift slightly, making the inspection difficult and less safe.
Good lighting is essential, as it is difficult to spot small nails and tiny holes in dim light.
Turning the steering wheel outward exposes a larger section of the tire, particularly the inner edge of the tread, which is often difficult to see.
This simple adjustment aids visibility and allows you to inspect areas that typically remain hidden when the wheels are facing straight ahead.
2. Conduct a Visual Inspection
A careful visual inspection is one of the most effective methods for finding a nail, specially if it is still embedded in the tire.
Pay particular attention to the tread area, as this is where most road debris tends to get lodged.
Look for any irregularities such as: small, shiny metal fragments, dark spots that do not match the texture of the rubber, or objects that appear to be lodged within the tire’s grooves.
Rather than rushing, it is important to proceed slowly and inspect every section with great care, as many nails may be embedded deep within the tread and can easily be overlooked.
You should also inspect the tire’s sidewall; however, bear in mind that damage to this area is typically more severe and often cannot be safely repaired.
The objective here is to identify anything that looks out of place or deviates from the tire’s normal surface appearance.
3. Slowly Rotate the Tire
As only a portion of the tire is visible at any given moment, it is necessary to rotate it in order to inspect its entire surface.
You can move the vehicle slightly forward or backward to expose new sections of the tire; alternatively, if a jack is available, you can lift the vehicle to facilitate a more thorough inspection.
This method ensures that no part of the tire remains unexamined, as even a small missed spot could be the very location where a nail is lodged.
It is essential to proceed slowly and methodically so that you can carefully observe each section of the tire as it comes into view.
This technique also provides an opportunity to re-examine any areas where you may have suspected a problem during your initial inspection but were not entirely certain.
4. Use Soapy Water
Not all punctures are clearly visible; therefore, using soapy water is a highly reliable method for detecting hidden leaks.
When air escapes through a small puncture, it reacts with the soap solution to form bubbles, making it easy to pinpoint the exact location of the leak.
Spray this solution evenly across the entire surface of the tire, paying particular attention to the grooves (tread) and crevices where punctures are most likely to occur.
Carefully observe any bubbles that form or expand at specific spots, as this is a definitive indication of escaping air.
Focus extra attention on those areas that appeared suspicious to you upon your initial visual inspection.
This method works because, even if the leak is minuscule, applying soapy water will inevitably cause bubbles to emerge from it.
5. Listen for the Sound of Escaping Air
In some instances, particularly when the puncture is relatively large, you may be able to hear the sound of air escaping from the tire.
This sound typically resembles a faint “hissing” noise and is quite easy to identify in a quiet environment, free from ambient noise.
Bring your ear close to the tire’s surface, slowly move it along the entire circumference of the tire and listen intently for any sounds of leaking air.
This method is most effective when used in conjunction with other techniques; once you have roughly narrowed down the general area of the leak, this step helps you pinpoint the exact location of the puncture.
Even if the sound is very faint, it can still provide a important clue, specially when a visual inspection alone fails to reveal any clear signs of a leak.
6. Check for Changes in Tire Pressure
Measuring tire pressure is a clear and precise method for determining whether or not there is a leak.
Typically, a puncture caused by a nail results in a gradual loss of pressure; therefore, periodically checking and comparing pressure readings can help identify this issue.
Use a tire pressure gauge to measure the air level and compare it against the recommended pressure value specified for your vehicle.
If a specific tire consistently shows lower pressure compared to the others, it is a definitive sign of a leak.
Re-checking the pressure after a short interval can also reveal how rapidly the air is escaping, helping you gauge the severity of the puncture.
This step adds precision to your inspection and serves to confirm your visual observations.
7. Mark the Location
Once you have located the nail, or the exact spot where the air is leaking, it is important to mark it clearly.
Tires are constantly rotating and if the puncture site is not marked immediately, it can easily be lost.
Using chalk or a marker, draw a clearly visible circle or line around the spot so that it can be easily re-identified during the repair process.
This simple step saves time and prevents potential confusion later on, specially if you intend to repair the tire yourself or plan to take it to a professional.
Marking the location ensures that the precise trouble spot is not overlooked or mistaken for another part of the tire.
Know About Common Places Where Nails Get Embedded in Tires
Nails and sharp objects do not penetrate tires randomly; they typically get lodged in specific areas where debris tends to accumulate easily due to the tire’s design or current road conditions.
Modern tires are constructed with patterns and layers designed to enhance grip and durability; however, these very features can also trap small objects such as nails, screws and metal shards.
Understanding where these objects are most likely to get stuck helps you inspect your tires more effectively and reduces the risk of overlooking a hidden puncture.
Most punctures occur in areas that come into direct contact with the road or where pressure and friction are highest; therefore, it is important to inspect these sections with particular care.
1. Tread Grooves
Tread grooves are the most common places where nails get embedded, as they are specifically designed to channel water, dirt and debris away from the tire’s surface.
These grooves create small voids where sharp objects can easily penetrate and remain hidden.
When a tire rolls over a nail, the weight of the vehicle drives the object deeper into the rubber, often causing it to become firmly lodged in place.
As the grooves are deeper than the flat surface of the tread, nails can sit within them in a way that makes them invisible at first glance.
This is why nails embedded in these grooves often result in a slow leak.
It is essential to inspect every groove carefully, as even a tiny object can be the cause of a persistent air leak.
2. The Shoulder Area
The shoulder area is the part of the tire where the tread meets the sidewall; this section is subjected to immense pressure when the vehicle turns or navigates corners.
This area is slightly curved and as the vehicle changes direction, it frequently establishes firm contact with the road surface.
Due to this increased pressure, nails and debris can be forcefully embedded into this section and become lodged there.
The shoulder is more flexible than the central tread of the tire, meaning it is more susceptible to trapping foreign objects.
Furthermore, damage to this area is often more severe, as it directly impacts the tire’s ability to support the vehicle’s weight and handle its speed.
Safely repairing a puncture in this specific area can sometimes be more challenging; therefore, it is important to identify any nail lodged in the shoulder as quickly as possible.
3. Near Previous Repair Sites
Areas of the tire that have undergone prior repairs can sometimes become weak points.
If a patch or plug was previously applied, the surrounding rubber may lack the structural integrity of the original material.
This makes it easier for new nails or sharp objects to penetrate the adjacent areas.
Additionally, minor imperfections resulting from previous repairs can create tiny gaps or uneven surfaces where debris may accumulate.
When inspecting tires, it is essential to carefully examine the areas surrounding previous repair sites, as a new puncture in this region can lead to rapid air loss or compromise the effectiveness of the previous repair.
4. Areas with Construction Debris
Many tire punctures are caused by the specific driving environment in which the vehicle is operated.
In areas where construction work, road repairs, or industrial activities are underway, nails, screws and metal fragments are often found scattered across the ground.
Driving through such areas increases the likelihood of a tire puncture caused by sharp objects, particularly at low speeds, when the tire has more time to exert pressure upon the debris.
These objects are typically sturdy and sharp, making it highly probable that they will pierce the tire’s surface.
Even after exiting such areas, a nail may remain embedded in the tire, potentially leading to a gradual loss of air pressure.
You should keep a close watch on the specific areas you have recently traversed; this will enable you to identify the potential source of the problem and conduct your inspection more effectively.
So, Is it Safe to Drive with a Nail in the Tire?
Driving with a nail embedded in a tire is a situation where safety depends on the severity of the damage, the location of the puncture and the rate at which air is escaping.
In many instances, a nail causes a slow leak rather than an immediate blowout, making the situation appear less hazardous at first.
However, even a slight drop in air pressure alters how the tire supports the vehicle, its grip on the road and the way heat accumulates within the rubber.
Tires are designed to operate within a specific pressure range; when that pressure drops, the sidewalls (the sides of the tire) flex excessively, generating additional heat and stress.
Over time, this can compromise the tire’s internal structure and increase the risk of sudden tire failure.
It is important to understand when it might be safe to drive for a short distance and when it becomes unsafe, distinguishing between these scenarios is vital for both your personal safety and for preventing further damage.
1. When It May Be Safe for a Short Period
In certain situations, driving with a nail in the tire may be safe for a limited time, specifically over short distances and at low speeds.
This typically applies when the nail is firmly lodged in the tire’s tread (the surface that contacts the road) and air is not escaping rapidly.
If the pressure remains close to the recommended level and the vehicle feels stable while driving, you may cautiously proceed to a nearby repair shop.
The reason for this is that the nail can act as a temporary plug, slowing down the rate of air loss for a while.
However, this is merely a temporary measure and the tire should be repaired as soon as possible.
Driving slowly, avoiding heavy loads and staying off high-speed roads can help minimize risks during this short journey.
2. The Risks of Driving with a Punctured Tire
Even if the air leak seems minor, driving with a punctured tire poses genuine risks that escalate over time.
As air pressure drops, the tire fails to maintain its proper shape, resulting in reduced contact with the road surface and compromised traction.
This can adversely affect braking distance, cornering ability and the vehicle’s overall handling.
Low pressure causes the tire to flex excessively, generating heat within the rubber layers.
Excessive heat is one of the primary causes of sudden tire failure, particularly during long journeys or when driving at high speeds.
Furthermore, driving on a damaged tire leads to uneven wear, which reduces the tire’s lifespan and may render it impossible to repair later.
What begins as a small, repairable puncture can evolve into a situation requiring the complete replacement of the tire.
3. Situations Requiring Immediate Attention
There are specific circumstances in which driving with a nail embedded in a tire is completely unsafe and demands immediate action.
You should not drive the vehicle if air is escaping rapidly from the tire, if it appears visibly deflated, or if it feels soft to the touch.
A nail lodged in the tire’s sidewall or shoulder area is particularly dangerous, as these sections of the tire bear the greatest structural stress and, in most cases, cannot be safely repaired.
If you experience strong vibrations, feel the vehicle pulling to one side, or notice any sudden changes in handling, these are indications that the tire is failing.
Driving at high speeds or carrying heavy loads with a defective tire significantly increases the risk of a tire blowout.
In such situations, rather than continuing to drive on the damaged tire, it is safer to stop the vehicle, use a spare tire (if available), or seek roadside assistance.
What to Do When You Find a Nail in Your Tire?
Discovering a nail in your tire is merely the first step; your subsequent actions will determine whether the tire can be salvaged or if it has become unsafe for continued use.
A nail causes a puncture, allowing air to escape; and even if the leak appears minor, the tire’s internal structure may already be under stress.
Taking immediate action helps prevent further air loss, excessive heat buildup and damage to the tire’s inner layers.
The appropriate course of action depends on the size of the puncture, its location and how long the tire has been driven under low air pressure.
Understanding both temporary and permanent solutions enables you to choose the safest and most effective option.
1. Temporary Solution Options
Temporary solutions come in handy when you require an immediate fix to stop an air leak and drive a short distance, typically to reach a repair shop.
Tire plug kits are among the most common temporary methods; they are designed to seal small punctures located in the tire’s tread (the surface of the tire that makes contact with the road).
These kits work by inserting a rubber plug into the hole, thereby preventing air from escaping.
This method can be effective for small, straightforward punctures, but it does not repair any damage that may have occurred to the tire’s interior.
Emergency sealants are another option; these are typically sprayed into the tire through the valve stem.
These liquid substances spread throughout the tire’s interior and, as air escapes, they seal small holes, creating a temporary barrier.
Although sealants are easy to use, they can sometimes disrupt the tire’s balance and complicate subsequent professional repairs.
Both of these methods are intended for short-term use only; These should not be considered permanent repairs.
2. Permanent Repair Solutions
A permanent repair ensures that the tire becomes safe for reuse and regains its ability to properly maintain air pressure.
The most reliable method for fixing a puncture is to apply a patch professionally, specially when the damage is located within the central tread area of the tire.
In this process, the tire is removed from the wheel, inspected from the inside and a patch or patch-plug is used to completely seal the puncture.
This method not only prevents air leaks but also reinforces the damaged area, thereby making the tire safe for use under normal driving conditions.
However, not all tires can be repaired.
If the puncture is too large, located on the sidewall or shoulder, or if the tire has been driven for an extended period with low air pressure, its internal structure may be compromised to such an extent that a safe repair is no longer possible.
In such situations, replacing the tire becomes necessary to avoid the risk of sudden tire failure.
Selecting the appropriate repair method based on a thorough inspection ensures both safety and the longevity of the tire.
Know, Mistakes to Avoid When Searching for a Nail
Locating a nail in a tire may seem simple, but minor errors made during the inspection process can lead to missed damage, rapid air loss, or even create unsafe driving conditions.
Tires are designed to contain pressurized air and even a small puncture can compromise the structural integrity and functional capacity of the tire.
Many drivers rely solely on what is visible at a glance; however, a proper inspection requires patience, the right techniques and an understanding of how air leaks occur.
Avoiding common mistakes helps you quickly pinpoint the actual problem, prevents further damage to the tire and ensures that any subsequent repairs are both safe and effective.
As well as, there’s research by the Transport Canada that shows that most of the vehicles on the road have at least one underinflated tire, which is often due to the slow leaks which is caused by small punctures such as: nails. That is why you need to be aware of this safety issue, as drivers may continue driving without even realizing their tire is gradually losing pressure, which is why detecting a nail early on actually helps you to prevent this silent loss of air and keeps the tire operating within the safe limits, that’s how you can reduce the risk of accidents and extend the tire life as well.[¹]
1. Ignoring Slow Leaks
One of the most common mistakes is overlooking a gradual drop in tire pressure, as it often does not appear serious at first glance.
A tire with a slow leak may look completely normal, leading many drivers to delay the inspection process.
However, even a slight reduction in pressure affects the tire’s contact patch with the road, reduces fuel efficiency and increases wear on the tire’s sidewalls.
Over time, driving on an underinflated tire causes heat to build up within the rubber layers, weakening the tire’s structure and significantly increasing the risk of a sudden blowout.
It is important to treat a slow leak as an early warning sign, as it often indicates the presence of a nail or small puncture that can be easily repaired if detected in time.
2. Removing the Nail Too Soon
Another common mistake is immediately pulling out a nail the moment it becomes visible.
While doing so might seem like the right course of action, the object such as: a nail, often acts as a temporary seal that merely slows down the rate at which air escapes.
Removing the object without being prepared to perform a repair can cause air to rush out rapidly, turning a slow leak into a complete flat tire within just a few minutes.
This can make it difficult to move the vehicle or safely reach a repair facility.
The best approach is to first pinpoint the exact location of the leak, mark the spot and formulate a complete repair plan before attempting to extract the nail or object.
Leaving the object in place until you are ready to fix the tire helps maintain air pressure and vehicle control.
3. Ignoring Sidewall Damage
Many drivers focus solely on the upper surface (tread) of the tire and neglect to inspect the sidewalls, which can lead to overlooked critical issues.
The sidewall is the section of the tire responsible for supporting the vehicle’s weight and absorbing road shocks; it is more flexible than the tread.
Any damage to this area such as: cuts, bulges, or punctures, is particularly hazardous, as it directly compromises the structural integrity of the tire.
Unlike punctures in the tread, most forms of sidewall damage cannot be safely repaired and typically necessitate the replacement of the entire tire.
Failing to inspect this area means you could be driving on a compromised tire, significantly increasing the risk of a sudden blowout.
4. Neglecting to Check Tire Pressure
Inspecting tires solely by visual observation, without checking the air pressure, is another common mistake.
A tire may appear to be in perfect condition visually, even if it has lost a significant amount of air pressure.
Using a tire pressure gauge provides a clear and precise measurement, helping to ensure that there are no leaks.
Comparing the pressure levels of all tires also aids in identifying which specific tire has been affected.
Without this step, it becomes easy to misjudge the condition of a tire and overlook the early warning signs of a puncture.
Regularly checking pressure not only helps detect punctures but also ensures that the tires are operating within safe limits for optimal performance.
Read More:
- How to Fix Slow Tire Air Leak
- How to Detect Tire Sidewall Damage
- How to Check Tire Tread Depth at Home
- How to Bleed ABS System Properly
- How to Replace Rusted Brake Lines
- How to Inspect Brake Lines for Rust
- How to Flush Contaminated Brake Fluid
- How to Check Brake Fluid Contamination Level
- How to Fix Brake Bias Issues
- How to Test Brake Proportioning Valve
- How to Replace a Brake Light Switch
- How to Diagnose Brake Light Switch Failure
- How to Fix Intermittent ABS Activation
- How to Clean ABS Wheel Speed Sensor
- How to Diagnose ABS Sensor Wiring Issues
- How to Test Electronic Brake Module (EBCM)
- How to Fix Parking Brake Dragging
- How to Adjust Parking Brake Cable
- How to Check Parking Brake Cable Tension
- How to Fix Brakes Dragging While Driving
- How to Diagnose Brake Dragging Issue
- How to Fix Internal Master Cylinder Leak
How to Prevent Tire Punctures in the Future
Preventing tire punctures is not a matter of luck; rather, it depends on consistently maintaining good habits and understanding how tires interact with the road.
Most punctures occur when a sharp object such as: a nail, screw, or metal shard, penetrates the tire under the weight of the vehicle.
Although avoiding every hazard is impossible, a few simple preventive measures can significantly reduce the likelihood of damage.
Keeping your tires in good condition, inspecting them regularly and being mindful of where you are driving, all play a important role in mitigating risk.
These steps also enhance safety, extend the lifespan of your tires and help maintain better fuel efficiency and driving performance.
1. Avoiding Roads Littered with Debris
Road conditions have a direct impact on tire safety and the likelihood of a puncture is highest in areas where debris is abundant.
Construction zones, repair sites and industrial areas often have nails, screws and sharp metal fragments scattered across the ground.
Driving through these areas increases the risk of a sharp object penetrating a tire, particularly at low speeds, when the tire presses more firmly against the road surface.
Whenever possible, it is best to avoid such roads or to drive through them with extreme caution.
Maintaining a safe distance from construction vehicles and avoiding the shoulders of the road, where debris often tends to accumulate, are additional ways to minimize the risk of punctures.
2. Regular Tire Inspections
Regular inspections are one of the most effective methods for identifying potential problems before they escalate into serious issues.
By visually inspecting your tires every few days, or at least once a week, you can identify any irregularities, such as small objects lodged in the treads, cuts or scrapes, or signs of uneven wear on one side of the tire.
Early detection of problems is important, as many punctures begin as minor leaks that can be easily repaired if identified in time.
A quick visual inspection requires very little effort, yet it can prevent major issues such as sudden blowouts or tire failure.
Making tire inspection a regular habit, specially before embarking on a long journey, significantly enhances your overall safety and reliability.
3. Maintaining Proper Tire Air Pressure
Maintaining the correct air pressure in your tires is essential for both optimal performance and protection against damage.
When a tire is inflated to the proper level, it retains its shape and distributes the vehicle’s weight evenly across its entire contact patch.
This reduces the likelihood of sharp objects penetrating the tire’s rubber.
Conversely, if a tire is underinflated, it makes greater contact with the road surface; this increases friction, allowing road debris to become easily lodged in the tire treads.
Low pressure also generates excessive heat within the tire, which can weaken its structural integrity over time.
Regularly checking tire pressure with a gauge and keeping it within the recommended range helps prevent punctures, while also improving fuel efficiency and vehicle handling.
4. Regular Tire Rotation
Tire rotation is a simple maintenance procedure that helps ensure even wear across all four tires.
As different parts of a vehicle are subjected to varying degrees of load and pressure, some tires may wear out faster than others.
Uneven wear can create weak spots in the tire tread, making it easier for nails and sharp objects to penetrate.
Rotating the tires at regular intervals, typically every few thousand miles, helps maintain uniform tread depth and structural integrity.
This not only extends the lifespan of the tires but also improves their resistance to punctures and their ability to maintain proper road grip.
Conclusion – How to Locate a Nail in a Tire
Now, you can say that even small actions actually creates big protection and when you find out nail early on then it proves to be really cost effective thing.
Tires are the only components of your vehicle that remain in constant contact with the road and even a small puncture can gradually compromise their ability to function safely.
What makes this problem critical is not merely the presence of the nail itself, but rather how quickly you identify it and how appropriately you respond to it.
A slow air leak can go unnoticed for days; it silently reduces internal air pressure, generates heat and gradually weakens the tire’s internal structure.
Over time, this can lead to reduced road grip, increased braking distances, uneven tire wear and, in severe cases, a sudden tire blowout.
Fortunately, detecting a nail in a tire does not require specialized tools or extraordinary expertise.
By adopting a few simple techniques such as: visual inspection, rotating the tire to examine it, regularly monitoring air pressure and using soapy water, you can accurately pinpoint even hidden punctures.
These methods are grounded in the physics of air leakage and the way tires react under pressure, making them both practical and reliable.
Knowing what to do once a nail is detected such as: choosing the correct repair method, avoiding common mistakes and understanding when to seek professional assistance, is equally important.
Prevention also plays a important role in ensuring long-term safety.
Conducting regular inspections, maintaining proper tire inflation pressure and paying attention to road conditions, all these measures combined can significantly reduce the likelihood of sustaining a puncture.
These habits not only keep your tires safe but also save fuel, extend the lifespan of your tires and provide you with better control while driving.
Ultimately, it is not merely about fixing a problem, but rather about raising awareness and taking small, consistent steps that keep you safe on the road.
Now, you can comment for more information.
Frequently Asked Questions
FAQ 1: Can a nail remain embedded in a tire without anyone noticing?
Answer: Yes, a nail stuck in a tire can easily go undetected, specially if the air is leaking out slowly rather than causing a sudden blowout. In many cases, the nail becomes firmly lodged in the tire’s tread (the part of the tire that makes contact with the road) and acts as a temporary seal, allowing air to escape very gradually. This means the tire may appear normal for several days while its pressure steadily drops. Most drivers only discover this issue when they find themselves needing to refill the tire frequently, notice a slight decrease in the tire’s height, or receive a warning on their dashboard. Because this change occurs gradually, it is easy to overlook the early signs; this is precisely why regular tire inspections and pressure checks are important.
FAQ 2: How long can a tire last with a nail embedded in it?
Answer: The lifespan of a tire with a nail in it depends on the severity of the puncture and the rate at which air is leaking out. If the air is escaping very slowly and the nail remains firmly lodged in place, the tire may last for some time, sometimes for a few days, but it is not safe for continued driving over the long term. As the pressure drops, the tire begins to lose its structural integrity and flexibility, which can lead to internal damage over time. Driving for extended periods in this condition can turn a minor, repairable issue into a situation requiring the complete replacement of the tire. Rather than relying on how long the tire might last, it is always best to have the tire repaired as soon as possible.
FAQ 3: Can all punctures caused by nails be repaired?
Answer: Not all punctures caused by nails can be safely repaired. Repair is typically possible only when the puncture is small and located within the central tread area of the tire, which is the strongest part of the tire. However, if a nail has pierced the tire’s sidewall (side) or shoulder area, the tire cannot be repaired, as these sections are subjected to immense pressure and constant flexing while driving. Large holes, irregular damage, or punctures that have compromised the tire’s internal structure also cannot be safely repaired. In such cases, replacing the tire is the only reliable option to ensure safety while driving.
FAQ 4: Why is my tire losing air, even though I don’t see a nail?
Answer: If your tire is losing air and you do not see a nail, the leak may be caused by something that is not easily visible. The puncture could be very small, hidden deep within the tire’s tread grooves, or caused by a sharp object that has As dislodged from the tire. Air can also leak from other sources, such as the valve stem, the seal between the tire and the rim, or even through tiny cracks within the tire itself. In some instances, the damage is internal and not visible from the outside. Hidden leaks can often be detected using methods such as applying soapy water; however, if the source of the problem remains elusive, it is best to have the tire inspected by a professional.
FAQ 5: Should I remove the nail immediately?
Answer: It is not always a good idea to remove a nail immediately upon discovering it. In many cases, the nail actually helps to plug the hole and slows down the rate at which air escapes. If you remove the nail without being prepared to repair the tire, the air may escape rapidly, potentially causing the tire to go completely flat within just a few minutes. This can make it difficult to drive or safely reach a repair shop. It is best to first locate the exact spot of the puncture, mark it and have your repair kit ready before removing the nail. This approach helps maintain control over the vehicle and prevents a sudden loss of air.
References:
[1] A Canadian Survey of Automobile Tire Pressures, Tire Failures and Tire Maintenance Practices
https://saemobilus.sae.org/papers/a-canadian-survey-automobile-tire-pressures-tire-failures-tire-maintenance-practices-810068

Hello Folks, Dean Shali here to help you out to solve the problems with your lovely vehicle, as i have lots of experience and knowledge about automotive industry as i woks directly with the customers and repair vehicles and i love to help the people to keep their cars safe and running smoothly.