Written By: Dean Shali
Fact Checked By: Sabré Cook
Reviewed By: Tamara Warren
The ABS system literally relies on the precision of the hydraulics, where even that tiny air bubbles behaves like a big fault and reduces the performance very much.
And, there’s carefully balanced hydraulic system inside your vehicle that literally turns pressing the brake pedal into stopping power.
Furthermore, in modern cars that comes with Anti-Lock Braking System, this process is more advanced than it just looks.
Because, ABS is actually designed to prevent the wheel lock during the emergency braking by rapidly controlling the brake pressure through a network of valves, sensors and hydraulic control module as well.
But, in terms of performing all those calculation correctly and works perfectly, the ABS system must remain completely free of air.
Because, the air inside the brake lines literally can be compressed and behaves unpredictably, that’s why having a small air pocket inside the ABS module can disrupt the hydraulic pressure that can lead to the soft brake pedal, delayed response or uneven braking force as well.
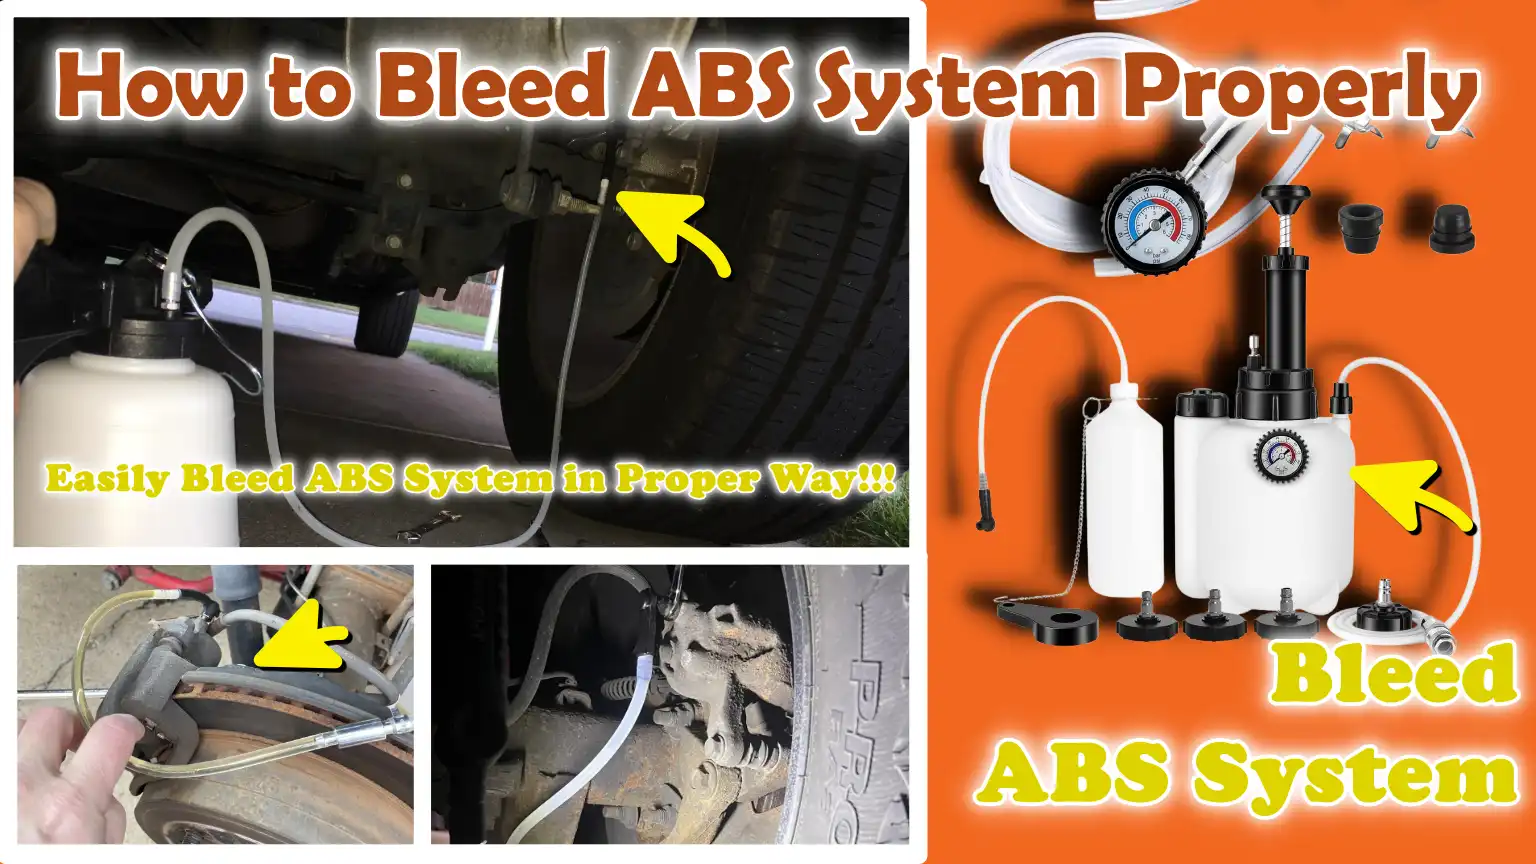
Which is why, you need to learn How to Bleed ABS System Properly so that you can understand everything about ABS system bleeding method and bring back firm pedal feel and most importantly stable braking force again.
Now, Let’s Understand About the ABS System
1. The Basic Working Principle of ABS – Anti-lock Braking System
The Anti-lock Braking System, commonly referred to as ABS, is designed to prevent your wheels from locking up during rapid or sudden braking.
When a wheel locks up, it stops rotating and begins to skid, thereby diminishing your ability to steer and control the vehicle.
ABS resolves this issue by utilizing sensors that continuously monitor the rotational speed of each wheel.
If the system detects that one or more wheels are decelerating too rapidly, indicating that they are about to lock up, it rapidly reduces the brake pressure applied to those specific wheels and then reapplies it multiple times per second.
This process of rapidly modulating the pressure helps the tires maintain traction with the road surface, allowing you to steer the vehicle even while braking.
Simply put, ABS does not merely stop the vehicle; it also assists you in maintaining control over the vehicle during the braking process.
This feature is particularly crucial on wet, icy, or uneven roads, where traction is naturally reduced.
2. Key Components Involved – ABS Module, Pump, Valves, Wheel Speed Sensors, Brake Lines
An ABS system operates through the coordinated interaction of several essential components that function collectively as a single unit.
Wheel speed sensors are installed near each wheel to continuously measure the speed at which the wheels are rotating.
These sensors transmit real-time data to the ABS control module, which serves as the “brain” of the system.
When the control module detects that a wheel is at risk of locking up, it sends signals to the hydraulic unit, which comprises the pump and valves.
Valves regulate the amount of brake fluid pressure applied to each wheel, controlling it by holding, reducing, or increasing the pressure as needed.
The function of the pump is to regenerate pressure after it has dropped, thereby ensuring that braking force is maintained.
All of this takes place through brake lines filled with brake fluid, which transmit pressure from the brake pedal to the wheels.
For the system to function correctly, it is essential that this fluid remains clean and free of air, as the entire process relies on consistent hydraulic pressure.
3. The Difference Between Standard Brake Bleeding and ABS Bleeding
Standard brake bleeding is used to purge air from basic brake lines and components such as calipers or wheel cylinders.
In a conventional system, bleeding is typically performed by manually depressing the brake pedal and releasing air through the bleeder valves in a specific sequence.
However, ABS systems are more complex, as they incorporate additional chambers, valves and a hydraulic control module where air can become trapped.
In many instances, standard bleeding methods fail to completely expel air from within the ABS module.
Consequently, ABS bleeding often necessitates activating the system, typically using a scan tool or a specialized procedure, to cycle the pump and valves.
Without this step, air may remain trapped inside the module, potentially resulting in a spongy pedal feel or compromised braking performance even after the bleeding process has been completed.
The fundamental distinction is that ABS bleeding is not limited merely to removing visible air from the lines; Rather, its purpose is to ensure that the entire system, including the internal components of the ABS module, is completely free of air, thereby guaranteeing that braking remains robust, consistent and reliable.
Know, Common Signs Shows That Your ABS Needs Bleeding
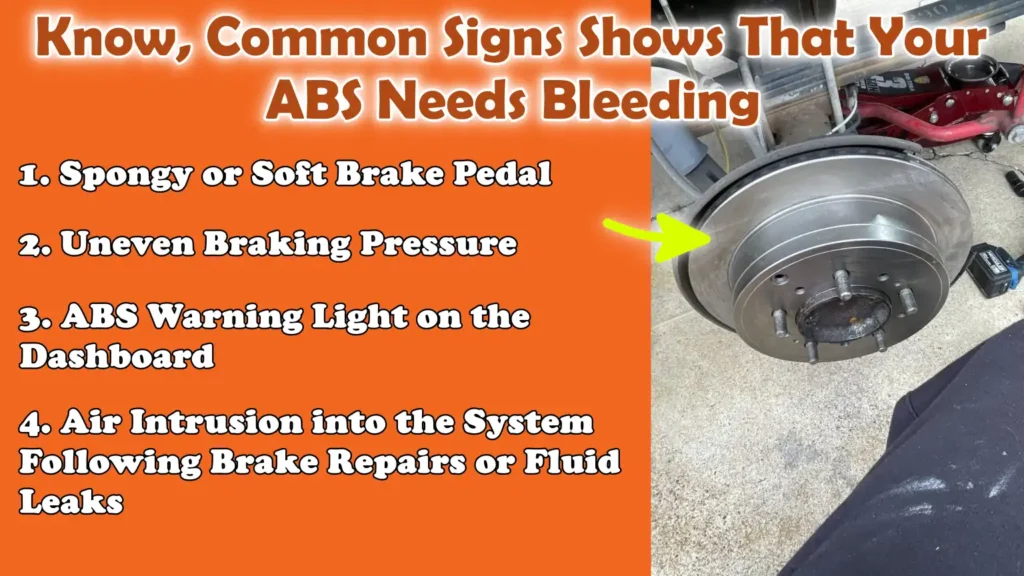
1. Spongy or Soft Brake Pedal
One of the most common and easily recognizable signs indicating that your ABS system may require bleeding is a brake pedal that feels soft, spongy, or yields too easily.
In a properly functioning braking system, the pedal should feel firm and respond immediately when pressure is applied.
This firmness is derived from the brake fluid, which is incompressible (cannot be compressed) and transmits force directly to the brakes.
However, when air enters the system, it behaves quite differently, as air is compressible.
This means that a portion of the force applied by your foot is absorbed within the brake lines themselves, rather than being fully transmitted to the wheels.
Consequently, the pedal may feel weak, sink lower than usual, or fail to deliver the expected braking power.
This condition often becomes more apparent during repeated braking or sudden stops, situations where maintaining consistent pressure is critical for safety.
2. Uneven Braking Pressure
Another clear indication is an uneven or inconsistent braking response.
You may notice that sometimes the brakes feel normal, while at other times they feel weak or delayed in their action.
This occurs because air trapped inside the ABS module or brake lines does not behave consistently under pressure.
Unlike brake fluid, which maintains a steady pressure, air bubbles can compress to varying degrees each time you depress the pedal.
This renders braking performance unpredictable, as the force applied to each wheel may not be balanced.
In real-world driving scenarios, this can pose a risk of losing control while braking, particularly in emergency situations where the ABS system is relied upon to maintain stability.
Due to uneven pressure, the vehicle may also feel less stable while coming to a stop specially on slippery or uneven road surfaces.
3. ABS Warning Light on the Dashboard
The ABS warning light on your dashboard serves as a crucial indicator that something within the system is not functioning correctly.
While this light can illuminate for various reasons, one potential cause is trapped air inside the ABS hydraulic unit, which may be affecting pressure readings or the system’s operational performance.
Modern ABS systems rely on precise data from sensors and consistent hydraulic pressure to function effectively.
If the system detects a malfunction such as: sudden pressure fluctuations or abnormal valve operation, it may trigger the warning light.
When this occurs alongside symptoms such as a soft brake pedal or poor braking response, it is a strong indication that the system requires inspection and proper “bleeding” (the process of expelling air) to restore it to proper working order.
4. Air Intrusion into the System Following Brake Repairs or Fluid Leaks
Air often enters the ABS system following specific types of brake-related maintenance or when a fluid leak occurs.
For instance, when replacing brake lines, calipers, the master cylinder, or the ABS module itself, air can infiltrate the system if proper precautions are not taken.
Similarly, if the brake fluid level drops significantly due to a leak, air can be drawn into the lines and potentially into the ABS unit as well.
Once air becomes trapped in these areas, it cannot always be expelled using standard brake bleeding methods, particularly when it is lodged inside the ABS module.
This is why, following major brake repairs, or in any situation involving significant fluid loss, a specific ABS bleeding procedure is often required.
Removing this trapped air is crucial to fully restore brake performance, maintain proper fluid pressure and ensure complete driving safety.
Tools
| Tools | Why It Is Needed | How to Use It Properly |
|---|---|---|
| Brake Fluid – Correct Type | This is a critical component of the braking system. Clean and proper fluid ensures correct pressure and facilitates safe vehicle stopping. Incorrect or old fluid can diminish braking power and cause damage to components. | Always use the specific type of fluid recommended by the vehicle manufacturer such as: DOT 3, DOT 4, or DOT 5.1. To prevent moisture-related damage, always open a fresh bottle. During the bleeding process, keep the reservoir topped up at all times to prevent air from re-entering the system. |
| OBD2 Scanner with ABS Bleed Function | Some ABS systems can trap air within their modules, which cannot be expelled solely through manual bleeding. A diagnostic scanner activates the pump and valves to purge this trapped air. | Connect the scanner to the OBD2 port, turn on the ignition and select the ABS bleed function. Follow the instructions displayed on the screen. During the brake bleeding procedure, the scanner will repeatedly cycle the ABS pump on and off. |
| Jack and Jack Stands | You will need to remove the wheels to access the bleeder valves. When working underneath or around the vehicle, ensuring proper safety support is absolutely essential. | Use a jack to lift the vehicle at the designated lift points. Place jack stands beneath sturdy support points and lower the vehicle onto them. Never rely solely on the jack while working. |
| Wrench Set – For Bleeder Valves | During the bleeding process, it is necessary to open the bleeder valves to expel air and fluid. Using a tool of the correct size ensures that the valves are not damaged. | Use a wrench of the appropriate size, typically 8mm or 10mm. Gently turn the wrench to open and close the valve. After bleeding, do not overtighten the valve, as this could damage its threads. |
| Clear Tubing and Catch Bottle | This allows you to observe air bubbles escaping from the system and prevents fluid from spilling onto components or the ground. | Connect one end of the tube to the bleeder valve and insert the other end into a bottle containing a small amount of brake fluid. Keep an eye on the bubbles while performing the bleeding procedure. Continue this process until no more bubbles are visible. |
| Safety Gloves and Eye Protection | Brake fluid can cause skin irritation and eye damage. It can also damage painted surfaces if spilled upon them. | Be sure to wear gloves before handling the fluid or tools. Wear safety goggles to protect your eyes, specially when opening pressurized lines or valves. If any fluid spills, clean it up immediately. |
How to Ensure Safety By Taking All the Necessary Precautions Before Starting
1. Ensuring the Vehicle is Safely Lifted and Stable
Before initiating any ABS bleeding procedure, the vehicle must be lifted and supported in a safe and stable manner.
When removing wheels or working around the brake system, the car must not shift, slip, or fall under any circumstances.
Hydraulic jacks are designed solely for the purpose of lifting, not for supporting a vehicle for extended periods.
Therefore, sturdy jack stands must be used to support the vehicle and they should be placed only at the specific lift points recommended by the manufacturer.
The ground surface must be level and solid to prevent the stands from sinking or tipping over.
If the vehicle is not stable, even the slightest movement could result in serious injury or damage.
A stable setup ensures that you can work with greater control and precision while opening bleeder valves and handling tools around the brake system.
2. Preventing Brake Fluid Contamination
Brake fluid must remain clean at all times, as even the slightest amount of dirt or contamination can compromise braking performance.
This fluid is designed to withstand high pressures and temperatures; however, it is highly sensitive to dirt, dust and moisture.
If any foreign matter (contaminant) enters the fluid, it can clog the intricate internal passages within the ABS module or damage internal seals.
Moisture is particularly harmful, as it lowers the fluid’s boiling point, which can lead to brake fade (weakened braking performance) during heavy use.
During the bleeding process, always ensure that the area surrounding the reservoir is thoroughly cleaned before removing the cap.
Use only clean tools and avoid exposing the fluid to air for prolonged periods.
Never reuse old fluid that has already been drained from the system.
Keeping the fluid clean helps maintain consistent pressure and ensures that the ABS system functions exactly as it was designed to.
3. Checking for Correct Brake Fluid Specifications
Using the correct type of brake fluid is crucial for both safety and system compatibility.
Different vehicles require specific types of fluid such as: DOT 3, DOT 4, or DOT 5.1, all of which possess distinct properties, such as boiling point and viscosity.
The ABS system relies on the precise behavior of the fluid to regulate pressure rapidly and accurately.
If the incorrect type of fluid is used, it can compromise braking response, damage seals, or prevent the ABS system from functioning correctly.
The correct specifications are typically listed in the owner’s manual or on the brake fluid reservoir cap.
It is also essential to avoid mixing different types of fluid, as doing so can degrade the system’s performance and reliability.
Using the correct fluid ensures that the system maintains proper pressure and operates effectively during braking.
4. Disconnecting the Battery – If Necessary to Access the ABS Module
In certain instances, particularly when using diagnostic tools or working directly on the ABS module, it may be advisable to disconnect the battery to ensure safety and facilitate a proper system reset.
The ABS system comprises electronic components such as: sensors, control modules and pumps, that operate on electrical signals.
When performing work, disconnecting the battery reduces the risk of these components being accidentally activated.
This also minimizes the potential for electrical short circuits or issues related to warning lights during the repair process.
However, this step depends on the specific vehicle design and the particular procedure being followed.
Certain ABS bleeding methods require the ignition to remain switched on or the system to be kept active via a scan tool.
Always adhere to the correct procedure for your specific vehicle.
Prioritizing electrical safety ensures the safety of both the system itself and the individual working on it.
Know, Some of the ABS Bleeding Methods
1. Manual Bleeding Method
The manual bleeding method is the most traditional way to purge air from a brake system and is commonly known as the ‘pump and hold’ technique.
In this method, one person slowly depresses the brake pedal, while a second person opens and closes the bleeder valve located at each wheel.
When the pedal is depressed, brake fluid, along with any trapped air, is expelled through the valve.
Once the valve is closed, the pedal is released to allow pressure to build up within the system again.
This process is repeated several times until air bubbles cease to appear and the pedal begins to feel firm.
The sequence of the wheels is crucial, as it ensures that air is expelled in a systematic manner, typically, the process begins with the wheel farthest from the master cylinder and gradually progresses toward the closer wheels.
Although this method works well for standard brake systems, it cannot completely purge air trapped inside the ABS module, as the module’s internal valves and chambers do not actively engage during this process.
2. Gravity Bleeding Method
Gravity bleeding is a simple method that relies on the natural flow of brake fluid, driven by gravity.
In this process, the bleeder valves are opened, allowing the brake fluid to slowly flow downward from the reservoir, pass through the brake lines and exit through the valves.
This continuous flow can expel a certain amount of air from the system without the need to depress the brake pedal.
This method is easy to perform and minimizes the risk of introducing air into the system due to improper manipulation of the brake pedal.
This method can be effective for purging small amounts of air or for replacing fluid in systems that have not undergone extensive repairs or tampering.
However, gravity bleeding is a slow process and does not generate the necessary pressure to expel trapped air from complex components, such as ABS modules.
For this reason, in vehicles equipped with ABS, it is often utilized as a preliminary step rather than as a complete solution.
3. Pressure Bleeding Method
Pressure bleeding employs a specialized tool that applies controlled pressure to the brake fluid reservoir.
This pressure forcefully drives the brake fluid throughout the entire system, thereby expelling air through the bleeder valves located at each wheel.
Unlike manual bleeding, this method provides a steady and consistent flow, allowing for more effective air removal and minimizing the risk of air re-entering the system.
This technique is particularly beneficial for vehicles equipped with ABS, as, compared to manual methods, the sustained pressure is able to reach even the innermost passages of the brake system.
Pressure bleeding also allows a single individual to perform the task without the need to depress the brake pedal.
Its primary advantage lies in its greater consistency and superior ability to expel trapped air; however, it may not be able to completely purge air trapped within the ABS module unless the system is actively cycled.
4. Scan Tool/Electronic ABS Bleeding – Most Important
Electronic ABS bleeding represents the most advanced, and often mandatory, method for modern vehicles.
This technique utilizes an OBD2 scanner or diagnostic tool to interface with the vehicle’s ABS control module.
The tool activates the ABS pump and valves, causing them to open and close in a specific, predetermined sequence.
This process facilitates the flow of brake fluid through the internal passages of the ABS module, specifically in those areas where air frequently becomes trapped.
Without this crucial step, air can remain lodged within these internal components, even after repeated attempts using manual or pressure bleeding methods.
This is why many manufacturers recommend, or even mandate, the use of a scan tool to cycle the system when working on ABS systems, particularly when a component has been replaced or air has entered the module.
Cycling the ABS module becomes essential following major repairs, fluid loss, or whenever the brake pedal remains soft even after standard bleeding procedures have been completed.
This process ensures that all internal passages within the ABS system are thoroughly purged of air, thereby restoring full braking capability and system reliability.
How to Bleed ABS System Properly – Clear Steps
1. Preparing the Brake Fluid Reservoir
The first step is to ensure that the brake fluid reservoir is clean, filled to the correct level and contains the specific type of fluid recommended for the vehicle.
Brake fluid acts as the medium that transmits hydraulic pressure from your foot to the brakes; therefore, its condition directly impacts performance.
Before opening the reservoir cap, the surrounding area should be wiped clean to prevent dust or debris from entering the system.
Once opened, the fluid level should be topped up using fresh fluid from a sealed container, as brake fluid absorbs moisture from the air over time, which can diminish its effectiveness.
Keeping the reservoir properly filled from the start ensures that no additional air enters the system during the bleeding process.
2. Connecting a Scan Tool – If Necessary
For many modern vehicles, particularly those equipped with advanced ABS systems, a scan tool is required to properly complete the bleeding process.
The scan tool connects to the vehicle via the diagnostic port and communicates directly with the ABS control module.
This allows the system to be placed into a specific mode designed for bleeding.
It is crucial to connect the tool correctly and follow the on-screen instructions, as this activates the ABS components such as: valves and pumps, in a specific sequence that facilitates the removal of trapped air.
Without this step, air may remain trapped inside the ABS module, even if the rest of the brake system has been properly bled.
3. Activating the ABS Bleed Mode
Once the scan tool is connected, it is necessary to activate the ABS bleed mode.
This mode enables the system to control the opening and closing of internal valves and to activate the pump when necessary.
The objective of this process is to circulate brake fluid through components that typically remain closed during normal braking operations.
Air can become trapped within these internal passages and this trapped air can only be expelled when the system is fully active.
Activating this mode ensures that the bleeding process reaches every component of the ABS system, rather than being limited solely to the external brake lines.
4. Wheel Bleeding Sequence – Correct Order
To effectively and completely expel air, it is crucial to bleed the wheels in the correct sequence.
The standard procedure begins with the wheel located farthest from the master cylinder and then proceeds progressively toward the wheel closest to the master cylinder.
This sequence facilitates the efficient expulsion of air without allowing it to become trapped in other parts of the system.
At each wheel, once pressure has been established, the bleeder valve is opened to allow the fluid, along with any trapped air, to escape.
Subsequently, the valve is closed before releasing the pressure to prevent air from being drawn back into the system.
Adhering to the correct sequence ensures that the entire system is thoroughly purged.
5. Activating the ABS Pump During Bleeding
During the bleeding process, it is essential to activate the ABS pump, particularly when utilizing a scan tool.
This pump plays a pivotal role in re-establishing and maintaining pressure within the system.
Activating the pump causes brake fluid to flow through the ABS module; this includes the internal sections where air is most likely to become trapped.
This flow helps dislodge air bubbles and propel them toward the bleeder valves, from where they can be expelled.
Without activating the pump, some air may remain trapped inside the module itself, potentially causing the brake pedal to feel spongy even after the bleeding process is complete.
6. Repeat Until No Air Bubbles Are Visible
The bleeding process should be repeated at each wheel until air bubbles cease to appear in the fluid being expelled.
Often, transparent tubing is used to easily monitor the fluid flow and detect the presence of any bubbles.
The presence of air bubbles indicates that air is trapped within the system, and removing this air is essential for the brakes to function correctly.
This process may need to be repeated several times, particularly if a significant amount of air has entered the system.
A steady flow of clear, bubble-free fluid is a definitive sign that the air has been successfully purged.
7. Maintain Fluid Levels Throughout the Entire Process
Throughout the entire bleeding process, it is absolutely crucial to constantly monitor and maintain the brake fluid level in the reservoir.
If the fluid level drops too low, air can re-enter the system, rendering all previous efforts futile.
This is one of the most common mistakes made during brake bleeding.
Keeping the reservoir filled ensures that only fluid, and not air, flows through the lines and the ABS module.
Regularly topping up the fluid also helps maintain consistent pressure during the bleeding process, which is essential for effectively expelling air and restoring proper brake functionality.
Read More:
- How to Replace Rusted Brake Lines
- How to Inspect Brake Lines for Rust
- How to Flush Contaminated Brake Fluid
- How to Check Brake Fluid Contamination Level
- How to Fix Brake Bias Issues
- How to Test Brake Proportioning Valve
- How to Replace a Brake Light Switch
- How to Diagnose Brake Light Switch Failure
- How to Fix Intermittent ABS Activation
- How to Clean ABS Wheel Speed Sensor
- How to Diagnose ABS Sensor Wiring Issues
- How to Test Electronic Brake Module (EBCM)
- How to Fix Parking Brake Dragging
- How to Adjust Parking Brake Cable
- How to Check Parking Brake Cable Tension
- How to Fix Brakes Dragging While Driving
- How to Diagnose Brake Dragging Issue
- How to Fix Internal Master Cylinder Leak
Know, The Correct Bleeding Sequence – Great Guidance
1. Rear Right Wheel
In many vehicles, the rear right wheel is typically the farthest from the master cylinder; therefore, the bleeding process begins at this location.
The master cylinder serves as the source of hydraulic pressure and air often tends to accumulate in the longest sections of the brake lines.
By starting with the rear right wheel, you expel the air from the longest path first; this ensures that air does not migrate to other parts of the system during the bleeding process.
When the bleeder valve at this wheel is opened, fluid, along with any trapped air, is expelled, initiating a flow of clean fluid from the farthest end of the system.
This step lays the foundation for effective bleeding, as it purges the most distant section of the system, the area where air is most likely to accumulate.
2. Rear Left Wheel
Once the work on the rear right wheel is complete, the process moves on to the rear left wheel.
This wheel is situated slightly closer to the master cylinder, yet it remains an integral part of the longer rear brake circuit.
Any residual air remaining in the rear section of the system is expelled during this stage.
Bleeding the rear left wheel ensures that equal pressure is established on both sides of the rear braking system and that no air remains trapped.
Maintaining a balance between the braking force of the left and right brakes is crucial, as any disparity in pressure can compromise the vehicle’s stability during braking.
By expelling air from this wheel, you advance the system-purging process in a controlled and logical sequence.
3. Front Right Wheel
Next in this sequence is the front right wheel, as it is situated at a greater distance from the master cylinder compared to the front left wheel.
The front brakes typically handle the majority of a vehicle’s stopping power; therefore, ensuring they are free of air is crucial for optimal braking performance.
By the time you reach this stage, most of the air has already been purged from the longer rear brake lines.
Bleeding the front right wheel expels any remaining air from the front circuit, thereby preparing the system for final equalization.
Maintaining proper pressure at this stage ensures that the braking response remains firm and consistent whenever the brakes are applied.
4. Front Left Wheel
The front left wheel is typically located closest to the master cylinder and is bled last.
By the time this stage is reached, the majority of the system has already been thoroughly purged of air; this final step ensures that any minor air bubbles remaining near the source of pressure, namely, the master cylinder, are completely expelled.
Completing this process at the nearest wheel helps stabilize the entire system and confirms that brake fluid is flowing clearly and without obstruction through all the brake lines from the master cylinder.
Following this step, the brake pedal often feels firm and highly responsive, indicating that pressure is being effectively transmitted throughout the entire system.
5. Adjust According to Manufacturer’s Instructions
Although this general sequence works for many vehicles, it is important to understand that not all brake systems are designed identically.
Some vehicles feature different brake line layouts, diagonally split systems, or advanced ABS configurations that may require a different bleeding sequence.
Manufacturers specify particular procedures based on the specific design of their systems.
Following the correct sequence for a specific vehicle ensures that air is effectively expelled and does not circulate to other parts of the system.
Consulting the sequence recommended in the service manual helps prevent errors and ensures that the braking system operates safely and reliably following the bleeding procedure.
Know, The Common Mistakes While Bleeding ABS System to Avoid
Plus, there’s research on the air-over-hydraulic systems that shows that even small air pockets literally can reduce the braking force and create unstable pressure, that leads to the delayed or inconsistent stopping, so this shows that why proper ABS bleeding is really important that restores full hydraulic efficiency and ensures the predictable braking performance as well.[¹]
1. Allowing the Brake Fluid Reservoir to Run Completely Dry
One of the most common and detrimental mistakes during ABS bleeding is allowing the brake fluid reservoir level to drop too low or letting it run completely dry.
The reservoir supplies fluid to the entire braking system; if the fluid level falls below the minimum mark, air can be drawn directly into the master cylinder and brake lines.
This introduces fresh air into the system, thereby defeating the very purpose of the bleeding process and often resulting in a brake pedal that feels even softer than before.
In vehicles equipped with ABS, this error can be particularly critical because air can also enter the ABS hydraulic module, from where it becomes extremely difficult to purge.
Consequently, a simple bleeding task can transform into a lengthy and far more complicated procedure.
Throughout the entire process, it is essential to monitor the fluid level regularly and continuously add fresh fluid to maintain hydraulic pressure and prevent the repeated ingress of air.
2. Bleeding the Wheels in the Wrong Order
Bleeding the wheels in the incorrect sequence is another mistake that can compromise the effectiveness of the entire process.
Brake systems are designed such that their fluid pathways follow a specific layout and it is essential to expel air in a controlled direction.
If this procedure is performed contrary to the system’s requirements, for instance, by bleeding a nearby wheel before a distant one, trapped air may remain within the longer brake lines or migrate to other parts of the system.
This can lead to uneven braking pressure, inconsistent pedal feel and a failure to completely purge the air from the system.
Adhering to the correct bleeding sequence, which varies depending on the vehicle’s design, ensures that air is expelled systematically in a logical order, rather than merely circulating within the system.
This is particularly critical in vehicles equipped with ABS, where brake circuits can be significantly more complex than those found in traditional systems.
3. Skipping the ABS Scan Tool Step When Necessary
Many modern ABS systems require a scan tool to be fully bled; yet, people often skip this step, assuming that traditional bleeding methods will suffice.
The ABS module contains internal valves, chambers and a pump where air can become trapped following repairs, fluid leaks, or component replacements.
Standard bleeding procedures only expel air from the visible brake lines and calipers; they typically do not facilitate fluid flow within the ABS module itself.
Without activating the ABS bleeding function via a scan tool, trapped air can remain hidden inside the unit.
The result is often a brake pedal that remains soft or spongy, even after repeated bleeding attempts.
When required, using the appropriate scan tool ensures that the ABS pump and valves function correctly, thereby completely purging all trapped air from the system.
4. Using the Wrong Brake Fluid
Using the incorrect brake fluid is a mistake that can jeopardize braking performance, component longevity and the overall safety of the system.
Brake fluid is formulated with specific chemical and performance characteristics, including boiling point, viscosity and compatibility with seals and ABS components.
Common types include DOT 3, DOT 4 and DOT 5.1 and every vehicle is designed to operate with a specific type of fluid.
Using the wrong fluid can result in compromised pressure response, reduced heat resistance, or, over time, damage to internal seals.
In ABS systems, fluid viscosity is particularly critical because, during operation, the system rapidly circulates the fluid through narrow passages and valves.
If the incorrect fluid is used, the system may not respond as intended.
Always verify the correct specifications before adding or replacing brake fluid.
5. Overtightening Bleeder Valves
Bleeder valves are small yet essential components used to expel air and fluid during the bleeding process.
Overtightening them once the bleeding is complete is a common mistake.
These valves are threaded into components made of relatively soft metals, such as brake calipers or wheel cylinders.
Applying excessive force can strip the threads, crack the valve seat, or even snap the bleeder screw.
This can lead to leaks, complicate future bleeding procedures, or necessitate the replacement of expensive brake components.
The valve should be tightened only enough to create a proper seal and prevent leaks.
Using controlled hand pressure and a correctly sized wrench protects the valve and ensures that the system remains sealed and safe for operation.
How to Know if the ABS Bleed Was Successful?
1. A Firm Brake Pedal Feel
A firm feel to the brake pedal is the clearest indication that the ABS bleeding process has been completed correctly.
When you depress the pedal, it should feel solid and should not slowly sink toward the floor under constant pressure.
This firmness indicates that the brake fluid is effectively transmitting pressure throughout the entire system, without any trapped air.
In a properly bled system, the pedal travels the same distance with every press and responds immediately.
If the pedal still feels soft or spongy, it means that air remains trapped somewhere within the brake lines or the ABS module.
A firm pedal confirms that hydraulic pressure is stable and that braking force is being properly distributed to all wheels.
2. Absence of Air Bubbles in the Transparent Tube
During the bleeding process, a transparent tube is often attached to the bleeder valve so that you can observe the fluid as it exits.
A successful ABS bleed is signaled when the fluid flows smoothly and contains no air bubbles.
Air bubbles in the fluid stream appear as small voids or intermittent gaps, indicating that air is still being expelled from the system.
As the bleeding continues, the number of these bubbles should decrease and, eventually, cease completely.
When only clear, steady fluid is visible, it means that most, if not all, of the trapped air has been expelled.
Visual confirmation is crucial, as even a small amount of residual air can compromise braking performance.
Clear, bubble-free fluid is a definitive sign that the system is properly filled and sealed.
3. The ABS Warning Light Remains Off
Following a successful bleeding procedure, the ABS warning light located on the dashboard should remain off.
This light is controlled by the vehicle’s electronic system and illuminates whenever it detects an issue with the ABS operation such as: irregular pressure, sensor-related problems, or a malfunction within the module itself.
If the system was experiencing issues due to trapped air prior to bleeding, this could have resulted in abnormal readings or erratic behavior.
Once the system has been properly bled and hydraulic pressure returns to normal levels, the ABS control module should no longer detect any faults.
In some instances, the system may require a reset using a diagnostic scan tool, particularly if the warning light was already illuminated beforehand.
The fact that the warning light remains off serves as an indication that the system is functioning correctly and operating within its specified parameters.
4. Consistent Braking Response
A consistent braking response implies that whenever you apply the brakes, the vehicle reacts in exactly the same manner every time, regardless of your speed or the prevailing driving conditions.
After properly bleeding the ABS system, the braking force should feel uniform, predictable and smooth.
There should be no sudden changes in pedal feel, no delay in brake engagement and the deceleration of the vehicle should not feel uneven.
This consistency demonstrates that the hydraulic pressure is balanced across all wheels and that the ABS system is capable of effectively modulating braking force whenever necessary.
In real-world driving scenarios, this translates to improved vehicle control, shorter stopping distances and enhanced overall safety.
If the braking still feels uneven or unpredictable, it may be an indication that air remains trapped within the system or that there is another underlying issue requiring attention.
How to Troubleshoot the ABS Bleeding Issues
1. Soft Pedal After Bleeding
If the brake pedal feels soft or spongy even after the bleeding process is complete, it indicates that air is still present somewhere within the system.
In a properly bled system, pressure should remain firm and consistent; therefore, any softness suggests that trapped air bubbles are compromising the hydraulic pressure.
This can occur if the bleeding procedure was not followed correctly, if the fluid level in the reservoir dropped too low during the process, or if the ABS module was not cycled properly.
In some cases, very small air bubbles may remain trapped internally and coalesce over time to form larger bubbles, resulting in inconsistent pedal pressure.
Carefully repeating the bleeding process, while maintaining correct fluid levels and utilizing the specific procedure for the particular ABS system, often resolves this issue.
If the problem persists, it may point to worn seals inside the master cylinder that are unable to effectively maintain pressure.
2. ABS Pump Failure to Activate
The ABS pump plays a crucial role in circulating brake fluid throughout the system, particularly during advanced bleeding procedures.
If the pump fails to activate at the expected time, air trapped within the ABS module cannot be expelled.
This issue may arise if the scan tool is not connected correctly, if an incorrect function was selected, or if the vehicle requires a specific ignition setting to activate the pump.
Electrical issues such as: a weak battery, a blown fuse, or faulty wiring, as it can also prevent the pump from operating.
As the ABS system relies on electronic controls, even a minor fault in the electrical circuitry can hinder its proper operation.
Ensuring that the vehicle has sufficient battery power, checking connections and strictly adhering to the correct activation steps are essential to guarantee that the pump functions as intended during the bleeding process.
3. Air Trapped Inside the ABS Module
Air trapped inside the ABS module is one of the most common and challenging issues faced during brake bleeding.
The module contains small internal chambers, valves and passageways that do not always remain open during standard bleeding procedures.
Due to this design, air can remain trapped within the module, even if the brake lines themselves appear clear.
When air remains inside the module, it results in a soft brake pedal and uneven braking performance, as hydraulic pressure is not distributed uniformly.
To expel this trapped air, it is often necessary to actively cycle the ABS system, typically by using a scan tool or by following a specific driving or activation procedure recommended by the manufacturer.
Activating the system causes brake fluid to flow through these hidden sections, thereby helping to purge the trapped air.
Without this step, traditional bleeding methods may not be sufficient to fully restore optimal brake performance.
4. Leaks in Brake Lines or Calipers
If there is a leak in the brake lines, fittings, or calipers, the system cannot generate and maintain the correct hydraulic pressure, even if the bleeding process has been performed correctly.
Brake fluid must remain completely sealed within the system at all times; any loss of fluid implies that air can enter the system and compromise hydraulic pressure.
Leaks can occur due to loose connections, worn seals, damaged brake lines, or broken components.
Symptoms of a leak may include visible fluid around fittings, a drop in the fluid level within the reservoir, or the brake pedal slowly sinking toward the floor when depressed.
Even a very minor leak can, over time, allow air to enter the system and significantly compromise braking effectiveness.
It is crucial to identify and repair any leaks before or during the bleeding process, as bleeding alone cannot rectify a system that is not completely sealed.
Ensuring that all components are securely fastened and in good condition helps maintain consistent pressure and ensures safe braking performance.
Know, The Final Testing and Road Safety Checks
1. Low-Speed Braking Test
After completing the ABS bleeding procedure, the first step is to test the brakes at low speeds in a safe and open area.
Driving slowly allows you to verify how the brakes are functioning without putting yourself at risk.
When you depress the brake pedal, the vehicle should slow down gradually and uniformly, without any delay or sudden changes in braking force.
The pedal should feel firm and consistent and the vehicle should not pull to one side.
Testing at low speeds is crucial because it helps confirm that the basic hydraulic pressure is functioning correctly before proceeding to more demanding situations.
It also gives you time to notice any unusual noises, vibrations, or delayed responses that could indicate a lingering issue.
2. ABS Activation Test on a Safe Surface
Once normal braking feels correct, the next step is to test the ABS system itself.
This should be performed on a safe surface such as: an empty road, a gravel patch, or a wet surface, where the wheels can be allowed to slip at a controlled speed.
Upon applying the brakes firmly, the ABS system should activate; this is typically felt as a rapid pulsation or vibration in the brake pedal.
This pulsation indicates that the system is rapidly modulating brake pressure to prevent the wheels from locking up.
If the ABS activates smoothly and the vehicle remains stable and under control, it confirms that the system is functioning properly.
If the activation does not occur as expected, or if the response seems irregular, it may indicate that air is still present in the system or that further investigation is required.
3. Re-checking for Leaks
After testing the brakes, it is essential to re-inspect the entire braking system to detect any signs of fluid leaks.
Even if everything appears normal during the bleeding process, the pressure generated during braking can expose tiny leaks that were previously invisible.
Inspect the area surrounding the bleeder valves, brake lines, fittings and calipers for any signs of fluid leakage.
Brake fluid typically ranges in color from clear to light amber (yellow-brown) and may leave behind a slightly oily residue.
Any leak, no matter how small, as it can allow air to enter the system over time, potentially compromising braking performance.
Ensuring that the system is completely sealed helps maintain consistent pressure and long-term reliability.
4. Final Brake Pedal Confirmation
The final step, once all tests have been completed, is to re-confirm the feel of the brake pedal.
The pedal should feel firm, should not sink under sustained pressure and should provide a consistent response every time it is depressed.
This final check confirms that the system is properly maintaining pressure and that no air or leaks are negatively impacting its performance.
A firm pedal feel is the most reliable indicator that the ABS bleeding process has been successful.
If the pedal feels spongy again, or if its feel changes over time, it may indicate that further bleeding or inspection is required.
A firm and reliable pedal provides the assurance that the braking system is ready for safe driving.
Conclusion – How to Bleed ABS System Properly
So, behind the smooth stop there is whole damn system that works in highly precise way even under pressure as well, without any kind of air and error as well.
Modern braking systems rely on precise hydraulic pressure to function correctly and even a minuscule amount of trapped air can compromise that pressure and adversely affect braking performance.
Unlike traditional braking systems, ABS incorporates internal valves, pumps and control units; therefore, a specific procedure is required to completely purge the air.
Consequently, adhering to the correct methodology, which includes following the proper wheel sequence and activating the ABS system when necessary, is an essential part of this process.
A properly bled ABS system restores firmness to the brake pedal, balances braking force and delivers consistent stopping performance.
It ensures that when you depress the brake pedal, hydraulic pressure reaches all four wheels instantly and uniformly.
This becomes particularly crucial during sudden braking situations, when the ABS system must react rapidly to maintain vehicle stability and prevent the wheels from locking up.
If the bleeding process is left incomplete or executed incorrectly, the system may appear to be operational, but it will fail to perform at its full safety potential.
This can result in increased stopping distances, reduced vehicle control and heightened risks during emergency situations.
Understanding this process also helps you avoid common pitfalls, such as allowing the brake fluid level to drop too low, skipping essential steps, or using the wrong tools or the incorrect type of brake fluid.
Taking the time to perform this task with care not only enhances safety but also safeguards critical components such as: the ABS module, the repair or replacement of which can be quite costly.
Simply put, properly bleeding your ABS means restoring your confidence in your braking system.
Now, that’s it from this guide about How to Bleed ABS System Properly, also you can ask all the related queries below.
Frequently Asked Questions
FAQ 1: What is ABS bleeding and why is it important?
Answer: ABS bleeding is the process of removing trapped air from the brake system, including the ABS module, brake lines and calipers. It is essential because the brake system relies on hydraulic pressure generated by brake fluid, which is incompressible. If air enters the system, it compresses under pressure, thereby reducing the force transmitted to the brakes. This results in a soft brake pedal, delayed stopping and reduced vehicle control. Proper ABS bleeding restores full pressure, ensures consistent braking and allows the ABS system to function correctly during sudden stops.
FAQ 2: How does ABS bleeding differ from standard brake bleeding?
Answer: Standard brake bleeding involves using manual or pressure-assisted methods to remove air from the brake lines and calipers. ABS bleeding takes this a step further, as it also requires removing air trapped inside the ABS module, which contains valves and a pump. In many modern vehicles, this requires activating the ABS system, typically using a scan tool, to allow brake fluid to flow through the internal passages of the module. Without this step, air may remain trapped inside the module, even if the rest of the system has been bled, potentially compromising braking performance.
FAQ 3: What are the common signs indicating that my ABS system needs to be bled?
Answer: The most common signs include a soft or spongy brake pedal, increased stopping distances, poor braking effectiveness and, occasionally, the illumination of the ABS warning light on the dashboard. You may also notice that the brake pedal travels lower than usual or does not respond properly when depressed. These symptoms typically manifest following brake repairs, fluid leaks, or whenever air enters the system. If these signs appear, it is often necessary to bleed the ABS system to restore proper performance.
FAQ 4: Can I bleed the ABS system without a scan tool?
Answer: In some cases, basic bleeding can be performed without a scan tool, particularly when very little air is trapped within the brake lines. However, in many modern vehicles, a scan tool is required to fully bleed the ABS module. This is because the internal valves and pumps must be activated to expel any trapped air. Failing to use a scan tool when necessary can leave air trapped within the system, causing the brake pedal to feel soft even after the bleeding process is complete.
FAQ 5: What happens if air remains trapped in the ABS module?
Answer: If air remains trapped inside the ABS module, the braking system will be unable to generate adequate pressure. This can result in a soft brake pedal, delayed braking response and reduced stopping power. In emergency situations, the ABS system may fail to react correctly, potentially compromising vehicle control. The presence of air within the module can also lead to inconsistent braking performance, making the vehicle’s behavior less predictable during stops.
FAQ 6: How long does it take to properly bleed an ABS system?
Answer: The time required depends on the type of vehicle, the amount of air present in the system and the method used. A standard bleeding process may take approximately 30 to 60 minutes, whereas more extensive ABS bleeding procedures involving the use of a scan tool may take longer. If a significant amount of air has become trapped inside the module, this process may need to be repeated several times to restore pedal firmness and stabilize braking performance.
FAQ 7: What type of brake fluid should I use?
Answer: You should always use the specific brake fluid recommended by the vehicle manufacturer such as: DOT 3, DOT 4, or DOT 5.1. Each type of fluid possesses distinct characteristics such as: boiling point and viscosity, that influence the performance of the braking system. Using the incorrect fluid can compromise braking efficiency, damage internal components and negatively impact the operation of the ABS. The correct specifications are typically listed in the owner’s manual or on the reservoir cap.
FAQ 8: Why does my brake pedal still feel soft after bleeding?
Answer: A soft pedal feel after bleeding typically indicates that air remains trapped within the system, or that the ABS module was not properly cycled. This can also occur if the bleeding sequence was incorrect, or if the fluid level dropped too low during the procedure. In some instances, a loss of pressure may be attributed to worn components, such as the master cylinder. Carefully repeating the bleeding process, ensuring that all steps are strictly adhered to, usually resolves this issue.
References:
[1] Modelling and analysis of an air-over-hydraulic brake system
https://journals.sagepub.com/doi/abs/10.1243/0954407041581066

Hello Folks, Dean Shali here to help you out to solve the problems with your lovely vehicle, as i have lots of experience and knowledge about automotive industry as i woks directly with the customers and repair vehicles and i love to help the people to keep their cars safe and running smoothly.