Written By: Dean Shali
Fact Checked By: Sabré Cook
Reviewed By: Tamara Warren
It is 100% true that your vehicle’s smoothness and comfortably behavior actually depends on how well your shocks and struts are working behind the bar: everyday, everytime.
Because, shocks and struts are actually special parts more of the essential parts of your car’s suspension system; and their job is to control how your vehicle literally moves whenever it hits bumps, potholes or going through the uneven roads, also it keeps your tires firmly in contact with the surface for having better grip and stability of course.
But, again whenever these components starts to wear out, then you can clearly see difference in how your car is bouncing more than usual, taking longer to stop and feeling less stable during the turns.
Also, there’s studies that shows that the worn shocks and struts can actually increase the braking distance and reduce the overall handling performance, specially at the higher speeds or on the rough roads.
Yes, there are common warning signs such as: rough or bumpy ride start to look common now, nose-diving when you brake the vehicle, fluid leaks near the wheels and uneven tire wear is one of them as well.
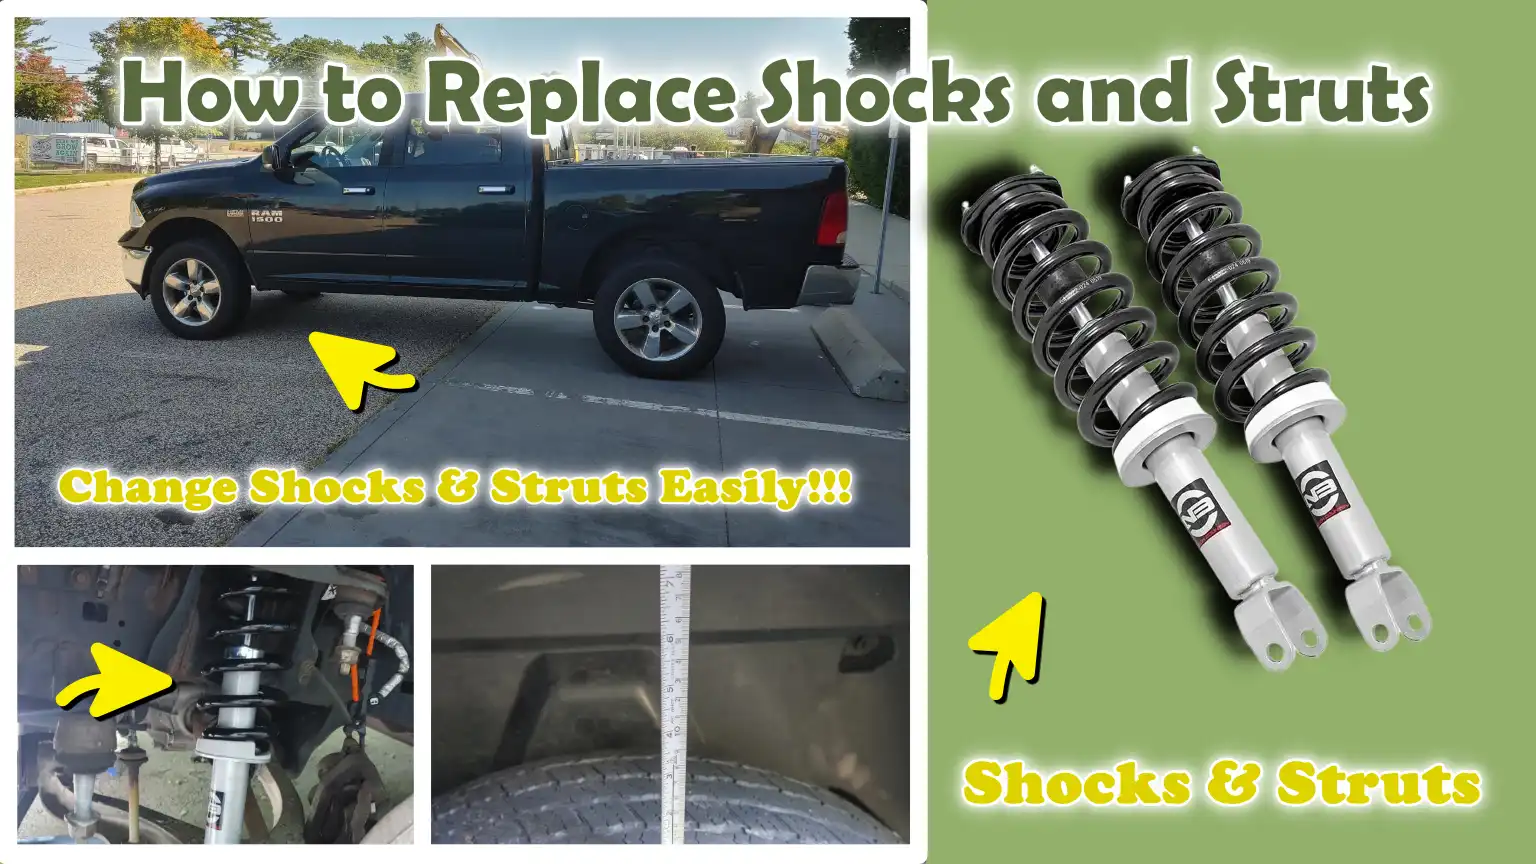
That’s why, you need to understand How to Replace Shocks and Struts, so that you can easily identify these common symptoms and ultimately replace shocks and struts with safe and easy to follow beginner friendly process.
Understand, What Are Shocks and Struts?
Shocks and struts are essential components of your car’s suspension system that help control how your vehicle performs on the road.
When you drive over uneven terrain, potholes, or rough surfaces, your suspension springs compress and release energy.
Without any control, this would cause your car to bounce continuously, thereby compromising its stability.
This is where shocks and struts come into play.
They dampen and control this movement by utilizing hydraulic fluid contained within sealed units; this fluid absorbs the energy and keeps your ride smooth and stable.
Their function is not to support the weight of the car, but rather to control movement, improve contact between the tires and the road and facilitate safe braking and steering.
When they are in good condition, your car feels stable, comfortable and easy to control.
When they become worn out, you may experience excessive bouncing, poor handling and reduced safety.
1. Shock Absorbers
Shock absorbers are designed to control the vertical (up-and-down) movement of your vehicle’s suspension.
They operate by forcing hydraulic fluid through small valves located inside a sealed tube; this process slows down the suspension’s movement after facing a bump or a pothole.
This helps prevent excessive bouncing and ensures that the tires maintain firm contact with the road.
Shock absorbers play a crucial role in enhancing ride comfort, minimizing tire wear and maintaining control during braking and cornering.
Although they do not bear the weight of the vehicle, they nevertheless assist in controlling the behavior of the suspension under various driving conditions.
Shock absorbers are typically mounted between the vehicle’s frame and its suspension components and are often situated in close proximity to the wheels.
In many cars, they are installed separately from the springs and are present in both the front and rear suspension systems.
Their positioning allows them to control movement precisely at the point where direct impact from the road occurs, making them essential for a smooth and stable ride.
2. Struts
Struts are more complex than shock absorbers because they serve as a structural component of the suspension system.
They integrate multiple functions into a single unit, comprising a shock absorber, a coil spring and a structural support that connects to the steering system.
This means that struts not only dampen motion much like: shock absorbers do, but also help support the vehicle’s weight and maintain proper wheel alignment.
Due to this design, struts play a direct role in how your car handles on the road, how it corners and how it maintains its overall stability.
A key distinction from shock absorbers is that struts are an integral part of the suspension assembly itself and cannot be easily separated from its other components.
They are commonly utilized in the front suspension systems of many modern vehicles, particularly those featuring a MacPherson strut design.
Because they bear greater responsibilities, worn-out struts can lead to a variety of issues, such as diminished steering performance, uneven tire wear and a general decline in the vehicle’s overall stability.
3. Key Differences Between Shock Absorbers and Struts
The primary differences between shock absorbers and struts lie in their design, their operational mechanisms and the procedures involved in replacing them.
Shock absorbers are relatively simple components focused entirely on controlling vehicle motion, whereas struts are more complex and serve as a structural element of the suspension system.
In terms of function, both help to dampen vehicle bouncing and ensure a comfortable ride; however, struts also bear the weight of the vehicle and assist in maintaining wheel alignment, making them more critical to the vehicle’s overall handling.
When it comes to replacement, changing shock absorbers is typically easier and faster, as they are distinct from the main suspension structure.
Replacing struts, on the other hand, is a more complex process, as they incorporate a coil spring and require specialized tools such as a spring compressor for installation.
Consequently, replacing a strut takes longer and necessitates greater safety precautions.
Understanding these distinctions helps you make informed decisions regarding vehicle maintenance, ensuring that your vehicle remains both safe to drive and comfortable.
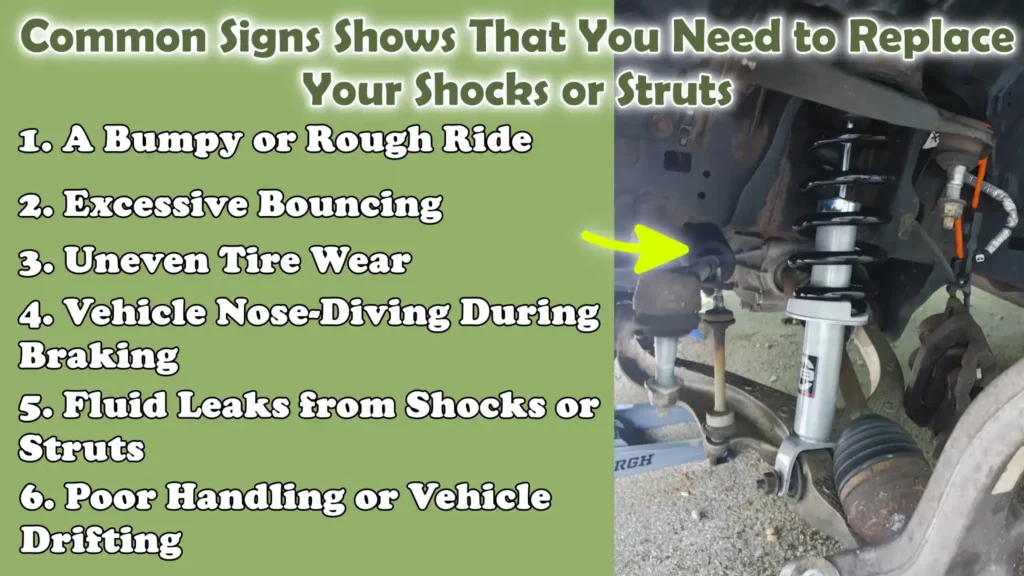
Common Signs Shows That You Need to Replace Your Shocks or Struts
Shocks and struts wear out gradually over time, so many drivers do not realize there is a problem until it becomes severe.
These components are constantly at work whenever your car is in motion; this means they must withstand the constant stress imposed by potholes, braking and cornering.
As they lose their ability to control motion, your vehicle becomes less stable, less comfortable and less safe to drive.
Recognizing early warning signs can help you avoid major issues, such as increased stopping distances, reduced tire traction and damage to other suspension components.
Listed below are the most common and critical signs that clearly indicate your shocks or struts may need to be replaced.
1. A Bumpy or Rough Ride
One of the first and most noticeable signs is a bumpy or uncomfortable ride.
When shocks and struts are in good condition, they absorb most of the impact from the road, resulting in fewer jolts felt inside the cabin.
As they wear out, they lose this capability and even small potholes or uneven surfaces begin to feel harsh.
This occurs because the suspension is no longer able to properly dampen the energy generated by the springs.
Over time, this can make long journeys fatiguing and diminish the overall driving comfort.
2. Excessive Bouncing
If your car continues to bounce excessively after driving over a pothole or a speed bump, it is a sure sign that your shocks or struts are no longer functioning correctly.
A healthy suspension system should stabilize quickly after absorbing a shock, typically after oscillating just once or twice.
Excessive bouncing indicates that the system is failing to dampen motion, which can reduce tire contact with the road surface.
This not only diminishes ride comfort but also compromises vehicle control, particularly at high speeds or on rough roads.
3. Uneven Tire Wear
Worn shocks and struts can lead to uneven tire wear because they fail to keep the tires firmly pressed against the road surface.
You may observe smooth spots on the tire treads, “cupping” (shell-like depressions), or irregular wear patterns.
This occurs when uncontrolled bouncing causes the tires to repeatedly lose contact with the road.
Uneven tire wear not only shortens the lifespan of your tires but also impairs their traction, making your vehicle less stable during braking and cornering.
4. Vehicle Nose-Diving During Braking
If the front end of your car dips sharply forward when you apply the brakes, it is often a sign that your front struts or shocks have weakened or worn out.
This phenomenon is known as “nose-diving,” and it occurs because the suspension system is unable to properly manage the weight transfer that takes place during braking.
This can result in increased stopping distances and reduced braking efficiency specially in emergency situations.
It can also make the vehicle feel unstable and difficult to control.
5. Fluid Leaks from Shocks or Struts
Shocks and struts contain hydraulic fluid, which is essential for controlling the vehicle’s motion.
If you observe oil or fluid leaking from the exterior of a shock or strut, it indicates that its internal seal has failed.
Once fluid begins to leak, the component loses its ability to function properly.
Even a minor leak can deteriorate rapidly over time, eventually leading to the complete failure of the component.
Checking for the presence of fluid around suspension components is a simple yet crucial step in identifying this issue.
6. Poor Handling or Vehicle Drifting
When shocks and struts become worn, your vehicle may feel unstable while cornering or driving at high speeds.
When changing lanes, you may notice the vehicle drifting slightly, swaying, or feeling “loose.”
This occurs because the suspension fails to keep the vehicle stable, preventing the tires from maintaining proper contact with the road surface.
Poor handling can erode driver confidence and increase the risk of losing control of the vehicle particularly on wet or uneven roads.
Tools
| Tool / Material | Why It Is Needed | How to Use It |
|---|---|---|
| Jack and Jack Stands | These lift the car and hold it securely in place while you are working underneath it or around the wheels. Relying solely on a jack for an extended period is unsafe. | Use a jack to lift the car at the correct lifting points. Once lifted, place jack stands beneath sturdy sections of the frame and slowly lower the car onto them. Always ensure that the car is stable before beginning your work. |
| Lug Wrench | This tool is used to loosen and tighten wheel nuts, allowing you to remove tires and access suspension components. | Before lifting the car, turn the lug wrench anti-clockwise to loosen the nuts. After replacing the parts, use a criss-cross pattern to tighten the nuts again. |
| Socket and Ratchet Set | These are required to remove and install the bolts that hold the shocks and struts in place. Different bolts require different socket sizes. | Select the correct socket size, attach it to a ratchet and turn it to loosen or tighten the bolt. Apply steady pressure to avoid damaging the bolt heads. |
| Torque Wrench | This ensures that bolts are tightened to the exact level recommended by the manufacturer. Proper torque is essential for safety. | Set the required torque value on the wrench. Tighten the bolt until you hear or feel a distinct “click”; this indicates that the correct tightness has been achieved. |
| Spring Compressor (For Struts) | This tool is used to safely compress the coil spring located inside the strut assembly. Springs are under immense pressure and handling them without the proper tools can be dangerous. | Position the spring compressor on opposite sides of the spring and tighten it evenly to compress the spring. Remove the strut only once the spring has been fully secured. Exercise extreme caution when using this tool. |
| Penetrating Oil | This aids in loosening rusted or seized bolts, a common occurrence, as suspension components are frequently exposed to dust and moisture. | Spray penetrating oil onto the bolts and nuts before attempting to remove them. Allow it to sit for a few minutes to ensure it penetrates deeply, thereby making them easier to loosen. |
| Replacement Shocks or Struts | These are the new components that replace worn-out or damaged parts, thereby restoring the vehicle’s driving performance and safety. | Ensure that the new parts are compatible with your specific vehicle model. Install them in the exact locations where the old parts were situated and tighten them securely using the appropriate tools and torque settings. |
| Safety Gloves and Goggles | While working, protect your hands from sharp edges and shield your eyes from dust, dirt, or debris. | Wear gloves throughout this entire process and be sure to wear safety goggles specially when working underneath the car or when using tools such as a spring compressor. |
How to Ensure Safety
Working on shocks and struts involves lifting your vehicle, handling heavy parts and dealing with components that are under immense pressure.
Therefore, safety becomes the most critical aspect of this entire process.
Many accidents during suspension work do not occur because the task itself is difficult, but rather because basic safety protocols are overlooked.
Working in a stable environment, using the correct tools and exercising caution can prevent injuries and damage to your vehicle.
Taking a few extra minutes to observe these precautions can make the job significantly safer and easier, even for beginners.
1. Always Work on a Level Surface
A level and solid surface ensures that your vehicle remains stable while being lifted.
If you attempt to work on an uneven or sloped surface, the vehicle may slide, roll, or become unbalanced situations that are extremely dangerous.
Even the slightest movement can cause the jack or stands to slip.
A concrete floor or level ground is ideal, as it provides a sturdy foundation and minimizes the risk of the vehicle shifting unexpectedly during repairs.
2. Use Jack Stands – Never Rely Solely on the Jack
A hydraulic jack is designed to lift a vehicle, not to hold it suspended in the air for an extended period.
Jacks can fail due to pressure loss or mechanical malfunction, causing the vehicle to drop suddenly.
Jack stands are specifically engineered to support the vehicle’s weight in a safe and stable manner.
After lifting the vehicle with a jack, always securely place jack stands beneath sturdy frame points and lower the vehicle onto them before beginning any work.
This step is absolutely essential to prevent serious injury.
3. Handle Compressed Springs with Caution
Struts contain coil springs that are under immense tension; if this stored energy is suddenly released, it can be extremely dangerous.
If a spring is not properly compressed, it can recoil with tremendous force and cause severe injury.
Using the correct spring compressor tool and tightening it evenly on both sides helps manage this pressure safely.
When working with compressed springs, it is crucial to proceed slowly, double-check your settings and never rush.
4. Wear Essential Safety Gear
Safety gear helps minimize the risk of injury while working on your vehicle.
Gloves protect your hands from sharp edges, hot surfaces and grime, while safety glasses shield your eyes from dust, rust particles and small debris that may fall while working underneath the vehicle.
Even during simple tasks such as: loosening bolts or removing components, as there is a risk of sudden slips or flying debris; therefore, wearing the appropriate safety gear adds a vital layer of protection.
5. Follow Manufacturer-Specified Torque Specifications
Every bolt in your suspension system is designed to be tightened to a specific level, known as torque.
If bolts are too loose, components may shift out of place or detach while driving.
Conversely, if they are overtightened, the threads may strip, or the bolt itself could snap.
Using a torque wrench and adhering to the torque values recommended by the manufacturer ensures that all components are secured correctly.
This not only keeps your vehicle safe but also maintains its excellent performance and helps prevent future mechanical problems.
How to Replace Shock Absorbers – Effortless Steps
Replacing shock absorbers is a practical task that can significantly improve your vehicle’s ride comfort, braking stability and overall handling.
Shock absorbers are distinct from the main suspension structure, making them easier to replace compared to struts; nevertheless, this job requires caution and the right tools.
These components control how quickly your suspension returns to its resting position after traveling over uneven terrain; when they become worn out, your vehicle may bounce excessively, feel unstable and take longer to come to a stop.
Performing this task correctly ensures proper contact between the tires and the road, while also preventing uneven tire wear.
Following each step in the correct sequence ensures both safety and proper installation.
1. Lift the Vehicle
The first step is to safely lift the vehicle so that you can access the shocks.
Park the vehicle on a level, sturdy surface and ensure that the parking brake is fully engaged.
Before lifting the vehicle, slightly loosen the wheel nuts, as they are easier to remove once the vehicle is raised.
Use a jack at the designated lifting points to raise the vehicle, then place jack stands beneath sturdy sections of the frame to provide secure support.
Once the vehicle is stable, completely remove the wheels to expose the suspension assembly where the shock absorbers are mounted.
2. Locate the Shock Absorbers
After removing the wheels, you will need to identify the shock absorbers and their mounting points.
A shock absorber is typically a long, cylindrical component connected between the vehicle’s frame and the suspension arm or axle.
It generally features two main mounting points, one at the top and one at the bottom.
The upper mount is often attached to the vehicle’s body, while the lower mount connects to the suspension system.
Correctly identifying these points allows you to properly remove and install the shock absorber without damaging surrounding components.
3. Removing the Old Shock Absorber
To remove the old shock absorber, begin by applying penetrating oil to the bolts, specially if they appear rusted or seized.
This helps loosen them and minimizes the risk of damage.
Use a socket and ratchet to remove the lower bolt first, followed by the upper bolt.
Once both bolts have been removed, carefully extract the shock absorber.
Some shocks may require a bit of wiggling or adjustment to pull them out; handle them with care to avoid causing any damage to adjacent parts, such as brake lines or suspension arms.
4. Installing the New Shock Absorber
Before installing the new shock absorber, compare it with the old one to ensure that its size and design match the original part.
Position the new shock absorber correctly and align it with its mounting points.
First, loosely attach the upper mount; then, align the lower mount with its mounting point and insert the bolt.
Once both ends are properly aligned, gradually tighten the bolts.
Use a torque wrench to tighten them in accordance with the manufacturer’s instructions, as applying the correct torque is crucial for both safety and optimal performance.
5. Reassembly and Lowering the Vehicle
Once the new shock absorber is securely installed, remount the wheels and hand-tighten the lug nuts.
Carefully raise the vehicle slightly using the jack to allow for the removal of the jack stands, then slowly lower the vehicle back down to the ground.
Once the vehicle is fully lowered, securely tighten the lug nuts using the correct pattern and torque specifications.
Finally, take the vehicle for a short drive (test drive) to verify that it handles smoothly, exhibits improved stability and produces no unusual noises.
This ensures that the shock absorber replacement was performed correctly and that your suspension is functioning as intended.
How to Replace Struts – Working Method
Replacing struts is a more complex suspension task, as struts are not merely shock absorbers; they are structural components of the vehicle that bear weight, maintain wheel alignment and connect directly to the steering system.
This means that any error during installation can adversely affect the vehicle’s handling, tire wear and overall safety.
Struts also contain an internal coil spring under immense tension, making it essential to handle them with extreme caution.
When performed correctly, replacing struts results in a more comfortable ride, improved steering control, greater braking stability and enhanced overall vehicle safety.
To prevent any damage or injury, it is crucial to follow every step carefully and use the appropriate tools.
1. Remove the Wheel
To begin, safely lift the vehicle and support it on jack stands placed on a level, sturdy surface.
Once the vehicle is stable, remove the wheel to gain access to the strut assembly.
The strut is typically located behind the wheel and is mounted directly between the vehicle’s body and the steering knuckle.
Removing the wheel provides a clear workspace, allowing you to view all connected components and work on them without obstruction.
2. Disconnect Components
Before removing the strut, you must disconnect the components attached to it.
These often include the brake line bracket, sensor wires and sway bar link.
These parts are connected to the strut to maintain stability while driving; therefore, they must be disconnected with great care to avoid any damage.
Use the correct tools to loosen the bolts and clips and gently move these components aside.
This step ensures that when the strut is removed, nothing is stretched, bent, or broken.
3. Remove the Strut Assembly
To remove the strut assembly, first loosen the bolts connecting it to the steering knuckle at the bottom.
These bolts are typically tightened very securely, as they are subjected to immense pressure while the vehicle is in motion.
Once the lower bolts have been removed, proceed to the upper section of the strut, which is attached to the vehicle’s body; either within the engine bay or the trunk area.
While supporting the strut from below, carefully remove the upper mount bolts.
Once all bolts have been removed, the entire strut assembly can be lifted out of the vehicle.
4. Compress the Spring – Essential Step
The coil spring attached to the strut is under extremely high tension; therefore, it is absolutely critical to compress it before disassembling the unit.
This is the most crucial and delicate step in the entire process.
Use an appropriate spring compressor tool and position it at equal intervals on both sides of the spring.
Tighten the tool slowly and evenly to ensure that the spring compresses securely without shifting.
This relieves the tension, allowing you to remove the top mount without the spring suddenly and violently springing outward.
Always perform this task with the utmost caution and attention, as doing it incorrectly poses a significant safety hazard.
5. Replace the Strut
Once the spring has been securely compressed, remove the top mount and extract the old strut from the assembly.
Install the new strut in its place, ensuring that it matches the original design and specifications.
This step is essential for maintaining proper suspension geometry and performance.
Align all components correctly so that the new strut fits securely within the assembly.
6. Reassemble the Strut Assembly
After installing the new strut, reassemble the coil spring, top mount and all other components in the correct sequence.
Before tightening, ensure that everything is properly aligned.
Once the assembly is secure, slowly release the spring compressor to allow the spring to return to its normal position.
This step must be performed with caution to ensure that the spring seats correctly and the assembly remains stable.
7. Reinstall the Strut on the Vehicle
Reinstall the complete strut assembly into its original position on the vehicle.
First, secure the assembly in place by tightening the top mount bolts; then, align the lower section with the steering knuckle and insert the bolts.
Tighten all bolts gradually and use a torque wrench to ensure they are tightened to the torque specifications recommended by the manufacturer.
Once everything is secure, reconnect all components that were previously removed, such as the brake line and sway bar link.
Finally, reinstall the wheel, safely lower the vehicle and verify that everything is fitted correctly.
Generally, it is recommended to have a wheel alignment performed after replacing a strut to ensure smooth driving and even tire wear.
Is a Wheel Alignment Necessary After Replacement?
Yes, after replacing shocks or struts; particularly for struts a wheel alignment is typically required.
This is because suspension work can cause slight shifts in the positioning of key components that determine how your wheels make contact with the road.
A wheel alignment involves adjusting the angles of the wheels so that they are set according to the precise specifications outlined by the manufacturer.
These angles influence how your tires interact with the road, how your vehicle handles and how evenly your tires wear.
Even minor deviations in alignment can lead to significant issues over time; therefore, checking and correcting the alignment after suspension work is a crucial step to ensure safety, comfort and long-term performance.
1. Why Alignment Is Important
When you replace struts or perform work on suspension components, you often loosen or remove the bolts that connect the wheel assembly to the vehicle.
This can result in a slight shift in the wheel’s position, even if everything has been carefully reassembled.
Proper alignment ensures that all four wheels are pointing in the correct direction and are set at the proper angles.
This maintains full contact between your tires and the road, thereby improving steering precision, braking performance and overall vehicle stability.
Correct alignment also reduces unnecessary stress on suspension components and helps your vehicle track straight without drifting to one side.
2. The Risks of Skipping an Alignment
If you do not get a wheel alignment after replacing shocks or struts, your vehicle may begin to experience a variety of issues.
One of the most common issues is uneven tire wear, where certain sections of the tires wear down faster than others.
This reduces the lifespan of the tires and increases replacement costs.
You may also notice that the vehicle pulls to one side, the steering wheel appears crooked while driving straight, or you experience reduced control over the vehicle when turning.
In more severe cases, improper alignment can negatively impact braking stability and make the vehicle difficult to handle, particularly at high speeds.
Over time, this can also place excessive strain on other suspension components, potentially leading to the need for further vehicle repairs.
3. The Right Time for an Alignment
It is best to get a wheel alignment immediately after replacing struts or performing any major suspension-related work.
This ensures that everything is properly calibrated right from the start and helps prevent premature tire wear.
In some instances such as: when only shock absorbers have been replaced and no major suspension components have been disturbed, an alignment may not be strictly necessary; nevertheless, having it checked is still a good idea.
Many experts recommend having your alignment checked every 10,000 to 15,000 kilometers, or whenever you notice any issues with the vehicle’s handling.
Getting an alignment done at the appropriate time ensures a comfortable ride, enhances safety and guarantees that your vehicle performs exactly as it should.
Know, The Cost of Replacing Shocks and Struts
The cost of replacing shocks and struts depends on the type of vehicle you own, the quality of the parts used and whether you perform the work yourself or hire a professional.
These components are crucial for both safety and the overall driving experience; therefore, it is essential to use reliable parts and ensure they are installed correctly.
Although the initial outlay may seem high, replacing these parts in a timely manner can help you avoid significant future expenses such as: uneven tire wear, reduced fuel efficiency and damage to other suspension components.
Understanding these costs allows you to budget effectively and choose the best option for your specific situation.
1. Cost of DIY vs Professional Replacement
If you decide to replace shocks or struts yourself (DIY), the primary costs will be for the parts and basic tools.
For shock absorbers, the process is generally straightforward and can be performed with common tools, making DIY replacement a more economical option.
Struts are more complex, as they incorporate a coil spring and require a spring compressor for replacement, as a tool that increases both the technical difficulty of the task and the associated safety risks.
While the DIY approach can significantly reduce costs, it requires time, the right technical knowledge and careful execution.
Conversely, hiring a professional incurs higher costs because you are paying for their skilled labor, specialized tools and expertise.
Mechanics can complete the job quickly and minimize the risk of errors; if you do not feel confident performing the work yourself, this can be a highly beneficial option.
2. Parts Price Range
The cost of shocks and struts varies depending on the brand, build quality and the specific type of vehicle.
Standard shock absorbers are generally the most affordable option, while the prices of other components can range from moderate to high, based on their performance capabilities.
Struts are typically more expensive because they integrate multiple components into a single unit.
For most vehicles, it is recommended to replace shocks or struts in pairs, which means the total cost for parts can increase.
However, while high-quality parts may have a higher upfront cost, they often last longer and deliver superior performance, proving to be a sound investment in the long run.
3. Breakdown of Labor Costs
Labor costs depend primarily on the complexity of the task and the time required to complete it.
Replacing shock absorbers generally takes less time, as they are distinct from the main suspension system.
Replacing struts takes longer, as it involves removing the entire assembly and safely handling a compressed spring.
Labor charges can vary based on the workshop, geographic location and the specific vehicle model.
In many instances particularly in the case of struts, as labor costs can constitute a significant portion of the total expense.
Some service centers may also include a wheel alignment in the total price; this is a procedure often recommended after replacing struts.
Understanding labor costs helps you compare different quotes and determine whether opting for professional service is more cost-effective for you compared to doing the work yourself (DIY).
Common Mistakes to Avoid During Replacement of Shocks & Struts
Replacing shocks and struts can significantly improve your vehicle’s safety and ride comfort; however, minor errors made during this process can lead to poor performance, premature wear and tear, or even hazardous situations.
Many of these mistakes stem from rushing the job, employing incorrect techniques, or attempting to cut corners in the wrong places.
Understanding these common errors helps you perform the work correctly and avoid issues such as uneven tire wear, loose components and unstable handling.
Paying close attention to proper techniques and adhering to correct procedures ensures that your suspension functions exactly as intended and lasts for the long haul.
1. Not Replacing in Pairs
A common mistake is replacing only a single shock or strut instead of replacing both on the same axle.
Shocks and struts wear out at a similar rate; therefore, replacing just one can create an imbalance in your vehicle’s handling.
This can result in uneven ride height, reduced stability and inconsistent braking performance.
Replacing them in pairs ensures balanced suspension performance, provides better vehicle control and promotes even tire wear, thereby enhancing overall driving safety.
2. Ignoring Torque Specifications
Many people tighten bolts by feel rather than using the correct torque settings, which can lead to serious problems.
If bolts are too loose, they may loosen further or shift out of position while driving.
Conversely, if they are overtightened, the threads can become stripped, or the bolt itself may weaken and eventually snap over time.
Using a torque wrench and adhering to the values recommended by the manufacturer ensures that every component is securely and correctly tightened.
This helps maintain safety, prevents damage and guarantees that the suspension functions properly under various driving conditions.
3. Improper Spring Compression
When working on a strut, mishandling the coil spring is one of the most dangerous mistakes anyone can make.
The spring stores a tremendous amount of potential energy; if it is not compressed evenly or securely, it can release suddenly and with immense force.
This can result in serious injury and damage to surrounding components.
Using the correct spring compressor and tightening it evenly on both sides helps manage this pressure safely.
It is absolutely crucial to take your time during this step and carefully inspect the setup.
4. Neglecting Wheel Alignment
After replacing struts or working on suspension components, the wheel alignment may shift slightly.
Neglecting alignment can lead to uneven tire wear, poor steering response and the vehicle pulling to one side.
Over time, this can reduce tire lifespan and compromise driving safety.
Getting a proper wheel alignment after the work is complete ensures that your wheels are correctly positioned, thereby improving vehicle handling, extending tire life and ensuring that your vehicle tracks straight and remains stable.
5. Using Low-Quality Parts
Opting for cheap or low-quality shocks and struts may save money initially, but it often leads to premature component wear and compromised performance.
Substandard parts may fail to provide adequate damping, potentially resulting in a rough ride, reduced stability and less effective braking.
In some instances, they may wear out much sooner than expected, leading to additional repair costs down the road.
Opting for reliable and thoroughly tested parts ensures superior durability, an enhanced driving experience and long-term benefits that provides a wise investment for your vehicle.
How to Maintain Shocks & Struts for Better Performance and Longevity
Additionally, there’s modern research that clearly shows that the worn out suspension components can significantly reduces the vehicle’s stability specially at the higher speeds. And, studies found out that the degraded suspension system literally lowers the stability performance by a noticeable margin, that makes the vehicle very hard to control, that clearly shows that why it becomes really important to replace shocks and struts at the right time to ensure having safe driving experience.[¹]
Keeping your shocks and struts in good condition involves more than just replacing them when they fail; it also entails adopting proper practices that help extend their lifespan and enhance their performance.
Whenever your vehicle is in motion, these components are constantly at work, enduring the continuous impact of road shocks, heat, dust and varying loads.
A few simple habits such as: timely inspections, using reliable parts and maintaining balance within the suspension system that can significantly improve ride comfort, handling and safety.
Proper maintenance also reduces the risk of sudden component failure and helps protect other critical parts, such as tires, control arms and steering components.
1. Replace in Pairs – Front or Rear
Replacing shocks or struts in pairs specifically on the same axle, as it is crucial for balanced performance.
When a component on only one side is replaced, the new part functions differently than the older, remaining part on the opposite side; this can lead to handling imbalances, reduced stability and uneven tire wear.
Replacing both front or both rear units simultaneously ensures that the suspension remains balanced and responds identically to road conditions on both sides.
The result is improved vehicle control, greater stability during braking and an overall more comfortable driving experience.
2. Choose High-Quality Brands
The quality of your shocks and struts has a direct impact on how your vehicle feels and performs on the road.
High-quality components are designed to guarantee consistent damping (shock absorption), exceptional durability and a long service life.
To ensure their reliability, they undergo rigorous testing under a wide range of operating conditions.
While inexpensive alternatives may appear attractive at first glance, they often fail prematurely and are unable to effectively control suspension movement.
Opting for reliable and well-engineered components ensures driving comfort, superior handling and long-term longevity.
3. Inspect Suspension Components
Shocks and struts work in conjunction with other suspension components such as: bushings, control arms and mounts.
If these associated parts are worn out or damaged, even brand-new shocks or struts will fail to function correctly.
Conducting regular inspections allows you to detect issues such as: cracks, looseness, or worn rubber components in a timely manner.
Addressing these issues promptly ensures that the entire suspension system operates smoothly as a cohesive unit, thereby preventing unnecessary strain on the new components.
4. Regular Maintenance Checks
Regular maintenance checks play a crucial role in extending the lifespan of your suspension system.
Checking for warning signs such as: fluid leaks, unusual noises, excessive bouncing, or uneven tire wear, that can help you identify potential problems early on.
It is also beneficial to inspect the shocks and struts during routine servicing; particularly after driving on rough terrain or undertaking long-distance journeys.
Keeping your suspension in good condition not only enhances driving comfort but also ensures better control, safer braking and a more stable driving experience over time.
Read More:
- How to Fix Uneven Tire Wear
- How to Rotate Car Tires
- How to Align Car Wheels
- How to Check Tire Pressure
- How to Replace Brake Rotors
Conclusion – How to Replace Shocks and Struts
Your vehicle craves to have a well-balanced suspension system, as it literally improves the comfort for you and also directly related to the safety and improved control of your vehicle.
These components play a pivotal role in controlling how your car responds to rough terrain, corners and braking factors that directly impact your driving experience.
When these parts become worn, the consequences extend beyond mere discomfort; they can lead to increased braking distances, reduced tire traction and uneven tire wear.
By recognizing warning signs early and adhering to proper replacement procedures, you can avoid major mechanical failures as well as unnecessary repair costs.
Using the right tools, observing safety precautions and ensuring correct installation guarantee that your suspension system functions exactly as intended.
It is also essential to remember that good maintenance habits make a significant difference.
Replacing shocks and struts in pairs, selecting reliable replacement parts and checking wheel alignment after installation all contribute to enhancing vehicle performance and extending its lifespan.
Regularly inspecting your suspension system allows you to identify minor issues before they escalate into serious problems.
In the long run, taking care of these components not only ensures a comfortable driving experience but also safeguards your tires, steering system and the vehicle’s overall stability.
Now, that’s all from the guide about How to Replace Shocks and Struts, now you can ask related question in comment section.
Frequently Asked Questions
FAQ 1: How long do shocks and struts last?
Shocks and struts typically last between 50,000 and 80,000 kilometers, although this depends on how and where you drive. If you frequently drive on rough or pothole-filled roads, or if you carry heavy loads, they may wear out more quickly. Smooth roads and careful driving can extend their lifespan. Even if they do not fail suddenly, their performance gradually diminishes over time; therefore, regular inspections are essential to identify early signs of wear.
FAQ 2: Can I drive with bad shocks or struts?
Yes, you can drive with bad shocks or struts for a short period, but it is not safe for long-term use. Worn-out shocks or struts compromise your vehicle’s ability to maintain stability, particularly during braking and cornering. This can increase stopping distances and make the vehicle difficult to control. It can also lead to uneven tire wear and potentially damage other components of the suspension system. For safety reasons, it is best to replace them immediately as soon as you notice clear signs of wear or malfunction.
FAQ 3: How long does it take to replace shocks and struts?
The time required depends on your level of experience and the type of vehicle you own. Replacing shock absorbers is generally a quick process; someone with basic mechanical knowledge might take about one to two hours per axle. Replacing struts takes longer because they incorporate coil springs and require careful handling; therefore, this process can take anywhere from two to four hours or more. A professional mechanic, utilizing their experience and the proper tools, can often complete this task much more quickly.
FAQ 4: Is replacing struts more difficult than replacing shocks?
Yes, replacing struts is more difficult than replacing shock absorbers because struts serve as a structural component of the suspension system. They contain a highly tensioned coil spring, which necessitates the use of a specialized tool called a ‘spring compressor.’ This complicates the process and also increases the associated safety risks. Replacing shocks is generally easier because they are separate components that do not bear the vehicle’s weight, making their replacement a quick and straightforward task.
FAQ 5: Do I need to get a wheel alignment after replacing shocks or struts?
Generally, getting a wheel alignment is recommended after replacing struts, as they are directly connected to the steering and suspension systems. Removing and reinstalling them can cause slight changes in the wheel angles. In the case of shocks, an alignment is not always strictly necessary, though it is still a good idea to have it checked. Proper alignment ensures even tire wear, improves handling and maintains a stable driving experience.
FAQ 6: What happens if I don’t replace worn-out shocks or struts?
If you neglect worn-out shocks or struts, your vehicle will gradually become less safe and less comfortable to drive. You may face issues such as excessive bouncing, poor handling and increased braking distances. Over time, this can also lead to uneven tire wear and place undue stress on other suspension components, potentially increasing future repair costs. Replacing them in a timely manner allows you to avoid these complications.
FAQ 7: Should I replace all four shocks or struts at the same time?
It is not always necessary to replace all four shocks or struts simultaneously; However, it is strongly recommended that they be replaced in pairs; specifically, both front ones or both rear ones. This ensures that the suspension remains balanced and performs consistently on both sides of the vehicle. Replacing all four shocks or struts simultaneously yields the greatest improvement in the vehicle’s ride quality and handling; particularly when the existing components are worn out.
FAQ 8: How can I tell if my shocks or struts are completely worn out?
You can identify faulty shocks or struts by observing specific signs, such as excessive bouncing of the vehicle on rough roads, a jarring sensation while driving, oil leaks near the suspension components, uneven tire wear, or the vehicle dipping forward when braking. In some instances, you may also hear strange noises while driving or experience reduced control over the vehicle. If you notice these signs, it indicates that your shocks or struts require immediate replacement.
FAQ 9: Is it safe to replace shocks and struts at home?
If you possess the proper tools and adhere to all safety protocols, replacing shocks can be a safe task, even for beginners. However, replacing struts is a slightly more complex undertaking, as it involves a compressed spring; if not handled correctly, this can pose a safety hazard. If you have the appropriate tools and are familiar with the procedure, you can certainly perform this task at home; however, if you lack comprehensive knowledge on the subject, it is advisable to seek the assistance of a professional.
References:
[1] Influence of suspension system service degradation characteristics on running stability performance of 160 km/h express freight car
https://link.springer.com/article/10.1007/s42452-025-07868-4

Hello Folks, Dean Shali here to help you out to solve the problems with your lovely vehicle, as i have lots of experience and knowledge about automotive industry as i woks directly with the customers and repair vehicles and i love to help the people to keep their cars safe and running smoothly.