Written By: Dean Shali
Fact Checked By: Sabré Cook
Reviewed By: Tamara Warren
Yes, there are literally “AFFORDABLE TO FIX” this backup camera system problems, so just give this guide a chance to solve this without spending blind money on repairs.
Now-a-days, Backup Cameras are not the luxury feature, as they have become a standard safety system in modern vehicles: specifically after the regulations such as: NHTSA made them mandatory in all new cars sold in the United States since 2018.
Basically, these cameras are designed to reduce the blind spots and helps you to prevent back-over accidents, which has bad history of causing thousands of injuries and hundreds of fatalities every year, particularly for the children and unknown pedestrians.
So, whenever your backup cameras just stops working, then it is a huge inconvenience and literally it affects your ability to see what’s actually behind your vehicle, that literally increases the risk of accidents.
There are common symptoms are available such as: blacked out screen, blurry image, flickering of display or a “No Signal” message: These all things usually points to the specific issues such as: having dirt buildup on the lens, blown out fuses, loosed-up wirings or having software glitches in the infotainment system as well.
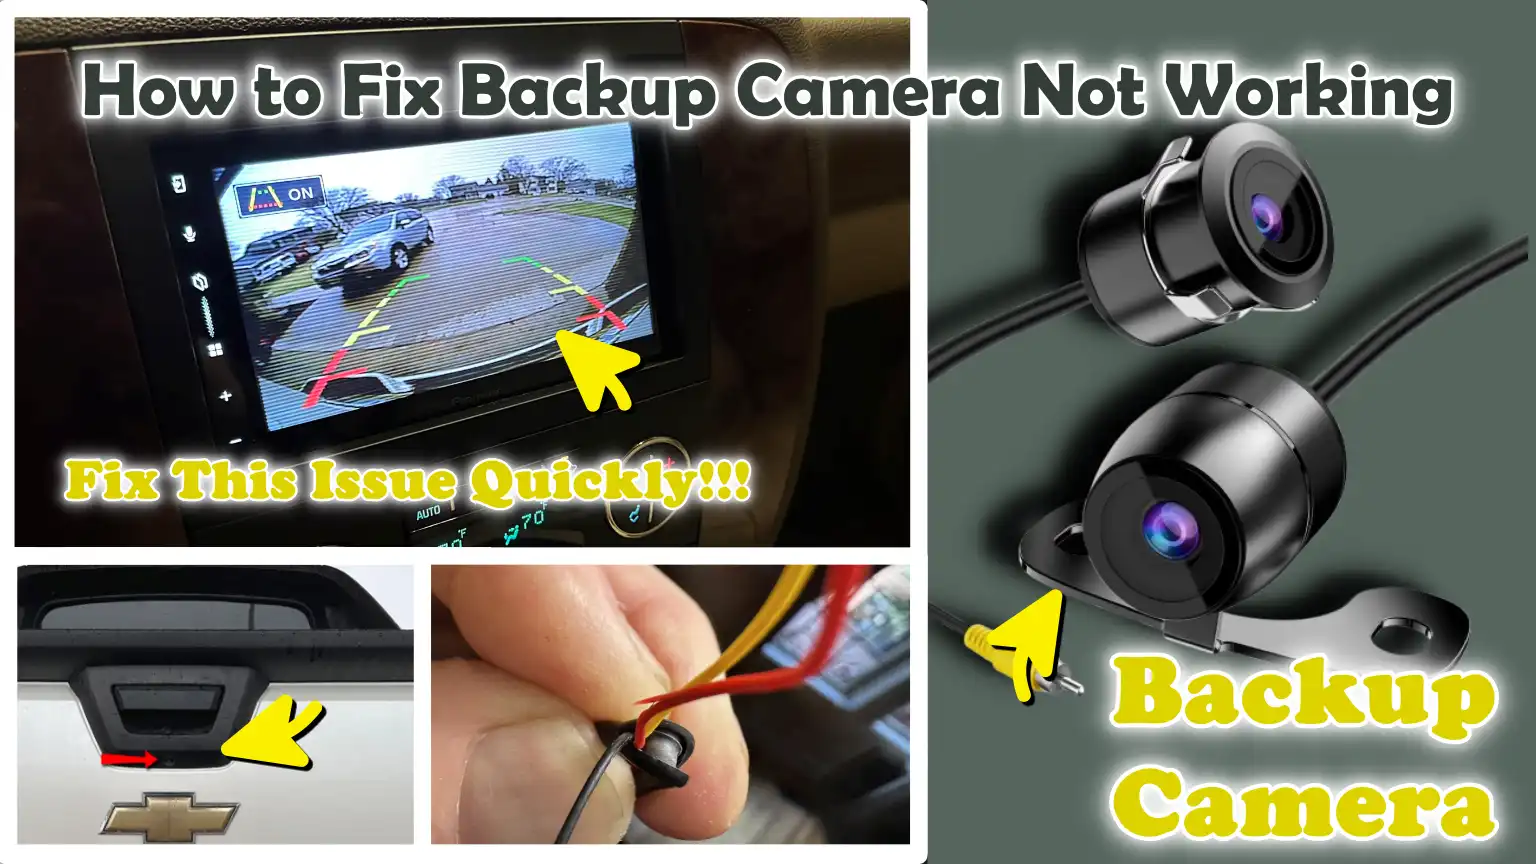
So, in this guide you’ll learn How to Fix Backup Camera Not Working, so that you can easily identify the cause and beginner friendly guide will follow for fixing it.
Know, How a Backup Camera System Actually Works?
A backup camera system is a simple yet highly organized setup designed to assist you in seeing what lies directly behind your vehicle while you are backing up (reversing).
It operates through the combined effort of several components: a small, rear-mounted camera; a display screen located inside the vehicle; wiring to transmit power and signals; and a control system that activates all these elements at the appropriate moment.
When all these parts function together correctly, you receive a clear, real-time video feed, which enhances safety and minimizes “blind spots”, those areas of the vehicle that are not directly visible to the driver.
Understanding how each individual component functions makes it much easier to identify potential issues and resolve them quickly.
1. The Camera – Rear-Mounted Lens
The camera is typically mounted on the rear of the vehicle, often near the license plate or the trunk handle, from where it captures a wide-angle view of the area behind the vehicle.
It utilizes a small digital lens to record video and is engineered to perform effectively under various lighting conditions, including low-light environments at night.
Most cameras are designed to withstand the elements; however, they can become dirty, fogged over, or obstructed by dust, water, or snow, which is the most common cause of a blurry or unclear image.
Provided the lens remains clean and undamaged, it typically delivers a wide and clear field of view, helping drivers identify obstacles, pedestrians, or objects located behind them.
2. The Display – Infotainment Screen or Rearview Mirror
The display is the screen on which you view the video feed transmitted by the camera.
In most modern vehicles, this display is integrated directly into the dashboard-mounted infotainment system, whereas in some cars, the image appears directly within the rearview mirror.
When the system is active, a live video feed appears on the screen, often accompanied by guiding lines that help you gauge distance and direction.
If the screen goes black, flickers, or displays a “No Signal” message, it typically indicates that the display is not receiving a proper input signal from the camera, or that there is an issue with the system’s connections.
A properly functioning display is crucial; even if the camera itself is in good working order, you will be unable to see anything if the screen is not functioning correctly.
3. Wiring and Power Supply
The wiring connects the camera to the display and provides the necessary power to operate the system.
These wires run from the rear of the vehicle to the front, often passing through moving components such as the trunk or tailgate.
Due to this movement, the wires may eventually become loose, damaged, or frayed over time.
The system typically receives power when the vehicle is operational, specifically when the reverse gear is engaged.
If a wire is severed, a connection becomes loose, or a fuse blows, the camera may fail to turn on at all or may function intermittently.
Electrical issues are among the most common causes of backup camera malfunctions.
4. Control Module and Software Integration
The control module is the component of the system that governs how the camera, the display and the vehicle’s electronic systems interact with one another.
It processes the video signal transmitted from the camera and renders it on the display in real time.
In modern vehicles, this function is often handled by the infotainment system’s software.
This software also manages functions such as parking guidelines and image adjustments.
If there is a glitch in the software, the system is outdated, or there is a fault in the internal hardware, the camera feed may freeze, stutter, or fail to display correctly.
Sometimes, simply restarting or updating the system can resolve these issues.
5. When It Activates – Reverse Gear Trigger
The backup camera system is designed to activate automatically the moment you shift the vehicle into reverse gear.
This occurs because the system is linked to the reverse gear signal, which prompts the camera and display to switch on instantly.
In most vehicles, this entire process takes less than a second and provides a live view of the area behind the vehicle without requiring any manual input.
If the camera fails to activate when shifting into reverse, it may indicate an issue with the gear signal connection, the wiring, or the system settings.
This automatic activation feature is crucial, as it ensures that the driver receives a clear view of the area behind the vehicle precisely when they need it most.
Common Signs That Shows Your Backup Camera Is Not Working
A backup camera typically provides clear warning signs before failing completely; by recognizing these signals, you can quickly diagnose the issue and avoid costly repairs.
Most problems do not arise suddenly; they are linked to specific malfunctions such as: a lack of power, a dirty lens, faulty wiring, or a software glitch.
By observing how the camera behaves when you shift the vehicle into reverse gear, you can often pinpoint the root cause of the problem without resorting to guesswork.
Each symptom listed below points to a distinct type of issue and accurately identifying them is the first step toward finding an effective solution.
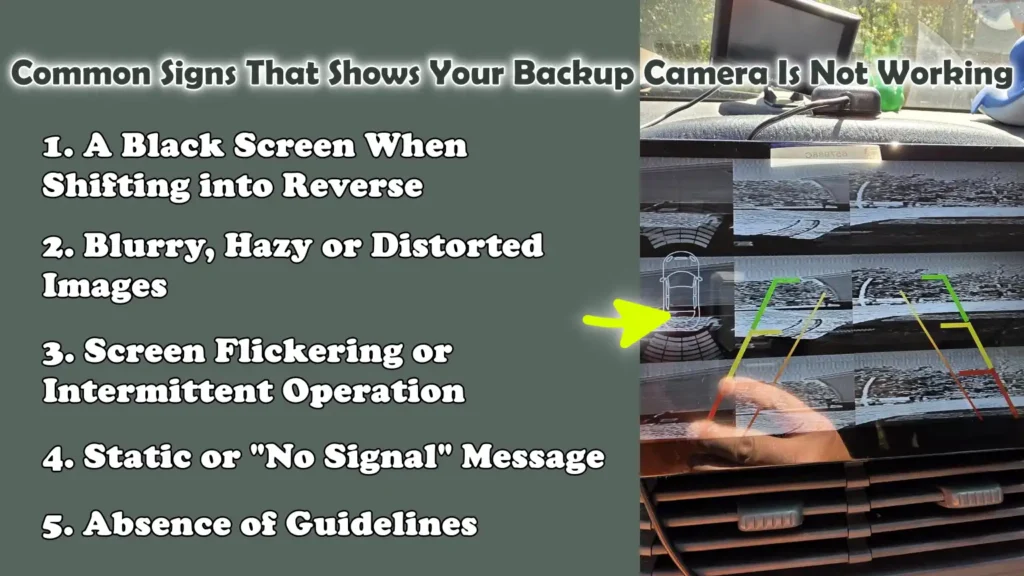
1. A Black Screen When Shifting into Reverse
When you shift your vehicle into reverse gear and the screen goes completely black, it is the most common and serious indication of a problem.
This typically means that the display is not receiving a video signal from the camera.
In many cases, this issue is related to the power supply such as: a blown fuse, a loose connection, or damaged wiring, preventing the camera from powering on.
This can also occur if the camera unit itself has suffered an internal failure.
Occasionally, the infotainment system may freeze or fail to switch to camera mode, which can also result in a black screen.
If the screen remains black every time you shift into reverse, it is a clear indication that a component of the system is not functioning at all.
2. Blurry, Hazy or Distorted Images
If the image produced by your backup camera appears unclear, blurry, or distorted, the problem is often related to the camera lens or its external condition.
Dirt, dust, water spots, or road grime can easily obscure the lens and degrade image quality, particularly during bad weather.
In some cases, moisture can penetrate the interior of the camera, causing condensation to form on the inside of the lens; this is quite difficult to repair.
A distorted or streaked image may also indicate that the lens itself has malfunctioned, or that the signal reaching the screen is weak.
Such issues typically develop gradually, allowing drivers to observe a steady decline in image quality over time, until the camera eventually becomes completely inoperable.
3. Screen Flickering or Intermittent Operation
If the screen is flickering or operating intermittently, it usually signals an unstable connection within the system.
This often occurs when the wiring becomes loose, worn, or slightly damaged, particularly in areas such as the vehicle’s trunk or tailgate, which are frequently opened and closed.
When the connection is broken and subsequently re-established, the display may toggle on and off or present an unstable image.
In some instances, screen flickering may also be caused by power interruptions or an insufficient power supply.
This is a serious symptom, as it often points to an internal issue that, if left unaddressed, could worsen significantly over time.
4. Static or “No Signal” Message
When static or a “No Signal” message appears on the screen, it indicates that while the display itself is functional, it is not receiving proper data from the camera.
This differs from a completely black screen, as the system itself remains active; however, the communication link between the camera and the display has been severed.
This issue may stem from faulty or damaged wiring, a defective camera unit, or internal malfunctions within the control module.
In certain vehicles, software glitches can also disrupt signal transmission, leading to the appearance of this message.
This symptom proves highly useful in diagnosing the issue, as it clearly indicates that the problem lies specifically with signal transmission rather than being a complete power failure.
5. Absence of Guidelines
Most modern backup cameras display guidelines that assist drivers in estimating distance and direction while reversing their vehicles.
If these guidelines suddenly disappear, even if the camera feed remains visible, it often points to a software or calibration issue rather than a hardware malfunction.
It is possible that the system settings have been altered due to a reset, a software update, or an internal glitch.
In some instances, this feature may have been accidentally disabled within the system settings without the driver’s knowledge.
Even if the camera itself is functioning, the absence of guidelines compromises accuracy and makes parking, particularly in tight spaces, significantly more difficult.
Understand About The Primary Causes of Backup Camera Failure
Backup camera malfunctions typically stem from a few common causes, each affecting the system in a distinct manner.
These systems rely on clear visuals, stable power and proper communication between components; consequently, even a minor fault can prevent the entire system from functioning correctly.
The good news is that most of these causes are easy to understand and in many cases, just as easy to fix, provided you know what to look for.
By identifying the root causes of camera failure, you can quickly trace symptoms back to their source and avoid unnecessary repairs or part replacements.
1. Dirty or Obstructed Camera Lens
The most common, and easiest to fix, cause of backup camera issues is a dirty or obstructed lens.
As the camera is mounted on the exterior of the vehicle, it is constantly exposed to dust, mud, rain, snow and road salt.
Even a thin layer of dust can degrade image clarity, causing the display to appear blurry or hazy.
In cold weather, ice or frost may accumulate on the lens, completely blocking the field of view.
Drivers sometimes assume the camera itself has failed, when in reality, the issue is simply that the lens is unable to capture a clear image.
A regular wipe-down with a soft cloth can restore full visibility in just a few seconds.
2. Blown Fuses or Electrical Issues
Backup cameras rely on the vehicle’s electrical system to provide power to both the camera unit and the display screen.
A blown fuse is a common reason for a camera suddenly ceasing to function, particularly if the screen goes completely black.
Fuses are designed to protect the system from electrical overloads; Therefore, if there is a sudden surge in power, the fuse will blow to prevent any further damage.
Other electrical issues such as: loose connections or voltage irregularities, as it can also disrupt the system’s operation.
If power is not reaching the camera or the display, the system will fail to activate when you shift the vehicle into reverse gear.
3. Loose or Faulty Wiring
Wiring plays a crucial role in transmitting both power and video signals between the camera and the display.
These wires often run through areas subject to frequent movement such as: the trunk or tailgate, which increases the likelihood of them deteriorating over time.
The repeated opening and closing of these components can cause the wires to loosen, develop cracks, or break internally.
When this occurs, the camera may function intermittently, working at times and failing at others, or the displayed image may flicker.
Even a minor fault in the wiring can completely interrupt the signal, leading to issues such as a “No Signal” message or an erratic display.
4. Faulty Camera Unit
The camera unit itself can also fail due to aging, wear and tear, or internal defects.
Like any electronic component, it has a finite lifespan and may cease to function after years of use.
Internal components can degrade, particularly if the camera has been exposed to extreme temperatures or physical shock.
A faulty camera often manifests as a black screen, distorted or blurry images, or a complete loss of signal, even if the power supply and wiring are intact.
In such cases, replacing the camera unit is often the only effective solution.
5. Infotainment System Glitches
Modern backup cameras integrate seamlessly with the vehicle’s infotainment system, which manages the display and processes the video feed.
Sometimes, the root of the problem lies not in the camera itself, but in the system responsible for displaying the image.
Software glitches or malfunctions within the infotainment system can cause the screen to freeze, prevent the system from switching to camera mode, or trigger error messages.
These issues may arise intermittently due to software anomalies, excessive system load, or minor internal bugs.
Restarting or resetting the system often resolves these issues without the need for any physical repairs.
6. Software Bugs or Outdated Firmware
Software plays a crucial role in the operation of backup camera systems, particularly in modern vehicles.
Software bugs can lead to delayed response times, missing guidelines, or a complete failure to display the camera feed.
Outdated firmware can also create compatibility issues within the system.
Manufacturers frequently release updates to fix these problems, enhance performance and ensure that the system functions correctly.
If the system software is not up to date, the unit may fail to operate properly, even if all hardware components are functioning correctly.
7. Water Damage or Moisture Intrusion
Water and moisture pose a serious threat to any electronic system, including backup cameras.
Over time, water can seep into the camera housing through tiny cracks or worn-out seals, particularly in regions experiencing heavy rainfall or where the vehicle is frequently washed.
Moisture trapped inside the camera can result in blurry images, corrosion of internal components and ultimately, the failure of the entire unit.
In some instances, water can also damage wiring connections, leading to signal loss or electrical malfunctions.
Once moisture-related damage becomes severe, the camera often requires replacement, as its internal components are not easily repairable.
How to Fix Backup Camera Not Working – Solve That Malfunctioning Thing
Troubleshooting a backup camera issue should always begin with the simplest and most common remedies, proceeding to more complex diagnostics only thereafter.
In many instances, the problem is not a major malfunction but rather a simple obstruction caused by dust or dirt on the lens.
As the camera is constantly exposed to the elements, even a minor accumulation of grime can compromise its ability to capture clear images.
By starting with a thorough cleaning, you can quickly identify and resolve the simplest potential cause, often restoring the camera to proper working order without the need for any tools or technical expertise.
1. How to Fix Backup Camera By Cleaning the Camera Lens
Use a Microfiber Cloth
The safest and most effective way to clean a backup camera lens is to use a microfiber cloth.
Microfiber is soft, non-abrasive and designed to remove dirt, dust and smudges without scratching the delicate surface of the lens.
Unlike paper towels or coarse fabrics, microfiber cloths prevent the tiny scratches that can permanently degrade image clarity over time.
Gently wiping the lens with a clean microfiber cloth ensures that the camera provides a clear and accurate view of the area behind the vehicle.
Remove Dirt, Snow, or Water Spots
Backup cameras are exposed to all manner of external debris, including dust, mud, snow, frozen moisture and water spots.
Even a thin layer of grime can obscure the image, causing it to appear blurry or completely black.
Removing these obstructions is crucial for maintaining clear visibility while reversing the vehicle.
Cleaning the lens after driving in wet or snowy conditions, or after parking the vehicle outdoors for an extended period, ensures that the camera delivers a clear, unobstructed view.
Avoid Harsh Chemicals
Harsh chemicals such as: ammonia-based cleaners, strong detergents, or abrasive solutions, as it can damage the lens coating and degrade image quality.
To prevent permanent scratches or haziness, it is recommended to use plain water, a lens-safe cleaning solution, or a cleaner specifically formulated for automotive glass.
Do not spray the cleaning solution directly onto the camera; Instead, apply it to a microfiber cloth and then gently wipe the lens.
Proper cleaning ensures the lens remains protected and that the backup camera continues to function reliably for years to come.
How to Fix Backup Camera By Restarting the Infotainment System
Restarting the infotainment system is a crucial step, as many backup camera issues stem not from physical damage, but from temporary software glitches or system errors.
Modern vehicles rely heavily on software to manage the communication between the camera, the display and various other electronic components.
Occasionally, minor glitches or an overloaded system memory can cause the system to freeze, slow down, or fail to display the camera feed.
A proper restart resets the system, clears temporary errors and often restores full functionality without the need for repairs or part replacements.
Fully Shut Down the Vehicle
The first step is to completely shut down the vehicle and allow all electronic systems to power off.
This involves turning off the engine and removing the key, or, in vehicles equipped with a push-button start, ensuring that the ignition is fully disengaged.
It is essential to wait a few moments to ensure the infotainment system has completely shut down, as some systems continue to run in the background for several seconds.
This complete shutdown allows the system to reset its internal processes and often resolves issues such as a frozen screen or the camera failing to activate when shifting into reverse.
Disconnect the Battery (Optional Advanced Step)
If a simple restart does not resolve the issue, disconnecting the car’s battery can provide a deeper reset of the entire electrical system.
This step cuts off all power to the vehicle’s electronics, causing every module, including the infotainment system, to undergo a complete reset.
To perform this safely, the negative terminal of the battery is typically disconnected for a few minutes and then reconnected.
This method can resolve persistent glitches, software issues, or communication errors between components.
However, it is considered an advanced procedure, as it may also reset other vehicle settings, such as the clock, radio presets, or system preferences.
Reboot the System
Once power is restored or the vehicle is restarted, the infotainment system will reboot and reload its software from scratch.
During this process, the system re-establishes its connections with the backup camera and other components.
In many cases, this reboot resolves issues such as a black screen, a delayed camera startup, or a missing display feed.
Once the system has fully loaded, the camera should activate normally when the vehicle is shifted into reverse gear.
If the camera begins working again after the reboot, it confirms that the issue was software-related rather than caused by a hardware malfunction.
How to Fix Backup Camera By Checking the Fuse Box
The fuse box plays a crucial role in protecting your vehicle’s electrical system, including the backup camera, from damage caused by power surges or short circuits.
Every electronic component in the vehicle, from the headlights to the infotainment system, is equipped with a fuse that acts as a safety switch.
When excessive electrical current flows through the system, the fuse “blows,” thereby interrupting the current flow and preventing further damage.
A blown fuse is one of the most common reasons why a backup camera suddenly stops working, particularly when the screen goes completely black or displays no video feed.
Learning how to locate and inspect fuses is an essential step in safely diagnosing and resolving camera-related issues.
Locate the Fuse for the Camera/System
The first step is to identify the specific fuse that powers the backup camera or the infotainment system.
In most vehicles, a fuse diagram is printed on the fuse box cover or provided in the owner’s manual, indicating which fuse corresponds to which system.
The backup camera may share a single fuse with other electronic components, so it is crucial to identify the correct fuse.
Fuse boxes are typically located under the dashboard, inside the glove compartment, or within the engine bay.
Knowing the exact location and function of the fuse allows you to focus on the correct component and avoid unnecessarily checking other fuses.
Check for a Blown Fuse
Once you have located the correct fuse, you should inspect it to determine whether it has sustained any damage.
A blown fuse typically exhibits a clearly visible break in its internal metal strip, or it may appear blackened or melted.
Even if the fuse looks intact to the naked eye, it is safer to use a multimeter to verify its actual condition and ensure that electrical continuity is present.
Carefully inspecting the fuse helps confirm whether the backup camera system is receiving a proper power supply.
If the fuse is defective, replacing it is essential to restore power to the camera.
Replace with a Fuse of the Correct Amperage
If a fuse has blown, it is crucial to replace it with a new fuse of the correct amperage rating.
Using a fuse with a rating that is too high or too low can lead to serious electrical issues, potentially damaging the camera, wiring, or infotainment system.
The amperage rating is typically printed directly on the fuse itself or specified in the vehicle’s owner’s manual.
Once the correct fuse has been installed, power should be restored to the system and the backup camera should function properly when the vehicle is shifted into reverse gear.
Regular inspection and maintenance of fuses help prevent sudden malfunctions and ensure the reliable operation of all the vehicle’s electronic systems.
How to Fix Backup Camera By Checking Wiring Connections
Wiring serves as the backbone of the backup camera system, transmitting both power and video signals between the camera and the display.
If the wiring is damaged, loose, or corroded, the camera may cease functioning entirely or operate intermittently.
Wiring issues are far more common than many drivers realize, as wires often pass through components subject to frequent movement such as: the rear hatch or trunk; this creates stress points that can wear down over time.
Thoroughly inspecting the wiring connections is essential for identifying hidden problems and ensuring that the system receives a consistent supply of power and signals.
Check Wiring in the Rear Hatch/Trunk
The wires connecting the rear camera to the vehicle’s main electrical system often run through the rear hatch or trunk area.
These areas undergo repeated opening and closing cycles, which can cause the wires to bend, twist, or become pinched.
Over time, this constant movement can degrade the wire insulation or cause internal wire breakage, resulting in a loss of camera signal or power.
Carefully inspecting the wiring along these routes helps identify specific locations where wires may be under tension, pinched, or severed.
Particular attention should be paid to any rubber grommets or protective sleeves that guide the wires through these moving components.
Check for Cuts, Corrosion and Loose Connectors
When inspecting the wiring, it is crucial to look for visible signs of damage, such as cuts in the insulation, exposed wires, or corrosion on the connectors.
Rusting is particularly common in vehicles frequently exposed to moisture, road salt, or humid climates and it can disrupt the proper flow of electricity.
Loose connectors can also interfere with the signal, causing the camera to flicker or display a “No Signal” message.
Ensuring that every connection is clean, secure and fully seated in place can often restore the camera’s functionality without the need to replace any parts.
Pay Attention to Flex Points
Flex points are locations where wires undergo repeated bending such as: at the hinges of the trunk, tailgate, or rear hatch.
These are the most common areas where wires become compromised and eventually fail, as the constant movement gradually weakens the internal metal conductors within the wire.
Even if the insulation appears intact, internal wear and tear can cause the camera to function intermittently or stop working altogether.
Carefully inspecting these flex points, and gently flexing the wires while observing the display, as it can help identify hidden damage.
Repairing or reinforcing the wiring at these locations can prevent future malfunctions and ensure that the backup camera continues to operate reliably.
How to Fix Backup Camera By Checking the Camera’s Power Supply
The power supply is a critical component of a backup camera system, as the camera cannot function without correct and stable voltage.
Even if the camera, display and wiring are all in good condition, a fault in the power supply can prevent the system from powering on or cause intermittent operational issues.
Checking the power supply ensures that power is reaching the camera correctly and helps identify hidden electrical faults that are difficult to detect with the naked eye.
Understanding and verifying voltage requirements is an essential step in troubleshooting backup camera problems.
Use a Multimeter
A multimeter is a simple and effective tool for measuring electrical voltage and continuity (circuit connections) within a system.
By connecting a multimeter to the backup camera’s power terminals, you can determine whether the camera is receiving the correct voltage.
Modern backup cameras typically operate on low-voltage power supplied by the vehicle’s electrical system; a multimeter allows you to verify whether the incoming voltage meets the specifications established by the manufacturer.
Using a multimeter also enables you to detect voltage fluctuations or drops, which can cause flickering in the camera’s video feed or lead to intermittent camera failure.
Verify That Voltage Is Reaching the Camera
It is crucial to verify that voltage is actually reaching the camera, as even a minor irregularity in voltage can adversely affect the camera’s performance.
If the voltage is too low, the camera may fail to power on at all, or its image may appear dim, distorted, or unclear.
Conversely, if the voltage is too high, it can cause damage to the camera’s internal components.
Checking the voltage at the camera terminals ensures that the wiring, fuses and power connections are functioning correctly.
Furthermore, should any issues arise in the future, this inspection serves as a baseline for diagnosing and resolving subsequent problems.
Identify Electrical Faults
While inspecting the power supply, various electrical faults can be detected such as: loose connections, damaged wires, corroded terminals, or blown fuses.
These issues disrupt the consistent flow of power to the camera and are among the most common causes of backup camera failure.
Identifying and rectifying these faults not only restores the camera’s functionality but also helps prevent future complications within the vehicle’s electrical system.
For the long-term reliability of the backup camera, a clean, stable and properly connected power supply is absolutely essential.
How to Fix Backup Camera By Updating or Resetting the Software
Software plays a crucial role in modern backup camera systems, as it dictates how the camera communicates with the display, processes video signals and manages additional features such as parking guidelines.
Even if all hardware components are in perfect condition, software glitches or outdated firmware can lead to issues such as delayed startup, missing guidelines, screen freezing, or a blank (black) screen.
Understanding how to update or reset the software is essential for troubleshooting these issues and this process often resolves problems without the need to replace any expensive components.
Proper software maintenance ensures that the system operates smoothly, enhances its reliability and extends the lifespan of both the camera and the infotainment system.
Check for Firmware Updates
Vehicle manufacturers periodically release firmware updates for infotainment systems to fix known bugs, improve compatibility and enhance performance.
Checking for these updates can help resolve issues where the camera freezes, operates sluggishly, or fails to display images correctly.
Depending on the vehicle model, updates may be available via the manufacturer’s official website, a USB drive, or an Over-the-Air (OTA) update system.
Keeping the software up to date ensures that the camera and display operate with the latest improvements, thereby minimizing the risk of recurring issues caused by outdated software.
Factory Reset the Infotainment System
If updating the software does not resolve the issue, performing a factory reset on the infotainment system often eliminates glitches that would otherwise be difficult to diagnose.
A factory reset restores all system settings to their original default state and clears out any corrupt data, temporary files, or conflicts that may be preventing the camera from functioning correctly.
Although this step may erase personal settings such as: radio presets, system preferences, or saved navigation data, it remains a highly effective method for restoring proper functionality whenever software-related issues are suspected.
Fix Glitches or Performance Lag
Glitches or sluggishness in the backup camera system are typically caused by minor software errors, temporary conflicts with other electronic modules, or memory overload within the infotainment system.
Updating the firmware and resetting the system often resolves these issues, as it refreshes the software environment and restores normal communication between the camera and the display.
Resolving these software issues ensures that the camera responds instantly when the vehicle is shifted into reverse, provides an accurate visual feed and maintains features such as parking guidelines without any delay or freezing.
Therefore, proper software maintenance is crucial for both safety and convenience while driving.
How to Fix Backup Camera By Replacing the Backup Camera – If Necessary
In some instances, issues related to the backup camera cannot be resolved through cleaning, software updates, or electrical troubleshooting; in such cases, replacing the camera becomes necessary.
This often occurs when the camera has sustained internal damage, developed corrosion, or suffered permanent hardware failure.
It is crucial to understand when a camera replacement is required and how to select the correct unit to restore full functionality while reversing the vehicle, thereby ensuring safety.
Replacing the camera ensures that the system displays clear, accurate images and continues to operate reliably in conjunction with the vehicle’s display and electronic systems.
When Is a Camera Replacement Necessary?
Replacing the camera becomes imperative when the unit fails to display an image even after cleaning the lens, verifying the power supply, checking the wiring and performing software updates.
If the screen remains consistently black, the image appears distorted, or the camera functions intermittently, and these issues persist despite troubleshooting efforts, it indicates a defect within the camera unit itself.
External factors such as: water damage, a severe impact, or prolonged exposure to extreme temperatures, as it can also cause permanent damage to the camera.
In such situations, repair is often not a cost-effective option; therefore, installing a new camera serves as the most efficient and long-lasting solution.
Also, there’s study published in the Journal of Transportation Safety & Security that found out that rearview cameras alone reduced police-reported backing crash rates by about 17% which is huge improvement, as backing collisions are common in everyday driving, specifically among the older drivers whose visibility is not that good now, that’s why having great backup camera always benefited older age groups the most.[¹]
OEM vs Aftermarket Options
When replacing a camera, drivers have the option to choose between OEM (Original Equipment Manufacturer) cameras and various aftermarket alternatives.
OEM cameras are designed specifically for a particular vehicle model and are guaranteed to integrate seamlessly with the vehicle’s infotainment system, parking guidelines and safety features.
Aftermarket cameras are often more affordable and compatible with a wider range of vehicle models; however, they may lack certain features or require additional adapters to be installed and function correctly.
The choice between OEM and aftermarket options depends on your budget, your specific needs and how long you intend to use the camera.
Basic Installation Information
Installing a new backup camera involves removing the old unit, connecting the new camera to the existing wiring and securely mounting it in its designated location.
Most cameras connect to the vehicle’s electrical system and display via standard plugs or harnesses, making the installation process quite straightforward for those with a basic understanding of automotive wiring.
Once the camera is installed, the system should be tested by engaging the ‘Reverse’ gear to ensure that the image displays correctly and that features such as: parking guidelines, are functioning properly.
It is crucial to verify that the camera is correctly positioned and securely fastened to ensure a clear field of view and reliable system performance.
Know, About The Vehicle-Specific Issues
Backup camera systems are not identical across all vehicles; in some models, differences in design, software, or wiring layouts make certain types of problems more likely to occur.
Understanding these vehicle-specific issues can save time, prevent unnecessary repairs and help drivers implement the correct solutions more effectively.
Manufacturers may utilize different camera units, infotainment systems, or wiring harnesses, meaning that a single symptom could have multiple root causes, depending on the specific vehicle model.
Staying informed about common malfunctions or recalls associated with a particular vehicle can also help maintain safety and prevent recurring faults.
1. Ford F-150 Camera Malfunctions
The Ford F-150 is a popular truck that occasionally experiences camera-related malfunctions, particularly in models equipped with advanced infotainment systems and trailer assist features.
Drivers have reported issues such as intermittent black screens, flickering images, or delays in camera activation when shifting into reverse gear.
These problems are often linked to software glitches within the Sync infotainment system or wiring issues near the tailgate, an area subject to significant movement.
Keeping the system software up to date and inspecting the rear wiring connections can help prevent or resolve most of these malfunctions.
For certain model years, the manufacturer has also issued specific service updates to address known issues related to the camera system.
2. Honda Civic Display Issues
In the Honda Civic, backup camera-related problems are often linked to the display unit itself rather than the camera module.
Common symptoms include a frozen screen, delays in the video feed, or the failure of parking guidelines to appear.
These issues are more prevalent in specific trim levels (models) that utilize touchscreen infotainment systems featuring integrated camera software.
These display-related problems may stem from electrical interference, loose connectors, or minor software glitches.
Checking connections, restarting the system, or updating the firmware often resolves the issue.
In some instances, Honda has issued technical service bulletins specifically to address camera-related display malfunctions.
3. Toyota Camry Wiring Faults
In Toyota Camry models, the backup camera occasionally ceases to function due to wiring faults, particularly within the wire harnesses that run through the trunk or tailgate area.
The flexible joints (flex points) located in these sections are susceptible to wear, pinching, or corrosion over time; consequently, the camera’s operation may become intermittent, the image may flicker, or a “No Signal” message may appear.
Water intrusion into the camera housing is also a common issue, particularly in older models.
Regular inspections of the wiring, connectors and seals can help prevent these problems; furthermore, promptly repairing any faulty wiring is essential to ensure the camera continues to operate reliably.
4. Why Certain Models Have Known Defects or Recalls
Some vehicle models may be more susceptible to backup camera issues due to differences in design, electronic components, or build quality.
Certain defects may be attributed to software bugs, faulty wiring, or camera units that are sensitive to environmental conditions such as moisture or temperature fluctuations.
Manufacturers occasionally identify these issues and issue recalls, technical service bulletins, or software updates to rectify them.
Being aware of model-specific defects helps drivers take precautions in advance, avoid recurring malfunctions and ensure that the backup camera system operates reliably, thereby enabling safe reversing.
When You Should Go for Professional Diagnosis
While many backup camera issues can be diagnosed and resolved at home, there are certain situations where professional expertise is required.
Modern backup camera systems involve a complex interplay of electrical wiring, software and hardware components, making it difficult to safely and accurately diagnose and repair malfunctions.
Attempting complex repairs without the proper knowledge or tools can sometimes exacerbate the problem or cause further damage to the vehicle.
Knowing when to seek professional assistance ensures that the system is repaired correctly, its reliable functionality is restored and safety is maintained while reversing the vehicle.
1. The Need for Electrical Diagnostics
If the problem persists even after performing basic troubleshooting steps such as: cleaning the lens, checking fuses, inspecting wiring, or restarting the system, electrical diagnostics may be necessary.
Professionals utilize specialized tools such as: multimeters, circuit testers and diagnostic scanners, to uncover hidden faults within the wiring, power supply, or control module.
With the aid of these tools, they can identify intermittent issues, voltage drops, or internal component failures that are difficult to detect during home repairs.
Electrical diagnostics pinpoint the exact root cause of the problem, thereby eliminating the need for unnecessary parts replacement.
2. Persistent “No Signal” Issues
If the backup camera continues to display a “No Signal” message despite having performed all basic troubleshooting steps, it indicates a more significant underlying issue, potentially involving the camera unit itself, the wiring, or the infotainment system.
Resolving persistent signal-related issues often requires the expertise of a trained mechanic capable of thoroughly diagnosing the entire electrical system, inspecting connections and determining whether the camera unit or display module needs to be replaced.
Attempting to fix this without prior experience can lead to a misdiagnosis of the problem or cause damage to other electronic systems within the vehicle.
3. The Complex Process of Camera Replacement
Replacing a backup camera may seem like a straightforward task; however, in many modern vehicles, this procedure demands extremely careful handling of sensitive electronics, precise alignment and secure integration with the wiring harness and infotainment system.
In some vehicles, the camera is linked to additional features such as: parking assist, cross-traffic alerts, or trailer guidance, making the replacement process even more complex.
Professional mechanics are trained to correctly install and calibrate the camera, ensuring that all associated features function exactly as intended.
4. Dealership vs Local Repair Shop
The decision of whether to visit a dealership or a trusted local repair shop depends on the type of vehicle, the severity of the issue and warranty-related considerations.
Dealerships often have access to the latest software updates, manufacturer-specific tools and trained technicians capable of accurately diagnosing and resolving the problem.
Local repair shops may offer lower labor rates for routine repairs or parts replacement and the work is often completed more quickly.
In either case, it is crucial to ensure that the mechanic has experience with that specific vehicle model and its backup camera system, thereby guaranteeing a reliable and long-lasting repair.
Estimated Cost of Backup Camera Repair
The cost of repairing a backup camera depends on the root cause of the problem and whether you perform the repair yourself or hire a professional.
Understanding the typical costs associated with various types of repairs helps vehicle owners plan effectively and make informed decisions.
Some remedies such as: cleaning the lens or checking the fuse, as it can be inexpensive or even free, while others such as: replacing the camera unit or undertaking complex wiring repairs, as it can be quite costly.
Labor charges may also vary depending on the vehicle model, the complexity of the repair and whether the work is performed at a dealership or a local repair shop.
1. Cleaning: Free or Minimal Cost
Cleaning the camera lens is typically the most economical solution, as it requires only a few basic supplies, such as a microfiber cloth and perhaps a small amount of water.
In most cases, if performed at home, this task is free and takes only a few minutes to complete.
Even if done at a car wash or by a professional detailer, the cost remains very low.
Regular cleaning not only resolves visibility issues but also prevents long-term damage to the lens caused by the accumulation of dirt, road dust, or moisture.
2. Fuse Replacement: Low Cost
Replacing a blown fuse is also a low-cost solution; depending on the vehicle and the specific type of fuse required, the cost typically ranges from a few dollars to around ten dollars.
Fuses are common components and are easy to install; consequently, if a mechanic performs this task, the associated labor charges are often very low.
For this reason, when a problem stems from a minor electrical interruption, replacing the fuse to restore the backup camera’s functionality is often the quickest and most cost-effective approach.
3. Wiring Repair: Moderate Cost
The cost of wiring repair is moderate, as the process involves identifying damaged wires, splicing them together, or replacing specific sections of the wiring harness.
The expense depends on the severity of the damage and the complexity of the vehicle’s wiring system.
If wires run through hard-to-reach areas such as: the trunk, tailgate, or rear hatch, the repair process may take longer.
Generally, wiring repair costs more than simply replacing a fuse, but it is typically less expensive than replacing the entire camera unit; therefore, it serves as a practical solution for intermittent or connection-related issues.
4. Camera Replacement: $100 to $500+
Replacing the entire backup camera is the most expensive repair option, particularly if you opt for an OEM (Original Equipment Manufacturer) camera designed specifically for your vehicle model.
Prices typically range from $100 to $500 or more, depending on the brand, features and compatibility.
Aftermarket cameras can be more affordable, but they may require adapters or additional calibration.
Labor costs for installation vary based on the vehicle’s design, its integration with infotainment features and the complexity of the wiring connections.
Professional installation ensures that the camera is properly aligned and functions correctly with all of the system’s features, including parking guidelines and safety alerts.
5. Breakdown of Labor Costs
Labor costs depend on the type of repair and the service provider’s hourly rate.
Simple tasks, such as cleaning the lens or replacing a fuse, can be completed in less than an hour and incur minimal cost.
Wiring repairs and camera replacements can take anywhere from one to three hours, depending on the vehicle, thereby increasing the total cost.
Labor rates at dealerships are typically higher than those at local repair shops, but they offer manufacturer-specific expertise.
To create an accurate budget and select the most efficient repair solution for a faulty backup camera, it is essential to consider both parts and labor.
Tips for Avoiding Backup Camera Problems In Future
Preventing backup camera problems is often easier and less expensive than fixing them once they occur.
Most issues develop gradually due to dust, moisture, or minor electrical and software glitches.
By adopting simple preventive measures, drivers can maintain clear visibility, reliable camera performance and the longevity of the system.
Regular maintenance not only ensures that the camera functions correctly but also enhances safety while reversing, particularly in crowded parking areas or low-light environments.
1. Establish a Regular Cleaning Routine
Establishing a routine for cleaning the backup camera lens is crucial for avoiding blurry or distorted images.
As the camera is mounted on the exterior of the vehicle, it is constantly exposed to dust, mud, road grime and other debris.
Gently wiping the lens with a soft microfiber cloth removes dirt without scratching its protective surface.
Consistent cleaning ensures that the camera provides a clear and accurate view at all times, thereby minimizing the likelihood of visibility-related issues.
2. Avoid Direct Exposure to High-Pressure Water
When washing your vehicle, it is essential to avoid directing high-pressure water streams directly at the camera lens or its housing.
High-pressure water can force moisture inside the camera or damage its delicate seals, potentially leading to lens fogging, corrosion, or the complete failure of internal electronic components.
By using water at moderate pressure along with a soft cloth or sponge, you can safely clean the camera without compromising its structural integrity.
3. Protect Against Harsh Weather
Extreme temperatures, heavy rain, snow and frost, all of these factors can negatively impact the performance and lifespan of a backup camera.
Exposure to extreme cold can cause condensation to form on the lens or lead to cracking, while excessive heat can cause electronic components to degrade over time.
Parking in shaded areas, using a car cover, or promptly clearing snow and frost from the camera lens can all help mitigate such damage.
Taking precautions to prevent weather-related damage ensures that the camera system continues to function reliably in all weather conditions.
4. Keep Software Updated
Backup camera systems rely on the vehicle’s infotainment software to function correctly; outdated software can lead to glitches, delayed response times, or the absence of features such as parking guidelines.
Regularly checking for firmware updates ensures that any existing bugs in the system are resolved, compatibility is improved and overall performance is enhanced.
Keeping the software updated ensures uninterrupted system operation, prevents recurring camera-related issues and maintains full safety while reversing.
Read More:
- How to Fix Bluetooth Not Working in Car
- How to Update Car Infotainment System
- How to Fix Speedometer Not Working
- How to Replace a TPMS Sensor
Conclusion – How to Fix Backup Camera Not Working
It is really important to have a reliable backup camera as it is the critical safety feature that protects both you and others on the road, so don’t delay the fix or if needed replace it but don’t take blind risks at all.
From the lens to the wiring, fuses, power supply and infotainment software, each element plays a crucial role in providing a clear and reliable view while reversing the vehicle.
Many common issues such as: a dirty lens, a blown fuse, loose wiring, or software glitches, as it can be resolved at home using simple yet effective methods.
For more complex problems such as: electrical malfunctions or permanent camera damage, seeking professional assistance is necessary to ensure that the system is repaired safely and effectively.
Regular maintenance, proper cleaning, software updates and staying informed about vehicle-specific issues can prevent most malfunctions and extend the lifespan of the backup camera.
Now, that’s all from this guide on How to Fix Backup Camera Not Working, but still there’s questions left unsolved: just let us know by commenting below.
Frequently Asked Questions
FAQ 1: What are the most common reasons why my backup camera isn’t working?
The most common reasons for a backup camera ceasing to function include a dirty or obstructed camera lens, a blown fuse, loose or faulty wiring, a defective camera unit, software glitches, or water damage. The presence of dust, mud, snow, or water spots on the lens can cause the camera’s image to appear blurry or completely black. Electrical issues such as: a blown fuse or loose wires, as it can prevent power from reaching the camera. Sometimes, the camera unit itself may fail due to age or internal defects. Software bugs or outdated firmware within the infotainment system can also cause the display to freeze or fail to show an image.
FAQ 2: How can I tell if my backup camera has a wiring issue?
Wiring problems often cause the camera to function intermittently or stop working entirely. You may observe flickering on the screen, the screen occasionally going black, or a “No Signal” message appearing. Wiring issues are common in areas where wires frequently flex or bend such as: within the trunk, tailgate, or rear doors. Over time, these wires can become frayed, broken, or corroded. Visually inspecting the wiring for cuts, pinched wires, corrosion, or loose connectors can help pinpoint the problem. Flex points areas where the wiring bends should be examined with particular care, as these are the locations most susceptible to damage.
FAQ 3: Can I fix backup camera problems myself?
Yes, many backup camera issues can be fixed right at home specially if they are caused by a dirty lens, a blown fuse, or minor software glitches. A few simple steps such as: cleaning the lens with a microfiber cloth, restarting the infotainment system, checking and replacing fuses, or performing a software update, as it can often restore the camera’s functionality. However, issues involving faulty wiring, a defective camera unit, or complex electrical problems may require professional assistance to ensure the system operates safely and reliably.
FAQ 4: How do I reset my backup camera system?
To reset the backup camera system, you can try restarting both the vehicle and the infotainment system. In some vehicles, performing a “soft reset” via the settings menu may also be necessary. For a more thorough reset, disconnecting the vehicle’s battery for a few minutes will reset the entire electrical system, including the camera. After the reset, the system will reboot, re-establish its connection with the camera and if the issue was caused by a temporary software glitch, then the camera will often begin working correctly again.
FAQ 5: What should I do if “No Signal” appears on my camera screen?
A “No Signal” message typically indicates an issue with the power supply, the wiring, or the camera unit itself. First, ensure that the camera lens is clean and free of any obstructions. Next, check the fuses and wiring connections to verify that power is reaching the camera. If the fuses and wiring appear to be in good condition, the problem may stem from a defective camera unit or a software glitch within the infotainment system. Diagnosing persistent “No Signal” issues and addressing their root causes often requires the assistance of a professional mechanic.
FAQ 6: How much does it cost to repair a backup camera?
The cost depends on the nature of the problem. Cleaning the camera lens is either free or involves very minimal expense. Replacing a blown fuse typically costs just a few dollars. Wiring repairs involve moderate costs, which depend on the complexity of the repair as well as the ease of access to the wiring. Replacing the camera unit itself can cost anywhere from $100 to $500 or more, particularly for OEM units. Labor charges vary depending on whether the work is performed at a dealership or a local repair shop; furthermore, complex issues involving electronics or wiring can increase the total cost.
FAQ 7: How can I prevent future problems with my backup camera?
The primary method for avoiding issues is regular care and maintenance. Clean the camera lens frequently to remove accumulated dust, mud, or water spots. When washing your car, avoid directing a high-pressure stream of water directly at the camera to prevent moisture from seeping into the unit. Protect the camera from harsh weather conditions and promptly remove any accumulated ice, snow, or debris. Keep the infotainment system’s software updated to prevent glitches and ensure the system functions correctly. Regularly inspecting fuses, wiring and connectors can also help prevent electrical malfunctions.
References:
[1] Effects of rearview cameras and rear parking sensors on police-reported backing crashes
https://pubmed.ncbi.nlm.nih.gov/28394632/

Hello Folks, Dean Shali here to help you out to solve the problems with your lovely vehicle, as i have lots of experience and knowledge about automotive industry as i woks directly with the customers and repair vehicles and i love to help the people to keep their cars safe and running smoothly.