Written By: Dean Shali
Fact Checked By: Sabré Cook
Reviewed By: Tamara Warren
Basically, if there’s fault in the ignition switch then it can literally turn a perfectly working car into a completely silent machine even without any noticeable warning.
Yes, ignition switch quietly controls almost the entire starting process, as it really does more than just “START THE ENGINE”.
As, it connects the battery power to the key systems such as: the starter motor, fuel system, dashboard electronics and even accessories such as: lights and radio as well.
And, ignition switch used every single time you drive, that’s why the ignition switch naturally wears out over the period of time, specially in the older vehicles or cars with heavy keychains that actually puts extra stress on the mechanism.
But, faulty ignition switch often have signs that: one day your car starts normally and the next day it may show no response at all, even with the healthy and fully functional battery.
Also, you can notice flickering of dashboard lights, sudden engine stalling while driving or key is feeling loose or hard to turn on.
So, that’s the proper guide about How to Fix Faulty Ignition Switch, so that you can identify whether the problem is truly lies with the switch and take the right action before that small issue becomes more serious one.
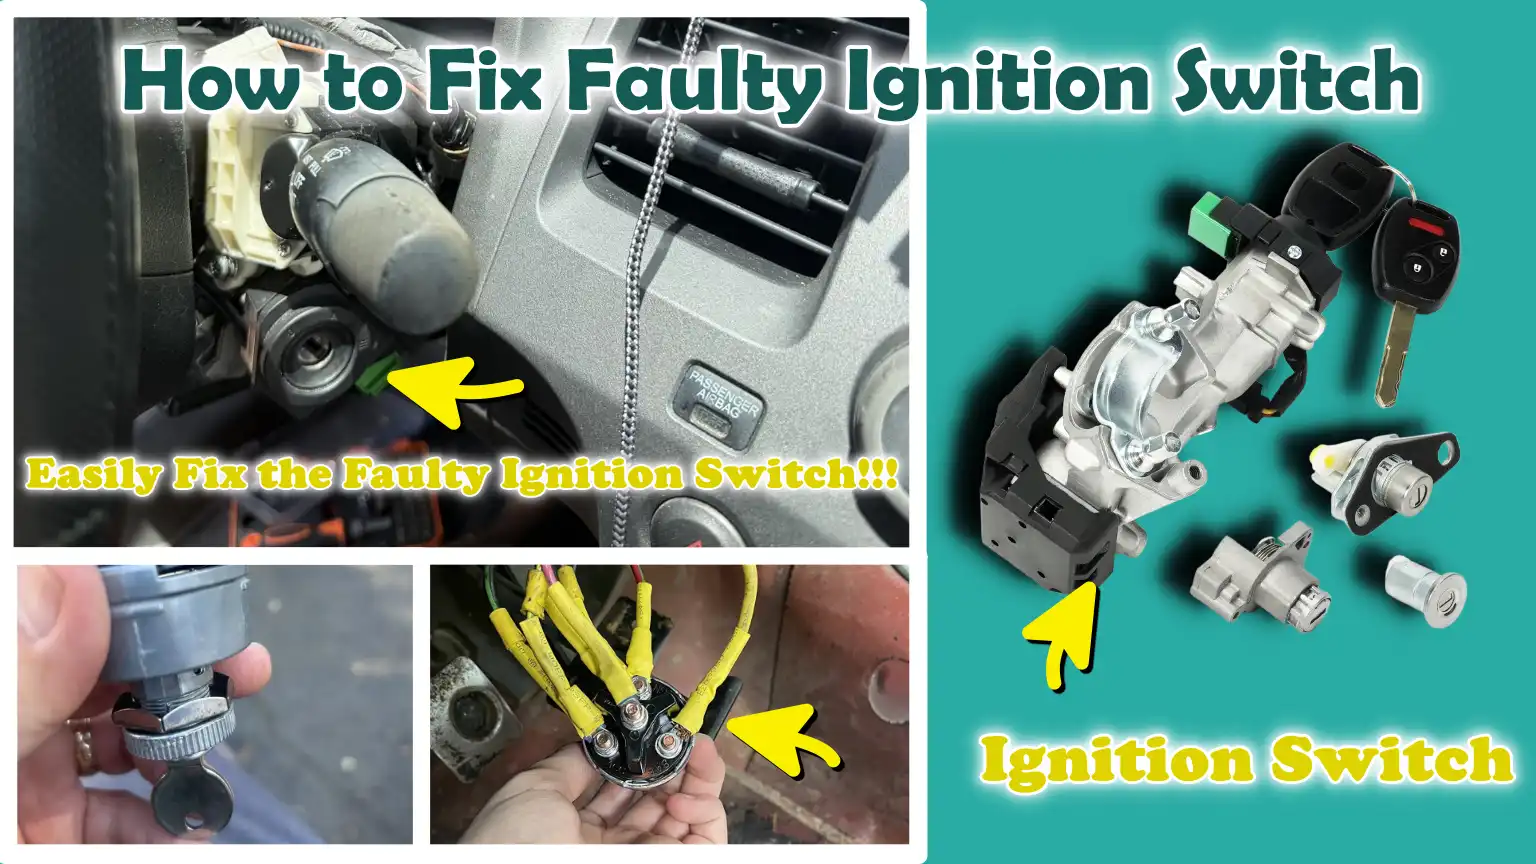
So, Understand What is an Ignition Switch?
The ignition switch is a small yet critical electrical component located inside a vehicle; it regulates the flow of electrical power from the battery to the various systems required to start and operate the vehicle.
In older vehicles, it is typically situated behind the key slot, whereas in vehicles equipped with a push-button start, it functions as an integral part of the starting system itself.
As you turn the key to different positions such as: Accessory, On, or Start, the ignition switch alters its internal electrical connections to route power to specific parts of the vehicle.
Although many drivers assume that its sole function is to start the engine, it actually controls multiple systems simultaneously.
If this component begins to fail, the vehicle may lose electrical power, fail to start, or shut down unexpectedly; this occurs because the switch is responsible for activating essential electrical circuits in the correct sequence.
1. Know the Function within the Ignition System
The ignition switch serves as the control point situated between the battery and the vehicle’s ignition system.
Its primary function is to supply electrical power to the systems necessary for both starting and operating the vehicle.
When the key is inserted and turned, the switch activates specific internal electrical contacts.
These contacts channel battery voltage to the starter motor circuit, the ignition control module, the engine computer, the fuel pump and the dashboard electronics.
In modern vehicles, numerous security systems also rely on signals routed through the ignition switch.
This implies that if the switch malfunctions, the resulting symptoms may mimic those of other issues such as: a weak battery, a faulty starter, or a blown fuse, even if those specific components are functioning perfectly fine.
A major advantage of understanding this distinction is this: it helps us avoid inadvertently replacing the wrong parts while diagnosing vehicle problems.
2. Its Connection with the Key Cylinder and Electrical System
The ignition switch works in conjunction with the ignition key cylinder; however, these two are not identical components.
The key cylinder is, in essence, a mechanical lock mechanism into which the ignition key is inserted and turned.
It physically activates the electrical ignition switch, located behind it, via a rod or actuator.
Simply put, the key cylinder performs the mechanical task of turning the key, while the ignition switch controls the flow of electrical signals.
This functional division is crucial because, at times, the key may turn easily, yet the internal switch mechanism ceases to function, preventing the vehicle from starting.
Conversely, in other instances, the key cylinder itself may jam, while the electrical switch continues to operate perfectly.
Furthermore, this switch connects directly to the vehicle’s wiring harness, thereby distributing power to various circuits.
As it serves as a central electrical gateway, even a minor internal fault within the switch can simultaneously disrupt the operation of several different vehicle systems.
3. Its Role in Powering Accessories, the Fuel System and the Starter Circuit
The ignition switch controls far more than just the process of cranking the engine.
In the ‘Accessory’ position, it supplies power to systems such as the radio, interior blower fan, infotainment display and charging ports.
In the ‘On’ position, it delivers power to dashboard warning lights, engine sensors, the Electronic Control Unit (ECU) and the fuel delivery system.
When moved to the ‘Start’ position, it activates the starter motor and energizes the starter solenoid, thereby enabling the engine to crank.
It also helps maintain voltage to the fuel pump, ensuring that fuel reaches the engine and combustion can occur.
If the switch malfunctions at any of these stages, the symptoms can vary significantly.
The vehicle may crank but fail to start; accessories may cease to function; or the engine may suddenly shut off while driving, as the flow of power to critical systems is interrupted.
This is precisely why the ignition switch is considered one of the most vital links between the driver’s input and the vehicle’s operating systems.
Know, Common Symptoms of a Faulty Ignition Switch
The symptoms of a failing ignition switch often manifest gradually and initially, they may not appear to be interconnected.
As this switch is responsible for starting the vehicle and powering the ignition and accessory systems, even a minor internal fault within it can give rise to a wide range of electrical problems.
These symptoms may appear intermittently, present at times, absent at others, which is why many drivers often mistake them for issues with the battery, starter, or wiring.
1. Failure to Start or Intermittent Starting
One of the most common symptoms is the vehicle failing to start, even if the battery is fully charged.
You may turn the key and receive no response, or the engine might start on some occasions but fail to start on others.
This occurs when the internal contacts within the ignition switch become worn out and are unable to consistently supply power to the starter motor.
Intermittent starting is often an early warning sign that the switch is deteriorating internally.
2. Key Sticking or Difficulty Turning
Difficulty turning the key is often an indication of wear within the ignition lock cylinder or the ignition switch mechanism located behind it.
Due to dirt, worn components, or internal defects, turning the key may feel stiff or gritty, or the key may get stuck at a specific position.
In some cases, the key may turn, but it fails to properly activate the vehicle’s electrical systems.
This can be a sign of both mechanical and electrical wear within the ignition assembly.
3. Sudden Engine Stalling While Driving
A faulty ignition switch can cause the engine to stall suddenly while the vehicle is in motion, as the electrical supply to the ignition system is abruptly interrupted.
In such instances, the spark or fuel supply reaching the engine may cut out without any warning.
This situation becomes even more hazardous when it causes the power steering assist or warning systems to cease functioning as well.
A faulty ignition switch can cause the engine to shut down abruptly at any moment; conversely, the engine may spontaneously restart on its own just a few minutes later.
4. Flickering or Non-Illuminating Dashboard Lights
If the dashboard lights flicker, dim, or fail to light up at all when the key is turned, it may indicate that the ignition switch is failing to provide a consistent voltage supply to the vehicle’s electrical circuits.
When the vehicle is started, the warning lights require a continuous supply of power from the ignition system to function correctly.
If the internal contacts within the switch become loose, this power supply can be interrupted, causing the lights to behave erratically, illuminating one moment and going out the next.
This symptom often manifests just before the vehicle completely fails to start.
5. Failure of Accessories to Receive Power
The ignition switch is also responsible for supplying power to the radio, interior blower motor, power windows and other electronic devices located within the vehicle.
If these components stop working, particularly when the key is held in a specific position, it may signal that the switch is failing to properly activate the accessory circuits.
A defective switch can cut off power to a single accessory or to multiple accessories simultaneously.
This serves as a definitive indication that the internal electrical contacts within the switch are deteriorating.
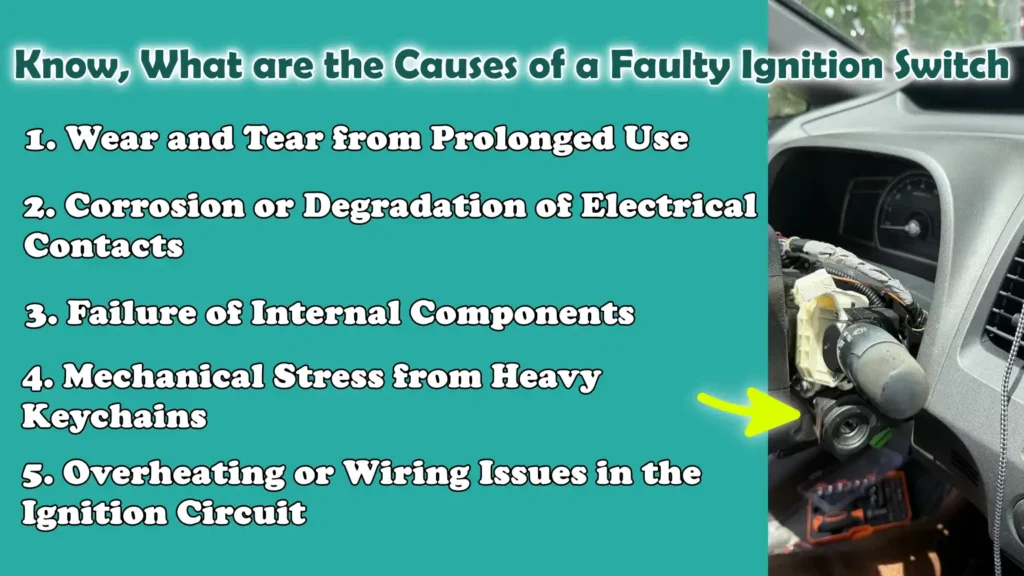
Know, What are the Causes of a Faulty Ignition Switch
A failing ignition switch typically does not stop working suddenly without any apparent reason.
In most vehicles, this malfunction develops gradually, often due to repetitive use, wear and tear on electrical components, exposure to heat, or mechanical stress on internal parts.
As the ignition switch is responsible for delivering power every time the vehicle is started, its internal contacts and moving parts naturally wear out after years of continuous use.
Understanding the root cause helps determine the most appropriate course of action: repair, cleaning, or replacement.
1. Wear and Tear from Prolonged Use
The ignition switch is utilized every time the vehicle is started, meaning it is turned thousands of times over its entire operational lifespan.
Inside the switch are electrical contacts that open and close as the key is turned.
Over time, these contacts wear down and may fail to establish a proper electrical connection.
This can lead to delayed starting, reduced power supply, or, in some cases, the vehicle failing to start at all, particularly in older, high-mileage vehicles.
2. Corrosion or Degradation of Electrical Contacts
The ignition switch contains small metal contacts responsible for transmitting power from the battery to the vehicle’s essential systems.
These contacts can corrode due to moisture, dust, oxidation, or the passage of time.
Corrosion creates resistance, which reduces electrical flow and can disrupt the signals sent to the starter, dashboard instruments, or fuel system.
Even a minor fault in these contact points can hinder the vehicle from starting and trigger electrical malfunctions, issues that may arise without any prior warning.
3. Failure of Internal Components
The ignition switch comprises springs, connectors, sliders and electrical terminals that work in unison within a compact housing.
If any of these internal components become loose, break, or wear out, the switch may cease to transmit electrical power correctly.
Some malfunctions occur because plastic components weaken over time due to exposure to heat and general aging.
As these parts are sealed within the unit, an internal failure typically necessitates replacing the entire switch rather than attempting to repair individual components.
4. Mechanical Stress from Heavy Keychains
Using a heavy keychain while driving places excessive weight on the ignition key.
This constant strain exerts pressure on the ignition lock cylinder and the ignition switch connected behind it.
Over time, this additional weight can cause internal actuators to wear out and electrical connections to loosen.
This is a common cause of ignition switch problems, yet it often goes unnoticed, particularly in older vehicles equipped with traditional “key-start” ignition systems.
5. Overheating or Wiring Issues in the Ignition Circuit
The ignition switch supplies power to various vehicle systems and faulty wiring can generate excessive heat.
Loose wires, poor grounding, or an electrical overload on the circuit can cause the internal components of the switch to overheat significantly.
Due to this heat, plastic components may melt or contact surfaces may become damaged, potentially causing the part to cease functioning entirely.
In some vehicles, repeated overheating can also damage the wiring harness connected to the switch, making it even more difficult to identify the root cause of the problem.
Tools
| Tools | Why It Is Needed | How to Use It |
|---|---|---|
| Multimeter | A multimeter verifies whether the ignition switch is receiving the correct voltage and whether it is transmitting that voltage onward. This helps confirm whether the switch’s electrical contacts have failed, which is one of the most common reasons why a vehicle fails to start. Without checking the voltage, many people mistakenly replace the wrong part. | Set the multimeter to DC voltage. Touch the black probe to a metal ground point and the red probe to the terminals of the ignition switch. Turn the key to each position and check whether power is reaching the correct terminals. Compare the readings against the vehicle’s wiring diagram. |
| screwdriver set | A screwdriver is required to remove the steering column covers and access the ignition switch assembly. Different vehicles utilize different types of screws; therefore, both flat-head and Phillips-head screwdrivers are often needed. | Remove the screws securing the steering column trim panels. Keep the screws organized so that they can be reinstalled in their correct locations. Use the correct size screwdriver to avoid damaging the screw heads. |
| Socket Set | A socket set helps remove the bolts that secure the ignition switch and surrounding steering column components. Many ignition switches are fastened with bolts that cannot be removed using a screwdriver. | Select the correct socket size for the bolts surrounding the switch housing. Loosen them carefully and avoid applying excessive force to rusted bolts. Keep the removed hardware together so that small mounting components do not get lost. |
| Replacement Ignition Switch | If inspection confirms that the old ignition switch is defective, it is essential to replace it. Installing a new switch restores the proper flow of electricity to the starter and accessory circuits. | Ensure that the replacement switch matches the specific make, model and year of the vehicle. Disconnect the battery before installing the switch. Remove the old switch, properly install the new one, reconnect the wiring and verify all key positions before completing the reassembly process. |
| Safety Gloves | Gloves protect your hands from accidental contact with sharp trim edges, metal brackets and dirty or hot components. They also improve your grip while using tools. | Wear gloves before removing the steering column cover or working near the wiring. Choose gloves that allow for easy finger movement so that you can securely handle screws, connectors and electrical probes. |
| Protective Eyewear | Safety glasses protect your eyes from dust, broken plastic clips and debris that may fall while removing dashboard or steering column under-panels. | Wear them while working under the dashboard or when removing tightly fitted trim components. This is particularly useful in older vehicles, where aged and brittle plastic parts may break during removal. |
| Wiring Diagram | A wiring diagram specific to your vehicle illustrates the correct wire colors, terminal locations and power pathways. As ignition wiring varies across different models, the diagram helps prevent incorrect testing or improper reassembly. | Use this diagram to identify the input and output wires of the ignition switch. Pay close attention to the terminal labels when performing tests with a multimeter. This makes troubleshooting more accurate and reduces the risk of damage to electrical components. |
How to Ensure Safety By Taking Precautions Before Starting
Before beginning work on the ignition switch, safety must always be the top priority, as the ignition system is directly connected to the battery, the starter circuit and various live electrical components.
If basic precautions are overlooked, even a minor repair can lead to a short circuit, accidental airbag deployment, or damage to sensitive wiring.
Taking a few minutes to prepare properly can prevent injury, safeguard the vehicle’s electrical system and make troubleshooting (diagnosis) significantly easier.
1. Disconnect the Battery to Prevent Electric Shock
The first step is to disconnect the negative terminal of the battery before touching any ignition wiring.
This prevents accidental contact with live electricity while removing the switch or inspecting nearby wires.
It also minimizes the risk of short circuits caused by metal tools coming into contact with live terminals, an occurrence that can result in damage to fuses or wiring.
In many vehicles, the ignition switch is located near the steering column wiring; therefore, disconnecting the battery before commencing any repairs adds a crucial layer of safety.
2. Ensure the Steering Wheel is Unlocked and Stable
The steering wheel must be in the unlocked position before removing the trim (cover) surrounding the ignition area.
If the wheel locks while you are working, accessing the area can become difficult and unnecessary strain may be placed on the steering components.
A stable wheel also helps prevent accidental movement while removing the ignition switch housing.
Keeping the front wheels pointed straight ahead simplifies the reassembly process and minimizes alignment-related issues during the repair.
3. Work in a Well-Lit and Safe Environment
The components of the ignition switch are typically located deep within the steering column, where visibility is limited.
Adequate lighting aids in identifying screws, wiring connectors and mounting clips, thereby preventing damage to surrounding parts.
Working in a dry and organized area also minimizes the risk of tools falling into the dashboard or small parts getting lost.
A tidy workspace ensures greater accuracy during electrical diagnostics and helps prevent accidental errors during reassembly.
4. Do Not Force the Ignition Key or Components
If the ignition key cylinder feels stuck, do not force the key; applying excessive pressure can cause the key to break, damage the cylinder, or snap the actuator linked to the switch.
The ignition assembly contains small internal components that can wear out over time; if you force them, a minor repair can turn into a costly replacement.
If something feels stuck, identify the root cause before attempting to apply force.
By working carefully, further damage can usually be avoided.
How to Diagnose a Faulty Ignition Switch
Before replacing any component, it is crucial to accurately diagnose a faulty ignition switch, as the symptoms of various other vehicle problems can be quite similar.
A weak battery, a defective starter, a blown fuse, or a worn-out key cylinder, all of these issues can prevent a vehicle from starting.
Proper diagnosis ensures that the problem is indeed linked to the switch, thereby avoiding unnecessary repairs.
A careful inspection often reveals whether the issue lies within the switch’s internal electrical components or if there is a mechanical fault within the key system itself.
1. First, Check the Battery’s Condition
Always check the battery before inspecting the ignition switch, as the symptoms of a weak battery can closely mimic those of a faulty ignition system.
If the battery voltage is too low, the starter motor will not engage and the dashboard lights may appear dim or fail to light up at all.
A healthy car battery should typically register a voltage of approximately 12.
6 volts when the engine is turned off.
If the battery is discharged, testing the ignition switch may yield misleading results and lead to an incorrect diagnosis of the problem.
2. Check the Voltage at the Ignition Terminals Using a Multimeter
Using a multimeter is one of the most reliable methods for testing an ignition switch.
The switch’s input terminal should receive battery voltage and when the key is turned, it should distribute power to the various circuits.
If power is entering the switch but failing to exit through the correct output terminal, there is a strong possibility that the internal contacts have worn out or become damaged.
Testing the switch at each key position helps determine whether the switch has failed completely or if it is simply malfunctioning in specific positions.
3. Check the Ignition Fuse and Relay
A blown fuse or a faulty relay can interrupt the flow of electricity, making the ignition switch appear defective, even if it is functioning perfectly fine.
The ignition circuit often relies on fuses and relays to safely regulate the flow of power to the starter system.
If either of these components fails, the vehicle may fail to start, or other vehicle accessories may cease to function.
Checking these components before removing the switch helps resolve minor issues preemptively.
4. Check the Movement and Response of the Key Cylinder
The ignition key cylinder should rotate smoothly through every position without binding or facing any resistance.
If the key feels rough, loose, or jammed when turned, the issue may be mechanical rather than electrical.
A faulty cylinder can prevent the ignition switch, located behind it, from rotating correctly.
Paying attention to how the key turns often provides an early indication of where the fault lies.
5. Determine Whether the Problem Is Electrical or Mechanical
The final step is to determine whether the problem originates from the electrical switch itself or from the mechanical key system.
If the key turns normally but power fails to reach the starter or the dashboard, the issue often lies within the internal wiring of the switch.
Conversely, if the key does not turn properly or feels stuck, the fault may lie in the cylinder or the actuator.
Recognizing this distinction is crucial, as the repair procedure differs for each type of problem.
How to Fix Faulty Ignition Switch – Easy Guide
Repairing a faulty ignition switch requires careful handling, as the switch is connected to the vehicle’s starting circuit, electrical accessories and internal components within the steering column.
Although the design may vary slightly depending on the specific vehicle model, the basic repair procedure remains largely consistent across most key-operated systems.
The objective is to safely remove the defective switch, install a replacement and ensure that all electrical connections are functioning correctly before operating the vehicle.
1. Access the Ignition Switch
The ignition switch is typically located behind the steering column cover, in close proximity to the key cylinder (where the key is inserted).
First, disconnect the vehicle’s battery; then, using an appropriate screwdriver, remove the upper and lower covers of the steering column.
These covers often hide the switch and its associated wiring connectors.
Once the covers are removed, the ignition switch assembly becomes visible near the key cylinder, making it easier to inspect its mounting points and electrical connections.
Remove the Steering Column Covers
The steering column covers serve to protect the ignition wiring and internal components.
Remove the screws located beneath the steering wheel and carefully separate the plastic covers.
Some clips may be seated quite firmly, particularly in older vehicles, so avoid applying excessive force when detaching them.
Removing these covers provides safe access to the switch without causing damage to other surrounding panels.
Locate the Ignition Switch Assembly
After removing the covers, locate the ignition switch situated behind the key cylinder.
It is typically connected to a wiring harness and secured in place using screws or small bolts.
Locating the exact position of the switch before removing it offers the advantage of preventing accidental damage to other wiring components.
To identify the correct switch, compare its location with that of the new replacement switch.
2. Disconnect Electrical Connections
The ignition switch supplies power to multiple circuits; therefore, its associated wiring must be disconnected with great care.
Locate the wiring harness connected to the switch and observe how its connectors are attached.
Most connectors feature release tabs (locking levers) that must be depressed before the connector can be separated.
Attempting to forcibly pull the connector without disengaging the lock may result in damage to the connector housing or the wires themselves.
Carefully Disconnect the Wiring Harness
The function of the wiring harness is to transmit electrical power between the switch and other vehicle systems.
Gently depress each locking tab and disconnect all connectors one by one.
Avoid pulling directly on the wires, as doing so may loosen the internal terminals.
If the wiring harness becomes damaged, the vehicle may exhibit symptoms similar to those caused by a faulty ignition switch.
Mark Connectors If Necessary
In some vehicles, multiple connectors are situated in close proximity to one another and may appear visually identical.
Marking them before removal helps prevent incorrect connections when reassembling the components.
Applying small labels or simple tape markings can save time during the reassembly process.
This technique is particularly useful in instances where several electrical components are clustered closely together on the steering column.
3. Remove the Faulty Ignition Switch
Once the wiring has been disconnected, the switch can be removed from the steering column.
Depending on the vehicle’s design, most switches are secured in place using screws, bolts, or retaining clips.
Carefully remove these fasteners to prevent them from falling inside the dashboard.
Once all mounting points have been disengaged, the switch should slide out easily without requiring any force.
Remove the Mounting Bolts
Use the appropriate socket or screwdriver to remove the switch’s mounting hardware.
Some bolts may be seized due to age or the application of thread-locking compound.
Apply steady pressure and take care to avoid stripping the bolt heads.
Keep all removed bolts together in a single location, as they will be reused during reinstallation.
Gently Detach the Switch from the Steering Column
Once the fasteners have been removed, pull the switch straight outward from its mounting location.
It may be connected to an actuator rod that links to the ignition lock cylinder.
Handle this component with care to avoid bending or damaging it.
If you face any resistance, thoroughly double-check for hidden fasteners before attempting to force the switch out.
4. Install the New Ignition Switch
A new replacement ignition switch should be identical to the original switch in terms of size, connector type and mounting design.
Before installation, compare both parts side-by-side.
This helps confirm compatibility and minimizes the risk of an improper fit.
Proper alignment is crucial, as even slight misalignment can affect the operation of the key.
Align the New Switch Correctly
Position the new switch in the exact same orientation as the old switch.
Before securing it in place, ensure that the actuator and the key cylinder are properly aligned.
Misalignment will prevent the key from rotating through all of its positions.
A correctly aligned switch should slide and fit into place on its own, without requiring any force.
Secure it with Bolts
Reinstall the original bolts and tighten them evenly.
Do not overtighten them, as many ignition switch housings are made of plastic and can crack under excessive pressure.
Once mounted, the switch should feel stable and secure.
A loose fit can lead to electrical interruptions later on.
5. Reconnect Wiring and Reassemble
Once the switch is installed, reconnect all electrical connectors and carefully inspect each connection.
Ensure that every plug is fully locked into place.
Loose connectors can cause symptoms of malfunction to persist, even after a new switch has been installed.
Once the wiring connections have been verified, the steering column covers can be reassembled.
Firmly Reconnect the Connectors
Reconnect each wiring plug to the correct terminal on the switch.
Continue pressing until every locking tab clicks securely into place.
A loose connector can prevent power from reaching the starter motor or accessories.
Double-check every connection before restoring battery power.
Reinstall the Steering Column Covers
Return the steering column covers to their original positions and tighten the screws evenly.
Ensure that no wires are pinched between the panels.
Once reassembled, reconnect the battery and test the ignition switch by turning the key through the Accessory, On and Start positions.
This confirms that the new ignition switch is functioning correctly before you resume regular driving.
How to Do Post-Replacement Testing
After replacing the ignition switch, it is crucial to test it before driving the vehicle, as the newly installed part may still harbor connection issues, alignment problems, or incorrect wiring.
A proper test ensures that the switch is correctly supplying power to the starter, accessories and ignition system.
This final check helps confirm that the repair has resolved the original issue and also helps prevent future scenarios where the vehicle fails to start.
1. Reconnect the Battery
Reconnect the negative terminal of the battery only after all wiring and steering column components have been fully installed.
Tighten the terminal securely to ensure a stable electrical connection during testing.
A loose battery connection can result in reduced power flow, potentially making the ignition switch appear faulty even if it is functioning correctly.
Once connected, wait a few seconds to allow the vehicle’s electrical modules to initialize properly.
2. Check Key Positions
Slowly rotate the key through each position and observe how the switch responds.
In the ‘Accessory’ position, systems such as the radio and cabin fan should turn on.
In the ‘On’ position, the dashboard lights and electrical systems should activate.
In the ‘Start’ position, the starter motor should engage smoothly and without any delay.
If the expected response is not observed in any position, the switch may not be properly aligned.
3. Check Dashboard Lights and Ignition Response
The dashboard serves as one of the easiest indicators to confirm that the ignition switch is functioning correctly.
When the key is turned to the ‘On’ position, the warning lights should illuminate as expected and remain steady.
Flickering lights, delayed illumination, or a complete lack of response may indicate poor electrical contacts or loose connectors.
When the key is turned, the ignition system should respond immediately, without any unusual interruptions.
4. Start the Engine and Confirm Stable Operation
Start the engine and let it run for a few minutes to confirm that the repair was successful.
The engine should crank smoothly, start without any hesitation and run continuously without stalling.
Verify that accessories, including the lights, power windows and radio, continue to function while the engine is running.
If everything operates normally, the ignition switch replacement was successful and the electrical circuit is functioning correctly.
Read More:
Know, The Common Mistakes While Fixing the Faulty Ignition Switch to Avoid Them
Repairing the ignition switch can resolve vehicle starting issues; however, many repairs fail due to minor errors made during the diagnostic or installation process.
As the ignition system is interconnected with numerous electrical and mechanical components, even a minor oversight can result in the same problems persisting even after the switch has been replaced.
By avoiding these common mistakes, you can save time, prevent damage and ensure a more reliable repair.
1. Overlooking Battery and Relay Issues Before Replacing the Switch
A weak battery or a faulty ignition relay can produce symptoms that closely mimic those of a defective ignition switch.
If the engine fails to start, many people rush to replace the switch immediately without first checking the battery voltage or the relay.
This can result in a waste of money, as the root cause of the problem may actually lie elsewhere within the starter circuit.
Always inspect the battery and relay before removing the switch, as these are frequently the primary culprits behind a vehicle’s failure to start.
2. Improperly Connecting the Wiring
The ignition switch relies on precise electrical connections to supply power to the starter, dashboard and various accessories.
If the connectors are not properly seated or are left loose, even a brand-new switch may appear to be malfunctioning, even if it is actually in perfect working order.
Improperly connected wires can lead to accessory malfunctions or prevent the engine from starting.
Carefully inspecting every connector during the reassembly process can save you the trouble of having to troubleshoot recurring issues later on.
3. Forcing Stuck Ignition Components
If the ignition cylinder or switch feels stuck, attempting to force it can result in further damage.
Applying excessive force can cause the key to break, damage the internal actuator, or ruin the steering column assembly.
Many ignition components contain small plastic and metal parts that are not designed to withstand extreme force.
If a component does not move as expected, you should inspect it first rather than attempting to force it.
4. Using Incorrect Replacement Parts
Not every ignition switch is compatible with every vehicle, even if the part appears identical at first glance.
Different model years, trim levels and ignition systems may utilize distinct connectors or internal configurations.
Installing an incorrect replacement switch can lead to difficulties in starting the vehicle, accessory malfunctions, or issues with key alignment.
Before installing a replacement part, always ensure that it matches the vehicle’s specific make, model, year and ignition type.
So, When to Go to the Mechanical Help
While some ignition switch issues can be resolved at home, certain situations require the expertise of a trained technician, as the malfunction may stem from deeper problems within the vehicle’s electrical system.
In modern vehicles, the ignition switch is often integrated with anti-theft modules, electronic steering locks and computer-controlled starting systems.
If the problem persists even after replacing the switch, professional diagnostics can prevent further damage and help pinpoint hidden faults with greater accuracy.
1. Persistent Starting Issues After Switch Replacement
If the vehicle still fails to start after installing a new ignition switch, the problem likely does not lie with the switch itself.
The issue may be linked to a hidden fault within the battery, starter circuit, fuse box, relays, or wiring.
Simply replacing the switch without addressing the root cause can make it even more difficult to identify the actual problem.
A professional technician can inspect the entire circuit to ensure that no other component is preventing the engine from starting.
2. Complex Electronic Ignition Systems
Many newer vehicles utilize electronic ignition systems that work in conjunction with security modules and key recognition technology.
These systems often incorporate an immobilizer, which establishes communication between a chip embedded in the key and the engine control system.
If the immobilizer fails to recognize the key, the engine will not start, even if the ignition switch is brand new.
These systems frequently require specialized diagnostic tools and programming equipment; therefore, seeking professional service is typically essential.
3. Wiring Faults or ECU-Related Issues
If the ignition wiring has melted, been severed, corroded, or short-circuited, simply replacing the switch will not resolve the problem.
Faulty wiring can disrupt signals reaching the starter, fuel system, or dashboard.
In some cases, the malfunction may lie within the Engine Control Unit (ECU), which governs the electronic communications that occur when the vehicle starts.
ECU-related issues can prevent the vehicle from starting, even if all mechanical components are functioning correctly, and resolving these faults typically requires advanced diagnostic scanning tools.
How to Prevent & Maintain the Ignition Switch
The ignition switch often degrades gradually and its lifespan can be extended by adopting a few simple maintenance habits.
As this switch is utilized every time the vehicle is started, it is subjected to constant mechanical stress and electrical strain.
Simple measures such as: minimizing the weight on the key, inspecting the electrical system and promptly repairing worn-out components, as it can alleviate the strain on the ignition system and prevent sudden starting difficulties.
Not only this, there’s official U.S. safety investigations that found out that ignition switch defects literally able to shut off the engine while the vehicle is moving, which may even disable the safety systems and increases the crash risk, so that’s why early diagnosis and repair is really important for both of the vehicle reliability and driver’s safety as well.[¹]
1. Avoid Using Heavy Keychains
Heavy keychains exert excessive pressure on the ignition cylinder while driving.
Due to this constant weight, the cylinder and the ignition switch actuator wear out more rapidly over time, particularly when driving on rough roads, where the keys are constantly jostling around.
This additional pressure can cause internal components to loosen and electrical connections to deteriorate.
Using only the vehicle key or a lightweight keychain minimizes wear and tear, thereby extending the lifespan of the ignition switch.
2. Regularly Inspect the Electrical System
The ignition switch requires stable battery voltage and sound electrical connections to function correctly.
A weak battery, poor grounding, or a faulty relay can place undue stress on the switch and accelerate its deterioration.
Regularly checking the battery’s condition, the charging system’s output and fuse connections helps identify potential issues before they negatively impact the ignition system.
Preventive electrical inspections often detect faults in their early stages, before they escalate into major problems.
3. Keep the Ignition Area Clean and Dry
Dust, moisture and debris accumulating around the key slot can adversely affect both the switch and the cylinder over time.
Dirt can infiltrate the key cylinder, making it difficult to turn the key, while moisture can cause corrosion in the surrounding electrical contacts.
Keeping the ignition area clean prevents key-sticking issues and minimizes internal wear and tear.
If any liquid spills onto the steering column area, drying it immediately can prevent long-term electrical damage.
4. Replace Faulty Components Promptly
If the key feels loose, is difficult to turn, or the engine fails to start properly, these warning signs should not be ignored.
Replacing faulty ignition components in a timely manner can prevent the switch from failing completely and save you from getting stranded unexpectedly on the road.
If minor issues are left unaddressed, they often escalate into major electrical problems.
Replacing a defective switch, a broken connector, or a worn-out cylinder immediately is typically easier and less expensive than waiting for the vehicle to break down completely.
Conclusion – How to Fix Faulty Ignition Switch
So, it seems like: a vehicle have some serious engine problem but the real issue can be worn out ignition switch hidden behind the key as well.
The vehicle may fail to start, shut down abruptly, lose power to accessories, or display erratic dashboard malfunctions, even though the root cause lies hidden within a small, unassuming switch.
As these symptoms often mimic faults in the battery, starter, or wiring, accurately diagnosing the problem is far more critical than hastily replacing parts.
Checking the battery’s condition, performing voltage tests with a multimeter, inspecting the ignition cylinder and verifying the integrity of the wiring can all help pinpoint the true culprit and avoid unnecessary repairs.
In many cases, replacing a defective ignition switch restores the vehicle to proper working order, provided, of course, that the correct replacement part is installed and the wiring connections are securely fastened.
Regular maintenance also plays a pivotal role, as simple habits such as: avoiding the use of heavy keychains, keeping the ignition assembly clean and addressing deteriorating components in a timely manner, as it can significantly extend the lifespan of the switch.
Most importantly, it is essential to understand that ignition-related issues often provide warning signs before a complete system failure occurs.
And, that’s all from this guide about How to Fix Faulty Ignition Switch, now you can ask the queries and questions below.
Frequently Asked Questions
FAQ 1: How do I know if my ignition switch is bad?
Answer: A faulty ignition switch typically exhibits several warning signs before failing completely. Common indicators include the car failing to start, the engine stalling while driving, flickering dashboard lights, or accessories such as: the radio and power windows, ceasing to function. In some instances, turning the key may feel difficult, or the key may get stuck. As these symptoms can also stem from issues with the battery or starter, the most reliable method for confirming the problem is to inspect the switch itself.
FAQ 2: Can a bad ignition switch prevent a car from starting?
Answer: Yes, a faulty ignition switch can prevent a car from starting because it regulates the electrical connection between the battery and the starting system. When the switch malfunctions, power fails to reach the starter motor, fuel system, or ignition components. Consequently, the engine may fail to crank, start intermittently, or make absolutely no sound at all when the key is turned. This is one of the most common symptoms of a defective ignition switch.
FAQ 3: Can I fix the ignition switch myself?
Answer: In many vehicles, if you possess basic tools and some mechanical knowledge, you can replace the ignition switch yourself at home. The repair process typically involves disconnecting the battery, removing the steering column covers, unplugging the wiring and installing a new switch in its place. This procedure is often straightforward for older vehicles; however, newer models may feature security systems that can make the repair process more complex. To avoid replacing the wrong component, you should always carefully diagnose the problem first.
FAQ 4: What tools are required to fix a bad ignition switch?
Answer: The most useful tool is a multimeter, as it helps verify whether the switch is receiving power correctly and if it is transmitting that power onward. You may also require a screwdriver, a socket set, safety gloves and a new ignition switch. Depending on your vehicle’s model, a wiring diagram can be extremely helpful, as wire colors and terminal layouts vary from one model to another. Using the correct tools allows for a more accurate diagnosis of the problem.
FAQ 5: Can the symptoms of a bad battery resemble those of a faulty ignition switch?
Answer: Yes, a weak battery can indeed produce symptoms identical to those of a faulty ignition switch. A low-charge battery can prevent the starter from engaging, dim the dashboard lights and cause accessories to malfunction. For this reason, many drivers end up replacing the ignition switch when the actual problem lies with the battery. Checking the battery voltage before inspecting the ignition switch is one of the most crucial steps to take.
FAQ 6: Why does my key get stuck in the ignition?
Answer: A stuck key may be caused by a worn-out ignition cylinder, pressure from the steering lock, or a fault within the internal switch mechanism. The presence of debris or dust inside the cylinder can also make it difficult to turn the key. In some cases, the ignition cylinder functions correctly, but the ignition switch located behind it has failed. If the key repeatedly gets stuck or is difficult to turn, you should have the ignition assembly inspected before attempting to force it.
References:
[1] Inadequate Data and Analysis Undermine NHTSA’s Efforts To Identify and Investigate Vehicle Safety Concerns
https://www.oig.dot.gov/library-item/32523

Hello Folks, Dean Shali here to help you out to solve the problems with your lovely vehicle, as i have lots of experience and knowledge about automotive industry as i woks directly with the customers and repair vehicles and i love to help the people to keep their cars safe and running smoothly.