Written By: Dean Shali
Fact Checked By: Sabré Cook
Reviewed By: Tamara Warren
So, how you “CHARGE BATTERY” creates real difference between how long it will last or fail during the journey.
And, without a doubt: car battery is really important to have perfectly charged, as it decides the power of your engine starter to lights and all the other electronics will function or not.
Not only this, there’s studies in the automotive maintenance that shows that a large number of battery failures are not only caused by the age, as it is caused by improper charging, overcharging or incorrect handling as well.
Yes, there are serious warning signs such as: slow engine cranking, dim headlights or needing frequent jump-starts.
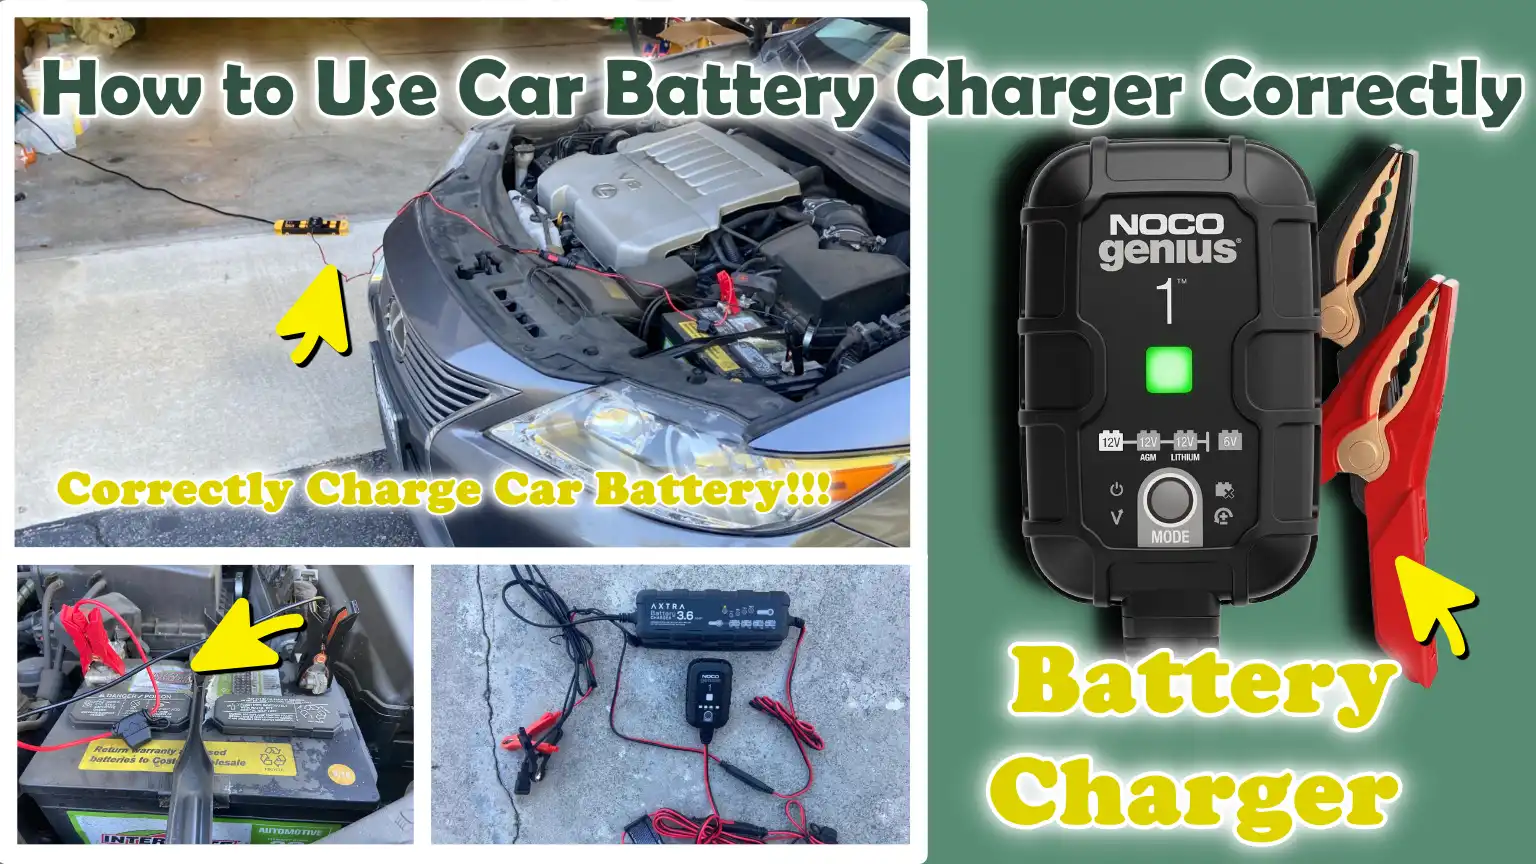
Now, in this guide you’ll learn How to Use Car Battery Charger Correctly, so that you can improve the vehicle reliability and save significant money on replacements as well.
Know, Common Types of Car Battery Chargers
Not all car battery chargers are created equal; selecting the right type depends on the condition of your battery, how quickly you need to charge it and how much control you wish to exercise over the process.
Using the correct charger is crucial, as the wrong type can charge too slowly, overcharge the battery, or even cause long-term damage.
Most modern vehicles utilize 12-volt batteries and each type of charger is designed to deliver power in a distinct manner, either under manual control or through automatic regulation.
Understanding how each charger operates helps you avoid common issues such as overheating, battery sulfation, or premature battery failure, thereby ensuring safe and effective charging every time.
1. Manual Chargers
Manual chargers represent the most basic category, requiring the user to manually monitor the entire charging process.
They deliver a steady flow of current to the battery but do not automatically shut off once the battery is fully charged.
Consequently, to prevent overcharging, you must closely monitor both the duration of the charge and the condition of the battery; excessive charging can lead to increased heat, fluid loss and, over time, irreversible damage to the battery.
These chargers are often preferred by experienced users who possess a solid understanding of voltage and amperage settings; they can be a useful option when you require a simple, low-cost charging solution.
However, they are not ideal for beginners, as they demand constant attention and precise timing.
2. Automatic or Smart Chargers
Automatic, or “smart”, chargers are designed to make the charging process safer and easier, as they handle the entire procedure on your behalf.
These chargers intelligently detect the battery’s condition and automatically adjust the charging rate, gradually reducing the current as the battery approaches its full capacity.
Most smart chargers stop charging once the battery is fully charged and switch to a ‘maintenance mode’ to prevent overcharging.
This helps protect the battery from damage and extends its overall lifespan.
These devices are particularly useful for beginners and daily drivers, as they minimize the risk of errors and provide a reliable, hassle-free charging experience.
3. Trickle Chargers
Trickle chargers deliver a very low and steady flow of current over an extended period.
Rather than rapidly charging a completely discharged battery, they are primarily used to maintain a battery that is already charged.
This is beneficial for vehicles that are not used frequently such as: seasonal vehicles or backup cars, as it prevents the battery from gradually losing its charge over time.
Trickle charging helps mitigate a common issue known as sulfation, a process in which lead sulfate crystals accumulate inside the battery, thereby reducing its capacity.
Although safe for prolonged use, these devices are not suitable for quickly recharging a completely dead battery.
4. Portable Jump Starters
Portable jump starters are compact devices capable of delivering a quick burst of power to start a vehicle with a dead battery.
Unlike traditional chargers, they do not gradually recharge the battery; instead, they provide just enough energy to immediately crank the engine.
Many modern jump starters feature built-in safety systems such as: reverse polarity protection and short-circuit prevention, making them safer to use than traditional jumper cables.
They prove invaluable in emergency situations, particularly when you find yourself stranded without access to another vehicle or a power source.
However, they cannot serve as a substitute for a proper battery charger, as they do not fully recharge the battery.
5. When to Use Each Type of Charger
Choosing the right charger depends on your specific situation and the condition of your battery.
Manual chargers are best suited for situations where you desire complete control and understand how to carefully monitor the charging process.
For most users, automatic or smart chargers are the best option, as they are safe, easy to use and prevent the battery from overcharging.
Trickle chargers are ideal for maintaining battery health during extended periods when the vehicle is not being used regularly.
Portable jump starters should be reserved for emergency situations when you need to start your vehicle immediately without waiting for the battery to fully recharge.
Using the right charger at the right time helps protect your battery, enhances its performance and reduces the likelihood of sudden failure.
Tools
| Tool/Gear | Why It Is Needed | How to Use It Correctly |
|---|---|---|
| Car Battery Charger | This is the primary device responsible for delivering electrical current to your battery in order to recharge it. Without it, a depleted or completely discharged battery cannot be properly restored. Using the correct charger helps restore the battery’s capacity, boosts its starting power and extends its overall lifespan. | Place the charger on a stable and level surface. Connect the positive clamp to the positive terminal and the negative clamp to the negative terminal or a metal ground point. Set the correct voltage and charging mode before switching on the device. Always turn off the charger before removing the clamps. |
| Safety Gloves and Goggles | Car batteries contain acid and can emit hazardous gases during the charging process. Gloves protect your skin from burns or irritation, while safety goggles shield your eyes from accidental splashes or sparks. This protective gear significantly reduces the risk of serious injury. | Put on gloves and safety goggles before handling the battery or the charger. Keep them on throughout the entire charging process. Ensure that they fit you properly and do not obstruct your movement or vision while you are working. |
| Clean Cloth or Wire Brush | Dirt or corrosion often accumulates on battery terminals, hindering the proper flow of electricity. Cleaning them establishes a strong connection between the charger and the battery, making the charging process more efficient and safer. | Before connecting the charger, gently clean the battery terminals using a dry cloth or a wire brush. Carefully remove any white or green deposits. Ensure that the terminals are completely dry and clean before attaching the clamps. |
| Multimeter – Optional for Accuracy | A multimeter helps measure a battery’s voltage, thereby revealing its current charge level, indicating whether the battery is fully charged or discharged. It provides precise data, enabling you to determine whether charging is necessary and to identify exactly when the battery has reached a full charge. | Set the multimeter to the DC voltage setting. Touch the red probe to the positive terminal and the black probe to the negative terminal. To monitor the battery’s condition and ensure that it has reached a full charge, compare the readings taken before and after charging. |
Know All The Essential Safety Precautions – Do Not Ignore These
Charging a car battery is a straightforward task; however, it involves electricity, chemical reactions and gases, elements that can become hazardous if basic safety precautions are overlooked.
A standard car battery contains sulfuric acid and during the charging process, it generates hydrogen gas, which is highly flammable.
Even a minor error such as: creating a spark near the battery or connecting the terminals incorrectly, as it can result in serious damage or personal injury.
Adhering to proper safety protocols not only ensures your personal safety but also protects your vehicle’s electrical system from damage, while simultaneously ensuring that the battery charges more efficiently and enjoys a longer lifespan.
1. Work in a Well-Ventilated Area
As the battery charges, it releases hydrogen gas as part of its normal chemical process.
This gas is very light and can accumulate in enclosed or poorly ventilated spaces, significantly increasing the risk of an explosion if it comes into contact with a spark.
Working in an open area or a location with good airflow allows these gases to dissipate safely.
Therefore, it is crucial to keep garage doors or windows open while charging and to strictly avoid charging in a completely enclosed environment.
Proper ventilation keeps the air safe and mitigates hidden hazards that are often overlooked.
2. Stay Away from Sparks or Open Flames
The hydrogen gas generated during charging is highly flammable and can ignite very easily, even from a tiny spark that may not even be visible to the naked eye.
Common sources of sparks include switching electrical devices on or off, loose connections, or even static electricity.
Open flames such as: those from cigarettes, lighters, or nearby heating appliances, as it can also ignite a fire.
It is absolutely essential to keep the battery area away from any sparks or sources of ignition, as exposure to fire can trigger a sudden explosion or fire incident.
Maintaining a safe distance from anything that generates heat or sparks is one of the most critical safety practices to observe while charging a battery.
3. Turn Off the Vehicle Before Charging
Before connecting the charger, the vehicle must be completely turned off to prevent electrical malfunctions and minimize the risk of sparks.
When the car is running, its electrical system remains active; connecting or disconnecting a charger under such conditions can cause sudden voltage fluctuations.
These fluctuations can damage sensitive electronic components such as sensors, control modules, or the alternator.
Turning off the vehicle creates a stable environment for charging, thereby protecting both the battery and the vehicle’s internal systems from unnecessary stress or damage.
4. Check the Battery for Defects or Leaks
Attempting to charge a defective battery is unsafe and can become hazardous when subjected to an electrical load.
Cracks in the battery casing, swelling, or leaking fluid are clear indications that the battery is not in a safe condition.
Battery fluid contains sulfuric acid, which is highly corrosive and poses a risk of burns to individuals or damage to surrounding vehicle components.
Charging a defective battery can increase internal pressure, potentially causing the battery to leak or even explode.
Carefully inspecting the battery before charging allows you to avoid serious hazards and ensures that the charging process remains both safe and effective.
5. Identifying Correct Polarity – Positive vs Negative
Every car battery features two terminals, one positive and one negative, and connecting them correctly is absolutely essential.
The positive terminal typically bears a plus sign (+) and is often fitted with a red protective cover, whereas the negative terminal displays a minus sign (-) and is generally black in color.
Reversing the connections of these terminals can result in sparks, damage the charger and harm the vehicle’s electrical system.
In some instances, this can cause fuses to blow or even permanently ruin electronic systems.
Always double-check the markings on the terminals before connecting the charger to ensure that the charging process is safe and being executed correctly.
How to Use Car Battery Charger Correctly – Great Working Method
Properly charging a car battery is crucial, as it impacts not only how easily your car starts but also the overall lifespan of the battery.
A standard car battery operates through a chemical reaction that stores and releases electrical energy.
Improper charging can disrupt this delicate balance, potentially reducing the battery’s capacity, causing it to overheat, or inflicting permanent damage.
Many battery-related issues such as: slow starting, frequent discharging, or reduced battery life, are often caused by incorrect charging methods rather than inherent defects within the battery itself.
By following the correct steps in sequence, you ensure safe charging, a stable flow of electricity and the long-term health of your battery.
1. Locate and Inspect the Battery
The first step is to locate your car’s battery.
In most vehicles, it is typically situated under the hood; however, in some cars, it may be located in the trunk or under a seat.
Once you have located the battery, carefully inspect it for any signs of external damage.
Check for corrosion around the terminals.
This corrosion often appears as a white or green powdery substance and can obstruct the proper flow of electricity.
Additionally, inspect the battery casing for any cracks, bulges, or leaks.
These are all indicators of internal damage and can render the charging process unsafe.
A clean, undamaged battery ensures a safe and effective charging process.
2. Identify the Battery Terminals
Every battery features two terminals: a positive terminal and a negative terminal.
Before making any connections, it is crucial to correctly identify these two terminals.
The positive terminal typically bears a “plus” (+) sign and is often fitted with a red cover or cable.
Conversely, the negative terminal features a “minus” (-) sign and is generally black in color.
This color coding helps prevent confusion; however, it remains essential to double-check the markings directly on the battery itself.
Correct identification ensures that the electrical current flows in the proper direction, thereby preventing potential electrical damage caused by incorrect connections.
3. Disconnect the Battery from the Vehicle – If Necessary
In some instances, it is advisable to disconnect the battery from the vehicle.
This step is particularly important when using a manual charger or when working on an older vehicle that lacks advanced electronic systems.
Disconnecting the battery protects the vehicle’s electronic components from potential voltage fluctuations that may occur during the charging process.
To perform this safely, always remove the negative cable first, followed by the positive cable.
Adhering to this sequence minimizes the risk of accidental short circuits.
If you are using a modern “smart” charger, completely disconnecting the battery is often unnecessary; nevertheless, understanding when and how to execute this step adds an extra layer of safety.
4. Connect the Charger Correctly
Connecting the charger correctly is one of the most critical steps in this entire process.
To begin, attach the charger’s positive clamp to the battery’s positive terminal.
Next, connect the negative clamp to the negative terminal, or, if recommended, to a solid metal section of the vehicle’s frame.
Doing so reduces the likelihood of sparks occurring in the immediate vicinity of the battery.
An improper connection can result in sparks, damage the charger, or even harm the battery itself.
Therefore, it is crucial to ensure that the clamps are firmly attached and not loose.
A secure and proper connection ensures that the flow of electricity remains smooth and safe.
5. Configure the Charger Settings
Before initiating the charging process, you must configure the correct settings on the charger based on your battery type.
Most car batteries are 12-volt, although some smaller batteries may be 6-volt; therefore, selecting the correct voltage is essential to prevent damage.
Next, select the charging mode.
‘Slow Charge’ utilizes a lower current and is generally safer, as it generates less heat and helps maintain the battery’s health; conversely, ‘Fast Charge’ uses a higher current, which is useful in emergency situations, but can place significant strain on the battery.
The amperage (current) setting should be selected based on the size of the battery; for standard charging, choosing a lower amperage is safer.
With the correct settings in place, the charging process remains both efficient and controlled.
6. Begin Charging
Once everything is correctly connected and set up, you can switch on the charger to initiate the charging process.
As soon as charging begins, an electric current flows into the battery, replenishing its stored power.
During this time, a small amount of gas may be emitted from the battery and it may also become slightly warm; this is considered normal.
Modern chargers often indicate charging progress via lights or digital displays.
It is essential to allow the charger to operate without interruption and to avoid touching its clamps or terminals while the charger is powered on.
7. Monitor the Charging Process
Monitoring the battery while it charges helps ensure that everything is functioning correctly.
Most chargers feature indicators such as: lights or displays, that show the charging status and progress.
Consistent progress toward a full charge is a positive sign, whereas excessive heat, strong odors, or rapid bubbling may indicate a problem.
If you observe sparks, extreme heat, or any unusual behavior from the charger, it is crucial to stop the charging process immediately.
Regular monitoring helps prevent overcharging and ensures the safety of the entire procedure.
8. Disconnect Safely
Once the battery is fully charged, the final step is to switch off the charger before disconnecting any connections.
This eliminates the risk of sparking and ensures safe handling.
First, remove the negative clamp, followed by the positive clamp.
Adhering to this sequence minimizes the risk of accidental short-circuiting.
After disconnecting, store the charger in a safe location and ensure that, if the battery terminals were previously disconnected, they have now been securely reconnected.
Properly removing the connection ensures that the process is completed safely and that the battery is now ready for reliable use.
How Long Does It Take To Charge A Car Battery?
The time required to charge a car battery is not fixed, as it depends on several key factors such as: the battery’s size, its current state of discharge and the settings of the charger being used.
Most standard car batteries have a capacity of approximately 40 to 70 amp-hours; this means they possess the ability to store a specific amount of electrical energy, which must be gradually replenished during the charging process.
If the battery is only slightly discharged, recharging it may take a few hours; however, if it is deeply discharged or completely drained, the process can take significantly longer.
As the battery approaches its full capacity, the charging speed naturally slows down, as the chemical reactions occurring within the battery become more stable and controlled.
Understanding this point helps avoid a common mistake: expecting immediate results from a process that, by its very nature, requires time to ensure a safe and complete charge.
1. Factors Affecting Charging Time
Several key factors directly influence how long it takes to charge a car battery.
Foremost among these is the battery’s current state of charge; a nearly empty battery will take considerably longer to recharge compared to one that is only slightly discharged.
The charger’s amperage also plays a crucial role; higher-amperage chargers deliver a stronger current and reduce charging time, whereas lower-amperage chargers take longer but provide a safer charging environment.
The overall condition of the battery is another significant factor; older or deteriorating batteries charge more slowly and may be unable to hold a charge effectively.
Temperature also impacts the charging process; In cold conditions, the chemical reactions occurring within the battery slow down, thereby increasing the charging time; conversely, charging at excessively high temperatures can pose safety risks.
Overall, these factors collectively determine how quickly or slowly a battery reaches a full charge.
2. Typical Timeframes -Slow vs Fast Charging
Charging times can vary significantly depending on the method employed.
Slow charging, typically conducted at approximately 2 to 10 amperes, as it can take anywhere from 6 to 24 hours to fully charge a standard car battery, depending on its current state of discharge.
This method is generally recommended because it delivers a steady and controlled flow of electricity.
Fast charging, which often utilizes a current of 10 to 30 amperes or higher, as it can reduce charging times to approximately 1 to 5 hours; however, this increases internal heat and pressure within the battery.
In certain emergency situations, a high-current “boost charge” can provide sufficient power to start the engine within 15 to 30 minutes, although this does not result in a full recharge of the battery.
These timeframes demonstrate that, when it comes to battery health, fast charging is not always the optimal choice.
3. Why Slow Charging Is Better
Slow charging is considered the safest and most effective method, as it allows the internal chemical processes within the battery to proceed in a stable and balanced manner.
When a battery is charged slowly, less heat is generated; this reduces the risk of damage to the internal plates and slows down the rate of electrolyte depletion.
This method also helps prevent overcharging and inhibits the formation of harmful deposits, accumulations that can diminish the battery’s capacity over time.
Conversely, fast charging rapidly replenishes the battery, which can generate excessive heat, lead to increased gas formation and accelerate the battery’s degradation process over the long term.
Regularly utilizing slow charging helps extend the battery’s lifespan, maintain consistent performance and mitigate the risk of sudden failure.
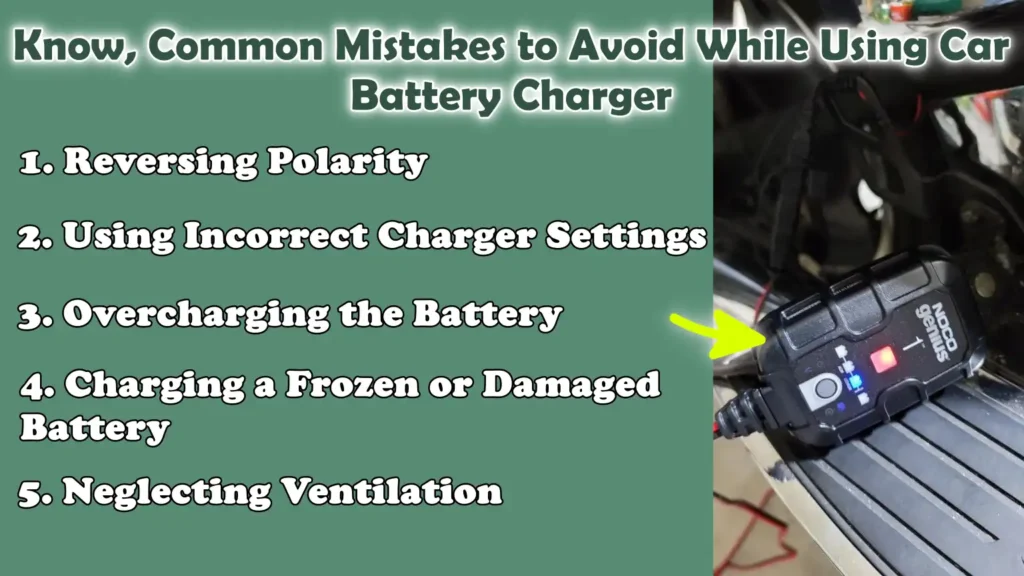
Know, Common Mistakes to Avoid While Using Car Battery Charger
Charging a car battery may seem simple, but several common mistakes can shorten the battery’s lifespan, damage the vehicle’s electrical system, or even pose a safety hazard.
A car battery operates through a chemical reaction that requires a delicate balance; improper charging can disrupt this equilibrium, leading to excessive internal heat generation, gas buildup, or a failure to charge properly.
Many instances of sudden battery failure are, in reality, the cumulative result of small, repetitive errors made over time such as: using incorrect settings or ignoring early warning signs.
By understanding these common pitfalls, you can charge your battery safely, optimize its performance and avoid costly repairs or premature battery replacement.
1. Reversing Polarity
Reversing polarity means connecting the charger clamps to the wrong terminals, specifically, connecting the positive clamp to the negative terminal and the negative clamp to the positive terminal.
This error can cause sparks, damage the charger and harm the vehicle’s sensitive electronic components, such as fuses and control systems.
In some cases, it can even lead to a complete failure of the electrical system.
This occurs because the electrical current flows in the wrong direction, a flow for which the system was not designed.
Always double-check the terminal markings before connecting the charger to ensure the current flows correctly and safely.
2. Using Incorrect Charger Settings
Using incorrect charger settings is another common issue that negatively impacts the health of the battery.
Most car batteries require a 12-volt setting; Selecting the wrong voltage can result in the battery being either undercharged or subjected to excessive electrical stress.
Choosing the incorrect amperage can also lead to problems; excessive current may cause the battery to overheat, whereas insufficient current prevents it from charging properly.
Some chargers offer various modes such as: fast or slow charging, and selecting the wrong mode for a specific situation can yield adverse results.
Configuring the charger correctly ensures that the battery receives the appropriate amount of energy in a safe and controlled manner.
3. Overcharging the Battery
Overcharging occurs when a battery continues to draw electrical current even after it has reached its full capacity.
This can cause the battery to overheat, deplete its internal fluid levels and damage its internal plates.
Over time, this diminishes the battery’s ability to retain a charge and reduces its overall lifespan.
In severe cases, overcharging can cause the battery to swell or leak.
Modern “smart chargers” help prevent this issue by automatically shutting off once the battery is fully charged; however, manual chargers require careful monitoring.
Avoiding overcharging is absolutely essential to maintain battery performance and ensure its long-term reliability.
4. Charging a Frozen or Damaged Battery
Attempting to charge a frozen or physically damaged battery is unsafe and should always be avoided.
In cold environments, if a battery becomes completely discharged, its internal fluids may freeze; charging a frozen battery can cause internal cracks or lead to a dangerous buildup of internal pressure.
Similarly, a battery exhibiting visible cracks, swelling, or leakage is considered compromised and may fail during the charging process.
These conditions significantly increase the risk of acid leakage or sudden battery failure.
Always inspect the condition of the battery before charging it and if the battery is frozen, allow it to warm up safely before attempting to recharge it.
5. Neglecting Ventilation
Neglecting ventilation during charging is a serious, yet often overlooked, mistake.
When a battery charges, it emits hydrogen gas; this gas is highly flammable and can accumulate in enclosed spaces.
If airflow is insufficient, the gas can build up and if it comes into contact with a spark, the risk of an explosion increases significantly.
Charging in an open or well-ventilated area allows the gas to dissipate safely, thereby mitigating this risk.
Good ventilation not only ensures your safety but also helps create a stable and controlled environment for the charging process.
Read More:
- How to Charge Car Battery at Home
- How to Revive Dead Car Battery Safely
- How to Fix Battery Not Holding Charge
- How to Diagnose Weak Battery Symptoms
- How to Test Battery Cold Cranking Amps
- How to Check Car Battery Voltage with Multimeter
How to Determine When the Battery Is Fully Charged?
It is crucial to know exactly when a car battery has reached a full charge; stopping the charging process too early prevents the battery from attaining its full power capacity, whereas charging it for too long can lead to overheating and a reduced lifespan.
A fully charged battery reaches a stable state where it can efficiently store and supply power without undue stress.
Modern charging methods rely on specific indicators such as: charger signals, voltage levels and the battery’s overall behavior, to detect this state.
Understanding these indicators eliminates the need for guesswork, ensuring that your battery is charged safely, performs optimally and lasts for its intended duration.
1. Charger Signals
Most modern battery chargers are designed to clearly display the charging status via indicator lights or digital screens.
During the charging process, the charger may display a steady or blinking light, indicating that power is being continuously supplied to the battery.
As the battery approaches a full charge, the charger typically automatically reduces the current flow and alters its signal to indicate that charging is complete, for instance, by displaying a steady green light or a “Full” message on the screen.
Some “smart” chargers even enter a “maintenance” or “float mode,” in which they continuously supply a very low level of current to keep the battery fully charged without overcharging it.
These built-in indicators represent one of the easiest and safest ways to determine when your battery is ready for use.
2. Voltage Readings
Measuring voltage is one of the most accurate methods for verifying whether a battery has reached a full charge.
A healthy, fully charged car battery, when the engine is off and the battery is in a resting state, will typically display a voltage reading of approximately 12.6 to 12.8 volts.
During charging, as the charger continuously supplies power, the voltage will rise; however, once the charger is disconnected and the battery stabilizes, the voltage should return to within this normal operating range.
If, even after charging, the voltage remains below this threshold, it may indicate that the battery has not fully charged or that it is losing its capacity to retain a charge.
Checking the voltage with a multimeter provides clear and reliable insight into the true condition of the battery.
3. Signs of a Healthy Battery
A fully charged battery, even during active use, exhibits several practical signs of being in good condition.
The engine should start quickly and easily, without any sluggishness or clicking sounds.
Electrically powered components such as: headlights, interior lights and dashboard displays, should operate at their normal brightness, showing no signs of flickering or dimming.
After charging, the battery should remain stable; it should not show any signs of generating abnormal heat, swelling, or leaking.
These indicators suggest that the battery is not only fully charged but also functioning correctly.
Recognizing these simple yet crucial signs helps ensure that your battery is ready to perform reliably, thereby minimizing the risk of sudden failure.
Know, The Tips for Extending Battery Life
In most cases, a car battery does not fail suddenly; rather, its capacity gradually diminishes over time due to usage patterns, charging habits and environmental conditions.
A standard car battery is designed to last approximately three to five years, but its actual lifespan depends heavily on how well it is maintained.
Batteries function through a series of recurring chemical reactions that store and release energy.
If a battery is frequently left in a discharged state, allowed to accumulate dirt and debris, or subjected to adverse driving conditions, these chemical reactions become less efficient.
By adopting a few simple and consistent habits, you can reduce the strain on the battery, enhance its performance and delay the need for replacement.
Proper maintenance not only saves money but also ensures that your vehicle starts reliably every time.
Also, there’s research that shows that using a car battery charger in correct way is essential that maintains battery performance, so whenever users follow the proper charging steps such as: correct voltage and controlled current, as they help you to preserve the battery’s internal structure and also it ensures consistent vehicle starting power as well.[¹]
1. Regular Charging Habits
The most effective way to extend battery life is to maintain a regular charging routine.
A battery performs best when kept close to a full charge, rather than being allowed to discharge excessively.
If the vehicle is not driven frequently, the battery will gradually lose its charge.
This occurs due to the battery’s natural rate of self-discharge and the minor electrical draw from the vehicle’s onboard systems.
Periodically recharging the battery helps maintain its internal chemical balance and prevents premature degradation.
Occasionally using a “smart charger” can help keep the battery in good condition without the risk of overcharging.
2. Prevent Complete Discharge
A battery is considered fully discharged when its charge level drops to a very low point.
This occurs when you leave the vehicle’s lights on or when the vehicle remains parked and unused for an extended period.
This situation is detrimental to the battery, as it leads to the accumulation of lead sulfate crystals inside it.
This process diminishes the battery’s capacity to store a charge.
Repeatedly allowing the battery to discharge completely can cause permanent damage to its internal plates and significantly reduce its overall lifespan.
You should strive to avoid situations that result in the battery becoming fully discharged.
Doing so helps preserve the battery’s capacity and ensures that it can provide sufficient power to start the vehicle whenever needed.
3. Regularly Clean the Battery Terminals
Over time, dust, grease and corrosion can accumulate on the battery terminals, thereby obstructing the flow of electricity.
Corrosion typically manifests as a white or green powdery substance surrounding the terminals and it can weaken the electrical connection between the battery and the vehicle.
Consequently, the vehicle may experience delayed starting, the battery may fail to charge properly and the battery itself may be subjected to undue strain.
Regularly cleaning the terminals with a cloth or brush helps maintain a robust electrical connection, enabling the battery to charge and discharge efficiently.
Keeping the terminals clean also helps prevent unnecessary energy wastage.
4. Driving Frequency and Maintenance
How often you drive (i.e., how frequently you use the vehicle) and the distances you cover have a direct impact on the health of your battery.
During short trips, the alternator does not have sufficient time to fully recharge the battery after the engine has started; consequently, the battery’s power level gradually diminishes over time.
Driving the vehicle regularly over longer distances allows the battery to recharge properly and helps maintain a stable charge level.
Furthermore, regular vehicle maintenance such as: checking the charging system and ensuring that all electrical components are functioning properly, helps maintain the overall health of the battery.
Consistent use and proper care keep the battery active, thereby reducing the likelihood of its sudden failure.
Know About the Common Issues with Car Battery Charger & Their Solutions
Problems associated with charging a car battery are common and often misunderstood; however, most of these issues can be identified and resolved through a few basic checks and a proper understanding of the underlying mechanisms.
A car battery functions by storing electrical energy through a chemical reaction; any interruption in this process, whether originating from the charger, the battery itself, or the connections, as it can adversely affect the battery’s performance.
Issues such as a failure to charge, rapid discharge, or extremely slow charging are often symptomatic of a deeper underlying problem, such as poor connections, incorrect settings, or battery degradation.
By identifying the root cause of each specific issue, you can take appropriate corrective measures, avoid unnecessary battery replacements and ensure the reliable performance of your vehicle.
1. Charger Malfunction
If the charger fails to operate, the first step is to inspect the power source and connections.
A charger requires a stable power supply; therefore, a loose plug, a faulty outlet, or a damaged cable can prevent the unit from functioning.
In some instances, the charger may incorporate internal safety features that prevent it from activating if the battery is connected incorrectly or if the battery voltage is critically low.
Modern chargers may also refuse to operate if they detect an internal fault within the battery itself.
Checking the clamps, verifying correct polarity and ensuring that the charger settings are appropriate for the specific battery type are steps that frequently resolve this issue.
A charger’s failure to operate does not always indicate that the unit is defective; it may simply be acting to protect the system from potentially hazardous conditions.
2. Failure to Hold a Charge
When a battery fails to hold a charge, it often indicates that its internal chemical structure has deteriorated.
Over time, due to repeated charging cycles, deep discharges and natural aging, the battery’s plates lose their ability to store electrical energy effectively.
Consequently, the battery often discharges rapidly, even after being fully charged.
In some cases, sulfation, the accumulation of lead sulfate crystals, reduces the battery’s capacity.
If the battery’s voltage drops below normal levels shortly after charging, or if you experience difficulty starting the engine, it is a clear indication that the battery is no longer capable of holding a charge effectively.
While minor issues can sometimes be resolved through proper charging techniques, severely worn-out batteries cannot be fully restored.
3. Slow Charging Issues
There can be several reasons for a battery charging slowly, such as a low-amperage charger, poor connections, or the battery being in poor condition.
Charging with a low-current charger naturally takes longer, as dictated by its design; however, if the charging process is excessively slow, the cause may lie in dirty or corroded terminals that are obstructing the proper flow of current.
Temperature also influences charging speed, as the chemical reactions occurring within the battery slow down in cold weather.
Furthermore, an aging battery may charge slowly because its internal resistance increases over time.
Keeping connections clean, utilizing the correct charger settings and maintaining a suitable environment can all help improve both charging speed and overall efficiency.
4. When to Replace the Battery
Eventually, a time comes when simply recharging the battery no longer resolves its issues and replacement becomes necessary.
Most car batteries typically last between three and five years, depending on their usage and maintenance.
Some signs indicating the need for a battery replacement include: the battery failing to hold a charge, a recurring need for recharging, slow engine starting (cranking) and visible physical defects such as: swelling or leaking.
If the battery voltage remains low even after proper charging, or if it drops rapidly during normal use, it signifies that the battery has reached the end of its useful lifespan.
Replacing the battery at the appropriate time ensures reliable vehicle performance and helps prevent issues such as sudden breakdowns.
Can You Charge a Car Battery Without Removing It?
Yes, a car battery can typically be charged without removing it from the vehicle and this is the most common method used today.
Modern vehicles and chargers are designed to facilitate in-vehicle battery charging specially when utilizing a “smart charger,” which automatically regulates voltage and current.
Charging the battery while it remains connected to the vehicle saves time and eliminates the need to reset the vehicle’s systems such as: the clock, radio settings, or onboard computer.
However, this procedure must be performed with great caution, as the battery remains connected to the vehicle’s delicate electronic components.
It is crucial to ensure that the vehicle is completely switched off, the charger is set to the correct voltage and the connections are properly secured to prevent any electrical damage or sparking.
When executed correctly, charging the battery without removing it serves as a safe, efficient and convenient solution for most everyday situations.
1. Yes, with precautions
To charge a battery without removing it, it is essential to observe certain safety protocols to safeguard both the battery and the vehicle’s electrical system.
The charger must always be connected with the correct polarity, positive to positive and negative to negative (or to an appropriate ground point), to prevent damage.
The use of a smart charger is highly recommended, as it automatically adjusts the charging rate and minimizes the risk of overcharging the battery.
It is also imperative to work in a well-ventilated area, as batteries emit certain gases during charging that should not be allowed to accumulate in an enclosed space.
Avoid activating any of the vehicle’s electrical components while charging is in progress, as this can cause voltage fluctuations.
By observing these precautions, you can safely charge your battery without removing it and effectively maintain its performance.
2. When It Is Better to Remove the Battery
Although charging the battery without removing it is convenient, there are certain situations where removing the battery constitutes the safer option.
If the battery exhibits any visible external damage such as: cracks, swelling, or leakage, it should be removed from the vehicle and handled with care prior to charging; if necessary, it should be replaced.
It is also advisable to remove the battery when using older, manual chargers that do not automatically regulate voltage; such chargers can cause voltage fluctuations that may adversely affect the vehicle’s electronics.
Furthermore, if the battery terminals are severely corroded or difficult to access, removing the battery allows for more thorough cleaning and the establishment of secure connections.
In such instances, removing the battery from the vehicle provides you with greater control over the charging process and minimizes potential risks.
Conclusion – How to Use Car Battery Charger Correctly
Now, you have clear technique for charging your battery in the right way, as it decides how long it will last tomorrow.
Batteries function through chemical reactions that store and release energy; these reactions rely on proper charging methods to remain stable and efficient.
By adhering to the correct procedures, utilizing the appropriate type of charger and observing safety protocols, you minimize the risk of damage, enhance battery performance and extend its lifespan.
Many common battery-related issues such as: sluggish starting, frequent discharging, or sudden failure, are often the result of minor errors, such as incorrect settings, poor connections, or overlooking early warning signs.
By understanding how the charging process works and paying attention to technical details such as: voltage, amperage and safety precautions, even a novice can undertake the task of charging a battery with complete confidence.
For the long-term health of the battery, slow and controlled charging is always preferable, while routine maintenance practices such as: cleaning the terminals and preventing the battery from fully discharging, help keep it robust and reliable.
In the long run, proper charging not only saves money by reducing the need for battery replacements but also ensures that your vehicle remains dependable for daily use.
Now, that’s it from this guide How to Use Car Battery Charger, now you ask more questions below.
Frequently Asked Questions
FAQ 1: What is the correct way to connect a car battery to a charger?
The correct way to connect a car battery to a charger is to first identify the battery’s positive and negative terminals. The positive terminal typically bears a plus sign (+) and often features a red cap, while the negative terminal bears a minus sign (-) and is usually black. You should connect the charger’s positive clamp to the positive terminal first and then connect the negative clamp to the negative terminal or, if advised, to a sturdy metal part of the car’s chassis. Following this sequence minimizes the risk of sparks. Once the connections are securely established, you can switch on the charger. When charging is complete, always turn off the charger before removing the clamps; when disconnecting, remove the negative clamp first, followed by the positive clamp.
FAQ 2: How long does it take to charge a car battery using a charger?
The time required to charge a car battery depends on the size of the battery, its current state of discharge and the power output of the charger. A “slow charger” typically takes between 6 and 24 hours to fully charge a battery; this is considered the safest and most highly recommended method. A “fast charger” can reduce this time to just a few hours, but doing so can generate excessive heat inside the battery and place it under greater stress. If the battery is only slightly discharged, it will take less time to charge, whereas a completely dead battery will require significantly more time. As the battery approaches a full charge, the charging speed also gradually slows down.
FAQ 3: Can I charge a car battery without removing it from the vehicle?
Yes, in most cases, you can charge a car battery without removing it from the vehicle specially if you are using a modern “smart charger.” This method is safe provided that the vehicle is turned off, the connections are made correctly and the charger’s settings match the specific type of battery. Leaving the battery inside the car is generally more convenient, as it eliminates the need to reset the vehicle’s electronic systems. However, if the battery is damaged, leaking, or heavily corroded, it is best to remove it from the car before charging to ensure safety.
FAQ 4: What happens if I connect the charger incorrectly?
If the charger is connected incorrectly such as: by reversing the positive and negative clamps, it can cause sparks, damage the charger and harm the vehicle’s electrical system. In some instances, this can blow fuses or ruin sensitive electronic components within the car. Many modern chargers feature safety mechanisms that automatically stop operation if an incorrect connection is detected; nevertheless, it is crucial to double-check your connections before turning on the charger. Correct connections ensure safe charging and protect both the battery and the vehicle.
FAQ 5: Is it safe to leave a car battery charging overnight?
If you are using a smart or automatic charger, leaving the battery connected overnight can be safe, as these chargers automatically stop or reduce the flow of current once the battery is fully charged. This prevents overcharging and minimizes potential risks. However, if you are using a manual charger, leaving it unattended for extended periods is unsafe, as it may continue to charge continuously, potentially generating excessive heat or causing damage. Always verify the type of charger you are using before leaving it connected for an extended period.
FAQ 6: How do I know if my car battery is fully charged?
You can determine whether your battery is fully charged by checking the charger’s indicator or by measuring the battery’s voltage. Most chargers provide a clear indication when charging is complete such as: a green light or a “Fully Charged” status display. If you use a multimeter, the voltage of a fully charged battery, with the engine turned off typically falls between 12.6 and 12.8 volts. You can also observe whether the car starts easily and if all electrical systems are functioning correctly; these are signs of a healthy and fully charged battery.
FAQ 7: What type of charger is best for a car battery?
For most users, an automatic or “smart” charger is the best option, as it automatically adjusts the charging process based on the battery’s condition and prevents overcharging. These chargers are easy to use and require very little supervision. Manual chargers can also work, but they require careful monitoring to avoid errors. Trickle chargers are useful for maintaining battery health over long periods, while portable jump starters are helpful in emergency situations, though they do not fully recharge the battery.
References:
[1] Design of Optimal Charging System on Lead-Acid Calcium Battery for UNY 2020 Electric Car
https://www.researchgate.net/publication/348110592_Design_of_Optimal_Charging_System_on_Lead-Acid_Calcium_Battery_for_UNY_2020_Electric_Car

Hello Folks, Dean Shali here to help you out to solve the problems with your lovely vehicle, as i have lots of experience and knowledge about automotive industry as i woks directly with the customers and repair vehicles and i love to help the people to keep their cars safe and running smoothly.