Written By: Dean Shali
Fact Checked By: Sabré Cook
Reviewed By: Tamara Warren
You need to understand that: even a difference which is small than a human hair can make your entire car shake when you brake.
Basically, brake rotor runout is the cause behind brake vibration, even it disturbs the smoothness during the vehicle stop s as well.
So, in the simple terms: the runout means the rotor does not spin in perfectly straight and even a tiny deviation as small as 0.002 to 0.005 inches can actually create the noticeable pulsation in the brake pedal and shaking in the steering wheel as well.
In this condition, many drivers just assume that this is due to the “WARPED ROTORS”, but in the reality, the problem often starts from the improper installation, uneven lug nut torque or rust and debris that could trapped between the hub and the rotor.
Along with this, even the slight misalignment can leads to the uneven brake pad wear, reduced in braking efficiency and increases the stopping distance as well.
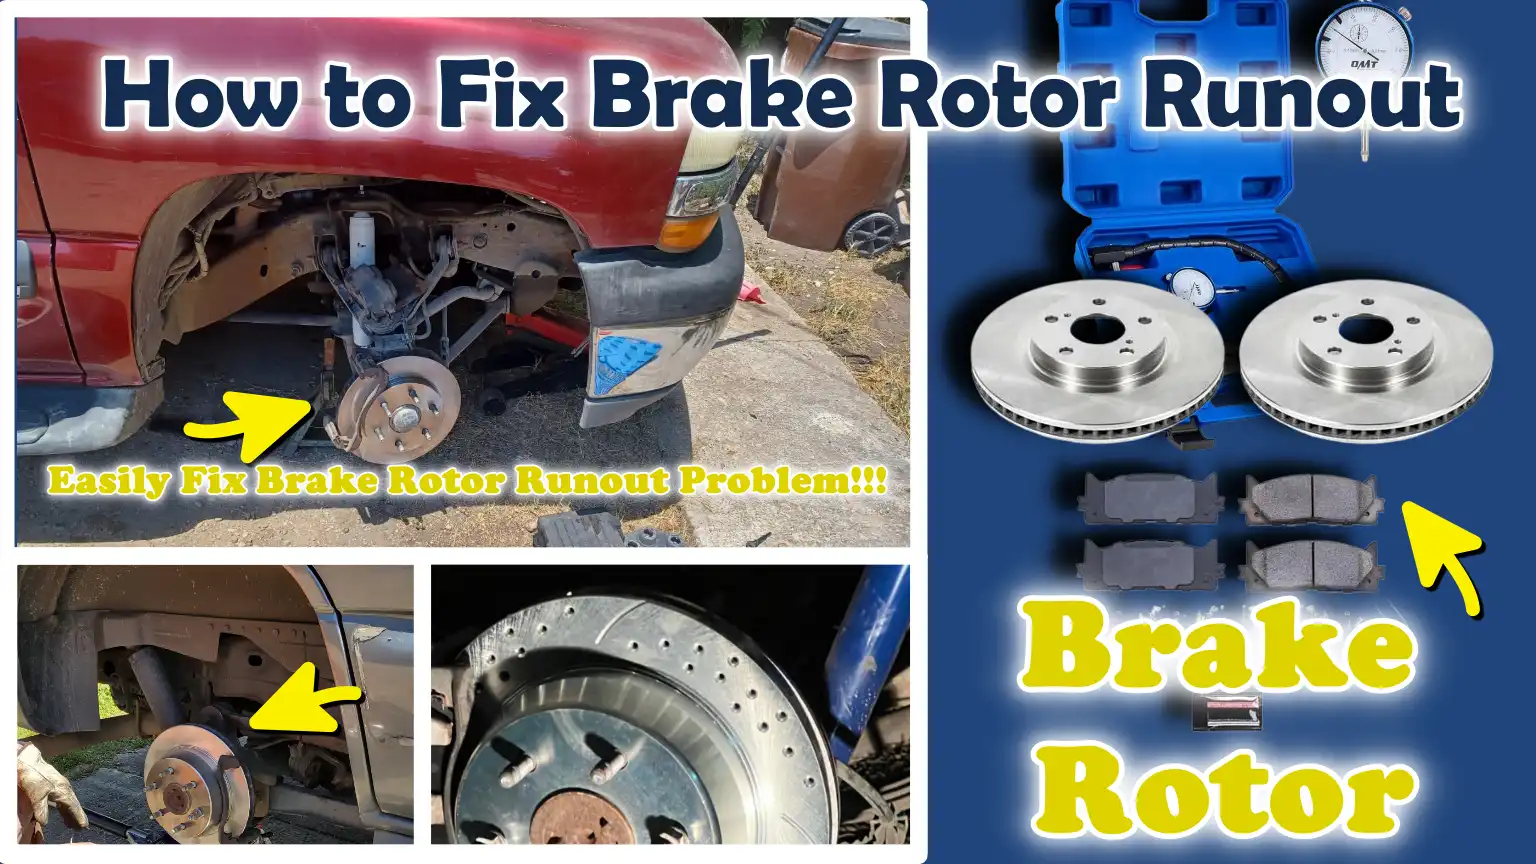
So, in this guide you’ll learn How to Fix Brake Rotor Runout, so that you can clearly understand the symptoms, accurately measure the rotor runout and then apply the proven solutions to restore smooth braking.
Know, What Actually is Brake Rotor Runout?
Brake rotor runout refers to a condition in which, as the wheel rotates, the brake disc does not spin along a perfectly straight and flat path.
Instead of remaining completely uniform, the rotor wobbles slightly from side to side while spinning.
This movement is typically very subtle, often invisible to the naked eye, yet it can significantly impact how the brakes function.
When brake pads apply pressure to a rotor that is not perfectly straight, the contact becomes uneven; this leads to vibrations, noise and a reduction in braking smoothness.
Runout is not always caused by a defective rotor.
It is often the result of dirt, rust, improper seating on the hub, or a wheel that has not been properly tightened.
1. Runout vs Thickness Variation
Brake rotor runout and thickness variation are two deeply interconnected issues, yet they are not the same thing.
Runout describes the rotor’s side-to-side wobble as it spins, whereas thickness variation refers to the inconsistency in the rotor’s thickness at different points across its surface.
Runout is often the initial problem; if left uncorrected, it can gradually lead to thickness variation over time.
This occurs because the wobbling motion causes the brake pads to exert greater pressure on specific sections of the rotor, resulting in uneven wear in those areas.
Typically, it is the thickness variation that creates the sensation of rapid pulsation in the brake pedal, although in many cases, the root cause of this symptom is ultimately uncorrected runout.
Understanding this distinction is crucial, because if you address only the thickness variation without correcting the underlying runout, the problem will not be fully resolved.
2. Why Even Slight Runout Matters
Even a minuscule amount of runout in a brake rotor can lead to significant problems, as braking systems operate with an extremely high degree of precision.
Runout is typically measured in thousandths of an inch, often between 0.002 and 0.005 inches, which is even thinner than a sheet of paper.
Despite being so minute, this irregularity in rotation causes the brake pads to move in and out as the rotor spins, resulting in a pulsating sensation in the brake pedal and vibrations in the steering wheel.
Over time, this constant and uneven contact accelerates wear on both the pads and the rotor, diminishes braking efficiency and can even compromise the vehicle’s stopping distance.
For precisely this reason, manufacturers establish strict limits for acceptable runout; consequently, correcting even the slightest deviation is absolutely essential to ensure safety, comfort and consistent, optimal braking performance.
Know, About the Signs of Brake Rotor Runout
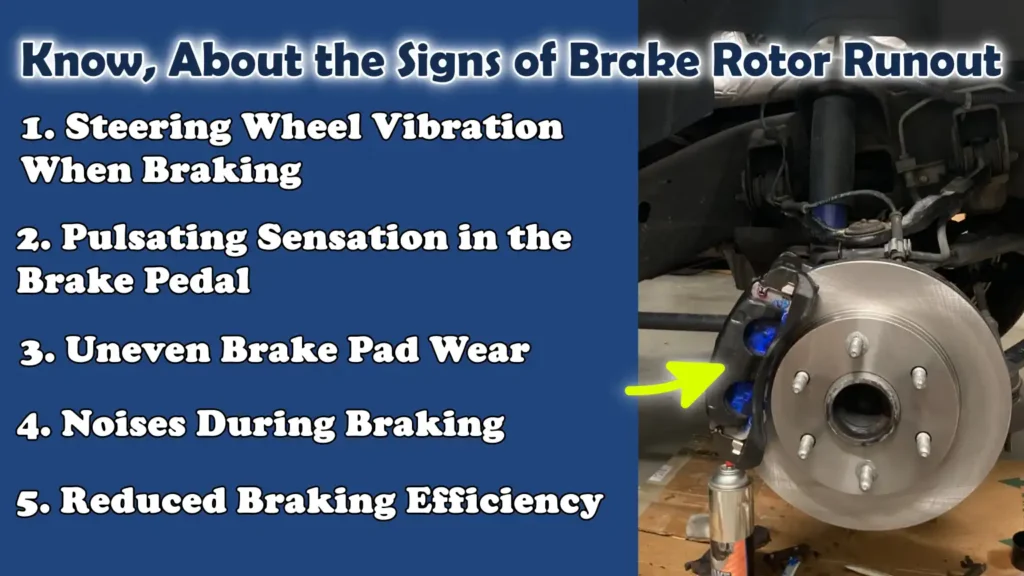
If you know what to look for, brake rotor runout typically presents clear warning signs.
These symptoms often appear gradually and may seem minor at first; however, as the problem worsens, they become more pronounced over time.
Because the rotor is not rotating uniformly, the brake pads are unable to apply pressure to it in a smooth and consistent manner.
The result is a sensation of vibration, uneven pressure and reduced control when braking.
Recognizing these signs early allows you to address the issue before it leads to more severe damage such as: uneven rotor wear, premature pad deterioration, or increased stopping distances.
1. Steering Wheel Vibration When Braking
One of the most common and easily identifiable signs of brake rotor runout is a vibration or shudder felt in the steering wheel when you apply the brakes.
This typically occurs at moderate to high speeds and intensifies as brake pressure increases.
The reason for this is that the front brake rotors are connected to the steering system; consequently, any irregular movement within the rotors is transmitted directly to the steering wheel.
Even a slight irregularity (runout) in the rotor can produce this effect, as the rotor pushes the brake pads in and out with every revolution, creating a continuous vibration that you can feel in your hands.
2. Pulsating Sensation in the Brake Pedal
A pulsating or vibrating sensation in the brake pedal is another strong indicator of rotor runout.
When you depress the brake pedal, instead of remaining steady and firm, it may feel as though it is moving slightly up and down beneath your foot.
This occurs because the uneven surface of the rotor pushes the brake pads back and forth as it rotates; this movement is then transmitted back through the braking system to the pedal.
This symptom is often mistaken as an indication of “warped rotors”; however, in many cases, the root cause is actually an underlying irregularity within the rotor itself, known as “runout.”
3. Uneven Brake Pad Wear
Brake rotor runout often leads to uneven wear of the brake pads over time.
Because the rotor does not remain perfectly flat while rotating, certain sections of the brake pads make greater contact with the rotor’s surface than others.
Consequently, some parts of the pads wear down more rapidly, while other sections remain relatively thicker.
As a result, the pad surface becomes uneven, further diminishing braking efficiency and increasing the likelihood of vibrations.
If left unaddressed, this uneven wear can also damage the rotor’s surface, potentially necessitating the premature replacement of both the pads and the rotors.
4. Noises During Braking
Unusual noises heard while braking can also be an indication of rotor runout.
When you apply the brakes, you may hear sounds such as squealing, grinding, or a faint scraping noise.
These sounds are generated by the uneven contact between the brake pads and the rotor’s surface.
When the rotor wobbles slightly, the pads are unable to maintain continuous contact, resulting in intermittent friction that produces the noise.
While noises alone can stem from various causes, if they are accompanied by vibrations or a pulsating sensation, it is often a definitive sign of rotor runout.
5. Reduced Braking Efficiency
Brake rotor runout can compromise overall braking efficiency, even if the issue appears minor.
As the rotor and pads do not make uniform contact with one another, the braking force is not applied evenly across the entire surface.
This means that it may take longer for the vehicle to come to a stop, particularly during sudden or hard braking situations.
Over time, this uneven force can generate excessive heat in certain areas, further degrading braking performance and potentially leading to more serious issues in the future.
Correcting runout restores uniform pressure, provides better vehicle control and ensures the ability to stop safely under all types of driving conditions.
Know, About The Common Causes Of Brake Rotor Runout?
Brake rotor runout is typically not caused by a single isolated issue, but rather results from a combination of minor errors, wear and tear, or adverse conditions.
These factors influence how the rotor seats against the hub and how it rotates.
Braking systems rely on extremely precise alignment; therefore, even the slightest deviation in installation, surface condition, or component quality can prevent the rotor from rotating true.
Many of these underlying causes can be prevented through proper care and attention during brake service.
Understanding the precise causes helps you resolve the root problem, rather than merely replacing parts, because simply replacing components without addressing the underlying issue may lead to a recurrence of the same problem later on.
1. Improper Wheel Installation
Improper wheel installation is one of the most common causes of brake rotor runout.
When lug nuts are not tightened uniformly, the rotor fails to seat correctly against the hub, resulting in a slight wobble during rotation.
Uneven lug nut torque means that some nuts are tightened more than others, causing the rotor to be pulled in different directions and begin to wobble.
The improper use of impact wrenches can exacerbate this issue, as they often apply excessive force too rapidly and without adequate control.
This can lead to stretched studs, damage to the rotor’s mounting surface and the creation of persistent uneven pressure.
Proper installation, which involves the use of a torque wrench and adherence to the correct tightening sequence, is essential to ensure that the rotor remains in perfect alignment.
2. Dirt or Rust on the Hub Surface
The presence of dirt, rust, or other debris on the hub surface can easily lead to brake rotor runout.
The rotor must sit flush against the hub; however, even a thin layer of rust or a small piece of debris can create a gap between the two surfaces, thereby compromising the alignment.
This gap may be minuscule, yet it is sufficient to prevent the rotor from rotating true.
Over time, exposure to moisture and road conditions can cause rust to accumulate on the hub, particularly if the surface is not cleaned during brake service.
Thoroughly cleaning the hub surface ensures full contact is maintained and helps prevent runout issues from occurring.
3. Warped or Damaged Rotor
A warped or physically damaged rotor can also be a cause of runout.
This often results from excessive heat generated by heavy braking such as: repeated hard braking or driving in heavy traffic where frequent braking is required.
High temperatures can cause the rotor to distort slightly, compromising its flat and uniform surface.
In some instances, sudden cooling such as: driving through water immediately after heavy braking, as it can cause the metal to contract unevenly.
Once the rotor is no longer perfectly flat, it cannot rotate smoothly, leading to vibrations and inconsistent braking performance.
4. Hub or Bearing Issues
Faults within the hub or wheel bearings can directly impact the rotor’s alignment and lead to runout.
Worn wheel bearings introduce excessive play into the wheel assembly, meaning the rotor cannot remain stable while rotating.
Although this movement may be very slight, over time it develops into a clearly visible wobble.
Irregularities in the hub flange such as: slight distortion or manufacturing defects, as it can also prevent the rotor from seating properly.
As the rotor is directly attached to the hub, any imperfection in the hub’s surface is transferred to the rotor, resulting in runout.
5. Poor Quality or Worn Parts
The use of low-quality or worn parts is another major cause of brake rotor runout.
Inexpensive rotors may not be properly machined or balanced, thereby increasing the likelihood of alignment issues right from the start.
Old or uneven brake pads can further exacerbate this problem by exerting uneven pressure on the rotor’s surface.
Over time, this uneven pressure can worsen the runout and lead to further damage.
Choosing high-quality parts and replacing worn components in a timely manner helps maintain proper alignment and ensures smooth, reliable braking performance.
Tools
| Tool/Material | Why It Is Needed | How to Use It |
|---|---|---|
| Dial Indicator – with magnetic base | This helps you check the extent of the rotor’s wobble, a condition known as ‘runout.’ It is the most accurate method for confirming whether or not a problem exists. | Attach the magnetic base to a solid metal component located near the rotor. Gently place the tip of the gauge against the surface of the rotor. Slowly rotate the rotor by hand while monitoring the reading to observe the degree of movement. |
| Torque Wrench | This ensures that all lug nuts are tightened uniformly. This prevents issues related to uneven rotor seating and runout. | Determine the correct torque value for your vehicle. Tighten the lug nuts in a ‘star pattern’ until you hear a distinct ‘click’ from the wrench; this indicates that the correct tightness has been achieved. |
| Brake Cleaner | This cleans the surfaces of both the rotor and the hub, ensuring that the rotor sits perfectly flush without any dirt or obstructions. | Spray the product directly onto the surfaces of the rotor and hub. Allow the grime to drip away and if necessary, wipe the surfaces with a clean cloth. Always use this product in a well-ventilated area. |
| Wire Brush or Sandpaper | This removes rust and debris from the hub surface, thereby preventing potential issues related to uneven rotor mounting and runout. | Gently scrub the hub surface until it becomes smooth and clean. Pay particular attention to removing any visible rust or accumulated grime before installing the rotor. |
| Lug Wrench | This tool is essential for removing the wheel, which provides access to the rotor and other brake components. | To remove the lug nuts, turn them in a anti-clockwise direction. Once the work is complete, use this tool to loosely tighten the nuts before performing the final tightening with a torque wrench. |
| Jack and Jack Stands | This allows you to safely access the wheel and brake assembly without any risk. | Use a jack to lift the vehicle at the correct ‘lifting points.’ Before commencing work, place ‘jack stands’ under the car for support. Never rely solely on the jack. |
| Micrometer – Optional but Recommended | This helps in checking for any irregularities in the rotor’s thickness; such irregularities can develop over time due to runout issues. | Position the micrometer at various points around the rotor and measure its thickness. Compare the readings to check for any signs of uneven wear. |
How to Measure Brake Rotor Runout – Before Attempting Repairs
Before attempting to fix any issues related to brake vibration, measuring brake rotor runout is the most critical step.
This allows you to accurately determine whether the rotor is spinning true.
Many people skip this step and replace parts without identifying the root cause of the problem; consequently, the same issue often resurfaces.
Runout is measured in very minute increments, typically in thousandths of an inch, so even a slight deviation can impact braking performance.
By using the correct method and tools, you can precisely determine the extent of the rotor’s wobble, enabling you to decide whether it requires cleaning, repair, or replacement.
If performed carefully, this process is quite straightforward and the results are clear and reliable.
1. Lift and Secure the Vehicle
To begin, lift the vehicle on a level and stable surface so that you can safely access the wheels and brake components.
Use a jack to lift the vehicle, positioning it at the specific lift points recommended by the manufacturer.
Once the vehicle is raised, place jack stands underneath it to safely support its weight.
This step is crucial for safety, as working underneath an unsupported vehicle can be extremely dangerous.
Before proceeding to the next step, ensure that the vehicle is stable and does not wobble.
2. Remove the Wheel
After securing the vehicle, use a lug wrench to loosen the lug nuts and remove the wheel.
Once the wheel is removed, the brake rotor will be clearly visible.
In some cases, when taking measurements, it is beneficial to slightly retighten a few lug nuts to ensure that the rotor remains firmly attached to the hub.
This guarantees that the rotor stays in its true position, exactly as it would with the wheel installed, thereby yielding more accurate results.
3. Mount the Dial Indicator
Mount the dial indicator on a solid, stable metal surface near the rotor such as: on the suspension or steering knuckle.
Its magnetic base helps keep it steady while measurements are being taken.
Position the tip of the dial indicator so that it makes light contact with the rotor’s surface, typically about half an inch from the outer edge.
Proper placement is crucial; if positioned too close to the center or right at the very edge, the accuracy of the measurement may be compromised.
As the rotor rotates, the indicator’s tip must maintain continuous contact with it; it should neither slip nor lose contact.
4. Rotate the Rotor
While keeping an eye on the dial indicator’s reading, slowly rotate the rotor by hand.
As the rotor turns, the gauge’s needle will move back and forth, revealing any fluctuations in the rotor’s movement.
Note the highest and lowest readings observed during one full rotation.
The difference between these two values is referred to as “Total Indicated Runout” (TIR).
This figure indicates the extent of the rotor’s wobble and determines whether or not it falls within safe operating limits.
5. Compare with Manufacturer Specifications
Once you have obtained the “Total Indicated Runout” value, compare it against the limits recommended by the manufacturer for your specific vehicle.
In most cases, the acceptable runout tolerance falls between 0.002 and 0.005 inches.
If the measured value falls within this range, the rotor is considered to be properly aligned.
If it exceeds this limit, it indicates that the rotor is not rotating uniformly and requires correction.
Conducting checks based on these guidelines ensures that you are not merely guessing, but rather making decisions based on accurate and reliable measurements.
How to Fix Brake Rotor Runout – Easy and Effective Method
1. Fix Brake Rotor Runout by Cleaning the Hub and Rotor Mounting Surfaces
One of the most effective methods for correcting brake rotor runout is cleaning the hub and rotor mounting surfaces, as even a thin layer of rust, dirt, or debris can prevent the rotor from seating properly.
It is crucial for the rotor to make complete and uniform contact with the hub; any debris between these surfaces creates a minute gap, causing the rotor to wobble as it rotates.
This issue is quite common, particularly in vehicles exposed to moisture or road salt.
In many cases, runout is caused not by defective parts, but by the poor condition of the mounting surfaces; therefore, this step is as essential as it is simple.
Remove Rust and Debris
First, remove all visible rust and debris from the hub surface, as even tiny particles can compromise alignment.
Use a wire brush or fine-grit sandpaper to clean the flat mounting area until it is smooth and uniform.
Pay special attention to removing raised spots of rust, as these are the primary culprits that prevent the rotor from seating correctly.
Investing time in this step ensures a meticulous job and helps prevent recurring issues.
Use Brake Cleaner and a Wire Brush
After cleaning the surface, use a brake cleaner to remove any residual dust, grease, or loose particles.
Spray it directly onto the hub and wipe it down as needed to ensure the surface is completely clean.
The wire brush helps loosen stubborn deposits, while the cleaner ensures that no dirt is left behind.
A clean and dry mounting surface is absolutely essential for proper rotor seating and accurate alignment.
Reinstall the Rotor and Recheck the Runout
Once the surface is thoroughly cleaned, reinstall the rotor and ensure that it sits flush against the hub without any gaps.
You may use a few lug nuts to hold it securely in place.
After installation, use a dial indicator to remeasure the runout and verify whether the vibration has been reduced.
In many cases, this simple cleaning procedure brings the runout back within acceptable limits and restores optimal braking performance.
2. Fix Brake Rotor Runout By Reinstalling the Rotor Using the Correct Lug Nut Torque
Reinstalling the rotor with the correct lug nut torque is a crucial step in correcting brake rotor runout, as uneven tightening is the most common cause of rotor misalignment.
When the wheel and rotor are attached to the hub, they must sit perfectly flat and evenly.
If the force applied by the lug nuts is not uniform, it can slightly distort the rotor or pull it unevenly against the hub surface.
This creates a “wobble” in the rotor as it spins, even if the rotor itself is in good condition.
Proper torque ensures that the clamping force is distributed evenly, keeping the rotor stable and maintaining smooth, consistent braking performance.
Tighten in a Star Pattern
Using a star pattern when tightening lug nuts helps apply even pressure to the rotor and wheel.
Instead of tightening the lug nuts sequentially in a circular order, you proceed across the wheel in a crisscross pattern.
This method prevents one side from being pulled down further than the other, a situation that can cause the rotor to seat unevenly.
By tightening gradually in this pattern, the rotor is pressed flat against the hub, thereby minimizing the likelihood of runout.
This technique is simple, yet highly effective in maintaining proper alignment.
The Importance of Torque Specifications
Adhering to the precise torque specifications provided by the vehicle manufacturer is essential for proper installation.
Every vehicle is designed to operate with a specific amount of clamping force; using too little or too much torque can lead to a variety of problems.
If the lug nuts are too loose, the rotor will not seat firmly in place, which can lead to wobbling and vibration issues.
Conversely, if the torque is excessive, it can stretch the wheel studs or warp the rotor, potentially causing the very runout problems you are attempting to resolve.
By using a torque wrench, you can apply the precise amount of force required to ensure a safe and accurate installation.
Avoid Overtightening
Avoiding overtightening is just as crucial as applying the correct amount of torque.
Many people use impact wrenches without proper control, which can easily result in excessive force and uneven tightening.
Overtightening can slightly warp the rotor or damage the mounting surfaces, leading to persistent braking-related issues over time.
It can also make it difficult to remove the lug nuts in the future and accelerate wear on the studs.
The best approach is to use an impact wrench only for the initial tightening (if necessary) and then complete the process using a torque wrench to ensure precision and prevent any potential damage.
3. Fix Brake Rotor Runout By Rotor Indexing
Rotor indexing is a practical technique employed when both the rotor and the hub are in good condition, yet their alignment is slightly compromised, in order to minimize brake rotor runout.
This method operates on the simple principle that even minor manufacturing imperfections (tolerances) within the rotor or hub can, when combined, generate vibrations.
Rather than immediately replacing the components, you shift the position of the rotor on the hub to achieve better alignment.
This is particularly useful when the runout is close to the acceptable limit but is still causing vibrations during braking.
By rotating the rotor and testing it at various positions, you can often identify a specific orientation where the rotor seats more uniformly, thereby reducing runout.
Reposition the Rotor on the Hub
First, remove the rotor, rotate it to change its position on the hub and then reinstall it.
Due to manufacturing variations, most rotors and hubs possess slight high and low spots; repositioning can help to compensate for these imperfections.
When reinstalling the rotor, ensure that it is seated correctly and tightened uniformly so that it sits flush against the hub.
This process may need to be repeated a few times, as each position may yield slightly different results.
The objective is to discover the specific orientation where the rotor naturally aligns best with the surface of the hub.
Matching High and Low Spots
Matching high and low spots is a core element of the indexing process, as it helps to eliminate minor imperfections between the rotor and the hub.
If a high spot on the rotor aligns with a low spot on the hub, the total runout can be significantly reduced.
This balancing effect allows the rotor to rotate more uniformly, even if neither surface is perfectly flat.
Identifying these specific points typically requires taking careful measurements using a dial indicator after each rotation.
With patience, you can discover the optimal alignment that minimizes vibration and ensures smoother braking performance.
Re-measuring Runout
After making any adjustments to the rotor’s position, it is crucial to re-measure the runout using a dial indicator.
This step confirms whether the new position has resulted in an improved alignment.
By comparing the measurements obtained from various rotor positions, you can identify the most stable configuration.
The position that yields the lowest total runout should be the one retained.
This final measurement ensures that the indexing process has been effective and that the rotor is now rotating within acceptable limits, thereby helping to restore smooth and reliable braking performance.
4. Fix Brake Rotor Runout By Using Correction Shims
Brake rotor correction shims are utilized when rotor runout (imbalance) persists even after cleaning the hub, applying the correct torque during tightening and indexing the rotor.
This typically occurs when the misalignment is very slight, yet significant enough to induce a vibrating or pulsating sensation in the brake pedal.
Shims are thin, precisely engineered layers of metal or composite material that, depending on the specific design, are inserted either between the rotor and the hub or between the wheel and the rotor assembly.
Their purpose is to slightly adjust the seating angle of the rotor, thereby allowing it to rotate more uniformly.
This method is often employed as a fine-tuning measure when the primary components are in good condition but require only minor adjustments to their alignment.
When Minor Runout Persists
Correction shims prove most effective when the measured runout exceeds the acceptable tolerance limit by only a very small margin, typically in cases where the discrepancy amounts to just a few thousandths of an inch.
In such instances, replacing the rotor or hub may not be strictly necessary, yet vibration may still be felt during braking.
Rather than unnecessarily replacing components, shims help rectify this minor imbalance by compensating for the uneven contact between the rotor and hub surfaces.
This makes them a practical solution for resolving brake alignment issues when all other basic corrective measures have already been attempted and the problem still persists.
How Shims Adjust Alignment
Shims function by altering the manner in which pressure is distributed between the rotor and the hub.
Even a very thin shim can slightly alter the seating angle of the rotor, helping to neutralize minor high or low spots present on the mounting surface.
This adjustment facilitates a more uniform rotation of the rotor, thereby reducing wobble and enhancing the overall braking feel.
When installed correctly, shims help to balance the rotor, allowing the brake pads to maintain more consistent contact across the entire surface.
The result is smoother braking engagement, reduced vibration and improved overall stability without the need to replace major components.
5. Fix Brake Rotor Runout By Resurfacing the Rotor – Machining
Resurfacing, or machining, a brake rotor is a mechanical repair process employed when the rotor is otherwise in good condition, but exhibits uneven wear or slight runout on its surface that cannot be corrected through cleaning, torque adjustment, or indexing.
This method involves removing a very thin layer of metal from the rotor’s surface to restore a smooth, flat and uniform braking surface.
This procedure is appropriate only if the rotor’s thickness exceeds the minimum safety limit specified by the manufacturer.
If the rotor is excessively thin, machining becomes unsafe and replacement becomes necessary.
Resurfacing helps re-establish proper contact between the brake pads and the rotor, thereby reducing vibration, improving the overall braking experience and eliminating uneven braking caused by surface imperfections.
When a Rotor Is Repairable
A rotor is considered repairable, and therefore suitable for machining, when it is free of cracks, does not suffer from excessive warping and retains sufficient thickness to allow for the safe removal of a thin layer of metal.
In many cases, minor irregularities develop on the rotor’s surface over time due to thermal cycling, uneven pad contact, or slight runout.
If these issues are not severe, machining can restore the rotor to its original, flat condition.
However, if the rotor exhibits deep grooves or heat spots, or has already undergone machining multiple times in the past, further machining may not be safe.
To ensure both safety and long-term performance, it is crucial to verify the rotor’s thickness using a micrometer before making any decisions.
On-Vehicle Machining vs Off-Vehicle Machining
On-vehicle machining is performed while the rotor remains attached to the vehicle.
This method allows the machine to true the rotor based on the actual condition of the hub and bearing assembly, thereby enhancing accuracy in cases where runout is caused by hub alignment issues.
Off-vehicle machining involves removing the rotor from the vehicle and mounting it onto a dedicated brake lathe machine within the workshop.
This approach is more common and facilitates precise surface restoration within a controlled environment.
Although off-vehicle machining is widely utilized, it does not always resolve runout issues stemming from hub or bearing irregularities, as the rotor is not machined while situated in its installed position.
Both methods aim to create a flat, even surface; however, their effectiveness depends on the root cause of the underlying problem.
Benefits and Limitations
Rotor resurfacing offers several benefits, including restoring a smooth braking surface, reducing vibrations and, provided sufficient rotor thickness remains, extending its service life.
In appropriate instances, it is also generally more cost-effective than replacing the entire rotor assembly.
However, this process does have certain limitations, as it necessitates the removal of a portion of the rotor’s material, thereby reducing its overall lifespan.
If performed too frequently, the rotor may become excessively thin and unsafe for continued use.
Furthermore, this procedure cannot resolve underlying mechanical issues, such as a defective hub, worn bearings, or improper installation.
This means that the root cause of the runout still needs to be rectified.
When performed correctly, resurfacing is an effective and precise repair method; however, it must always be carried out within the safety limits established by the manufacturer.
6. Fix Brake Rotor Runout By Replacing the Rotor Itself
Replacing the brake rotor is the most reliable and definitive solution when rotor runout (a slight lateral deviation during rotation) cannot be corrected through cleaning, proper tightening, indexing, or resurfacing.
This method becomes essential when the rotor is no longer safe for use, or when it develops structural defects that compromise its ability to rotate uniformly.
It is critical for a brake rotor to remain perfectly true and balanced so that it can maintain smooth and consistent contact with the brake pads.
If this condition deteriorates, braking performance is directly affected.
Replacing the rotor restores the system to its original precision, ensuring that braking force is applied uniformly across the entire surface of the rotor.
When Runout Exceeds the Specified Limit
Rotor replacement becomes necessary when the measured runout exceeds the acceptable limit established by the manufacturer, a limit typically ranging between 0.002 and 0.005 inches.
In this scenario, the rotor can no longer rotate stably; its wobble becomes so pronounced that it generates clearly perceptible vibrations and leads to uneven braking.
In many cases, excessive runout is accompanied by other issues, such as variations in rotor thickness, hot spots, or permanent warping that cannot be corrected through machining.
Continuing to use the rotor in this condition can lead to premature brake pad wear, reduced braking efficiency and increased stopping distances.
Replacing the rotor ensures that the braking surface is fully restored and safe for operation.
Choosing a High-Quality Replacement
Selecting a high-quality replacement rotor is crucial, as the performance and durability of the braking system depend on it.
High-quality rotors are manufactured using precision machining and balanced materials, enabling them to maintain their flat surface even under extreme heat and pressure.
Low-quality rotors may harbor minor defects from the outset, which can quickly lead to issues such as runout or vibration.
It is also essential to match the correct specifications for your vehicle, including the rotor size, thickness and material type.
Proper installation of the rotor is just as important as the component itself; if the hub is not clean or the lug nuts are not tightened uniformly, even a high-quality rotor can develop runout issues.
When the correct rotor is selected and installed properly, it ensures smooth and consistent braking, facilitates superior heat management and delivers long-lasting reliability.
How to Prevent Brake Rotor Runout in the Future
The primary method for preventing brake rotor runout is to ensure that you meticulously follow every small detail whenever you perform work on the brakes.
Braking systems rely on precise alignment; therefore, even a minor error made during installation or maintenance can subsequently lead to vibrations.
Most runout issues stem not from major mechanical failures, but rather from improper mounting, surface contamination, or heat-related damage.
By adhering to the correct procedures during every brake-related task, you can maintain proper rotor rotation, achieve smoother braking and extend the lifespan of both the rotors and the pads.
1. Always Clean the Hub Before Installation
Cleaning the hub before installing the rotor is one of the most critical steps, as the rotor must sit perfectly flush against the hub’s mounting surface.
Even a thin layer of rust, dust, or debris can create a minuscule gap, which may cause the rotor to wobble during rotation.
Although this gap may be extremely small, it is sufficient to generate noticeable vibrations during braking.
Using a wire brush or sandpaper to remove rust, followed by cleaning with a brake cleaner, ensures that the surface is smooth and fully prepared for the rotor to seat correctly.
2. Use a Torque Wrench – Not Just an Impact Tool
Rather than relying solely on impact tools, using a torque wrench ensures that all lug nuts are tightened uniformly and to the exact specified torque specifications.
Unevenly tightening the nuts is one of the most common causes of rotor runout, as it causes the rotor to shift slightly out of alignment.
A torque wrench applies precisely the amount of force required, ensuring that the rotor sits perfectly flush against the hub.
Impact tools can be used for rapid tightening; however, to avoid uneven pressure, the final tightening of the nuts should always be performed using a torque wrench.
3. Prevent Brake Overheating
Preventing excessive heat buildup in the brakes helps protect the rotor from premature wear or deformation over time.
Aggressive or repetitive braking causes the rotor to overheat significantly; this uneven heating can lead to slight warping or surface irregularities.
Furthermore, if the rotor cools down too rapidly such as: after driving through water, it can induce internal stress within the metal.
Good driving habits, controlled braking and allowing the brakes time to cool down during periods of heavy use all contribute to maintaining the rotor’s structural integrity and preventing future runout issues.
4. Use High-Quality Brake Parts
Using high-quality brake parts makes a significant difference in preventing runout, as superior materials and manufacturing processes ensure that the components are more precise and stable.
High-quality rotors are precision-machined to exact specifications and are better equipped to withstand heat and pressure without losing their shape.
Lower-quality parts may harbor minor imperfections from the outset, which can lead to premature issues such as vibration or uneven wear.
Choosing reliable components enhances overall braking performance and minimizes the likelihood of future complications.
5. Check for Runout During Brake Repair
Checking for runout during brake service allows for the timely detection of minor alignment-related issues.
Even when installing new parts, slight irregularities may persist due to manufacturing tolerances or installation methods.
Measuring runout with a dial indicator ensures that the rotor is rotating uniformly and falls within safe limits.
This step adds precision to the repair process and verifies that the braking system is functioning as intended before the vehicle is put back into operation.
Read More:
- How to Check Brake Disc Runout
- How to Prevent Brake Fluid Boiling
- How to Diagnose Brake Fluid Boiling
- How to Fix Brake Pedal Sinking Slowly
- How to Check Brake Pad Wear Sensor
- How to Measure Brake Pad Thickness Without Removing Wheel
- How to Replace Brake Pads
- How to Replace Brake Rotors
- How to Bleed Car Brakes
Know, Common Mistakes to Avoid
Brake rotor runout issues often recur, not because the repair method itself was flawed, but because necessary steps were omitted or not executed correctly.
As braking systems rely on highly precise alignment, even minor errors during installation or inspection can lead to vibrations, uneven wear and diminished braking performance.
Many drivers, and even inexperienced technicians, focus solely on replacing parts while overlooking the root causes that actually initiate the runout problem.
Understanding these common mistakes helps ensure that once an issue is resolved, it does not recur.
Even, there’s scientific testing that shows that the brake rotor runout is often amplified by the wheel assembly errors rather than the rotor damage itself, so this shows that why many vehicles actually experiences vibration even after rotor replacement, that’s why it is really important to install it in correct way and align the hub as well.[¹]
1. Skipping Runout Measurements
Skipping runout measurements is one of the most common errors, as it leads to mere guesswork rather than confirming the actual problem.
Without taking measurements, it is impossible to determine whether the rotor is truly out of alignment or if the issue stems from another source, such as the hub or bearing.
Many people replace the rotors without conducting any diagnostics, only to discover later that the vibration persists.
Measuring runout using a dial indicator provides precise data and helps avoid unnecessary repairs.
2. Neglecting Hub Condition
Neglecting the condition of the hub is another major mistake, as the rotor relies entirely on the hub’s surface for proper alignment.
If the hub features rust, dirt, or uneven spots, the rotor will not seat correctly, even if it is brand new.
This minute gap can induce wobbling and trigger runout issues almost immediately after installation.
Cleaning and inspecting the hub before installing the rotor is crucial to ensure a smooth and stable mounting surface.
3. Uneven Tightening of Lug Nuts
Unevenly tightening lug nuts can easily lead to runout issues, even if all other components are in good condition.
If lug nuts are tightened in an irregular sequence or with varying amounts of force, the rotor may shift slightly off-center.
This creates a wobble, which is felt as vibration during braking.
Using a proper star pattern and a torque wrench ensures that pressure is distributed evenly, thereby keeping the rotor in correct alignment.
4. Reusing Defective Rotors
Reusing defective rotors is a common mistake that often leads to recurring brake problems.
If a rotor is already warped, excessively thin, or has deep grooves on its surface, it cannot provide a stable surface for braking.
Even if it appears to be in decent condition, the underlying issue typically resurfaces quickly and can even damage new brake pads.
Replacing excessively worn or defective rotors provides a safe and stable braking surface, thereby preventing future complications.
5. Failing to Inspect Wheel Bearings
Failing to inspect wheel bearings carries the risk of overlooking a hidden cause of “runout.”
Worn or loose bearings create excessive play within the wheel assembly, which affects the way the rotor rotates.
This movement, no matter how slight, is sufficient to generate vibrations and uneven braking.
If the bearings are not inspected, and replaced when necessary, any repairs performed on the rotor will not last long.
To maintain the rotor’s alignment and ensure the smooth operation of the braking system, it is absolutely essential that the bearings are in good condition.
When to Consult to a Professional Mechanic
Brake rotor runout can often be minimized or corrected through careful cleaning, proper tightening and precise measurements; however, there are situations where the problem persists even after taking all the correct steps.
In such cases, consulting a professional mechanic becomes essential, as the root cause of the issue may lie in a deeper mechanical fault that is difficult to identify without specialized modern tools.
Modern braking systems require extremely precise alignment; when issues such as vibration or uneven braking persist, it is usually an indication of a more complex underlying problem, one that runs far deeper than mere surface-level issues or installation errors.
1. Persistent Vibration Even After Repairs
If vibration in the steering wheel or brake pedal persists, even after cleaning the hubs, properly tightening the lug nuts and checking for rotor runout, it is a clear indication that the underlying issue has not been fully resolved.
This can occur if there is a hidden defect within the rotor, a misalignment of the hub, or uneven wear that is not easily visible.
A professional mechanic possesses specialized measuring tools capable of detecting minute imperfections that are difficult to identify with standard tools.
They can also conduct a comprehensive inspection of the entire braking system under controlled conditions to pinpoint the true cause of the problem.
2. Suspected Hub or Bearing Faults
When a fault in the hub or wheel bearing is suspected, a professional inspection becomes crucial, as these components directly influence how the rotor rotates.
Even slight wear in the bearings can introduce instability into the wheel assembly, leading to persistent issues related to runout and vibration.
Similarly, if the hub surface is damaged or uneven, the rotor cannot seat properly in its position.
These issues are often not readily apparent during routine inspections; if overlooked, they can lead to recurring brake-related problems.
A mechanic can verify that everything falls within safe tolerances by checking for bearing play (looseness), hub flatness and the alignment of the entire assembly.
3. Lack of Proper Tools
The lack of proper tools is another compelling reason to consult a professional mechanic.
Accurately detecting brake rotor runout requires specialized equipment such as: dial indicators, torque tools and, in some cases, on-car machining systems.
Without these tools, it is easy to overlook minor yet critical measurement errors, which can adversely affect braking performance.
A professional workshop possesses the necessary tools and expertise to accurately measure, diagnose and rectify runout issues.
This ensures that repairs are based on precise data rather than mere guesswork, resulting in safer and more reliable braking performance.
Conclusion – How to Fix Brake Rotor Runout
Now, you have clearly understood that most of the time brake problems are not sudden failures, but it is actually the result of small alignment issues building up over the period of time.
Although the measurements involved are minute, often measured in thousandths of an inch, their effect on braking performance can be substantial.
This condition can lead to problems such as steering wheel vibration, a pulsating sensation in the brake pedal, uneven brake pad wear and a diminished sense of confidence in the vehicle’s stopping capability.
A crucial point to understand is that rotor runout is rarely caused by a single isolated factor; it typically results from a combination of minor issues such as: improper wheel installation, rust or debris accumulation on the hub, uneven torque application, or component wear.
Fortunately, in many cases, runout issues can be resolved without the need to replace components.
Techniques such as thoroughly cleaning the hub surface, proper use of a torque wrench, rotor indexing, or resurfacing the rotor face can often restore the braking system to within safe operating limits.
However, success in this regard hinges on identifying the true root cause of the problem rather than merely treating its symptoms.
This is why, before selecting any repair strategy, it is absolutely essential to take precise measurements using the appropriate tools.
Furthermore, prevention is far more important than repair.
A few simple habits such as: cleaning the hub whenever brake work is performed, tightening lug nuts evenly, avoiding brake overheating and using high-quality components, as it can significantly reduce the likelihood of rotor runout occurring in the first place.
Also, you can comment down below for more information about How to Fix Brake Rotor Runout.
Frequently Asked Questions
FAQ 1: In simple terms, what is brake rotor runout?
Answer: Brake rotor runout means that as the wheel spins, the brake disc is not rotating in a perfectly straight line. Instead of remaining flat and uniform, it wobbles slightly from side to side. This wobble is very slight, typically measured in thousandths of an inch, yet it still impacts braking performance. When the rotor is not “true” (perfectly aligned), the brake pads cannot grip it evenly, leading to vibrations in the steering wheel and brake pedal.
FAQ 2: What are the main symptoms of brake rotor runout?
Answer: The most common symptoms include the steering wheel shaking while braking, a pulsating brake pedal and sometimes a slight vibration felt throughout the entire car body. You may also notice uneven wear on the brake pads or a reduction in braking efficiency. In some cases, you might even hear a faint noise while braking, as the pads are not making constant contact with the rotor.
FAQ 3: Are brake rotor runout and a “warped rotor” the same thing?
Answer: No, they are not exactly the same. A “warped rotor” typically refers to a rotor whose physical shape has been distorted due to heat, whereas runout means that the rotor is not sitting or spinning correctly on the hub. In many real-world situations, what appears to be a warped rotor is actually caused by runout; this can result from improper installation, dirt on the hub surface, or unevenly tightened lug nuts.
FAQ 4: What causes brake rotor runout?
Answer: Brake rotor runout is typically caused by minor issues related to installation or surface irregularities. Common causes include rust or debris between the rotor and the hub, unevenly tightened wheel nuts, improper use of impact tools, worn wheel bearings, or minor damage to the hub surface. Sometimes, even brand-new rotors can experience runout issues if they are not installed correctly.
FAQ 5: Can I drive with brake rotor runout?
Answer: You can drive with mild runout, but it is not recommended, as it can reduce braking efficiency and accelerate wear on both the brake pads and the rotors. Over time, the vibrations may worsen and potentially compromise safety. If the runout is excessive, it can lead to longer stopping distances and unstable braking, particularly at high speeds.
FAQ 6: How is brake rotor runout measured?
Answer: A “dial indicator” tool is used to measure brake rotor runout. This tool is positioned close to the rotor’s surface and the rotor is slowly rotated by hand. The dial displays the extent of the rotor’s lateral deviation (wobble) over the course of a full rotation. This measurement helps determine whether the rotor falls within the safe limits established by the manufacturer; this limit typically ranges between 0.002 and 0.005 inches.
FAQ 7: Can brake rotor runout be fixed without replacing the rotor?
Answer: Yes, in many cases, it can be fixed without replacing the rotor. Simple remedies such as: cleaning the hub surface, correcting lug nut torque, or properly seating the rotor, as it can help reduce or eliminate runout. In some cases, resurfacing the rotor’s surface can prove beneficial. However, if the rotor is severely worn or has become excessively thin, replacing it remains the only safe option.
FAQ 8: Why does my steering wheel shake when braking?
Answer: Vibration in the steering wheel during braking is often caused by uneven contact between the brake pads and the rotor. When a rotor exhibits “runout,” it pushes the pads in and out as it rotates; this vibration travels through the suspension system and reaches the steering wheel. This is one of the most common symptoms of a improperly installed brake rotor.
References:
[1] The influence of wheel assembly non uniformity on disc brake lateral runout
https://eurekamag.com/research/103/158/103158733.php

Hello Folks, Dean Shali here to help you out to solve the problems with your lovely vehicle, as i have lots of experience and knowledge about automotive industry as i woks directly with the customers and repair vehicles and i love to help the people to keep their cars safe and running smoothly.