Written By: Dean Shali
Fact Checked By: Sabré Cook
Reviewed By: Tamara Warren
Most of the time the so called “Battery Problems” are actually “CHARGING SYSTEM PROBLEMS”.
As, every car literally depends on a charging system and at the center of it there’s the Alternator: which is a component that continuously converts mechanical energy from the engine into the electrical power to run lights, sensors, ignition systems and recharge the battery while driving.
As well as, in most of the passenger vehicles, there’s should be healthy alternator in terms to maintain a steady output between about 13.5 and 14.7 volts, even when multiple electrical loads are active, because if there’s anything that is lower than this then it can slowly discharge the battery instead of charging it.
But, whenever an alternator begins undercharging, then there’s definitely a signs; yes they are subtle at first but they are available to notice such as: you can sense slightly dim headlights at idle, slower window movement or battery warning light lights up and goes away.
And, it can be because of worn out alternator components, slipping belts or poor grounding connections that actually reduces charging efficiency over the time.
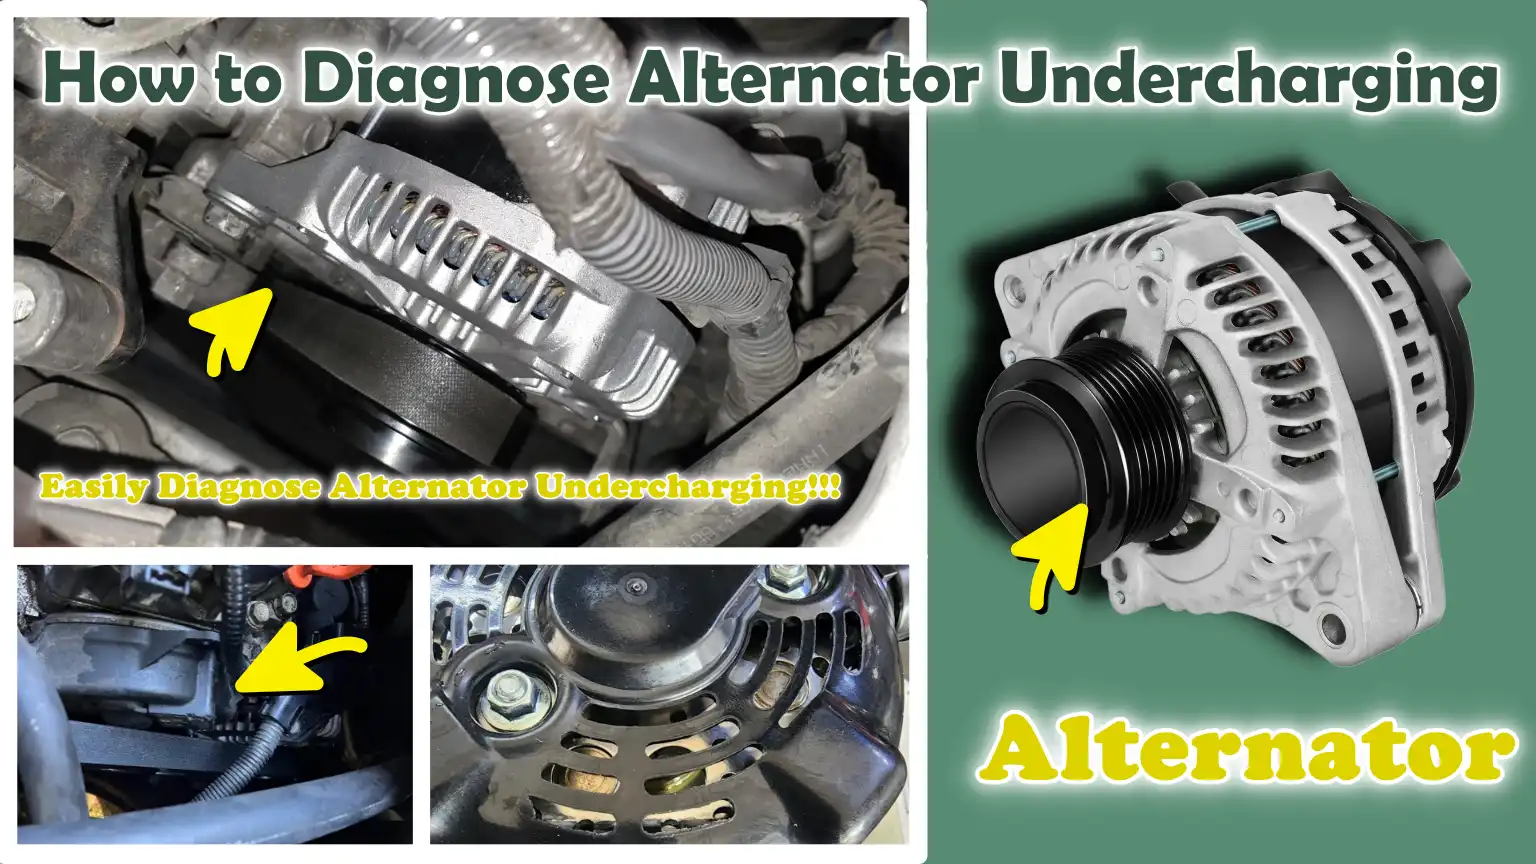
Now, in this guide we have explained How to Diagnose Alternator Undercharging so that you can confidently identify whether the problem lies in the alternator, wiring, belt system or battery itself is the actual culprit here.
So, Let’s Understand the Standard Alternator Charging System
1. The Fundamental Role of the Alternator in Modern Vehicles
The alternator is one of the most critical components of a vehicle’s electrical system, as it generates electricity while the engine is running.
It is driven by a belt connected to the engine crankshaft, which spins a rotor located inside the alternator; this rotation generates Alternating Current (AC), which is subsequently converted into Direct Current (DC) for use by the vehicle.
This electricity powers essential systems such as ignition, fuel injection, headlights, air conditioning, infotainment systems, sensors and the onboard computer.
Furthermore, the alternator keeps the battery charged, ensuring that the battery can provide power when the engine is off or during moments of sudden, high electrical demand.
Without a properly functioning alternator, a standalone battery cannot sustain the electrical requirements of a modern vehicle for very long; this is why even a slight decline in the alternator’s operational efficiency can quickly lead to starting difficulties and system failures.
2. Standard Charging Voltage Range – Typically Around 13.5V to 14.7V
A properly functioning alternator maintains a regulated voltage output that is slightly higher than the battery’s resting voltage, as this differential is what enables the battery to recharge.
In most standard passenger vehicles, the normal charging range while the engine is running typically falls between 13.5 volts and 14.7 volts.
If the voltage consistently drops below this range, the battery will not charge properly and will continue to slowly discharge even while the vehicle is being driven.
Conversely, if the voltage rises too high, it can overcharge the battery and potentially damage sensitive electronic components.
This range is carefully regulated to match the vehicle’s electrical requirements across various operating conditions such as: idling (when the engine is running but the vehicle is stationary), acceleration (increasing vehicle speed) and the electrical load imposed by accessories like headlights and air conditioning.
Over time, even a slight deviation from this range can serve as an early warning sign of potential issues within the alternator or its regulation system.
3. The Interplay Between the Alternator, Battery, Voltage Regulator and ECU
The alternator does not operate in isolation; it functions as part of a synchronized system that includes the battery, the voltage regulator and, in many modern vehicles, the Engine Control Unit (ECU).
The battery acts as a stabilizer, storing energy and providing supplemental power during periods of high demand or when the engine is not running.
The voltage regulator controls the alternator’s power output by adjusting the field current within the alternator, thereby ensuring that the voltage remains within a safe operating range.
In older vehicles, this regulator is often integrated directly into the alternator itself, whereas in newer systems, it is electronically controlled by the ECU.
The ECU continuously monitors the battery’s condition, engine load and overall electrical demand, subsequently adjusting the alternator’s output to optimize both performance and fuel efficiency.
This interplay ensures a consistent power supply; however, if even a single component malfunctions or fails such as: a faulty regulator or a loose battery connection, the entire charging equilibrium is disrupted.
This can lead to a condition known as “undercharging,” which is often mistakenly attributed to a general battery issue.
Common Symptoms of an Undercharging Alternator
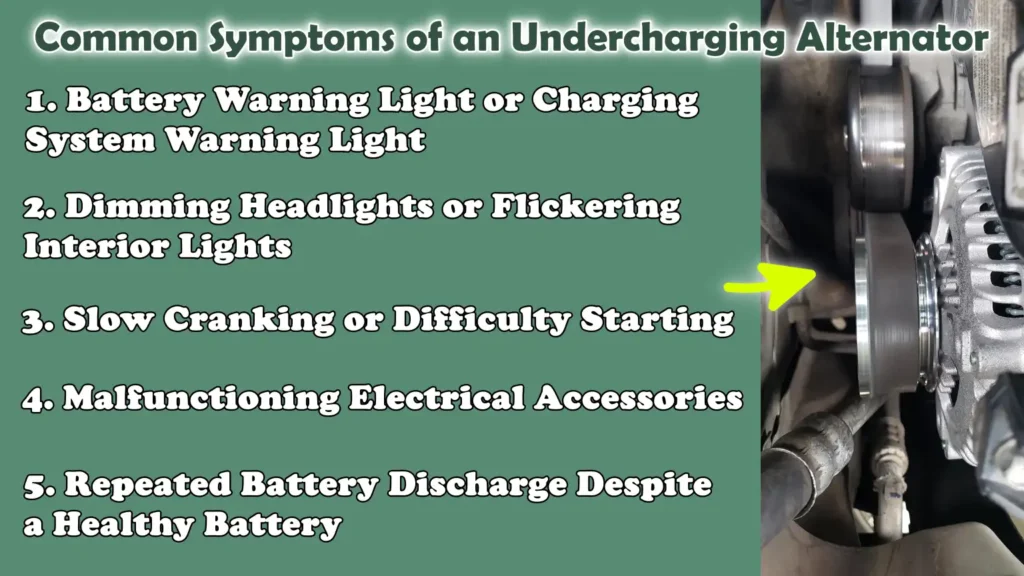
1. Battery Warning Light or Charging System Warning Light
One of the earliest and most critical indicators of an undercharging alternator is the illumination of the battery or charging system warning light on the dashboard.
This light does not merely signal a battery issue; it often points to a voltage imbalance within the charging system itself.
When the alternator fails to generate sufficient voltage, the ECU or voltage regulator detects this deficiency and triggers the warning light.
In some instances, this light may only illuminate when the vehicle is idling (at a standstill) or may flicker while driving; this often indicates that the alternator’s output is unstable, rather than signifying that the unit has failed completely.
2. Dimming Headlights or Flickering Interior Lights
Another common symptom is the dimming of headlights or fluctuations in the brightness of interior lights while the vehicle is in operation.
This occurs because the alternator is unable to provide a consistent voltage supply, making it difficult for the electrical system to maintain stable power.
At lower RPMs, the lights may appear dim, while they may brighten slightly as the engine speed increases.
This fluctuation is a definitive sign that the charging system is unable to maintain a stable output under normal operating conditions.
3. Slow Cranking or Difficulty Starting
When an alternator consistently undercharges the battery over an extended period, the battery gradually loses its full charge capacity.
Consequently, when an attempt is made to start the engine, the starter motor does not receive adequate power, resulting in slow cranking or a delayed start.
The engine may still start, but it often sounds weak or struggles to turn over.
This symptom becomes particularly evident when the vehicle has been parked for several hours, or overnight, and the battery did not receive an adequate charge during the previous drive.
4. Malfunctioning Electrical Accessories
Modern vehicles rely heavily on their electrical systems and insufficient charging can directly impact their performance.
Components such as power windows, infotainment systems, air conditioning fans and dashboard electronics may begin to operate sluggishly or erratically.
In some instances, voltage drops can cause these systems to temporarily shut down or cycle on and off repeatedly.
This occurs because the alternator is unable to meet the vehicle’s total electrical demand, particularly when multiple accessories are running simultaneously.
5. Repeated Battery Discharge Despite a Healthy Battery
A primary indicator of an alternator’s failure to charge properly is the repeated discharge of the battery, even if the battery itself is in good condition.
If the alternator fails to adequately recharge the battery while the vehicle is running, the battery’s charge level will gradually deplete over the course of several drives.
This creates a scenario where the vehicle starts normally after the battery has been recharged or jump-started, but subsequently stalls or shuts down after a period of use.
When this pattern recurs, it typically signifies that the root cause of the problem lies not with the battery, but rather with the charging system itself.
Know, The Potential Causes of Low Alternator Output
1. Worn or Slipping Serpentine Belt
A worn or loose serpentine belt is one of the most common mechanical causes of low alternator output.
This belt is responsible for rotating the alternator; if its grip is compromised due to cracks, glazing, or insufficient tension, the alternator cannot spin at the correct speed.
This results in a reduction in power generation, particularly when the engine is idling or running at low RPMs.
Even if the alternator unit itself is in good condition, a slipping belt can exhibit symptoms identical to those of a faulty unit, as it physically limits the amount of electricity being generated.
2. Faulty Alternator Diodes or Stator Windings
Inside the alternator, diodes convert AC electricity into DC electricity, while the stator windings generate the electrical current.
If the diodes fail, the output becomes unstable and weak, often resulting in a drop in charging voltage.
Similarly, if the stator windings are partially burnt or have developed a short circuit, the alternator will be unable to generate sufficient electrical current.
These internal faults typically develop over time due to heat and wear and often lead to erratic charging, a condition that worsens significantly when electrical demand increases.
3. Faulty Voltage Regulator
The voltage regulator controls the amount of electricity generated by the alternator by adjusting the field current.
If this component fails or ceases to function correctly, the alternator may generate excessively low voltage, resulting in insufficient charging.
In modern vehicles, this regulator may be integrated directly into the alternator unit itself or controlled by the ECU; This implies that, at times, a malfunction may manifest as an electronic issue rather than a mechanical one.
A faulty regulator often results in unstable or fluctuating voltage readings.
4. Corroded or Loose Battery Terminals
Battery terminals play a direct role in facilitating the exchange of electrical power between the alternator, the battery and the vehicle’s electrical system.
If these terminals are loose or corroded, electrical resistance increases, thereby reducing the effective charging voltage reaching the battery.
Consequently, even a perfectly functional alternator may appear to be underperforming, as electrical energy is being wasted right at the connection points.
Even a minor amount of corrosion can hinder proper charging efficiency and lead to recurring low-voltage issues.
5. Poor Engine Ground Connection
The electrical system of any vehicle relies on a robust ground connection to complete its circuits.
If the engine ground strap or grounding points are loose, corroded, or damaged, the alternator cannot properly complete the electrical loop.
The result is a drop in voltage and unstable charging performance.
Ground-related issues are often overlooked, yet they can exhibit symptoms identical to those of a failing alternator, making it even more difficult to pinpoint the root cause without proper diagnostic testing.
6. Issues with the ECU or Wiring Harness
In modern vehicles, the ECU plays a pivotal role in regulating the alternator’s output based on the engine load and the battery’s condition.
If there is a fault in the ECU’s signals or if the wiring harness has sustained damage, the alternator fails to receive the correct instructions regarding its charging operations.
Broken wires, faulty connectors, or communication glitches, all of these factors can compromise the charging output.
These electrical issues are not very common; nevertheless, they can cause persistent low-charging problems in the vehicle, even if the mechanical parts are functioning properly.
Tools
| Tools | Why It Is Needed | How to Use It |
|---|---|---|
| Digital Multimeter | This is the most essential tool for checking alternator output and battery voltage. It helps determine whether the alternator is undercharging or functioning correctly. | Set the device to DC voltage mode; connect the red probe to the positive terminal of the battery and the black probe to the negative terminal. Check the reading with the engine off, then check it again with the engine running and compare these values against the normal operating range. |
| Battery Load Tester – Optional But Helpful | This indicates how well the battery performs under load and helps distinguish between battery-related issues and alternator-related issues. | Connect the device to the battery terminals, apply a load for a few seconds and observe the resulting voltage drop; a healthy battery should maintain a stable voltage even under load. |
| OBD2 Scanner – For Modern Vehicles | This tool helps detect charging system malfunctions, voltage fluctuations and ECU-related issues that are not visible to the naked eye. | Plug the device into the OBD2 port located under the dashboard, turn on the ignition and scan for diagnostic codes related to the charging system or low-voltage conditions. |
| Basic Hand Tools for Inspection | These tools are used to check belt tension, tighten loose connections and visually inspect the physical components of the alternator system. | Use these tools to visually inspect and tighten the battery terminals, check the condition of the serpentine belt and ensure that all connections are securely fastened. |
How to Diagnose Alternator Undercharging – Perfect Method
1. Battery Baseline Test
The first step in diagnosing an alternator undercharging issue is to inspect the battery in a resting state, as a weak or partially discharged battery can yield misleading results.
With the engine turned off and the vehicle allowed to rest for at least a few hours, measure the battery’s voltage using a multimeter.
A healthy, fully charged battery typically registers a voltage of approximately 12.6 volts or slightly higher.
If the reading is significantly lower, the battery may already be weak or undercharged; in such cases, it should be charged or tested before proceeding further.
This step is crucial as it establishes an accurate baseline, enabling you to clearly determine whether the issue stems from the battery or the alternator.
2. Charging Voltage Test
Once the battery baseline has been established, the next step is to test the alternator’s charging output.
Start the engine and while it is running, measure the voltage directly across the battery terminals.
A normal charging system typically operates within a voltage range of approximately 13.5 to 14.7 volts.
It is essential to check the voltage at both idle speed and higher engine speeds (approximately 2000 RPM), as a weak alternator may perform slightly better at higher RPMs but fail to maintain adequate charging at idle.
If the voltage remains below the normal range in both scenarios, it is a definitive indication of an undercharging problem.
3. Load Test
After confirming the basic charging voltage, the system should be tested under real-world electrical load conditions.
Switch on all major electrical accessories such as: the headlights, air conditioning and rear defogger, simultaneously.
Then, observe how the voltage reading on the multimeter changes.
In a healthy system, voltage should remain relatively stable even under load, experiencing only a slight drop.
If the voltage falls significantly below the normal range, it indicates that the alternator is unable to supply sufficient current to meet the vehicle’s electrical demands, a clear sign of undercharging.
4. Belt and Pulley Inspection
The mechanical condition of the drive belt and pulleys constitutes another critical part of the inspection process.
Check the serpentine belt for cracks, glazing, wear, or signs of slippage, as any of these conditions can compromise the alternator’s speed and output.
Furthermore, verify the belt tension, as a loose belt cannot effectively transmit engine power to the alternator.
Additionally, inspect the pulleys for any irregularities or signs of wear; even minor imperfections can degrade operational efficiency over time and destabilize charging performance.
5. Wiring and Ground Inspection
Electrical connections must be inspected with great care, as even minor interruptions can diminish charging capacity.
Begin by checking the battery terminals for corrosion, looseness, or dirt accumulation, as poor contact can impede the proper flow of voltage.
Next, inspect the alternator’s wiring connections to ensure they are securely fastened and free of defects.
Finally, examine the engine ground strap, as a weak or broken ground connection can prevent the system from properly completing its electrical circuit.
These issues often present symptoms identical to those of an alternator failure, even if the alternator itself is functioning correctly.
6. Alternator Output Test – Advanced
For a more in-depth assessment, advanced testing procedures can be performed to diagnose the internal condition of the alternator.
An AC ripple test, performed using a multimeter, helps detect internal issues within the diode rectifier, as a properly functioning alternator should produce a very low AC voltage output.
If the ripple is excessive, it typically indicates a faulty diode.
Symptoms of diode-related problems include unstable charging and electrical noise within the system.
Furthermore, it is crucial to verify the functionality of the voltage regulator, as it controls the amount of power generated by the alternator.
If the regulator is defective, the alternator may undercharge or generate unstable voltage, even if all other components are in good condition.
How to Distinguishing Between Alternator and Battery Problems
1. How to Determine if the Primary Issue Lies with the Battery
The symptoms of a weak battery and a failing alternator often appear similar, but they behave differently when properly tested.
If the root of the problem is the battery, you will frequently experience difficulty starting the vehicle, even after a full charge or a jump-start, and the voltage may drop rapidly as soon as the engine is turned off.
A properly functioning alternator will charge even a weak battery, but a defective battery will be unable to retain that charge for very long.
When the engine is running and the alternator is functioning correctly, the voltage should remain stable; therefore, if the charging voltage appears normal yet the vehicle still struggles to start, it is highly probable that the problem lies with the battery itself.
2. Symptoms Specifically Indicating Low Alternator Output
Problems associated with low alternator output typically manifest while the engine is running, rather than when it is off.
Common symptoms include dim or flickering lights that fluctuate with engine speed, the illumination of the battery warning light while driving and the improper functioning of power-operated accessories.
Another definitive sign is the battery repeatedly discharging even after being replaced, as the new battery is also failing to receive an adequate charge.
Unlike battery-related issues, these symptoms often worsen when electrical demand increases such as: when operating headlights, air conditioning, or the defroster, because the alternator is unable to meet that increased power requirement.
3. The Importance of Testing Both Components Separately
It is crucial to test the battery and the alternator as separate components; replacing the wrong part not only results in a waste of money but also fails to resolve the actual underlying problem.
The battery should first be tested in both its ‘resting state’ (when not in use) and under ‘load’ (when in operation) to determine its overall health; conversely, the alternator should be tested while the engine is running to assess its charging output.
Many drivers assume the fault lies with the battery, whereas the actual problem stems from low alternator output; conversely, some replace the alternator when, in reality, the battery itself is unable to hold a charge.
Proper diagnostic testing ensures that each component is evaluated under its actual operating conditions, thereby facilitating accurate repairs and preventing recurring electrical issues.
Know, Common Diagnostic Mistakes to Avoid Them
1. Replacing the Battery Without Checking the Alternator
One of the most common mistakes is immediately replacing the battery without first checking the alternator.
In many vehicles, a fault in either of these components presents identical symptoms such as: slow engine cranking or dim lights, making it easy to assume that the battery has simply gone weak.
However, if the alternator is not properly charging the battery, even a brand-new battery will fail prematurely because it is not receiving adequate charge while the vehicle is being driven.
This leads to recurring breakdowns and unnecessary expenses, while the true root cause of the problem remains unresolved.
2. Overlooking Wiring and Grounding Issues
Another common error is overlooking wiring and ground connections, which are critical for the proper functioning of the charging system.
Corrosion on battery terminals, loose connections, or a compromised engine ground strap can impede voltage flow and make a perfectly functional alternator appear to be defective.
These hidden sources of resistance can cause voltage drops, creating the illusion that the alternator is not charging correctly.
If these components are not thoroughly inspected, the diagnostic process remains incomplete and misleading.
3. Misinterpreting Multimeter Readings
Improper use of a multimeter can also lead to erroneous conclusions regarding the charging system.
Some individuals take readings at incorrect points, use the wrong settings, or fail to understand the normal voltage parameters.
For instance, mistaking the battery’s static voltage for the actual charging voltage can lead to false assumptions about a fault in the alternator.
For accurate diagnosis, it is essential to precisely measure the voltage across the battery terminals under both ‘idle’ (engine running with no load) and ‘load’ (engine under load) conditions; this requires the use of the correct DC voltage settings.
4. Testing Without Proper Electrical Load
A very common error in diagnosis is testing the alternator solely under “no-load” conditions.
When the engine is running and no accessories are active, the system may display normal voltage levels; however, when electrical demand increases, it may fail to maintain those levels.
It can be nearly impossible to detect a weak alternator without activating headlights, air conditioning, or other electrical loads.
For a proper diagnosis, it is crucial to simulate real-world driving conditions to accurately assess the alternator’s true performance under stress.
Read More:
Know, When to Repair and When to Replace Alternator
1. When to Repair Individual Alternator Components
Repairing individual alternator components is generally feasible when internal damage is minor and the main alternator housing remains in good condition.
Components such as worn bearings, faulty voltage regulators (in certain models), or worn brushes can often be replaced without having to swap out the entire unit.
This option proves to be more cost-effective when the alternator is still producing some output but is not operating at its full capacity.
A thorough inspection is crucial here, as repairing is a sensible option only if the core components such as: the rotor and stator, remain intact.
2. When Replacing the Entire Alternator Becomes Necessary
Replacing the entire alternator becomes necessary when internal damage is extensive or when multiple components have failed simultaneously.
This includes issues such as burnt stator windings, recurring diode failures, or completely unstable voltage output, problems that cannot be resolved through minor repairs.
In modern vehicles, replacing the entire alternator is often considered the best course of action, as these units are frequently manufactured as sealed assemblies and are not designed to be fully rebuilt internally.
If, even after inspection, the alternator consistently fails to maintain the correct charging voltage, replacing the unit remains the most reliable and long-lasting solution.
3. Replacing the Belt or Adjusting Its Tension
The serpentine belt plays a direct role in the alternator’s operation; therefore, ensuring that it remains in good condition is essential for proper charging.
If the belt exhibits signs of cracking, glazing, looseness, or slipping, it should be replaced immediately.
In some cases, replacing the belt is unnecessary; rather, its tension simply needs to be properly adjusted to ensure it grips the pulley correctly.
Belt slippage reduces the alternator’s rotational speed, resulting in diminished voltage output and manifesting symptoms that resemble an electrical fault.
Resolving belt-related issues often restores normal charging function without the need to even touch the alternator itself.
4. Cleaning and Tightening Electrical Connections
Electrical connections are frequently overlooked, yet they are crucial for consistent charging.
Corrosion on battery terminals, loose connectors, or dirty grounding points can obstruct or weaken the flow of electricity between the alternator and the battery.
Cleaning these contact points and tightening all connections can significantly improve voltage stability.
Even a thin layer of corrosion can increase electrical resistance and induce symptoms of undercharging.
Proper maintenance of these connections ensures that the alternator’s full output reaches the battery and the vehicle’s electrical system without any loss.
How to Prevent Alternator from Undercharging
So, there’s even scientific research that literally confirms that alternator faults are not always visible in simple voltage checks, that’s why early undercharging often appears as unstable voltage behavior rather than having a clear cut failure, even with the studies on the voltage fluctuation patterns shows that monitoring how voltage literally changes over the period of time that can reveal hidden alternator problems before complete failure occurs.[¹]
1. Regular Inspection of the Charging System
Regular inspection of the charging system helps identify early signs of low alternator output before they escalate into major malfunctions.
A simple voltage check, performed every few months or during routine servicing, as it can indicate whether the alternator is delivering the correct output within its normal operating range.
Early detection is crucial because alternator issues often develop gradually; even a slight drop in voltage, if left uncorrected, can gradually degrade battery health, starting performance and overall electrical reliability.
2. Keeping Terminals Clean and Corrosion-Free
Battery terminals and connection points should always be kept clean, as even a thin layer of corrosion can impede the smooth flow of electricity.
Dirt, rust, or deposits such as: white powdery residue, increase electrical resistance and reduce the amount of charging voltage reaching the battery.
Cleaning the terminals and ensuring tight connections maintain a consistent flow of electricity between the alternator and the vehicle’s electrical system.
This simple preventive measure can help avoid many “false symptoms” that mimic alternator failure but are, in reality, connection-related issues.
3. Checking Belt Condition During Oil Changes
The serpentine belt should always be inspected during routine oil changes, as it directly drives the alternator.
If the belt becomes worn, cracked, loose, or glazed due to slippage, it cannot effectively rotate the alternator at the necessary speed.
This results in compromised charging performance, particularly at low engine RPMs.
Regular visual inspections help identify early signs of wear and tear before they lead to performance-related issues or sudden battery failure.
As such, this constitutes one of the simplest preventive measures for maintaining a healthy charging system.
4. Avoiding Electrical Overload on Older Alternators
Older alternators naturally deliver a less efficient output compared to new or recently serviced units; therefore, burdening them with an excessive number of electrical accessories can adversely affect their charging capacity.
The increased demand generated by headlights, air conditioning, audio systems and additional aftermarket equipment can force the alternator to operate beyond its safe operating limits.
This constant strain gradually diminishes charging efficiency over time and can shorten the alternator’s lifespan.
Managing the electrical load and avoiding unnecessary accessories helps maintain stable voltage and prevents the system from failing prematurely.
Conclusion – How to Diagnose Alternator Undercharging
So, its been clear that every charging system problem actually has story to tell and the alternator is usually the comes with the hidden problems in their, so diagnosing it becomes really helpful.
Every vehicle relies on a continuous flow of electricity and the alternator plays a pivotal role in maintaining this equilibrium while the engine is running.
When it begins to undercharge, the consequences manifest gradually as symptoms such as: dimming headlights, weak starting power and frequent battery discharge.
However, the true root cause often lies in subtle details such as: the condition of the belt, the integrity of the wiring, the soundness of the grounding, or the functionality of the voltage regulation system.
This is precisely why a proper diagnosis always begins with a simple voltage check, progressing step-by-step through load testing, mechanical inspections and electrical diagnostics.
A crucial point to remember is that many drivers unnecessarily replace their batteries because the symptoms appear similar; however, the battery’s function is solely to store electrical energy, whereas the alternator is responsible for generating it.
If the alternator is not functioning correctly, even a brand-new battery will be unable to resolve this underlying issue for very long.
Therefore, a systematic approach, utilizing basic tools like a multimeter to ensure accurate results, combined with a keen observation of the symptoms, is absolutely essential.
Now, that’s it from this guide and you can comment in the box below for more information regarding this guide.
Frequently Asked Questions
FAQ 1: What is alternator undercharging in a car?
Answer: Alternator undercharging is a condition in which the alternator, while the engine is running, fails to generate the necessary electrical voltage to properly power the vehicle and recharge the battery. In most cars, the normal charging range is approximately 13.5 to 14.7 volts; when the system drops below this range, the battery gradually begins to lose its charge, even while the vehicle is in motion. The result is reduced starting power, dimming lights and instability throughout the entire electrical system.
FAQ 2: What are the early signs of alternator undercharging?
Answer: Early signs typically include dimming headlights, flickering interior lights and the illumination of the battery warning light on the dashboard. Many drivers also notice that the engine takes longer than usual to start, or that electrical accessories such as: power windows or the infotainment system, do not function correctly. These symptoms often manifest gradually and tend to worsen when the vehicle is under a heavy electrical load.
FAQ 3: Can a faulty battery produce similar symptoms?
Answer: Yes, a faulty battery can indeed produce symptoms such as slow cranking and weak starting; however, there is a distinct difference in their behavior. A weak battery typically fails to function properly even after being charged or jump-started, whereas a battery affected by alternator undercharging continues to discharge over time, regardless of whether it is new or in good condition. For this reason, it is essential to test both components individually to pinpoint the true cause of the problem.
FAQ 4: How can I check if my alternator is undercharging?
Answer: The most common method involves using a digital multimeter to measure the voltage across the battery terminals while the engine is running. If the reading consistently remains below approximately 13.5 volts, it generally indicates an undercharging condition. It is crucial to perform this check in both scenarios: at idle (when there is no load on the engine) and at higher RPMs, as a faulty alternator may behave slightly differently at varying engine speeds. Conducting a load test such as: switching on accessories like headlights and air conditioning, as it can also help confirm the presence of this issue.
FAQ 5: Can a slipping belt cause the alternator to undercharge?
Answer: Yes, a slipping or worn serpentine belt is one of the most common mechanical causes of this problem. The alternator relies on the belt to rotate at the correct speed; if the belt is loose, cracked, or worn, it cannot effectively transmit the necessary power from the engine to the alternator. Consequently, the alternator’s output diminishes and voltage levels drop, particularly when the engine is idling (under no load) or operating under a load.
References:
[1] Diagnosing of Failures of Automotive Alternators Based on Amplitude of Fluctuations of Voltage
https://www.researchgate.net/publication/337823193_Diagnosing_of_Failures_of_Automotive_Alternators_Based_on_Amplitude_of_Fluctuations_of_Voltage

Hello Folks, Dean Shali here to help you out to solve the problems with your lovely vehicle, as i have lots of experience and knowledge about automotive industry as i woks directly with the customers and repair vehicles and i love to help the people to keep their cars safe and running smoothly.