
Written By: Dean Shali
Fact Checked By: Sabré Cook
Reviewed By: Tamara Warren
Having a properly tightened belt actually keeps your engine’s electrical system really stable, efficient and actually predictable.
So, alternator belt has one job: transfer the engine power to the alternator so that your vehicle’s battery stays charged and your electrical systems keep working fine.
Additionally, in the modern vehicles, specially those uses serpentine belt systems: this belt also supports multiple components such as: the power steering pump and air conditioning compressor, which basically means even with the slight loss of tension it can affect several systems at once.
Along with this, it shows that proper is not always with the failing alternator or battery: as in may cases: the real problem lies with the simple belt that has stretched over the time or was never correctly tightened after the vehicle service.
And, whenever that tension drops below the required level: then the belt slips on the pulley, that reduces the friction and interrupts the stable energy transfer as well, that’s how it gradually leads to the overheating problem, even reduces the charging efficiency and even you can face some unexpected breakdowns during journey.
But, in this guide we come up with the proper guide about How to Tighten Alternator Belt so that you can properly inspect first and then tighten the alternator belt to prevent form larger electrical failures in immediate future.
Tools
| Items | Why It Is Needed | How to Use It |
|---|---|---|
| Wrenches | This tool is used to loosen and tighten the alternator’s mounting bolts, allowing you to properly adjust the belt tension. | Apply the correct-sized wrench to the alternator’s pivot bolt and adjustment bolt; then, slowly loosen or tighten them as needed, taking care not to damage the bolts. |
| Socket Set | This tool helps access tight bolts located within the engine bay, offering superior grip and control compared to standard wrenches. | Attach the correct-sized socket to a ratchet handle, place it onto the bolt and turn it clockwise or anti-clockwise to loosen or tighten the bolt in a controlled manner. |
| Pry Bar | This tool is used to gently maneuver the alternator, allowing you to increase or decrease belt tension in systems that do not feature an automatic tensioner. | Carefully position the pry bar between the alternator and the engine bracket, then apply slow, controlled pressure to slightly shift the alternator’s position. |
| Flashlight | This tool aids visibility within the engine bay, an area often characterized by poor lighting or obstructed views due to engine components. | Switch on the flashlight and direct it toward the belt and pulley assembly to clearly observe the belt’s alignment, check for any cracks and inspect the condition of the bolts. |
| Gloves | This protects your hands from the sharp edges, heat, oil and grime commonly found within the engine compartment. | Wear well-fitting gloves before handling any engine components to ensure a secure grip while working and to prevent injury. |
| Eye Protection | This prevents dust, rust particles, or minor debris from entering your eyes during inspections or adjustments. | Wear safety goggles before opening the engine bay and keep them on until your work is complete. |
| Engine Off Condition | This prevents sudden movement of belts and pulleys, thereby reducing the risk of injury or damage. | Always turn off the ignition and remove the key before beginning any inspection or adjustment work. |
| Cool Engine | This prevents burns and ensures that metal components are at a normal temperature, allowing for the proper adjustment of belt tension. | After driving the vehicle, wait at least 20 to 40 minutes before touching any engine components to allow the heat to dissipate safely. |
| Battery Safety – Disconnect Negative Terminal | This interrupts the flow of electricity and reduces the risk of short circuits or the engine starting unexpectedly. | Before beginning work, use a wrench to loosen the negative battery terminal clamp; then, remove it from the battery post and set it aside. |
Now, Let’s Understand About Alternator Belt Types
Before attempting to tighten or adjust the alternator belt in your vehicle, it is crucial to understand its specific type, as the necessary procedures and tools depend entirely on the system’s design.
Modern and older vehicles utilize different types of belt systems and each system regulates belt tension in a unique manner.
If you attempt to tighten the belt without knowing which system you have, you may apply force in an area where it is not needed, or, worse yet, you could damage the tensioning mechanism itself.
Therefore, identifying the belt type is the first step in any proper repair procedure.
1. Serpentine Belt System
The serpentine belt system is the most common design found in modern vehicles.
It consists of a single, continuous belt that winds through multiple engine components such as: the alternator, power steering pump, air conditioning compressor and sometimes the water pump.
Because a single belt drives multiple systems simultaneously, it is designed to maintain a specific level of tension at all times.
In most cases, this system does not require manual tightening, as it is equipped with an automatic belt tensioner.
This tensioner is a spring-loaded device that continuously adjusts the pressure applied to the belt, ensuring that the belt remains properly taut even as it stretches slightly over time.
When this system begins to malfunction, the issue typically lies not with the belt itself, but with the tensioner; in such cases, rather than manually adjusting the alternator’s position to tighten the belt, the tensioner is released and reset.
2. V-Belt System
The V-belt system is an older design that can still be found in some vehicles today, particularly in older models.
Unlike the serpentine system, this setup utilizes one or more separate belts, each dedicated to driving a specific component (such as the alternator or power steering pump).
This system lacks an automatic tensioner, meaning that the belt tension must be adjusted manually.
The alternator is mounted on an adjustable bracket, allowing it to be shifted slightly to increase or decrease the belt tension.
When the belt becomes loose, the alternator is moved slightly outward to tighten it; conversely, if it is excessively tight, it is adjusted slightly inward to reduce the tension.
Such manual adjustments require great care, as improper tensioning can cause the belt to slip or place undue stress on the alternator bearings, thereby shortening their lifespan.
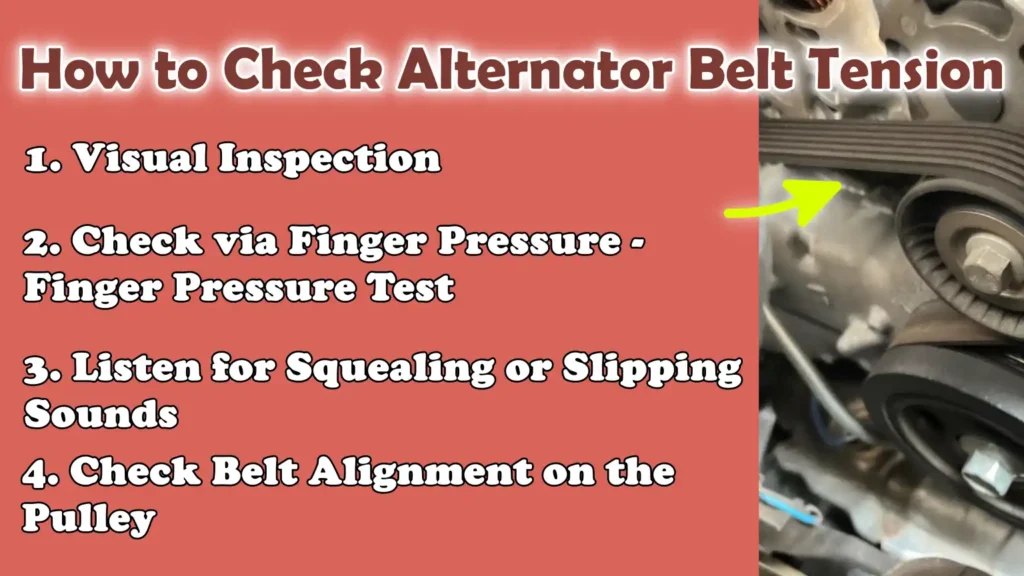
How to Check Alternator Belt Tension
Before tightening the alternator belt, it is crucial to verify whether the belt truly requires adjustment or replacement.
From a distance, the belt may appear to be in good condition; however, it may have weakened, stretched, or begun to slip under load.
A proper inspection helps avoid unnecessary tightening and prevents potential engine damage that could result from ignoring early warning signs.
A properly tensioned belt should feel taut, run smoothly over the pulleys and produce no unusual noises while the engine is running.
Checking the tension involves not only assessing the tightness but also evaluating the overall condition of the belt and the quality of its grip on the pulleys.
1. Visual Inspection
The first step is to carefully visually inspect the surface of the belt.
An alternator belt in good condition should appear smooth and exhibit uniform wear; it should be free of deep cracks, shiny or glazed spots and frayed edges.
Cracks typically form when the rubber ages or is exposed to heat over time; these are clear indications that the belt is losing its structural integrity.
A glazed surface, one that appears shiny or polished, often indicates that the belt is slipping on the pulley; this condition is typically caused by insufficient tension or a worn pulley.
Wear on the edges can also be a sign of misalignment, preventing the belt from tracking correctly.
This simple visual inspection helps determine whether merely tightening the belt will suffice, or if the belt is nearing the end of its service life.
2. Check via Finger Pressure – Finger Pressure Test
Checking via finger pressure, also known as the deflection test, is a simple, manual method for assessing belt tension.
With the engine turned off, apply pressure to the longest unsupported section of the belt, specifically, the section located between two pulleys.
A properly tensioned belt should yield slightly under pressure, but not excessively.
If it moves too easily or feels loose, it indicates insufficient tension; this means the belt could slip while the engine is running.
Conversely, if it does not move at all, it may have been overtightened; this can place excessive strain on the alternator bearings and other associated components.
The goal is to maintain a balanced tension, one that provides the belt with enough flexibility to absorb vibrations while simultaneously ensuring a firm grip on the pulleys.
3. Listen for Squealing or Slipping Sounds
Paying attention to unusual sounds while the engine is running is another crucial method for detecting faults.
A loud, sharp squealing sound, particularly when starting the engine or revving it, often indicates that the belt is slipping against the pulleys, either due to improper tensioning or the presence of contaminants such as oil or moisture.
In some instances, you may also hear a faint chirping sound that varies with engine speed; this could signal uneven belt wear or a misalignment issue.
These sounds serve as early warning signs that the belt is failing to maintain the necessary friction and requires immediate inspection before the problem escalates.
4. Check Belt Alignment on the Pulley
Proper alignment is crucial for the smooth operation of the belt and for extending its service life.
The belt should run perfectly straight and centered on every pulley; while rotating, it should not drift to one side, nor should it exhibit any vibration.
If the belt alignment is incorrect, it may experience uneven wear, generate noise and suffer from reduced traction, even if the tension is set correctly.
Poor belt alignment can be caused by bent brackets, worn pulleys, or improper installation.
When checking alignment, it is essential to view the belt from the side to ensure that it sits uniformly within all the grooves of the pulley.
Correct alignment ensures that the belt distributes force effectively and minimizes unnecessary stress on the alternator and other engine components.
How to Tighten a V-Belt Alternator System – Easiest Method
Tightening a V-belt alternator system is a delicate mechanical process that requires adjusting the alternator with both care and precision.
This is because, unlike modern systems equipped with automatic tensioners, this setup relies entirely on manual adjustment.
The primary objective is to achieve the correct belt tension: the belt must be tight enough to maintain a firm grip on the pulley, yet not so tight that it places excessive strain on the alternator bearings or the crankshaft pulley.
To ensure a safe adjustment and extend the lifespan of the belt, it is crucial to execute each step thoughtfully and in the correct sequence.
1. Locate the Alternator and Adjustment Bolts
The first step is to identify the alternator and its adjustment points within the engine bay.
In a V-belt system, the alternator is typically mounted on a bracket that allows it to pivot and slide slightly.
You will generally find two main points: the pivot bolt, which anchors the alternator in place while allowing it to rotate; and the adjustment bracket or slider bolt, which controls the range of the alternator’s forward and backward movement.
Understanding these two points is essential, as one governs the alternator’s stability, while the other regulates the belt’s tension.
Correctly locating these points ensures that you can properly adjust the system without placing unnecessary strain on the wrong components.
2. Loosen the Mounting Bolts
Once you have identified the alternator and its associated bolts, the next step is to slightly loosen the mounting bolts to allow the alternator to pivot freely.
The pivot bolt should be loosened just enough to allow the alternator to move; it should not be removed completely, as it must still support the weight of the alternator.
It is also necessary to loosen the adjustment slider bolt so that the alternator can slide back and forth within its bracket.
Loosening these bolts in a controlled manner is crucial to ensure that adjustments can be made smoothly and without any sudden jerks; otherwise, a sudden jolt could damage the belt or cause the pulley to slip out of position.
3. Adjust Belt Tension
Once the bolts have been loosened, the alternator is shifted outward to increase the belt tension.
This is typically accomplished by gently pushing the alternator away from the engine block, you can do this by hand, or, if greater force is required, by using a pry bar.
A pry bar must be used with extreme caution and applied only against sturdy metal components; applying force in the wrong location could bend the brackets or damage other parts.
The alternator should be moved slowly and steadily to ensure that the belt tension increases gradually, rather than forcing the belt into place; applying sudden pressure can cause the belt to overstretch or crack.
4. Determine Correct Belt Tension
Once the belt feels taut, its tension should be checked and adjusted to the correct level.
A general guideline for V-belt systems is that when moderate finger pressure is applied to the belt at the longest span between the pulleys, there should be approximately 10 to 15 millimeters of deflection.
However, specific details may vary depending on the vehicle’s design.
The belt should feel taut, yet possess a slight amount of “give” when pressure is applied.
Maintaining this balance is crucial; excessive tension can damage the bearings, while insufficient tension may cause the belt to slip, generate noise and compromise charging performance.
5. Tighten the Bolts
Once the correct tension has been achieved, the alternator must be locked into position by tightening its mounting bolts.
First, tighten the adjustment bolt to secure the alternator in its new position and prevent any alteration in tension.
Next, tighten the pivot bolt to firmly anchor the alternator to its bracket.
Tightening the bolts in this specific sequence ensures that proper alignment is maintained, preventing the alternator from shifting out of place when the final torque is applied.
6. Re-check Belt Tension
The final step involves re-checking the belt tension after all bolts have been fully tightened; this is essential because tightening the bolts can sometimes cause a slight shift in the alternator’s position, thereby altering the belt tension.
The deflection test should be repeated to confirm that the belt tension remains within the correct range.
Additionally, a visual inspection of the belt’s alignment on the pulleys is necessary to ensure that the belt did not slip out of place while the bolts were being tightened.
Finally, start the engine and let it run for a short while to verify that it operates smoothly, without any rattling or squealing noises, and to ensure that the belt remains stable under load.
How to Adjust Belt Tension in a Serpentine Belt System
Serpentine belt systems are designed differently than older V-belt setups, as they do not rely on manually adjusting the position of the belt to maintain tension.
Instead, they utilize an automatic tensioner that maintains constant pressure on the belt throughout its entire operation.
This tensioner is a spring-loaded or hydraulic component that automatically compensates for the belt’s natural stretching and engine movement.
Due to this design, “tightening” a serpentine belt is not accomplished by moving the alternator, but rather by inspecting and working with the tensioner system.
Understanding this is crucial, as applying incorrect manual force can damage the tensioner or disrupt the belt’s routing.
1. Locate the Automatic Tensioner
The first step is to locate the automatic tensioner inside the engine bay.
It is typically a spring-loaded arm attached to a pulley that exerts pressure on the belt to maintain constant tension.
In most engines, the tensioner is positioned in a way that allows for easy access using a wrench or socket tool.
Correctly identifying it is essential, as it is the only component in the system designed to be moved for the purpose of belt adjustment.
The other pulleys in the system are fixed and should not be used to make adjustments.
A worn or weak tensioner often exhibits symptoms such as improper belt tracking, vibration, or noise while the engine is running.
2. Use a Wrench to Rotate the Tensioner Arm
Once the tensioner has been located, a wrench or socket is applied to the tensioner’s mounting bolt or square drive area.
By slowly rotating the tensioner arm, you relieve the pressure on the belt, causing it to go slack temporarily.
This movement must be smooth and controlled, as the tensioner is spring-loaded and can snap back rapidly if released abruptly.
The objective of this step is not to manually adjust the tension permanently, but rather to loosen the belt sufficiently so that it can be safely removed or replaced.
Executing this step correctly ensures that neither the belt nor the tensioner sustains any damage during the adjustment process.
3. Release the Belt and Verify Proper Seating
After rotating the tensioner and loosening the belt, inspect the belt to ensure it is seated correctly on all the pulleys.
Serpentine belts follow a specific routing pattern, which is typically printed under the hood or detailed in the vehicle’s owner’s manual.
Once the belt is properly positioned, the tensioner is slowly released, allowing it to reapply pressure to the belt.
As it returns to its original position, it automatically establishes the correct tension.
At this stage, it is crucial to verify that the belt is seated properly within all the pulley grooves, without any twists or misalignment, as improper seating can lead to noise, premature belt wear, or system failure.
4. When to Replace the Belt Instead of Tightening It – Weak Tensioner Spring
In a serpentine system, if the belt continues to slip, squeal, or feel loose even after being properly seated, the issue often lies not with the belt itself, but rather with a weak or failing tensioner spring.
Over time, the internal spring loses its tensioning force and fails to maintain the necessary pressure on the belt.
In such cases, simply tightening the assembly is not a solution, as the system is designed to be self-adjusting.
The correct remedy is to replace the entire tensioner assembly or any worn pulley components.
Symptoms of failure include noticeable belt fluttering, inconsistent tension, or the recurrence of noise shortly after an adjustment.
Replacing a faulty tensioner stabilizes belt operation, protects engine components and restores the proper functioning of the charging system.
Know, Common Mistakes While Tightening of Alternator Belt to Avoid Them
When tightening or adjusting an alternator belt, many problems arise not from complex mechanical malfunctions, but rather from simple errors made during installation or inspection.
These mistakes can shorten the belt’s lifespan, damage engine components and even lead to sudden breakdowns.
Just as it is crucial to tighten the belt correctly, it is equally important to know which mistakes to avoid, as even a minor error in tension or alignment can compromise the entire charging system and lead to recurring issues.
1. Overtightening the Belt – This Can Damage Bearings
One of the most common mistakes is tightening the belt beyond what is necessary.
While it may seem logical that a tighter belt would perform better, excessive tension actually causes more harm than good.
When a belt is overtightened, it exerts constant, heavy pressure on the alternator bearings, the crankshaft pulley and other connected components.
Over time, this pressure accelerates bearing wear, leading to issues such as noise, excessive heat generation and, ultimately, component failure.
It also reduces the belt’s flexibility, increasing the likelihood of it snapping under tension.
A properly tensioned belt should maintain a firm grip yet allow for a slight, controlled amount of movement; it should be neither too rigid nor excessively tight.
2. Ignoring Belt Wear or Cracks
Another major mistake is focusing solely on tightening the belt without first inspecting its actual condition.
A belt that already exhibits cracks, frayed edges, or a glazed surface is inherently compromised and remains at risk of failure, even if its tension has been correctly adjusted.
Ignoring these warning signs can lead to sudden belt failure while driving; this may cause the alternator to stop charging the battery and, depending on the belt’s design, may also result in the shutdown of other systems.
Regular inspection is crucial because a worn belt loses its grip, even if its tension appears correct; this means that simply tightening the belt will not resolve the underlying issue.
3. Pulley Misalignment
Pulley alignment plays a critical role in belt performance, yet it is often overlooked during the adjustment process.
If the alternator or other pulleys are even slightly misaligned, the belt will not run straight; instead, it will drift to one side or wobble as it rotates.
This erratic movement generates excessive friction on one side of the belt, leading to accelerated wear, increased noise and reduced operational efficiency.
Even a minor misalignment can significantly shorten the belt’s lifespan.
To ensure the belt operates smoothly and reliably, it is essential to verify that all pulleys are correctly aligned and that the belt is seated uniformly within every groove.
4. Using Incorrect Tools or Applying Improper Force
Using incorrect tools or applying improper force while adjusting a belt is another common mistake that can easily result in damage.
For instance, using a wrench of the wrong size can strip the bolts, making it difficult, or even impossible, to adjust the belt in the future.
Similarly, using a pry bar without caution can result in bent brackets, broken mounting points, or damage to surrounding engine components.
Belts should always be adjusted using precise, controlled tools that are correctly sized for the bolts and allow the belt to be manipulated in a stable and controlled manner.
Applying excessive force, or doing so in an unsafe manner, as it can turn a simple maintenance task into a costly repair.
Read More:
Common Signs That Your Belt Is Still Not Properly Tightened
Even after adjusting or tightening the alternator belt, it is crucial to verify that the system is actually functioning correctly under actual engine operating conditions.
Sometimes, the belt may appear to be properly tightened when the engine is off; however, once the engine starts and is placed under load, it may slip or malfunction.
This occurs because the alternator system operates under constant mechanical forces, vibrations and fluctuating electrical demands.
Identifying these warning signs early helps prevent battery failure, charging issues and damage to engine components.
1. Persistent Squealing Sound
The most common sign of an improperly tightened belt is a persistent squealing sound coming from the engine bay, particularly when the engine is started or when the engine is under load such as: when turning on the headlights or air conditioning.
This noise occurs when the belt fails to generate sufficient friction and grip against the pulley surface, causing it to slip slightly as it rotates.
Even if the belt has been recently adjusted, a squealing sound indicates that the tension is still incorrect, or that the belt’s surface has worn down or accumulated grime.
A properly tightened belt should operate quietly and without any loud noises under normal driving conditions.
2. Battery Warning Light Remains Illuminated
Another critical warning sign is when the battery indicator light on the dashboard remains continuously illuminated, or flashes intermittently, after the engine has started.
This light indicates that the alternator is failing to generate sufficient electrical power to properly charge the battery.
If the belt is too loose, it cannot effectively transfer sufficient mechanical power from the engine to the alternator, which directly impacts its charging capacity.
In some instances, the vehicle’s lights may flicker while driving, particularly when the electrical load increases; this, too, signals unstable belt tension or slippage.
3. Visible Belt Slippage Upon Acceleration
A clear mechanical indicator of incorrect tension becomes apparent when the belt appears to wobble or slip as the engine speed increases.
When the belt is closely observed while the engine is running, it should move smoothly, without any bouncing, jerking, or deviation from its path.
If the belt appears to lag behind the rotating pulley or exhibits sudden, intermittent jerks, it signifies that it is failing to maintain a consistent grip.
Such slippage diminishes power transmission and can lead to uneven wear on both the belt and the pulley; if left unaddressed, these components may eventually fail.
4. Excessive Vibration Near the Alternator
Excessive vibration in the vicinity of the alternator is another definitive sign that the belt tension is incorrect.
A properly tensioned belt allows the alternator to operate smoothly, without excessive movement or shifting.
However, when the belt is loose or lacks uniform tension, it can generate a rhythmic vibration that can be felt near the alternator bracket, and, at times, even observed visually.
This vibration not only compromises the belt’s performance but also accelerates wear on the mounting points and internal bearings.
Over time, ignoring this symptom can lead to increased mechanical stress and a reduced service life for the associated components.
So, When to Replace the Belt Instead of Tightening It
Knowing when to replace an alternator belt, rather than simply tightening it, is crucial for ensuring the long-term health of the engine and reliable charging performance.
Many drivers attempt to resolve belt-related issues solely by increasing the belt’s tension; however, this approach fails to provide a solution when the belt or its associated components are already worn out.
The belt is constructed from durable rubber, which naturally degrades over time due to exposure to heat, friction and continuous operation.
Once it has worn down to a certain extent, tightening it serves merely as a temporary stopgap and may even increase the risk of sudden failure.
Assessing the condition of the belt and its surrounding components helps you determine when replacement constitutes a safer and more effective course of action.
Also, there’s research in the automotive belt systems that actually shows that maintaining steady belt tension is really important to prevent the pulley slip under changing engine loads, even studies on serpentine belt drive design actually confirms that tension directly influences how effectively power is transferred from the crankshaft to accessories such as: alternator, so whenever tension drops even slightly, then the belt slip actually increases, which then reduces the charging efficiency and creates noise or vibration as well, that’s why correct tightening is not just a mechanical thing but it affects the performance for stable vehicle operation as well.[¹]
1. Cracks or Glazing on the Belt Surface
A belt exhibiting visible cracks, signs of fraying, or a smooth, glossy surface should always be replaced rather than merely tightened.
Cracks develop when the rubber hardens due to aging and exposure to heat, thereby compromising its structural integrity and flexibility.
A “glazed” surface, one that appears smooth and polished, typically indicates that the belt has been slipping against the pulley for an extended period, generating excessive heat and diminishing its grip.
In either scenario, the belt has lost its proper traction and structural integrity; therefore, tightening it will not restore its performance and it may even snap unexpectedly while the vehicle is in operation.
2. Operating the Belt Beyond the Recommended Service Interval
Every belt has a recommended service life, typically based on mileage or elapsed time, even if it appears to be in good condition visually.
Over time, the internal fibers of the belt weaken and the rubber loses its elasticity, thereby diminishing its ability to maintain proper tension when the engine is under load.
Even if no visible cracks are present, an aging belt may slip or stretch far more easily than it should.
Therefore, replacing the belt at the recommended intervals is crucial, as it prevents sudden failure and ensures consistent, optimal performance from the alternator without the need for frequent retightening.
3. Worn Pulleys or a Faulty Tensioner
Occasionally, the root cause of the problem lies not with the belt itself, but rather with the pulley or tensioner system that supports it.
A worn pulley may have an uneven surface or defective internal bearings, preventing the belt from tracking correctly and resulting in a loose grip.
In serpentine systems, a weak or faulty tensioner spring may be unable to maintain constant pressure, causing the belt to continue slipping even after it has been adjusted.
In such instances, simply replacing the belt will not resolve the issue, as the underlying cause lies within the mechanical components themselves.
For a proper repair, it is necessary to replace the worn pulley or tensioner assembly, along with the belt, if required.
4. The Need for Frequent Adjustments
If a belt repeatedly becomes loose and requires frequent retightening, it is a clear indication that it should be replaced rather than subjected to continuous adjustments.
A high-quality belt and system should be capable of maintaining consistent tension over extended periods without requiring repeated manual intervention.
The need for frequent adjustments typically indicates that the belt has stretched beyond its operational limits or that its supporting components are no longer functioning correctly.
Continuously tightening a deteriorating belt merely postpones its failure temporarily while increasing the risk of a sudden rupture; therefore, replacing it constitutes a more reliable and safer solution.
How to Perform Final Safety Check
After tightening or adjusting the alternator belt, a final safety check is a crucial step, as it ensures that the belt functions correctly under actual engine operating conditions.
Many belt-related issues only manifest when the engine is running and a load is placed on all accessories; therefore, this step verifies that the adjustment was successful and safe.
A properly conducted safety check helps prevent future malfunctions, protects engine components and ensures that the charging system operates continuously and without interruption.
1. Start the Engine and Observe Belt Operation
The first step is to start the engine and carefully observe how the belt rotates while the engine is running.
The belt should rotate smoothly across all pulleys without any bouncing, slipping, or lateral movement.
It should sit firmly within the pulley grooves and maintain a steady speed, even as the engine RPM fluctuates.
Observing the belt under actual operating conditions is vital, as it reveals how the belt tension holds up when the alternator and other engine components begin to place a load on the system.
Any irregular movement observed during this phase typically indicates that the tension or alignment still requires adjustment.
2. Check for Noise and Vibration
While the engine is running, it is also essential to listen carefully for any unusual noises around the belt and alternator and to feel for any vibrations.
A properly tensioned belt should operate quietly, without any squealing, chirping, or humming sounds.
If a loud noise is heard, it usually indicates that the belt is still slipping or that the tension is not properly balanced.
Similarly, excessive vibration may indicate that the belt is too loose, too tight, or improperly aligned with the pulleys.
These indicators are crucial, as they help identify minor issues before they escalate into serious mechanical problems.
3. Re-check the Tension After Driving for a While
Even if the belt appears to be functioning correctly while the vehicle is idling (stationary), it is essential to re-check the tension after driving for a period.
This is because engine heat, vibration and movement during actual driving conditions can slightly alter the belt’s position and tension.
After driving, the belt should be re-inspected to ensure that it still exhibits the correct deflection and remains properly seated on all pulleys.
This final check confirms long-term stability and ensures that the adjustments made during the process remain intact during daily use, thereby minimizing the risk of future belt slippage or charging-related issues.
Conclusion – How to Tighten Alternator Belt
Basically, if alternator belt is properly maintained then it functions smoothly with every electrical things in your car.
The function of the alternator belt is to transmit engine power to the alternator, thereby keeping the battery charged and supporting all of the vehicle’s primary electrical systems.
If the belt is too loose, it may slip and compromise charging efficiency; conversely, if it is overtightened, it can exert excessive pressure on the bearings and reduce the lifespan of critical engine components.
Given this delicate balance, proper inspection, precise adjustment and subsequent testing are all essential steps in this process.
The primary objective of this comprehensive guide is to emphasize that minor warning signs should never be overlooked.
Squealing noises, visible signs of belt wear, vibrations, or sluggish performance of electrical systems are often early indicators of a fault within the belt system.
By accurately identifying whether the vehicle utilizes a V-belt system or a serpentine system, one can adopt the correct approach rather than relying on guesswork or forcing adjustments.
And, that’s all from this guide and you can comment for more info.
Frequently Asked Questions
FAQ 1: What is the actual function of the alternator belt in a car?
Answer: The alternator belt is a simple, yet crucial, component of your engine system. Its primary function is to transmit power from the engine to the alternator, enabling the alternator to generate electricity. This electricity is used to charge the battery and to power various systems such as the headlights, dashboard electronics, ignition and air conditioning. If the belt becomes loose or damaged, the alternator cannot function properly; this can lead to a gradual discharge of the battery and result in electrical issues while driving.
FAQ 2: How can I tell if my alternator belt is loose?
Answer: A loose alternator belt typically provides clear warning signs. One of the most common indicators is a loud, high-pitched squealing sound coming from the engine, particularly when you start the vehicle or switch on electrical systems like the headlights or AC. You may also notice dimming lights, poor battery performance, or the battery warning light illuminating on your dashboard. In some instances, the belt may appear visibly slack or, when the engine is off, feel excessively loose when pressed by hand.
FAQ 3: Can I tighten the alternator belt myself?
Answer: Yes, in many older vehicles equipped with V-belt systems, you can tighten the alternator belt yourself using common tools such as a wrench or a socket set. This process involves loosening the alternator’s mounting bolts, adjusting the alternator’s position to increase tension and then tightening everything back up. However, modern cars featuring serpentine belt systems typically do not require manual tightening, as they are equipped with an automatic tensioner. In such cases, the issue often lies not with the belt itself, but rather with a faulty tensioner.
FAQ 4: What happens if the alternator belt is too tight?
Answer: If the alternator belt is excessively tight, it can exert undue mechanical stress on engine components. Excessive tension can damage the alternator bearings, crankshaft pulley and other associated parts. Over time, this can lead to premature wear, noise, overheating and even the complete failure of components. A properly tensioned belt should feel firm, yet retain a slight degree of flexibility; it should not feel overly rigid or stretched taut.
References:
[1] Design and Analysis of Automotive Serpentine Belt Drive Systems for Steady State Performance
https://www.researchgate.net/publication/239402594_Design_and_Analysis_of_Automotive_Serpentine_Belt_Drive_Systems_for_Steady_State_Performance

Hello Folks, Dean Shali here to help you out to solve the problems with your lovely vehicle, as i have lots of experience and knowledge about automotive industry as i woks directly with the customers and repair vehicles and i love to help the people to keep their cars safe and running smoothly.