Written By: Dean Shali
Fact Checked By: Sabré Cook
Reviewed By: Tamara Warren
It is true that: Power, Lighting and Ignition all those things literally depends on the Alternator Belt and that’s why it should work perfectly every second.
Also, alternator belt literally plays a major role to keep your vehicle up and running smoothly as it transfers power from engine to the alternator, which in return keeps your vehicle’s battery perfectly charged and support the essential electrical systems such as: Headlights, Ignition and Sensors.
And, because of the usage and over the period of time: there’s heat, friction and constant rotation which later causes the belt to crack up, glaze, loosen up or slip, so these are the small signs that appears long before having a full failure.
At first, driver may notice something like: high-pitched squealing noise during starting the vehicle, there could be flickering of dashboard lights or having weak battery, so don’t ignore these struggles signs.
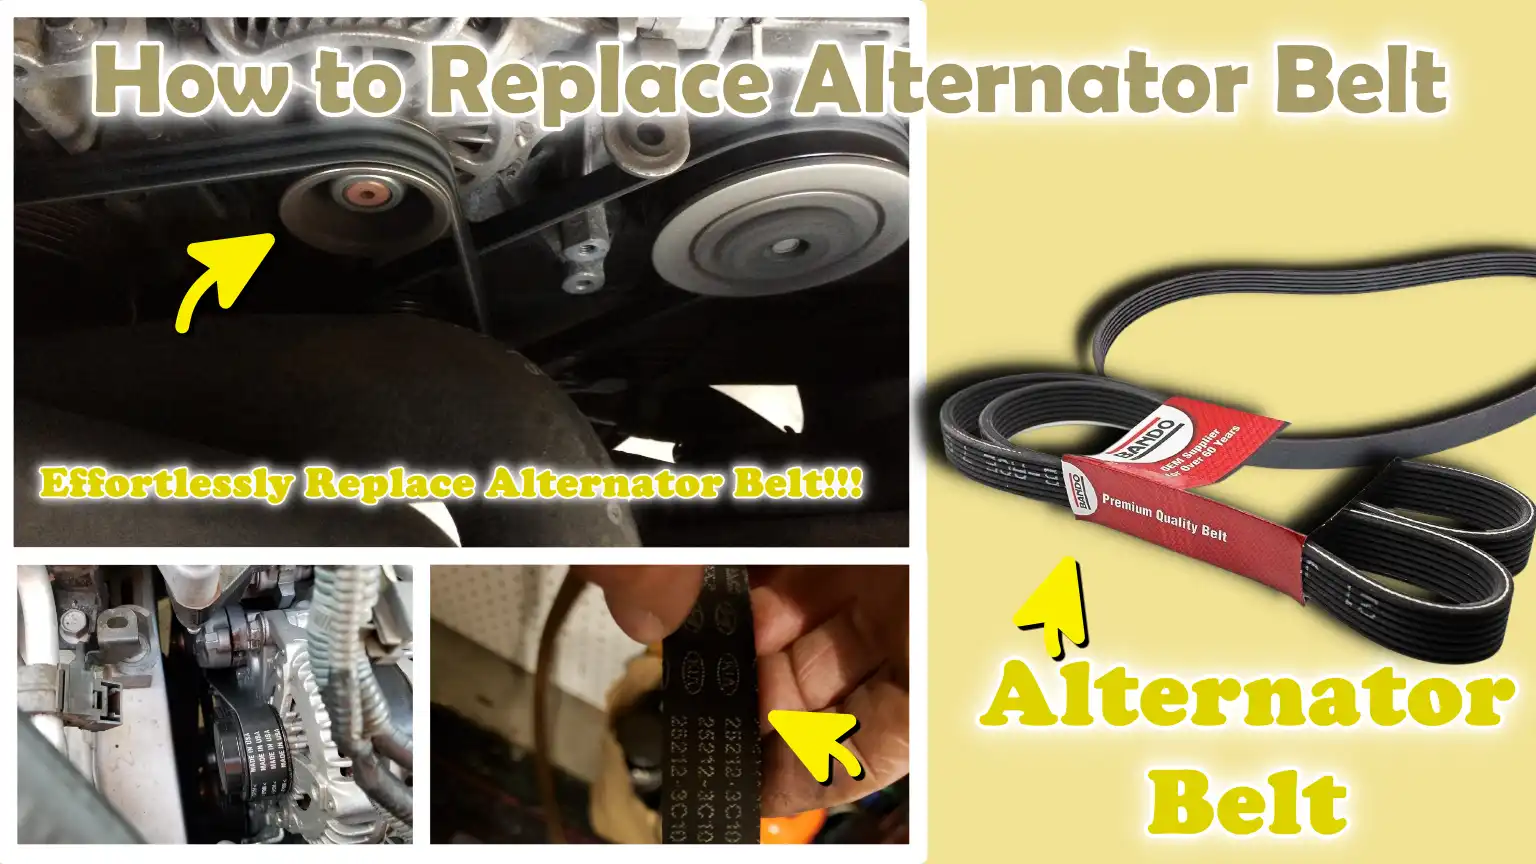
So, that’s the guide where we have specifically shows you How to Replace Alternator Belt so that you can have truly structured and easy to follow guide to prevent breakdowns, extend the engine life and keep your vehicle truly reliable on every journey ahead.
Tools
| Tools/Materials | Why It Is Needed | How to Use It |
|---|---|---|
| New Alternator Belt – Correct Size and Type | This is the primary component you are replacing. An old belt loses its grip, develops cracks, or begins to slip, leading to charging issues and excessive noise. | Ensure this part specifically matches your car’s model. Consult your engine manual or check the markings on the old belt. Install it onto the pulleys according to the correct routing diagram. |
| Socket Set and Ratchet | This tool is used to remove the bolts that securely fasten the tensioner or alternator bracket in place. Without it, the belt tension on many vehicles cannot be loosened or adjusted. | Attach the correct-sized socket to the ratchet. Turn the tool anti-clockwise to loosen the bolts and turn it clockwise to tighten them when reinstalling the components. |
| Wrench Set | This helps you access tight spaces where a ratchet cannot reach, particularly in older engines equipped with manual belt adjustment systems. | Using the correct-sized wrench, slowly and carefully loosen or tighten the adjustment bolt, thereby controlling the belt tension. |
| Belt Tension Tool – If Applicable | This ensures that the belt is tightened to the exact and precise level required. If the belt is too loose, it will slip; if it is too tight, the bearings will wear out prematurely. | Place the tool against the belt to measure its deflection or tension. Continue adjusting the belt until it reaches the recommended tension level specified in your vehicle’s manual. |
| Jack and Jack Stands – If Access Is From Below | In some vehicles, it is necessary to work from underneath the vehicle to safely access the alternator or tensioner pulley. | Use a jack to lift the vehicle and then secure it with jack stands before commencing work underneath. Never rely solely on the jack. |
| Flashlight for Visibility | Engine compartments are often dark and cramped, making it difficult to clearly visualize belt routing and pulley locations. | Shine a flashlight on the pulleys and belt paths to clearly identify any cracks, assess the condition of the belt and verify that it is properly seated. |
Ensure Safety By Taking Precautions for Replacing the Alternator Belt
1. Disconnect the Battery’s Negative Terminal
Before beginning any work on the alternator belt, it is absolutely essential to disconnect the battery’s negative terminal.
This step prevents sudden electrical shocks within the system while you are working on the engine.
Cars continue to draw power even when they are turned off; if metal tools come into contact with live components, sparks or a short circuit may occur.
By removing the negative terminal first, you minimize the risk of electric shock and also protect sensitive electrical components, such as the alternator and various sensors.
This is a fundamental safety rule applicable to almost all automotive repair tasks, as it helps make the entire process safer and more controlled.
2. Ensure the Engine Has Cooled Down Before Starting Work
Always ensure that the engine has completely cooled down before you begin working.
After driving, engine components, particularly those located near the alternator, belts and pulleys, become extremely hot.
Touching these parts too soon poses a significant risk of burns.
Furthermore, rubber belts become more pliable when hot, which can make them difficult to handle safely.
Waiting for the engine to cool down allows you to work comfortably and significantly reduces the risk of injury.
In most cases, allowing the vehicle to sit for at least thirty minutes to an hour is sufficient to ensure safe working conditions.
3. Keep Your Hands and Tools Away from Moving Parts
Even when the engine is turned off, certain components within the engine bay may move unexpectedly, either if the engine is accidentally started or if parts suddenly shift.
When replacing an alternator belt, you are working in close proximity to the pulleys and tensioner, which rotate at very high speeds when the engine is running normally.
It is absolutely essential that you keep your hands and tools clear of these moving parts at all times.
If the engine is started for testing purposes, you must maintain a safe distance and avoid leaning over the belt assembly.
This helps minimize the risk of serious injury caused by the sudden movement of mechanical components.
4. If the Vehicle is Raised, Secure It Properly
If your vehicle needs to be raised to access the belt from underneath, it is crucial to secure it properly.
Hydraulic jacks alone are insufficient to safely support the weight of a vehicle for an extended period.
Once the vehicle has been lifted, it is imperative to support it by placing jack stands at strong, stable points on the vehicle’s frame.
This ensures that the vehicle does not fall while you are working underneath it.
A stable and properly supported vehicle prevents accidents and allows you to focus safely on the repairs without worrying about the risks of the vehicle shifting or collapsing.
How to Locate the Alternator Belt
1. Overview of the Engine Layout
To locate the alternator belt, you must first understand the basic layout of the engine bay (the compartment where the engine is housed).
In most modern cars, the engine is mounted at the front and its various components are connected by belts that transmit power.
The alternator is typically mounted on the side of the engine and is driven by a rubber belt connected to the crankshaft pulley.
This belt system is designed to drive multiple accessories simultaneously; therefore, identifying the location of each component helps you understand how power flows within the engine.
Taking a moment to carefully observe the engine layout makes it easier to avoid confusion later on when removing and installing the belt.
2. Identifying the Serpentine Belt System or V-Belt Setup
Vehicles primarily utilize two types of belt systems and it is crucial to identify which system is installed in your vehicle before beginning any work.
A serpentine belt system features a single, long belt that winds through multiple pulleys, including those for the alternator, power steering pump and air conditioning compressor.
This type is more common in modern cars as it is more efficient and easier to maintain.
Conversely, older vehicles may employ a V-belt setup, which uses separate belts for individual components, specifically including a dedicated belt for the alternator.
V-belts are generally narrower and sit deeper within the grooves of the pulleys.
Understanding which system is used in your car ensures that you follow the correct procedure for belt installation, thereby preventing errors during the process.
3. Locating the Alternator Pulley and Belt Routing Path
Once you have identified the belt system, the next step is to locate the alternator pulley itself.
The alternator is typically a compact metal component featuring vents for cooling and it is often mounted on the upper or side section of the engine to ensure it is easily visible and accessible.
The belt runs over the alternator pulley, connecting it to the engine’s other pulleys via a specific course known as the “belt routing path”.
This path is meticulously designed to maintain proper belt tension and ensure the efficient distribution of power to all components.
In many vehicles, a belt routing diagram is provided, either under the engine hood or within the vehicle’s owner’s manual, illustrating the specific path the belt follows.
If no such diagram is available, it is crucial to carefully observe the belt’s current routing before removing it, to ensure that it can be reinstalled correctly.
Understanding this routing path is absolutely essential, as even a minor error can lead to belt slippage, excessive noise, or damage to other engine components.
How to Check the Belt Routing Before Removal
1. The Importance of Documenting the Belt Path
Before removing the alternator belt, it is crucial to understand and document exactly how the belt is routed around the engine pulleys.
The belt follows a specific path that connects the crankshaft, alternator, tensioner and other components in a precise sequence.
If this routing is not properly memorized, reinstalling the belt can be difficult and it may not seat correctly.
Incorrect belt routing can lead to belt slippage, squealing noises, improper charging, or even damage to engine components.
Documenting the belt’s path before removal ensures that you can reinstall the new belt in the exact same configuration, thereby keeping the engine system functioning correctly and safely.
2. Using a Routing Diagram – Under-Hood Sticker or Manual
Many vehicles feature a belt routing diagram that illustrates the correct path of the belt.
This diagram is often found on a sticker located under the hood or within the vehicle’s service manual.
This is one of the most reliable methods, as it is provided by the manufacturer and accurately depicts the precise location of every pulley.
Using this diagram eliminates the need for guesswork and minimizes the potential for errors during belt reinstallation.
It also helps you understand how the belt interacts with the various engine components, making the entire belt replacement process more organized and accurate.
3. Taking Photos for Reference
If a routing diagram is unavailable or difficult to interpret, taking a clear photograph of the belt’s configuration before removing it is a highly practical strategy.
A simple photograph taken with your smartphone can serve as a visual guide when installing a new belt.
Ensure that all the pulleys are clearly visible in the photo and that the way the belt wraps around them is also clearly discernible.
This visual reference is particularly helpful for novices, as it allows them to compare the old configuration with the new one, step by step.
Having a photograph minimizes the risk of errors in belt routing, thereby enabling the belt replacement task to be completed much more quickly and with greater confidence.
How to Relieve Belt Tension
1. Using a Tensioner Pulley – Automatic System
In many modern vehicles, the alternator belt is kept taut by an automatic tensioner pulley.
This system utilizes a spring-loaded mechanism that continuously applies the correct amount of pressure to the belt, ensuring that the belt remains tight without requiring any manual adjustment.
To relieve tension in this setup, you typically need to apply force to the tensioner arm, using a wrench or ratchet, to pivot the tensioner pulley.
As you apply force, the internal spring within the tensioner compresses, temporarily loosening the belt so that it can be removed.
This system is designed to maintain consistent belt tension; therefore, it is crucial to hold the tensioner firmly while removing the belt to prevent it from suddenly snapping back, an occurrence that could result in injury or damage.
2. Loosening the Adjustment Bolt – Manual System
Older vehicles often feature a manual tensioning system, wherein belt tension is controlled by adjusting the position of the alternator.
In this setup, there is typically an adjustment bolt and a pivot bolt that secure the alternator in place.
To relieve tension, the adjustment bolt is loosened first; this allows the alternator to shift slightly toward the engine, thereby reducing the belt’s tightness.
Once loosened, the pivot bolt may also need to be adjusted, depending on the specific design of the system.
This method requires careful control, as the belt tension depends directly on how tightly the bolts are fastened.
Even a slight adjustment can make a significant difference; Therefore, it is essential to loosen the bolt gradually while simultaneously monitoring how much the belt is slackening.
3. Safely Reducing Belt Tension
Belt tension must always be reduced in a highly controlled and cautious manner, as the belt remains under constant pressure.
Whether you are utilizing an automatic tensioner or a manual adjustment system, your objective should be to reduce the tension gradually so that the belt can be removed without any undue force.
A sudden release of tension can cause the belt or tools to snap back, potentially resulting in personal injury or damage to surrounding components.
It is also crucial to keep your hands clear of the belt’s path while reducing tension and to ensure that the tool being used to hold or adjust the tension is firmly and securely seated in place.
Once the belt has slackened sufficiently, it should be easily slid off the pulley without applying any excessive force, as doing so could cause damage to both the belt and the pulley grooves.
How to Remove the Old Alternator Belt
1. Gently Sliding the Belt Off the Pulleys
Once the belt tension has been completely released, the next step is to carefully remove the old alternator belt from the pulleys.
This task should be performed slowly and in a controlled manner to avoid causing any damage to surrounding components.
The belt is typically removed by sliding it off the pulley that is easiest to access; this process often begins at the alternator pulley or a smooth idler pulley.
It is crucial to avoid applying excessive force to the belt, as doing so could damage the pulley edges or cause the belt to snap back suddenly, posing a risk of injury.
Instead, while keeping an eye on the belt’s positioning, gently lift it off the pulleys one by one.
This careful removal process ensures that surrounding components such as: wiring, hoses and plastic covers, are not accidentally dislodged or damaged during the repair.
2. Inspecting the Belt’s Condition After Removal
After removing the belt, it is essential to inspect its condition closely to understand why it required replacement.
A worn alternator belt often exhibits clear signs of wear, such as surface cracks, shiny or glazed spots, fraying edges, or uneven wear patterns.
These signs indicate that the rubber material has degraded due to heat, friction and prolonged use.
In some cases, the belt may also feel hard or brittle (easily breakable) to the touch; this indicates that the belt has lost its elasticity and could snap at any moment.
Inspecting the old belt helps confirm whether the symptoms you previously observed such as: squeaking noises or charging-related issues, were indeed caused by belt wear.
This inspection also assists you in identifying whether the belt failed prematurely due to an underlying internal issue elsewhere within the engine.
3. Checking Pulleys for Wear or Damage
After removing the belt, the pulleys must also be carefully inspected, as they directly influence how the new belt will perform.
Every pulley, including the alternator pulley, crankshaft pulley and idler or tensioner pulleys, should be examined to ensure they rotate smoothly and are properly aligned.
If a pulley feels rough to the touch, makes noise when rotated, or shows signs of wobbling, it may indicate that its bearings are worn out or that it has sustained internal damage.
It is also essential to check the pulley grooves for cracks, rust, or debris accumulation, as these factors can affect how well the new belt seats and tracks on the pulley.
Even with a new belt installed, a damaged or improperly seated pulley can cause the belt to wear prematurely, slip, or generate noise.
Ensuring that all pulleys are in good condition guarantees the longevity of the new belt and the stable performance of the engine.
How to Inspect Related Components
1. Condition of the Alternator Pulley
After removing the belt, the alternator pulley should be carefully inspected, as it plays a direct role in charging the battery and maintaining the stability of the electrical system.
The pulley should rotate smoothly, without any friction, stiffness, or abnormal resistance.
If the pulley feels rough or makes a noise when spun by hand, it may indicate wear in the internal bearing; over time, this can degrade charging performance or even lead to complete alternator failure.
It is also crucial to check the pulley surface for any signs of damage such as: deep grooves, rust, or uneven wear.
A damaged pulley can prevent a new belt from seating properly, potentially causing the belt to slip or resulting in reduced power transfer even after replacement.
2. Wear on the Idler Pulley and Tensioner
The idler pulley and belt tensioner are equally critical components, as they help guide the belt throughout the system and maintain proper belt tension.
The idler pulley should rotate freely and quietly, without any wobbling or vibration.
If it feels loose or makes a grinding noise, it generally indicates that the internal bearing is worn out and the pulley requires replacement.
The tensioner system, whether automatic or manual, should also be inspected to ensure it is functioning correctly.
In automatic systems, the spring mechanism should maintain consistent pressure without sticking or bouncing.
In manual systems, the adjustment mechanism should turn easily and lock firmly in place once tightened.
Over time, any weakness in these components can cause the belt to loosen, potentially leading to slippage, noise, or reduced alternator performance.
3. Signs of Misalignment or Sources of Noise
Proper alignment (positioning in a straight line) of all pulleys is crucial for the belt to run smoothly; even slight misalignment can lead to serious problems.
During inspection, all pulleys should be aligned in a straight line to ensure that the belt runs uniformly without twisting or pulling to one side.
If any pulley is even slightly out of position, it can cause uneven belt wear, generate chirping or squeaking noises, or lead to the premature failure of a new belt.
Misalignment can be caused by worn mounting brackets, loose bolts, or faulty pulley bearings.
Sources of noise should also be identified during the inspection, as sounds such as squealing, grinding, or rattling often indicate an underlying mechanical issue rather than mere belt wear.
Detecting and rectifying these issues early ensures that a new belt operates smoothly and lasts for an extended period without any sudden failures.
How to Install the New Alternator Belt
1. Properly Aligning the Belt Routing
Before installing the new alternator belt, it is crucial to align the belt routing exactly as it was before removal.
The belt routing determines how power is transmitted from the engine’s crankshaft to the alternator and other components; therefore, even a minor error can lead to significant performance issues.
Correct routing ensures that every pulley rotates in the proper direction and that the correct tension is maintained throughout the entire system.
This is why the previous steps such as: noting the belt’s path or utilizing a diagram, are so vital.
If the belt is installed incorrectly, it may slip, squeal, fail to charge properly, or even cause damage to the belt itself and engine components.
2. Properly Seating the Belt on the Pulleys
Once the belt routing has been confirmed, the next step is to carefully seat the new belt onto each pulley in the correct sequence.
This process should be performed slowly and with meticulous attention to detail to ensure that the belt does not twist or slip out of position.
In most cases, the easiest approach is to first seat the belt onto the largest pulley, typically the crankshaft pulley, and then guide it onto the remaining pulleys, including the alternator, idler and tensioner.
It is essential to gently guide the belt into place rather than forcing it, as excessive force can damage the belt’s internal fibers or compromise its long-term durability.
At this stage, every section of the belt should sit naturally around the pulleys without any tension.
3. Checking for Proper Seating in the Grooves
After installing the belt on all the pulleys, it is crucial to verify that it is seated correctly within the grooves of each individual pulley.
These grooves are designed to securely hold the belt in place and allow it to rotate smoothly without slipping.
If the belt is even slightly misaligned or not fully seated, issues such as vibration, noise, or uneven wear on one side of the belt may arise once the engine is started.
Carefully inspect each pulley by hand to ensure that the belt is seated uniformly and correctly within its grooves.
Proper seating ensures full contact between the belt and the pulley surface, a condition essential for the efficient transmission of power and for maintaining optimal performance over the long term.
Taking a moment to verify proper seating at this stage helps prevent future complications and ensures the stable and reliable operation of the engine.
How to Adjust the Belt Tension
1. Automatic Tensioner: Releasing Gradually to Apply Tension
In vehicles equipped with an automatic tensioner system, belt tension is controlled by a spring-loaded mechanism that exerts constant pressure on the belt.
After properly installing and seating the new belt, the tensioner should be released gradually, allowing the spring to slowly take up the slack and tighten the belt.
This step is crucial; if the tensioner is released too abruptly, it can subject the belt to a sudden shock, potentially causing it to slip out of position or fail to seat correctly on the pulley.
The correct procedure involves using a tool to hold the tensioner, carefully guiding it back into place and then allowing it to set automatically.
Once released, the system self-adjusts to maintain constant pressure, ensuring the belt operates smoothly without the need for any manual tightening.
2. Manual System – Properly Tightening the Adjustment Bolt
In older vehicles featuring a manual tensioning system, belt tension is controlled by shifting the position of the alternator using an adjustment bolt.
After fitting the belt onto the pulleys, the alternator is pulled slightly outward to achieve the correct belt tension and the adjustment bolt is then tightened to secure the alternator firmly in place.
It is essential to tighten the bolt gradually while continuously monitoring the belt tension; overtightening the bolt can place excessive strain on the belt and bearings, whereas leaving it too loose may cause the belt to slip and generate noise.
After making adjustments, it is crucial to properly tighten the pivot bolt to ensure that the alternator is firmly locked into its final position.
Balancing this system requires great care, as the correct belt tension depends entirely on the precision with which the bolts are set.
3. Checking for Correct Belt Deflection or Tension Levels
Once the belt has been adjusted, it is essential to verify that its tension is at the correct level to ensure proper operation.
Belt deflection refers to the extent to which the belt bends when slight pressure is applied to the center of its longest span.
If the belt deflects excessively, it indicates that it is too loose; this can cause it to slip while the engine is running, potentially leading to charging issues and generating noise.
Conversely, if no deflection is observed at all, it implies that the belt has been overtightened, a condition that can, over time, damage the pulleys, bearings and the belt itself.
In automatic systems, the tensioner typically self-regulates this parameter; nevertheless, it remains vital to visually inspect the physical condition and operation of the belt to ensure that everything is functioning correctly.
In manual systems, checking for belt deflection ensures that the proper balance between tightness and flexibility is maintained, thereby allowing the belt to operate efficiently and for an extended duration without premature wear.
How to Check the Installation of New Alternator Belt
1. Manually Rotating the Engine to Check Alignment – If Possible
Before starting the engine, manually rotating it is a crucial safety step, provided your vehicle’s design permits it.
This is typically accomplished by using a socket and ratchet on the crankshaft pulley bolt.
Slowly rotating the engine helps you confirm that the belt is running smoothly across all pulleys without any obstructions or sudden, excessive tightness.
This manual rotation also allows you to immediately identify installation errors such as: incorrect routing or improper seating, before the engine is even started.
If you face any unusual resistance while rotating, it may indicate belt misalignment or a pulley that is not seated correctly; the system must be re-inspected before proceeding further.
2. Ensuring the Belt is Properly Seated on All Pulleys
After manually rotating the engine, it is essential to carefully verify that the belt is properly seated on every pulley.
Each pulley should hold the belt evenly within its grooves; no part of the belt should be riding on the edge or sitting too high.
Proper seating ensures that the power transmitted from the engine reaches all accessories, including the alternator and other rotating components, efficiently.
Even a minor seating error can generate vibrations, reduce operational efficiency, or cause premature belt wear.
Closely inspecting the contact point at every pulley helps confirm that the installation is secure and the engine is ready to be started.
3. Checking the Belt for Any Twists or Misalignment
The final stage of the inspection involves checking the entire length of the belt for any signs of twisting or misalignment.
The belt should run in a straight and natural line across all pulleys, without any lateral pulling or uneven tension.
A twisted belt can lead to serious issues, such as squealing noises while the engine is running, uneven wear and belt slippage.
Misalignment can occur if a pulley has shifted slightly from its position or if the belt was not installed correctly during the installation process.
Carefully examining the belt from various angles helps in promptly identifying these problems.
Ensuring that the belt’s path is straight, smooth and properly aligned is crucial for the longevity and reliability of the alternator system.
Read More:
At Last, How to Test the Alternator Belt
1. Reconnecting the Battery
After completing the installation and verification steps, the first part of the final testing phase involves reconnecting the negative terminal of the battery.
This step restores the electrical supply to the vehicle, allowing the engine and all electrical systems to function properly once again.
It is crucial to ensure that the terminal is securely tightened to maintain a robust connection and prevent it from coming loose; a loose connection can lead to difficulties in starting the vehicle or result in unstable electrical performance.
Once the battery is reconnected, the vehicle is ready for a test run, which begins by safely starting the engine.
2. Starting the Engine and Observing Belt Operation
When starting the engine for the first time after replacing the belt, it is essential to carefully observe the belt while the engine is running.
The belt should rotate smoothly over all the pulleys without any visible vibration, bouncing, or slipping.
A properly installed belt will rotate uniformly and remain firmly seated in its correct position, even when the engine is under load.
This observation helps confirm that the installation was performed correctly and that the belt tension is functioning as intended.
It is particularly important to keep an eye on the belt during the first few seconds after the engine starts, as most installation errors tend to manifest immediately upon engine startup.
3. Listening for Squealing or Unusual Noises
Listening carefully to the engine sounds is another critical aspect of the final testing process.
A properly installed alternator belt should operate quietly, without producing any squealing, grinding, or rattling noises.
A sharp squealing sound typically indicates that the belt is either too loose or not seated correctly within the pulley grooves.
Sounds resembling grinding or rubbing may point to internal issues within the pulley or bearings that were overlooked during the inspection process.
Paying attention to these sounds allows for the early detection of minor issues before they escalate into major mechanical failures.
The sound of a quiet and steady engine is a strong indication of a properly executed installation.
4. Checking Dashboard Warning Lights
The final step involves observing the dashboard for any warning lights that illuminate after the engine has been started.
The battery warning light is particularly critical, as it is directly linked to the alternator’s performance and the operational efficiency of the belt.
If the belt is functioning correctly, the alternator should adequately charge the battery and no warning lights should remain illuminated.
If a warning light flashes or remains lit, it may signal an issue with the belt’s tension, alignment, or electrical charging capacity.
Monitoring the dashboard ensures that both the mechanical and electrical systems are functioning in harmony; thereby confirming a successful installation and the safe operation of the vehicle.
Know, Common Mistakes While Replacing Alternator Belt to Avoid
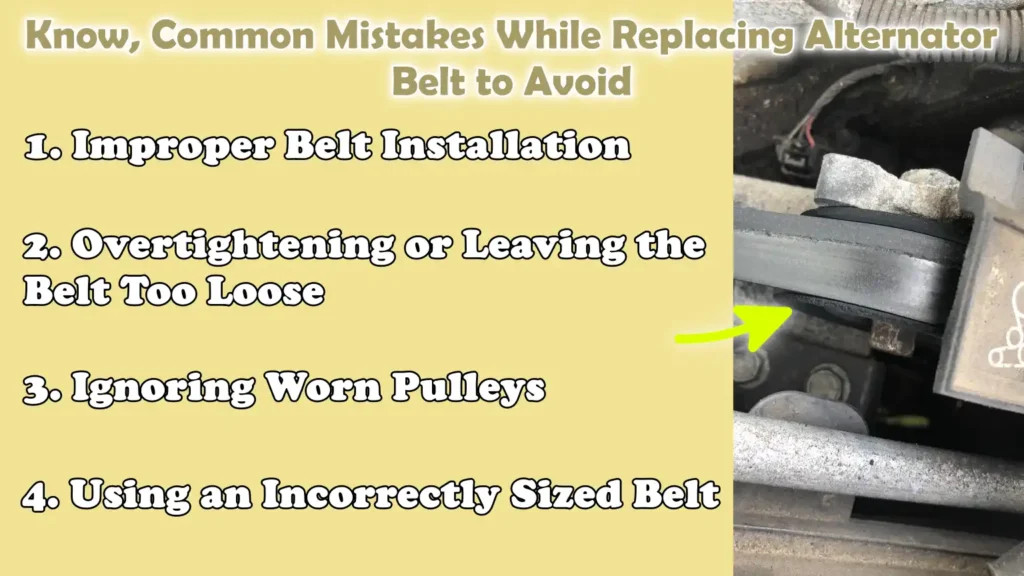
1. Improper Belt Installation
One of the most common and serious mistakes made when replacing an alternator belt is installing it incorrectly.
The belt must follow a very specific routing path around every pulley, including the crankshaft, alternator, idler and tensioner.
If the belt’s routing is even slightly off, it will not function properly; under load, it may slip or fail to drive essential components effectively.
In many cases, improper installation causes the belt to rub against engine components, leading to premature wear or damage.
As modern engine compartments are often quite cramped and complex, it is crucial to verify the correct belt routing, using a diagram or clear instructions, both before and after installation.
2. Overtightening or Leaving the Belt Too Loose
Another major error involves incorrectly setting the belt tension.
If the belt is overtightened, it places excessive strain on the alternator bearings, idler pulleys and tensioner system, potentially leading to their premature wear or failure.
Sustained excessive tension can also cause the belt itself to develop cracks rapidly.
Conversely, if the belt is left too loose, it may slip while the engine is running, particularly when the electrical load increases, such as when operating the headlights or air conditioning.
Such slippage reduces the alternator’s operational efficiency and can lead to issues with battery charging.
Proper tension is essential for the belt to function correctly and ensure its longevity.
3. Ignoring Worn Pulleys
Many people focus solely on the belt and neglect to inspect the pulleys, a mistake that can prove costly.
Worn or defective pulleys can cause even a new belt to fail prematurely, even if the belt has been installed correctly.
If a pulley has worn bearings, rough grooves, or is even slightly misaligned, it can lead to vibration, noise and uneven wear on the belt.
In some cases, a faulty pulley may even seize completely, resulting in a sudden belt rupture.
Inspecting all pulleys before installing a new belt ensures that the entire system is functioning properly, thereby eliminating the need for frequent repairs.
4. Using an Incorrectly Sized Belt
Using a belt of the wrong size is another major error that can lead to immediate problems.
If the belt is too long, it will fail to maintain proper tension; this can cause it to slip, negatively impacting engine performance.
Conversely, if the belt is too short, it may be difficult to install and can place excessive strain on the pulleys and the tensioner system.
Even a slight discrepancy in the belt’s length or type can significantly affect the overall operation of the system.
Therefore, it is crucial to always select a belt that strictly adheres to the specific specifications recommended for your vehicle’s model, ensuring a proper fit, correct tension and long-term reliability.
How to Maintain Alternator Belt
Plus, there’s study about the reliability and failure behavior of automotive serpentine belt systems that includes the alternator-driven accessories as well, so it shows that belt failures often occurs due to the fatigue stress, tension imbalance and long-term material degradation under the heat cycles and research also highlights that belt-driven alternator systems are really important as even small efficiency losses can actually affects vehicle electrical stability, that’s why when you replace them then it prevents you from sudden breakdown risks as well.[¹]
1. Regular Inspection Intervals
Regular inspection of the alternator belt is the easiest and most effective way to prevent sudden breakdowns.
The belt should be inspected at regular intervals, particularly during routine vehicle servicing or when changing the oil.
Frequent inspections allow you to detect early signs of wear or changes in the belt’s condition such as: minor cracks, glazing, or changes in belt tension.
As the belt is constantly in operation whenever the engine is running, it gradually wears down over time due to heat, friction and engine vibrations.
Regular inspections enable you to catch potential issues in their early stages, before they lead to charging system failures or roadside breakdowns, thereby making the vehicle more reliable and safer to drive.
2. Keeping the Belt and Pulley Clean
Keeping the belt and pulley system clean is essential for ensuring the vehicle’s smooth and long-lasting performance.
Dirt, oil and debris can compromise the belt’s grip on the pulley, potentially causing the belt to slip or produce squealing noises while the engine is running.
In some cases, oil leaks from surrounding engine components can also degrade the belt’s rubber material, accelerating its wear rate.
Cleaning the surrounding area and ensuring that there are no leaks helps maintain the necessary friction between the belt and the pulley.
A clean system allows the belt to run smoothly and minimizes unnecessary wear on the surfaces of both the belt and the pulley.
3. Replacing the Belt at Recommended Mileage Intervals
Every vehicle manufacturer specifies a recommended mileage or time interval for replacing the alternator belt.
Adhering to these recommendations is crucial because, even if a belt appears to be in good condition externally, its internal rubber structure can deteriorate over time.
Due to high temperatures and constant rotation, the belt’s structural integrity gradually diminishes, thereby increasing the likelihood of it failing without warning.
Replacing the belt at the appropriate time ensures that the engine’s charging system continues to operate efficiently and minimizes the risk of sudden vehicle breakdown.
Rather than waiting for the belt to fail completely, it is always safer to replace it before it becomes fully worn out.
4. Monitoring for Early Signs of Wear
Paying attention to early warning signs is one of the most effective maintenance habits for preventing serious problems.
Common early indicators include a sharp squealing or chirping sound when starting the vehicle, visible cracks on the belt’s surface, uneven wear, or the surface becoming shiny and smooth.
In some instances, you may also notice dimming lights or a decline in battery performance; these can be signs that the belt is slipping.
These subtle cues often manifest well before the belt fails completely, providing you with ample time to replace it safely.
By promptly addressing early signs of wear, you can avoid sudden breakdowns and ensure that your vehicle’s electrical system continues to function reliably and without interruption.
Conclusion – How to Replace Alternator Belt
Basically, when you install the alternator in well mannered then it works quietly and keeps your entire driving experience really stable and free of worries.
This single belt plays a pivotal role in driving the alternator, which directly facilitates battery charging and powers essential electrical systems such as lights, ignition, sensors and air conditioning.
When the belt becomes worn, loose, or damaged, the consequences may manifest gradually in the form of warning signs such as: squealing noises, diminished battery performance, or dashboard alerts, and if left unaddressed, this can ultimately lead to a sudden vehicle breakdown.
By adhering to a meticulous procedure, which involves safe preparation, proper belt installation, precise tension adjustment and a careful inspection of associated components like pulleys and tensioners, you can significantly minimize the likelihood of future complications.
What makes this repair particularly crucial is that it not only resolves an immediate issue but also helps prevent major mechanical failures that could incur far greater costs in the long run.
Regular inspections, timely belt replacements and heeding early warning signs ensure that the entire charging system remains stable and efficient.
So, that’s all from this guide about How to Replace Alternator Belt and you can comment fore more info.
Frequently Asked Questions
FAQ 1: What is an alternator belt and what does it do?
Answer: An alternator belt is a rubber belt that connects the engine’s crankshaft to the alternator and sometimes to other engine components as well. Its primary function is to transmit power from the engine, enabling the alternator to generate electricity. This electricity charges the battery and powers essential systems such as the headlights, ignition and dashboard electronics. If the belt is not functioning properly, the battery will gradually discharge and the vehicle may cease to operate correctly.
FAQ 2: How can I tell if my alternator belt is failing?
Answer: A failing alternator belt typically provides several clear warning signs before it fails completely. The most common sign is a loud squealing noise coming from the engine, particularly when you start the vehicle or switch on electrical systems. You may also observe cracks on the belt’s surface, a shiny or glazed texture, or fraying along the edges. In some instances, the battery warning light may illuminate, or the headlights may dim, as the alternator is unable to charge the battery effectively.
FAQ 3: Can I drive with a failing alternator belt?
Answer: Driving with a failing alternator belt is unsafe, as it can lead to a sudden battery failure. If the belt is slipping or has snapped, the alternator will not charge the battery and the vehicle will run solely on the power stored in the battery. Once the battery is completely discharged, the engine may shut down without any warning. This could leave you stranded on the road; furthermore, depending on the type of vehicle, it may also result in the failure of the power steering and other electrical systems.
FAQ 4: How long does it take to replace an alternator belt?
Answer: The time required to replace an alternator belt depends on the type of vehicle and your level of experience. For most common cars, this process typically takes anywhere from 30 minutes to 2 hours. For engines with a simple layout and easy accessibility, the job can be completed quickly; however, for vehicles where engine components are tightly packed, accessing the belt and tensioner may require more effort and take longer.
FAQ 5: Will I need special tools to replace the alternator belt?
Answer: In most cases, you will not need highly specialized tools, but you will certainly require some basic tools. Typically, a socket set, a ratchet and a wrench set are used. For certain vehicles equipped with automatic tensioners, a specific tool may be required to adjust the tensioner pulley. A flashlight can also prove helpful for illuminating tight spaces within the engine compartment. In some instances, particularly if the work needs to be performed from underneath the vehicle, a jack may also be required.
References:
[1] Reliability and Availability Models of Belt Drive Systems Considering Failure Dependence
https://link.springer.com/article/10.1186/s10033-019-0342-x

Hello Folks, Dean Shali here to help you out to solve the problems with your lovely vehicle, as i have lots of experience and knowledge about automotive industry as i woks directly with the customers and repair vehicles and i love to help the people to keep their cars safe and running smoothly.