Written By: Dean Shali
Fact Checked By: Sabré Cook
Reviewed By: Tamara Warren
Basically, most of the time alloy wheel paint problems are not caused by the age alone, but there’s brake dust, road chemicals and scratches that exposes the bare aluminum as well.
So, whenever you drive that lovely vehicle of yours, then there’s road grit, brake dust, curb contact, moisture and unbearable heat from the braking that all adds up to the wheel surface directly and destroys those attractive looking wheels.
Not only this, modern alloy wheels are made of the aluminum alloy materials because of the light weight specification rather than traditional steel wheels, that helps you to reduce the unsprung weight, as it can improve the heat dissipation around the brakes as well.
But, that light metallic comes with the one drawback: as once the factory paint or clear coat gets scratched, chipped or won out through the exposed alloy underneath that can start the oxidizing as well.
That’s why, even a small curb scrape often turns into the bubbling paint, white spots, peeling finish or rough pitted areas even after few months later as well.
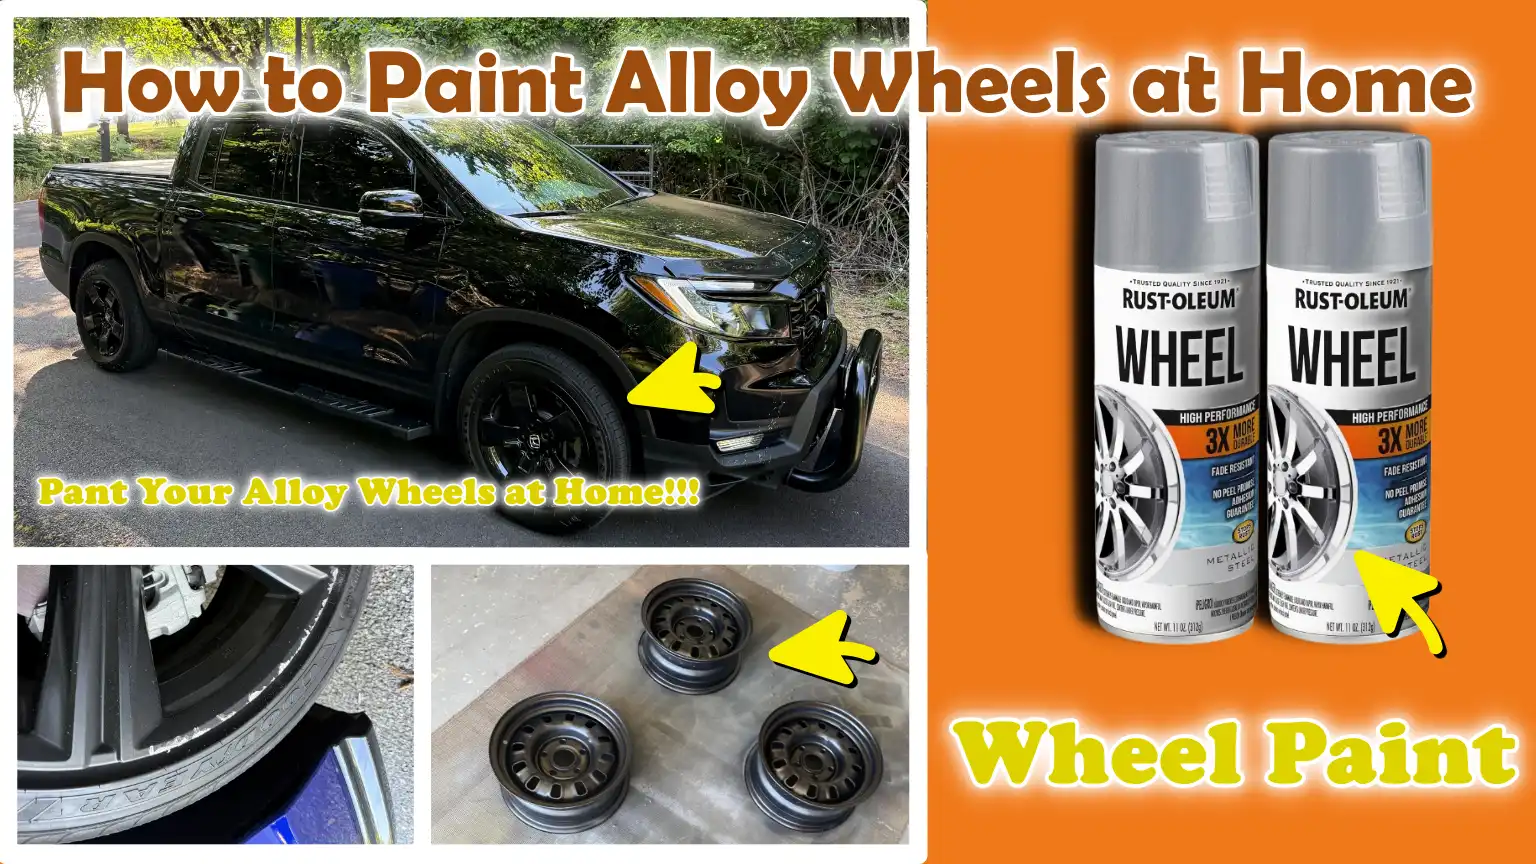
Now, in this guide you’ll learn everything about How to Paint Alloy Wheels at Home, so that you can easily refinish the appearance of your vehicle alloy wheel.
Understand, What Are Alloy Wheels?
Alloy wheels are among the most common types of wheels used in modern passenger vehicles, as they significantly reduce vehicle weight and offer considerable flexibility in design.
Unlike traditional steel wheels, alloy wheels are manufactured by blending aluminum with other metals, resulting in wheels that are not only lightweight but also robust enough to easily withstand the rigors of daily driving.
Car manufacturers frequently opt for alloy wheels because they enhance vehicle handling, reduce overall wheel weight and assist the brakes in dissipating heat more effectively.
This is significant because wheels constitute a portion of a car’s “unsprung weight”, that is, the weight not supported by the suspension, which directly influences how the suspension responds to uneven road surfaces.
Lighter wheels can substantially improve both steering responsiveness and ride comfort.
Alloy wheels are also popular because they allow for more intricate and attractive styling; this is why “appearance packages” offered on many cars often feature exclusive wheel designs.
Despite their attractive appearance, alloy wheels require regular maintenance, as exposure to weather elements, brake dust and road grime can degrade their finish.
1. Know About Alloy Wheels
Alloy wheels are manufactured from a mixture of aluminum or magnesium, to which small quantities of other metals are added to enhance their strength, durability and performance.
The term “alloy” refers to a metal created by combining two or more metals, resulting in properties that are superior to those of any single constituent metal.
In most vehicles sold today, aluminum alloy wheels are far more common than those made of magnesium, as aluminum strikes an excellent balance between weight, strength, cost and corrosion resistance.
These wheels are shaped through casting or forging processes, after which a primer, paint and a clear coat are applied to protect their exterior surface.
Applying these layers is crucial because raw alloy can react over time when exposed to moisture and air.
When people speak of repainting alloy wheels, they typically refer to repairing this protective layer of paint rather than altering the structural composition of the wheel itself.
2. Common Metals Used in Alloy Wheels
Most alloy wheels are primarily composed of aluminum, with small amounts of other metals such as: silicon, magnesium, or nickel, added depending on the specific design and manufacturing process.
Aluminum is widely used because it is significantly lighter than steel and is naturally resistant to rust, although it can undergo oxidation if left unprotected.
Silicon is often added to improve casting quality and facilitate the creation of complex wheel geometries.
Magnesium can further reduce weight; however, due to its higher cost and the specialized care it requires, it is rarely used in standard passenger vehicles.
Some high-performance vehicles may utilize forged aluminum alloys; these are stronger than cast alloys because the metal’s grain structure is compressed under immense pressure.
The choice of material influences how easily the wheel scratches, how it withstands impacts and how it reacts to environmental conditions.
Although metal is naturally durable, its outermost layer serves as a primary protective shield, safeguarding it against the wear and tear resulting from everyday use.
3. Why Do Alloy Wheels Require Periodic Maintenance?
Alloy wheels constantly endure some of the harshest conditions that any vehicle faces.
Whenever the vehicle is driven, the wheels are directly exposed to water, mud, road salt, sand, brake dust and heat.
Brake dust is particularly damaging because it contains tiny metal particles that can adhere to the wheel’s surface and gradually abrade its protective top layer (clear coat).
When dirt and impurities are allowed to accumulate on the surface for extended periods, they can dull its luster and make it difficult to clean.
Minor scratches resulting from contact with curbs or stones, no matter how insignificant they may seem, as it can expose the underlying alloy material.
Once the metal surface is exposed, the risk of corrosion (oxidation) increases significantly.
This often manifests as white spots, discoloration, or blistering of the paint.
Without proper maintenance, these issues can spread beneath the paint, ultimately leading to paint peeling.
Regular cleaning, inspection and periodic repainting can prevent this damage from escalating, before the cost of repairs becomes prohibitive.
4. How Does Paint Protect the Surfaces of Wheels?
The paint applied to alloy wheels serves a purpose beyond mere aesthetics or visual appeal; it acts as a protective shield between the metal and the external environment.
This layer of paint helps prevent moisture, road chemicals, brake dust and oxygen from coming into direct contact with the alloy.
Without this paint, the aluminum alloy is susceptible to oxidation, causing its surface to become dull and rough.
A typical paint system consists of a primer, a color coat and a clear coat.
The primer helps the paint adhere properly to the wheel and seals the metal surface.
The color coat gives the wheel its visual appearance, while the clear coat provides additional protection against scratches, UV rays and chemicals.
When this protective shield becomes compromised, corrosion can begin to form beneath the surface, even if it is not immediately visible from the outside.
Therefore, when the paint on the wheels begins to chip, peel, or fade, it is beneficial to have them repainted.
A properly applied layer of paint helps preserve the wheel, enhances its aesthetic appeal and protects the surface against wear and tear over the long term.
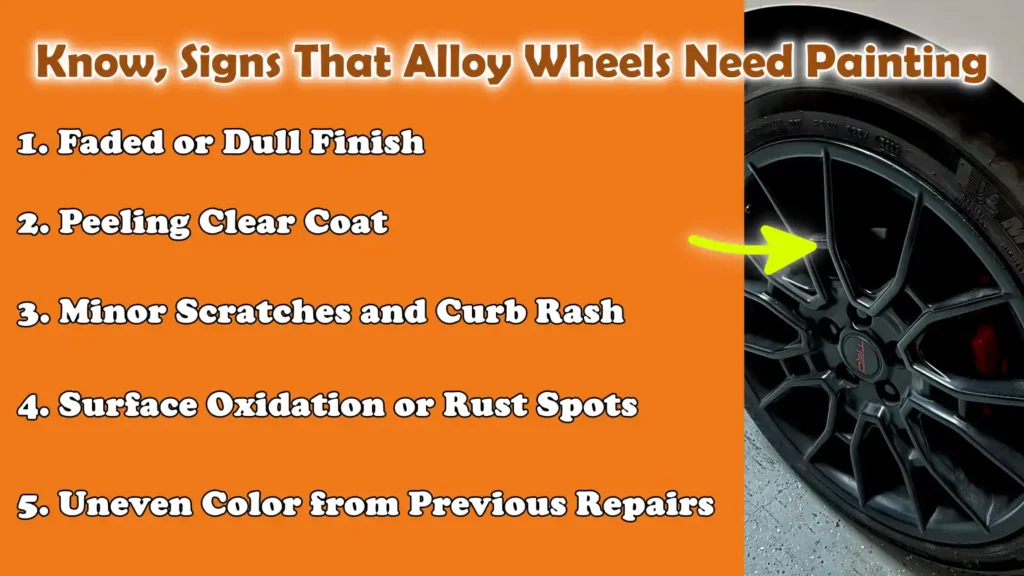
Know, Signs That Alloy Wheels Need Painting
Before alloy wheels require repainting, certain clear signs typically begin to emerge.
The paint and clear coat applied to the wheel serve to protect the underlying metal; however, this protection gradually weakens due to exposure to brake dust, water, road debris and accidental curb strikes.
Once the outer layer begins to deteriorate, the wheel may lose its original luster and over time, distinct signs of damage become visible.
Repainting often becomes necessary when the finish is no longer effectively protecting the metal, not merely when the wheel begins to look old.
1. Faded or Dull Finish
A faded or dull finish is often the earliest indication that the wheel’s paint is deteriorating.
This occurs when the clear coat gradually degrades due to exposure to sunlight, road grime and repeated washing.
The wheel may begin to appear hazy, less glossy, or uneven compared to its original, new condition.
A lackluster surface also signals that the protective top layer is weakening, thereby increasing the likelihood of the paint cracking or wearing away.
If cleaning fails to restore the shine, repainting may be the best solution.
2. Peeling Clear Coat
Peeling clear coat refers to the condition in which the outer protective layer begins to separate from the painted surface beneath it.
This often begins along the edges of the spokes, around the lug holes, or in areas that have already sustained damage, where moisture has managed to penetrate beneath the coating.
Once peeling begins, the underlying paint can rapidly lose its protective properties and may start to flake off.
The exposed area can trap dirt and water, causing the damage to spread rapidly.
Repainting effectively reseals the surface, preventing further peeling and safeguarding the underlying metal.
3. Minor Scratches and Curb Rash
Minor scratches and scuff marks from curbs are very common on alloy wheels, as the wheels frequently come into contact with curbs, stones and rough road surfaces.
Although these marks may appear minor at first glance, they can strip away the paint and expose the underlying alloy metal.
Once this occurs, moisture and dirt can penetrate the metal, initiating the process of oxidation (rusting).
If even minor scratches are left unaddressed, they can worsen and cause significant damage to the paintwork.
Smoothing out the damaged area and repainting it restores both the protective integrity and the aesthetic appeal of the wheel.
4. Surface Oxidation or Rust Spots
Unlike steel, alloy wheels do not rust in the traditional sense; however, if their protective paint layer becomes compromised, they can undergo oxidation.
Oxidation often manifests beneath the paint as white spots, chalky streaks, or rough patches.
It typically begins in areas where scratches, cracks, or peeling paint allow moisture to come into direct contact with the alloy.
If left untreated, this oxidation can spread beneath the surrounding paint and, over time, cause the surface to become increasingly rough.
Proper sanding followed by repainting can help prevent this damage from worsening.
5. Uneven Color from Previous Repairs
Wheels that have undergone prior repairs may exhibit uneven coloring if the paint shade was not accurately matched during the previous repair process.
Certain sections of the wheel may appear darker, lighter, or glossier compared to the rest.
This often occurs when different paint brands, poor surface preparation, or an incorrect clear coat were used during the repair process.
Such color inconsistencies typically become more apparent when viewed under direct sunlight.
Repainting the entire wheel ensures a uniform finish and effectively helps to hide any residual traces of previous repairs.
Tools
| Tools | Why It Is Needed | How to Use It |
|---|---|---|
| Wheel Cleaner | It removes brake dust, road grime and old residues that could prevent paint from adhering properly. Dirt trapped beneath the paint on dirty wheels can subsequently compromise the paint’s adhesion. | Spray it directly onto the wheel surface, allow it to sit for the duration specified in the product instructions, then scrub and rinse thoroughly. Allow it to dry completely before beginning the sanding process. |
| Degreaser | It removes grease, wax, tire dressing and oil from the surface. Even a small oil stain can later cause the paint to peel. | Apply this after washing. Wipe down the entire wheel with a clean cloth to ensure the surface is completely free of residues before applying the primer. |
| Sandpaper – Different Grits | It smooths out scratches, removes chipped paint and helps new paint adhere to the surface. Different grits (levels of coarseness) are used for the various stages of the process. | Use a coarse grit such as: 320–400, for damaged areas, then use a finer grit such as: 600–800, to smooth the surface. Sand the surface evenly and remove all dust before painting. |
| Masking Tape | It protects the tires, valve stems and any other parts you do not wish to paint. It helps keep the edges of the paint clean and crisp. | Firmly press the tape around the rim of the tire and onto all the parts you wish to cover. Carefully inspect for any gaps or exposed areas before you begin spraying. |
| Plastic Sheets or Trash Bags | This covers the tires and surrounding components, ensuring that paint overspray does not reach surfaces you do not wish to paint. | Place it over the tire and secure it in position using masking tape. Before painting, ensure that no exposed rubber remains visible. |
| Primer | This aids in the adhesion of the paint to the metal surface and seals the repaired areas. It also minimizes issues related to paint peeling and extends the lifespan of the paint finish. | After sanding, spray light and even coats of this product onto the wheel. Allow each coat to dry before applying the next one. Avoid applying thick coats. |
| Wheel Paint | This adds a fresh color and restores the wheel’s appearance to a like-new condition. Formulated specifically for wheels, this paint withstands harsh road conditions more effectively than standard spray paints. | Shake the can thoroughly and spray from a distance of approximately 8–12 inches. To prevent paint drips, apply several light coats rather than a single thick one. |
| Clear Coat | This protects the paint layer from scratches, moisture, UV rays and brake dust. It enhances the durability and finish of the paintwork. | Apply this after the paint has dried. Spray 2–3 thin coats, allowing ample drying time between each layer. |
| Safety Gloves | These protect your skin from chemicals, paint and sanding dust. They also prevent the natural oils from your fingers from transferring onto the wheel’s surface. | Wear them while cleaning, sanding and painting. If they tear or become saturated with chemicals, replace them immediately. |
| Respirator Mask | This protects you from paint fumes, sanding dust and chemical vapors. Spray paint should never be inhaled. | Wear this during every stage of the sanding and spraying process, specially when working in enclosed spaces such as a garage. |
| Microfiber Cloth | This removes residual dust and helps you wipe down the wheel surface without causing any scratches. | Use this after washing and sanding. To prevent dust from getting trapped, wipe down the wheel before applying each coat of paint. |
| Jack and Lug Wrench | If you decide to remove the wheels, this step is essential, as it simplifies the task and results in a cleaner paint finish. Painting the wheels while they are detached from the vehicle generally yields superior results. | First, slightly loosen the lug nuts; then, use a jack to safely lift the vehicle, remove the wheel and place it on a sturdy surface for painting. |
How to Choose the Right Paint
Selecting the right paint for alloy wheels depends on how long the finish lasts and how effectively it protects the metal.
Wheels are subjected to the effects of brake dust, heat, road debris, water and frequent washing; therefore, ordinary household paint is not suitable for this task.
Paint specifically formulated for wheels adheres better to metal surfaces and is capable of withstanding temperature fluctuations.
Choosing the wrong paint can result in the finish fading prematurely, peeling, or cracking.
A robust paint system typically consists of a primer, a color coat and a clear coat, ensuring that the wheel remains protected while also looking clean and glossy.
1. The Best Types of Paint for Alloy Wheels
The best option for alloy wheels is typically automotive wheel paint, specifically designed for vehicle wheels, which is formulated for use on metal surfaces.
These paints are engineered to adhere strongly to aluminum and to provide protection against scratches or damage caused by stones or brake dust.
Acrylic enamel and urethane-based wheel paints are commonly used options, as they provide a more durable finish compared to standard spray paints.
Some wheel paints also possess rust-inhibiting properties, which help to minimize oxidation.
Choosing products specifically designed for wheels yields superior results compared to using general automotive paints.
2. Spray Paint vs Brush-On Options
For DIY (Do-It-Yourself) alloy wheel painting projects, spray paint is the most popular choice, as it delivers a smoother and more uniform finish.
This allows for easy access to the wheel spokes, curved surfaces and tight corners.
Brush-on paint is ideal for minor touch-ups, but it often leaves brush marks and does not spread evenly across large surfaces.
For repainting an entire wheel, spray paint is generally the superior choice, whereas brush-on paint is primarily used to repair minor scratches or blemishes.
The final appearance of the paint often depends more on the application technique than on the actual color of the paint itself.
3. Heat-Resistant Wheel Paint
Wheel paint generally requires a certain degree of heat resistance, as the wheels are situated in close proximity to the braking system.
During driving, braking generates heat that radiates to the surrounding wheel surfaces.
This effect becomes even more pronounced when braking hard, driving on hilly terrain, or navigating stop-and-go traffic.
Heat-resistant wheel paint is formulated to better withstand these conditions and prevent the paint from fading prematurely.
Although wheel temperatures typically do not reach the same extremes as engine temperatures, it remains beneficial to use a standard wheel paint designed for high-temperature automotive environments.
4. Matching OEM Wheel Colors
Using a paint that matches the wheel’s original factory color ensures that the repair work looks natural and authentic.
OEM stands for “Original Equipment Manufacturer”, referring to the specific factory finish applied during the vehicle’s manufacturing process.
Many wheel finishes are not simply “silver,” but rather feature distinct shades such as: Bright Silver, Hyper Silver, Gunmetal, or Machined Gray.
The color visible in the can may appear different once dry or when viewed in sunlight.
Matching the OEM color preserves the original aesthetic and ensures that the repaired sections blend seamlessly with the rest of the wheel.
5. Matte, Gloss, Satin and Metallic Finishes
After painting, the finish transforms the appearance of the wheel, even if the base color remains the same.
A matte finish is flat and non-reflective; it can also help hide minor surface imperfections.
A gloss finish offers maximum shine, giving the wheel a highly polished look, though scratches tend to be more visible on it.
A satin finish strikes a balance between matte and gloss; it is a popular choice as it provides a clean, sophisticated look without being overly reflective.
A metallic finish contains tiny shimmering particles that further enhance its luster when illuminated by sunlight.
Generally, the choice of finish does not affect the structural integrity of the wheel, but it certainly influences how easily dust, scratches and brake dust become visible on the surface.
How to Prepare the Alloy Wheels Before Painting
One of the most critical aspects of painting alloy wheels at home is their preparation.
A high-quality paint finish depends less on the paint itself and more on proper cleaning and surface preparation.
If dirt, brake dust, or moisture remains on the wheel, the paint will not adhere properly and may peel prematurely.
With proper preparation, the new coating bonds firmly to the wheel’s surface, resulting in a smooth finish.
Many issues associated with DIY (Do-It-Yourself) painting arise because wheels are painted without being thoroughly cleaned or inspected for pre-existing damage.
1. Removing the Wheels from the Car
Removing the wheels from the car typically yields better painting results, as it allows you to access the entire surface much more easily.
This also minimizes the risk of paint overspray landing on brake components, fenders, or suspension parts.
Painting the wheels while they are detached from the vehicle allows you to work on all the spokes, rims and inner surfaces, areas that are difficult to reach when the wheels are mounted on the car.
It also makes sanding and inspecting the wheels much easier.
Although it takes a little extra time, removing the wheels generally results in a cleaner and more uniform finish.
2. Thorough Washing
Before beginning any sanding or painting work, it is essential to wash the wheels thoroughly.
This removes loose dirt, road grime and surface dust that could scratch the wheel during the sanding process.
On a clean wheel, it also becomes easier to identify scratches, peeling paint, or hidden rust.
Use a wheel cleaner that can effectively remove brake residue without damaging the existing finish.
Pre-washing ensures that dirt does not become embedded deeper into the surface during the subsequent stages of preparation.
3. Removing Brake Dust and Grease
Brake dust and grease are two common causes of damage to wheel paint.
Brake dust consists of tiny metal particles shed from brake pads and rotors, which can adhere very strongly to the wheel’s surface.
Grease can also originate from tire dressings, road oils, or fingerprints.
If these contaminants remain on the wheel, the primer will not adhere properly.
A degreaser helps remove invisible oils that might be missed during a standard wash.
Before painting begins, the surface must be completely clean and dry and free of any greasy residue.
4. Proper Drying
Thoroughly drying the wheel is crucial, as trapped water can compromise paint adhesion.
Water often hides in lug holes (nut recesses), spoke joints and the rim flange, the area where the tire meets the wheel.
If paint is applied over wet spots, bubbles may form in the paint later, or it may peel off.
After washing, the wheel should be wiped down with a clean microfiber cloth and left to air dry.
Allowing ample drying time helps prevent moisture from becoming trapped beneath the layers of paint.
5. Inspecting for Damage Before Painting
Before painting, the wheel should be carefully inspected for scratches, curb rash, minor cracks and rust.
Some damage may affect only the paint, while deeper marks may extend down to the underlying alloy metal.
This inspection helps determine where sanding or minor repairs are needed before proceeding.
If the existing clear coat is peeling, it is essential to smooth out that area before beginning to paint.
Closely examining the wheel before starting the work helps prevent hidden damage from going unnoticed, damage that could subsequently become visible beneath the new finish.
How to Properly Sand Alloy Wheels
Sanding is one of the most critical steps when painting alloy wheels, as it prepares the surface to ensure the new paint adheres properly.
Paint adheres best to a clean, slightly textured surface, rather than one that is glossy or peeling.
If the old finish remains too smooth, the new paint will not bond correctly and may peel off prematurely.
Sanding also removes damaged clear coats, loose paint, minor oxidation and surface imperfections.
This meticulous sanding process ensures that the final paint finish looks uniform and lasts longer.
1. Why Sanding Is Essential
Sanding creates an ideal surface for primer and paint adhesion.
Alloy wheels often retain traces of old clear coats, minor scratches and invisible signs of oxidation; all of these factors can prevent new paint from bonding correctly.
Even if the wheel appears clean, its existing surface may still harbor weak spots.
Sanding removes this worn-out top layer and creates a texture that allows the primer to adhere more firmly.
Without sanding, the new paint may look good initially, but it will eventually peel or flake off when exposed to heat, washing, or flying road debris.
2. The Best Grit for Removing Old Finishes
The grit (coarseness) of the sandpaper determines how much material is removed from the surface.
Lower-numbered grits are coarser and strip away old paint quickly, while higher-numbered grits are finer and serve to prepare the wheel for the final stages of painting.
For repainting most alloy wheels, a medium grit such as: 320 or 400, is highly effective at removing peeling paint and damaged clear coats.
A finer grit, such as 600 or 800, is useful for smoothing the surface prior to applying primer.
Using sandpaper that is too coarse can result in deep scratches that may remain visible even after painting; therefore, it is essential to use a fine grit during the finishing stage.
3. Sanding Damaged Areas
Before painting the entire wheel, special attention should be paid to damaged areas.
Scratches, curb scuffs and spots where the paint is peeling should be sanded until their rough edges feel smooth to the touch.
If the edge of the old paint remains raised and is not properly blended, it may remain visible even beneath the new paint.
Sanding the damaged sections removes loose coatings and helps to minimize the visibility of the repaired area later on.
The objective here is not to remove excessive metal, but rather to level out the damaged section so that the new paint can adhere to it uniformly.
4. Smoothing the Entire Wheel
Once the damaged areas have been addressed, the entire wheel should be lightly sanded to create a uniform surface.
This step helps to eliminate minor imperfections and ensures that the new paint appears consistent across all spokes and edges.
Sanding only specific sections can result in an uneven surface, which may manifest as varying levels of glossiness after painting.
Thoroughly and lightly sanding the entire wheel allows the primer to adhere uniformly across the entire surface.
It also helps to lighten the existing finish, resulting in a more uniform final finish.
5. Cleaning Off Dust After Sanding
Sanding generates fine dust that must be removed before painting.
This dust can accumulate in corners, spoke joints and lug holes, where it may subsequently become trapped beneath the primer or paint.
If left uncleaned, it can create rough patches and result in an uneven finish.
After sanding, the wheel should be wiped down with a microfiber cloth and then cleaned again using a degreaser or surface cleaner.
A dust-free surface ensures proper adhesion for the paint and helps achieve a smoother final finish.
How to Repair Minor Damage First
Before painting alloy wheels, any minor damage should be repaired so that the new finish appears smooth and lasts for a long time.
While paint can hide color discrepancies, it cannot hide dents, deep scratches, or raised edges.
If damage is left unrepaired, it often remains visible even beneath the new paint and can compromise the protective layer.
Addressing minor issues beforehand also prevents moisture from reaching the exposed metal.
The primary objective is to prepare a smooth and stable surface prior to applying primer and paint.
1. Repairing Light Scratches
Light scratches typically damage only the paint’s “clear coat”, that is, the outermost layer.
These can often be fixed by gently rubbing the affected area with fine-grit sandpaper until the edges become smooth.
The main goal is to eliminate rough edges so they do not remain visible beneath the new paint.
If a scratch is deep enough for your fingernail to catch in it, the repair process may require more effort.
Before painting, most light scratches can be seamlessly blended with the surrounding surface by using a combination of medium and fine-grit sandpaper.
2. Repairing “Curb Rash”
“Curb Rash” occurs when the outer rim of a wheel scrapes against a curb (the edge of a sidewalk), resulting in rough marks or small gouges.
This often causes the paint to chip away, exposing the underlying alloy metal.
The damaged area should be sanded until the rough edges are smooth and the surface achieves a uniform finish.
If the damage is not too severe, simple sanding may be sufficient before beginning the painting process.
Promptly repairing “curb rash” helps prevent oxidation (rusting) on exposed metal surfaces.
3. Filling Dents – When Necessary
Some dents are too deep to be fixed by sanding alone.
If a dent creates a clearly visible depression in the surface, a small amount of “automotive filler” can be used to level the affected area.
The filler should be applied only to the damaged section and allowed to dry completely before sanding begins.
This ensures that, once painted, the repaired area remains completely undetectable.
Filling dents is primarily beneficial for fixing deep depressions that leave distinct marks on the surface.
4. When the Damage Is Too Severe for DIY Repair
Certain types of wheel damage cannot be repaired merely by repainting.
Deep scratches, cracks, bent rims, or severe corrosion on a wheel not only mar its aesthetic appeal but also compromise its structural integrity.
Painting will not resolve these issues; rather, it will merely hide damage that requires repair by a professional technician.
If the wheel exhibits vibration, air leaks, or any visible cracks, it should be inspected by a wheel repair specialist.
DIY painting is effective only for enhancing the wheel’s cosmetic appearance, not for correcting its structural flaws.
How to Mask Tires and Wheel Components
Before painting alloy wheels, proper masking is crucial, as spray paint can drift much further than anticipated.
Even a fine mist of paint can reach the tires, valve stems, brake components, or adjacent body panels.
Once dry, removing overspray can be a difficult task.
Proper masking ensures that the paint remains confined to the wheel’s surface and that the paint edges appear clean and sharp.
This also minimizes cleanup work and results in a more professional-looking paint finish.
1. Covering the Tire Sidewalls
The tire sidewalls should be covered to prevent paint from adhering to the rubber.
Although spraying paint on a tire does not necessarily damage its structural integrity, it often looks unsightly and may eventually crack or peel over time.
Masking tape can be applied around the perimeter of the wheel, specifically where the rim meets the tire.
The remainder of the tire can be covered using plastic sheeting or a bag.
This ensures that the paint remains strictly on the wheel, thereby preventing accidental paint marks on the sidewalls.
2. Protecting the Valve Stem
The valve stem should also be covered before you begin spraying.
Getting paint on the valve stem can make it look messy and paint may accumulate around the valve cap or the stem’s opening.
While this typically does not directly affect tire pressure, it can complicate future tire repair or maintenance tasks.
Wrapping a small piece of masking tape around the valve stem is sufficient.
Covering it takes just a few seconds and ensures that these small components remain clean.
3. Masking the Lug Holes
Excess paint can accumulate inside the lug holes, as these are deep recesses within the wheel that are often overlooked during the masking process.
If excessive paint builds up in these areas, the paint may chip or peel away later when lug nuts are installed or removed.
This can also result in an uneven finish around the central hub area of the wheel.
To protect the inner edges, small pieces of tape can be firmly pressed into each lug hole.
This ensures that the wheel retains a clean, neat appearance even after it has been remounted.
4. Preventing Paint from Spreading to Surrounding Surfaces
Overspray refers to the fine mist of paint that disperses into the air away from the wheel during the painting process.
If the wheel remains attached to the vehicle, this mist can settle on the ground, nearby tools, brake components, or the vehicle’s body panels.
For this reason, it is crucial to perform the painting work in an open yet controlled environment.
Plastic sheeting can be laid out around the workspace to prevent any stray paint droplets from spreading.
If the wheel remains mounted on the vehicle, the surrounding painted body panels should also be covered.
Proper masking ensures a clean job and eliminates the need for extensive cleanup afterward.
How to Apply Premier Effortlessly
Primer is a base layer that helps paint adhere to alloy wheels.
After sanding, the wheel’s surface may consist of bare metal, repaired areas and old paint, all of which react differently to new paint.
Primer creates a uniform surface, allowing the topcoat to adhere more effectively across the entire wheel.
It also helps protect the bare alloy metal from moisture and air, thereby reducing the risk of oxidation occurring beneath the paint.
Applying primer correctly often makes the difference between a paint job that lasts for a long time and one that begins to peel shortly thereafter.
1. Why Primer Is Essential
Primer helps the paint adhere more firmly to the wheel’s surface.
Bare alloy metal is smooth and, if sprayed directly without proper preparation, does not accept paint effectively.
Primer fills in minute sanding marks, covers repaired areas and establishes a solid foundation for the topcoat.
It also helps prevent color inconsistencies in areas where the old paint meets the bare metal.
Without primer, the likelihood of the paint peeling increases, particularly on wheels that are exposed to road debris, heat and frequent washing.
2. How Many Coats to Apply
Most wheel painting projects require the application of two to three light coats of primer.
A single thin coat may not be sufficient to completely cover all bare spots, specially over sanding scratches or repaired areas.
Applying several thin coats generally results in better adhesion compared to applying a single thick coat.
A thick layer of primer can run, dry unevenly, or trap solvents underneath.
Light coats gradually build up coverage and help create a smooth foundation for the paint.
The goal is to achieve uniform coverage, not to build up an excessively thick layer.
3. Drying Time Between Coats
Allowing adequate drying time between primer coats is crucial, as wet layers can compromise the final finish.
If the next coat is applied too soon, the underlying primer may remain soft, potentially leading to issues with paint peeling later on.
Most aerosol primers require a few minutes to dry between light coats; however, the exact drying time depends on temperature and humidity levels.
Cold weather can significantly slow down the drying process.
Before applying the next coat, the surface should feel dry to the touch.
Allowing sufficient drying time ensures that the primer cures evenly and enhances the durability of the paint job.
4. Common Mistakes When Applying Primer
A common mistake is applying primer to a dirty wheel.
The presence of dust, grease, or moisture beneath the primer can weaken its adhesion, potentially leading to paint failure later on.
Another mistake is over-spraying; this can cause the paint to run or result in thick, uneven layers that remain clearly visible even after the painting is complete.
Failing to sand the surface before applying primer is also problematic, as the existing smooth “clear coat” prevents the primer from adhering properly to the surface.
Furthermore, some people begin applying the colored paint before the primer has fully dried (cured).
By dedicating a little extra time at this stage, the final paint finish typically appears more durable and professional.
How to Paint Alloy Wheels at Home – Effective Method
Painting alloy wheels involves more than just changing their color.
It also entails creating a durable protective layer capable of withstanding road grime, brake heat, moisture and routine washing.
The paint must be applied in controlled layers to ensure it bonds effectively with the primer and dries uniformly.
Most issues faced during DIY wheel painting stem from applying excessive paint or failing to properly prepare the surface between coats.
Taking the time to execute each step with care ensures greater paint longevity and results in a more uniform finish for the wheels.
1. Shaking the Spray Can Correctly
Before using a spray can, it is crucial to shake it thoroughly, as the paint inside, which consists of pigments, solvents and propellants, as it can separate over time during storage.
If these components are not properly mixed, the paint may spray unevenly, appear too thin, or lack color uniformity once dry.
Shaking the can remixes the internal contents, thereby ensuring a consistent spray pattern.
Most cans perform best after being shaken for at least one to two minutes.
To maintain color consistency throughout the entire painting process, from start to finish, it is also beneficial to shake the can again between coats.
2. Maintaining the Correct Spraying Distance
The distance between the spray can and the wheel significantly impacts the smoothness of the paint finish.
Holding the can too close can lead to issues such as wet spots, paint runs, or excessive paint buildup.
Conversely, holding it too far away can result in “dry spray”, a condition where paint particles dry before reaching the wheel’s surface, leaving the finish rough and grainy.
A standard working distance is typically between 8 and 12 inches from the surface.
Continuously shaking the can while spraying ensures that the paint distributes more evenly across the entire wheel.
3. Applying the First Light Coat
The first coat should be very light.
It is often referred to as a “tack coat,” as it creates a thin surface layer that allows subsequent coats to adhere more effectively.
The first coat should not completely obscure the wheel’s original color.
Its purpose is to establish an initial grip and minimize the likelihood of the paint running or dripping.
This initial thin layer also helps the paint dry more uniformly.
Attempting to fully cover the entire wheel in a single pass often leads to unsatisfactory results.
4. Adding Additional Coats
Once the first coat has dried, additional coats can be applied to achieve full color coverage.
In most wheel painting projects, it is essential to apply several light coats rather than a single thick one.
Each subsequent coat provides greater coverage and improves color uniformity.
Spraying light coats ensures that the paint distributes evenly across the wheel’s spokes, rims and inner surfaces.
This also reduces the risk of solvents becoming trapped beneath the paint layer.
Building up the color gradually generally results in a more durable and smooth finish.
5. Drying Time Between Coats
Each coat must be allowed sufficient time to dry before the next one is applied.
This allows solvents to evaporate and helps the paint layer set properly.
If the next coat is applied too soon, the underlying paint may remain soft, potentially leading to issues such as shrinking or peeling later on.
Hot and dry conditions generally accelerate the drying process, whereas humid weather can slow it down.
Before applying the next coat, the surface should feel dry to the touch.
Exercising patience at this stage often yields the best final results.
6. Avoiding Drips and Uneven Coverage
Paint typically drips when an excessive amount is sprayed onto a single spot.
This often occurs when the spray can remains stationary in one place or is held too close to the surface.
Uneven coverage can result when some areas receive too much paint, while others receive too little.
Spraying in a side-to-side motion at a consistent speed helps prevent this.
Maintaining a slight overlap with each pass also aids in ensuring uniformity.
Rather than attempting to fix heavy drips once the paint has begun to dry, it is better to apply a few additional thin coats later on.
How to Apply the Clear Coat
After painting alloy wheels, the clear coat serves as a final protective layer.
It completely encapsulates the colored paint, helping to shield it from brake dust, moisture, sunlight, road salt and minor surface scratches.
While the colored coat gives the wheel its aesthetic appeal, the clear coat helps preserve that finish over time.
Without it, painted wheels are at a higher risk of fading, staining, or premature deterioration.
The clear coat also simplifies cleaning, as dust and brake particles do not adhere directly to the paint surface.
1. How the Clear Coat Protects the Paint
The clear coat acts like a protective shield over the paint.
It seals the color layer, helping to prevent moisture, oxygen and road grime from reaching it.
This is crucial because brake dust often contains hot metal particles that can embed themselves in the wheel’s surface and gradually degrade its finish.
The clear coat also provides protection against UV rays from sunlight, which can cause certain colors to fade over time.
This is particularly beneficial for alloy wheels, as they are constantly exposed to heat, road debris and frequent washing.
A high-quality clear coat helps prevent the paint from deteriorating prematurely.
2. How Many Coats to Apply
For most wheel painting projects, two to three light coats of clear coat are sufficient.
A single thin coat may not provide adequate protection, specially for wheels used on daily-driven vehicles.
Applying multiple light coats ensures good paint coverage and results in a uniform finish.
Applying thick coats can cause the paint to run or trap solvents between the layers, which can negatively affect the drying process.
Applying the clear coat in thin, uniform layers provides better control and typically results in a cleaner, superior surface finish.
The objective is to provide consistent protection across the entire wheel, including the spokes and rims.
3. Proper Drying Techniques
The clear coat requires adequate drying time to cure properly.
Although the surface may feel dry to the touch quite quickly, the underlying layers often continue to cure for a considerably longer period.
Handling the wheel too soon or remounting it on the vehicle prematurely can cause blemishes on the surface or compromise the durability of the finish.
It is best to allow the wheel to dry in a clean, dust-free environment with good airflow circulating around it.
Avoid direct exposure to moisture during the drying process, as water can damage the finish before it has fully cured.
Allowing sufficient drying time ensures that the clear coat adheres properly and enhances its long-term durability.
4. Enhancing Gloss and Durability
The clear coat significantly impacts both the aesthetic appeal of the wheel and its long-term protective qualities.
The more uniformly it is applied, the smoother and glossier the resulting finish will be.
Glossy wheels typically exhibit a higher shine because the clear coat reflects more light, whereas the appearance of matte or satin finishes depends on the specific type of clear coat used.
Durability is enhanced because the protective top layer absorbs minor scratches and abrasions, thereby safeguarding the underlying paintwork.
A properly applied clear coat also helps prevent color fading and simplifies routine cleaning.
In most DIY wheel-painting projects, the final appearance of the wheel depends just as much on the clear coat as it does on the color of the paint itself.
How Much Time Required for Drying and Curing
After painting alloy wheels, drying and curing are two distinct stages, both of which impact the longevity of the paint finish.
Many people assume that as soon as the paint looks dry, it is ready; however, this merely indicates that the outer surface has begun to set.
The inner layers may still be soft.
As solvents evaporate and the coating fully bonds with the wheel, the paint continues to harden.
Rushing this stage can lead to fingerprints, smudges, peeling paint, or damage when remounting the wheels.
Allowing sufficient time ensures that the paint achieves full strength and is better prepared to withstand the rigors of daily road use.
1. Air Drying vs Curing
Air drying means that the surface has dried sufficiently to be lightly touched, whereas curing signifies that the paint has fully hardened.
The drying process typically occurs first and, depending on weather conditions, may take a relatively short amount of time.
Curing takes significantly longer, as the inner layers of the paint still require time to stabilize.
Although the wheel may appear ready after air drying, the coating remains susceptible to scratches.
Full curing provides the paint with maximum durability, enabling it to withstand brake dust, water and washing.
This is why waiting for a longer period generally yields a superior final result.
2. How Long to Wait Before Touching?
Do not touch the wheel until its surface has dried to the point where it no longer feels tacky.
Touching the surface prematurely can result in fingerprints, smudges, or tiny depressions in the paint.
Even a light touch can mar a freshly applied clear coat.
Drying time depends on temperature, humidity and the specific type of paint used.
Generally, surfaces dry faster in warm, dry conditions.
It is safer to wait longer than anticipated, specially after applying the final clear coat, because the top layer may dry faster than the underlying layers of paint.
3. How Long Should You Wait Before Reinstalling the Wheels?
Reinstalling the wheels too soon can damage the fresh paint around the lug holes and outer edges.
If the coating is still soft, tightening the lug nuts can scratch the surface.
Moving the wheels around or placing them on rough ground can also cause scratches.
It is best to wait until the paint and clear coat have hardened sufficiently to withstand normal contact.
Fully cured paint does not chip easily during the reinstallation process.
Exercising caution at this stage helps protect the work you have already completed.
Reinstalling the wheels too soon can damage the fresh paint around the lug holes and outer edges.
4. When Can You Drive the Vehicle After Painting?
Driving immediately after painting exposes the wheels to dust, heat generated by the brakes, water and road debris before the paint has fully dried.
Driving generates heat within the braking system and this heat can adversely affect paint that has not yet fully cured.
Gravel and road grime can also easily adhere to a soft clear coat.
Waiting for a while before driving allows the paint time to cure, thereby enhancing its durability.
The more thoroughly the paint has dried before the vehicle is taken out on the road, the better it will be able to withstand scratches and daily wear and tear.
How to Reinstalling Alloy Wheels
Reinstalling painted alloy wheels is the final step and it must be performed with care, as fresh paint can be damaged during handling.
Even if the surface appears dry, the paint around the center hub and lug holes may be softer than anticipated.
Gripping the wheel too tightly or dragging it along the ground can result in scratches on its finish.
Proper installation is also crucial for vehicle safety, as the wheel must sit perfectly flush against the hub.
A clean and careful reinstallation process ensures the protection of both the paintwork and the wheel’s fitment.
1. Securely Reattaching the Wheels
When reinstalling a wheel onto the car, it should be lifted carefully and positioned perfectly straight against the wheel hub.
The wheel must sit completely flush against the mounting surface, ensuring that no dirt, rust flakes, or debris are trapped behind it.
Even a small object trapped between the wheel and the hub can cause vibrations while driving.
The fresh paint should not be rubbed forcefully against any sharp surfaces, as this can lead to scratches.
Supporting the wheel with both hands and keeping it steady helps prevent damage during the installation process.
2. Properly Tightening the Lug Nuts
Lug nuts securely fasten the wheel to the vehicle; therefore, tightening them correctly is essential.
They should initially be tightened by hand to avoid cross-threading, which can damage the studs.
Tightening them in stages ensures that the wheel seats evenly.
Most mechanics tighten lug nuts in a criss-cross pattern, as this distributes the pressure evenly across the center of the wheel.
Tightening one side completely before the others can result in an uneven distribution of pressure and compromise the wheel’s fit.
3. Considerations Regarding Torque
Torque refers to the precise tightening force applied to the lug nuts.
The manufacturer specifies a recommended torque value for every vehicle.
Insufficient torque can cause the wheel to loosen, whereas excessive torque may stretch the studs or damage the wheel mounting surface.
Using a torque wrench ensures that the correct force is applied, rather than relying solely on guesswork.
This is particularly important after painting, as uneven force around the wheel can affect how it seats against the hub.
Correct torque enhances both safety and the long-term integrity of the wheel’s fit.
4. Final Inspection
After installing the wheel, performing a final inspection before driving helps identify any minor issues.
Ensure that all lug nuts are securely tightened and that the wheel is properly seated on the hub.
Inspect the paint around the lug holes to check for any scratches that may have occurred during installation.
It is also beneficial to check the tire valve stem and ensure that all masking materials have been removed.
A final visual check can help prevent minor installation-related issues and ensures that the painted wheel is ready for normal use.
Know, Common Mistakes While Painting Alloy Wheels to Avoid
Painting alloy wheels at home can yield excellent results, but certain common mistakes can cause the paint to deteriorate prematurely.
Most issues such as: peeling, blistering, roughness, or uneven color, stem not from a lack of paint quality, but rather from errors made during the paint preparation phase.
Wheels are exposed daily to heat, moisture, brake dust and road debris; consequently, any shortcomings in the paint preparation process quickly become apparent.
Understanding these common mistakes will save you time and ensure you achieve a durable paint finish that stands the test of time.
Not only this, there’s many drivers thinks that alloy wheels cannot corrode at all because aluminum does not rust like the steel one, but there’s research that clearly shows that aluminum alloy that can still oxidize and deteriorate whenever the protective finish is damaged, so when you repaint that exposed areas can help you to reduce this surface oxidation and slow visible deterioration.[¹]
1. Painting Without Sanding
Applying paint directly to a smooth or damaged wheel surface is one of the most common mistakes.
The existing clear coat may appear intact to the naked eye, but it can be so smooth that new paint fails to adhere to it properly.
Sanding slightly roughens the surface, helping the primer, and subsequently the paint, establish a strong bond with the substrate.
Without this step, the paint may merely rest on the surface rather than adhering firmly to it.
This can lead to issues such as peeling or flaking within a short period, particularly around the spokes and edges, which are most susceptible to contact with road debris.
2. Skipping the Primer
Failing to apply primer often results in poor paint adhesion, specially on unpolished alloy surfaces or in areas where repairs have been made.
Primer serves to seal the metal and creates a uniform base for the color coat.
Without it, the paint may be absorbed differently in sanded areas compared to previously painted areas, ultimately resulting in an uneven finish.
Furthermore, unsealed aluminum is highly susceptible to moisture-related damage.
Primer mitigates this risk and enhances the durability of the paint under normal driving conditions, thereby extending its lifespan.
3. Applying Excessive Paint
Applying too much paint in a single pass can lead to various issues, such as paint runs, the formation of thick layers and significantly prolonged drying times.
Thick layers of paint tend to trap solvents internally, which can cause the paint finish to remain soft for an extended period.
This often results in problems such as fingerprints, blemishes, or subsequent paint peeling.
Thick paint can also unevenly obscure the fine details of the wheels, creating a rough, textured surface.
Generally, applying several thin coats, rather than a single thick one, yields a stronger and smoother finish.
Ultimately, the technique used to apply the paint is far more critical than the sheer quantity applied.
4. Painting in Humid Weather
Humidity affects the way paint dries, as moisture present in the air can significantly slow down the curing process.
When humidity levels are high, the paint may remain tacky for longer periods or appear cloudy once dry.
This effect is particularly noticeable in the case of clear coats.
Moisture can also become trapped within the fresh paint, thereby compromising its adhesion to the wheel’s surface.
Painting in dry weather generally results in a superior finish and significantly reduces the risk of bubbles or soft spots forming.
Weather conditions can have a far greater impact on the final outcome than you might anticipate.
5. Not Allowing Sufficient Drying Time
Many people make the mistake of remounting their wheels or resuming driving prematurely, simply because the top surface of the paint feels dry to the touch.
However, a dry surface does not necessarily mean that the paint has fully cured or that all its layers have completely hardened.
The underlying layers may still be in the process of drying.
If the wheels are handled before they have fully dried, the paint, particularly around the lug nut mounting points, as it can sustain scratches or develop unsightly blemishes.
Driving the vehicle too soon prevents the paint from receiving adequate curing time and exposes it to the heat generated by the brakes as well as chemicals present on the road.
Allowing the paint sufficient time to cure enhances its durability and reduces the likelihood of premature deterioration.
6. Using the Wrong Type of Paint
Not all spray paints are suitable for use on wheels.
Standard decorative spray paints typically cannot withstand the intense heat generated by brakes, exposure to road chemicals, or the rigors of frequent washing.
Automotive paint specifically formulated for wheels is designed to adhere better to metal surfaces and to endure harsh conditions.
Using the wrong type of paint can cause it to fade quickly, soften, or begin to peel.
Utilizing products specifically designed for wheel surfaces generally yields superior and longer-lasting results.
The type of paint used matters because alloy wheels are subjected to far greater stress than other painted parts of a vehicle.
How to Care for Painted Alloy Wheels
If cleaned and protected regularly, newly painted alloy wheels can remain in excellent condition for years.
The paint and clear coat form a protective shield over the metal; however, this layer is constantly exposed to brake dust, water, road grime, sunlight and the rigors of washing.
Most wheel paint begins to deteriorate prematurely because dirt is allowed to accumulate on the surface for too long, or because harsh chemicals damage the clear coat.
Regular maintenance preserves the finish, maintains color uniformity and minimizes the risk of scratches or oxidation spreading beneath the paint.
1. Safe Cleaning Methods
The safest way to clean painted alloy wheels is to use a mild car shampoo, water and a soft microfiber cloth or a soft-bristled wheel brush.
This removes dirt without scratching the clear coat.
Cleaning should be performed when the wheels are cool, as cleaners dry too quickly on hot wheels, leaving behind unsightly spots.
Gentle and frequent washing removes brake dust before it has a chance to bond firmly to the surface.
Thorough rinsing is also essential, as residual soap can accumulate on the surface and cause the wheels to look dull over time.
2. What to Avoid
Certain products can damage painted wheels, no matter how effective they may seem for quick cleaning.
Harsh, acid-based wheel cleaners can weaken the clear coat if used excessively.
Strong degreasers, specially those not formulated for painted surfaces, as it can also dry out and degrade the finish.
Coarse steel brushes or abrasive scrubbing pads can scratch the paint, creating vulnerable spots where rust may begin to form.
Household cleaners can also be risky, as many of them are not formulated for use with automotive coatings.
Using products specifically designed as “wheel-safe” helps ensure that painted surfaces remain protected for the long term.
3. Washing Schedule
Regular washing helps prevent the accumulation of brake dust and road grime.
Wheels tend to get dirty faster than other parts of the car because they are situated closer to the brakes and the road surface.
If brake dust is allowed to accumulate for too long, it can bond with the clear coat, making it difficult to remove later.
For normal driving conditions, washing the wheels once every two weeks is often sufficient; however, if the car is driven in dusty, muddy, or snowy environments, the wheels may require more frequent cleaning.
Preventing dust from settling on the surface helps preserve its finish.
4. Protection Against Brake Dust
Brake dust is one of the primary causes of damage to wheel finishes.
It consists of tiny metal particles shed from brake pads and rotors, which can become extremely hot during driving.
When brake dust settles on the wheels and is not cleaned off promptly, it can gradually degrade the protective clear coat over time.
Regular wheel washing removes this buildup before it has a chance to bond with the surface.
Some car owners also apply wheel-safe sealants to make the removal of brake dust easier.
Keeping brake dust under control ensures that painted wheels remain shiny and clean.
5. Weather-Specific Care Tips
Painted wheels can be affected differently depending on the weather conditions.
During the rainy season, if regular cleaning is neglected, road moisture can leave behind mineral deposits or grime on the surface.
In colder regions, road salt can accelerate paint wear and exacerbate damage in areas where the paint has already chipped or peeled.
During hot weather, intense sunlight can degrade the clear coat, causing the paint color to gradually fade.
Cleaning according to the season ensures that these dirt particles are removed before they can damage the paint finish.
Inspecting the wheels in every season helps detect minor scratches or marks before they spread.
Read More:
- How to Fix Scratched Alloy Wheels
- How to Protect Wheels From Corrosion
- How to Remove Brake Dust From Wheels
- How to Clean Alloy Wheels Properly
Conclusion – How to Paint Alloy Wheels at Home
It is often seen that alloy wheels are replaced too early as they’ve got damages such as: fading, peeling and curb rash that can often be restored at the home with the correct processing and methods.
Alloy wheels are constantly exposed to road debris, moisture, brake dust, sunlight and minor impacts, causing their factory coating to gradually wear down.
When the original finish begins to fade, peel, or sustain scratches, the alloy itself becomes vulnerable to corrosion.
This is why repainting is not merely an aesthetic enhancement; when executed correctly, it also serves to protect the metal surface and prevent further deterioration.
Any wheel-painting project is successful only when the emphasis is placed less on the paint itself and more on the preparation.
Cleaning, sanding, repairing minor damage, applying primer and allowing adequate drying time, all these factors directly influence the durability of the paintwork.
Skipping these steps often leads to paint peeling, uneven color, or premature flaking, regardless of how high-quality the paint you used may be.
The results yielded by investing time in proper surface preparation are far superior to those achieved through a rushed spray-painting job.
Now, that’s all from this guide about How to Paint Alloy Wheels at Home, also you can ask more questions below.
Frequently Asked Questions
FAQ 1: What is the easiest way to paint alloy wheels at home?
Answer: The easiest way to paint alloy wheels at home is to remove the wheels from the car, clean them thoroughly, smooth the old surface using sandpaper, apply a primer, spray on light coats of paint and finally, apply a clear coat. The most crucial part of this process is preparation. Most problems arise when wheels are painted directly over dirt, grease, or peeling old paint. Rather than rushing the painting itself, spending a little extra time on cleaning and sanding usually results in a superior finish.
FAQ 2: Can you paint alloy wheels without removing them?
Answer: Yes, alloy wheels can be painted while they remain attached to the car, but the results are typically not as precise. It is difficult to access the inner rims and spoke areas and there is a higher risk of paint particles (overspray) landing on the tires, brakes, or body panels. Removing the wheels makes the sanding, masking and painting process significantly easier. It also helps in achieving a clean and uniform finish.
FAQ 3: What type of paint should be used for alloy wheels?
Answer: Automotive paint specifically designed for wheels is usually the best option. These paints are formulated to withstand road conditions, brake heat and frequent washing. Ordinary household or decorative spray paints often do not last long on wheels, as they are not designed to endure dirt and constantly fluctuating temperatures. Using a combination of wheel primer, wheel paint and a clear coat typically yields the strongest and most durable result.
FAQ 4: Is sanding necessary before painting alloy wheels?
Answer: Yes, sanding is generally necessary before painting. This removes the old clear coat, peeling paint, minor scratches and oxidation. It also creates a surface to which primer and paint can adhere more effectively. If wheels are painted without sanding, the new paint may peel or chip very quickly. Even wheels that appear smooth to the naked eye often require light sanding to improve paint adhesion.
FAQ 5: How long does it take to paint alloy wheels at home?
Answer: Although spraying the paint itself may take only a few hours, the entire process often takes significantly longer, as it involves time spent on cleaning, sanding, drying and allowing the paint to cure completely. Preparation typically takes more time than the actual painting work. It is also crucial to allow ample drying time between each coat of paint and to let the final clear coat cure properly. A rushed paint job may look fine initially, but if the paint does not cure correctly, it can deteriorate very quickly.
FAQ 6: Can I use regular spray paint on alloy wheels?
Answer: Regular spray paint may last for a while, but it is not ideal for alloy wheels. Wheels are constantly exposed to brake dust, water, road salt and road debris. Regular spray paint typically cannot withstand these conditions as effectively as paint specifically formulated for wheels. It may fade quickly, chip, or soften prematurely. Paint designed for automotive wheels is engineered to adhere more strongly and last longer.
FAQ 7: How many coats of paint should I apply?
Answer: In most alloy wheel painting projects, it is essential to apply several light coats rather than a single thick coat. The first light coat helps the paint adhere to the surface, while subsequent coats bring out the full depth of the color. Thick layers of paint can drip or fail to dry evenly. Thin coats of paint typically yield a smoother finish and reduce the likelihood of the paint peeling. The number of coats required depends on the type of paint used, the specific color and how thoroughly the wheel was prepared prior to painting.
FAQ 8: How long should I let the paint dry before touching the wheel?
Answer: The surface should not be touched until it feels dry to the touch and is no longer tacky. Fingerprints or smudges can very easily ruin fresh paint. Even if the surface feels dry to the touch, the underlying paint may still be soft. Waiting a little longer usually yields better results. Temperature and humidity can also affect the paint’s drying time; therefore, paint may dry more slowly in humid or cold weather.
References:
[1] Review of Cr-Free Coatings for the Corrosion Protection of Aluminum Aerospace Alloys
https://www.mdpi.com/2079-6412/12/4/518

Hello Folks, Dean Shali here to help you out to solve the problems with your lovely vehicle, as i have lots of experience and knowledge about automotive industry as i woks directly with the customers and repair vehicles and i love to help the people to keep their cars safe and running smoothly.