Written By: Dean Shali
Fact Checked By: Sabré Cook
Reviewed By: Tamara Warren
You need to understand this basic rule that: many times steering vibrations begins with the wheel imbalance, not in the fault of engine or suspension failure.
From the starting of your vehicle, each wheel literally spins hundreds of times per minutes and at the highway speeds that number can even possibly reach close to the 800 to 900 rotations every minute that depends on the tire size and speed of course.
So, that basically means that even small imbalance in one wheel can create repeated force again and again, that actually makes the steering shake and the tires even wear unevenly and that’s how ride starts to feel rough.
Also, there’s common thinking that wheel balancing only needs when you installs new tires, but imbalance can happen from normal driving, potholes, curb hits, lost wheel weight or even mud stuck inside the rim as well.
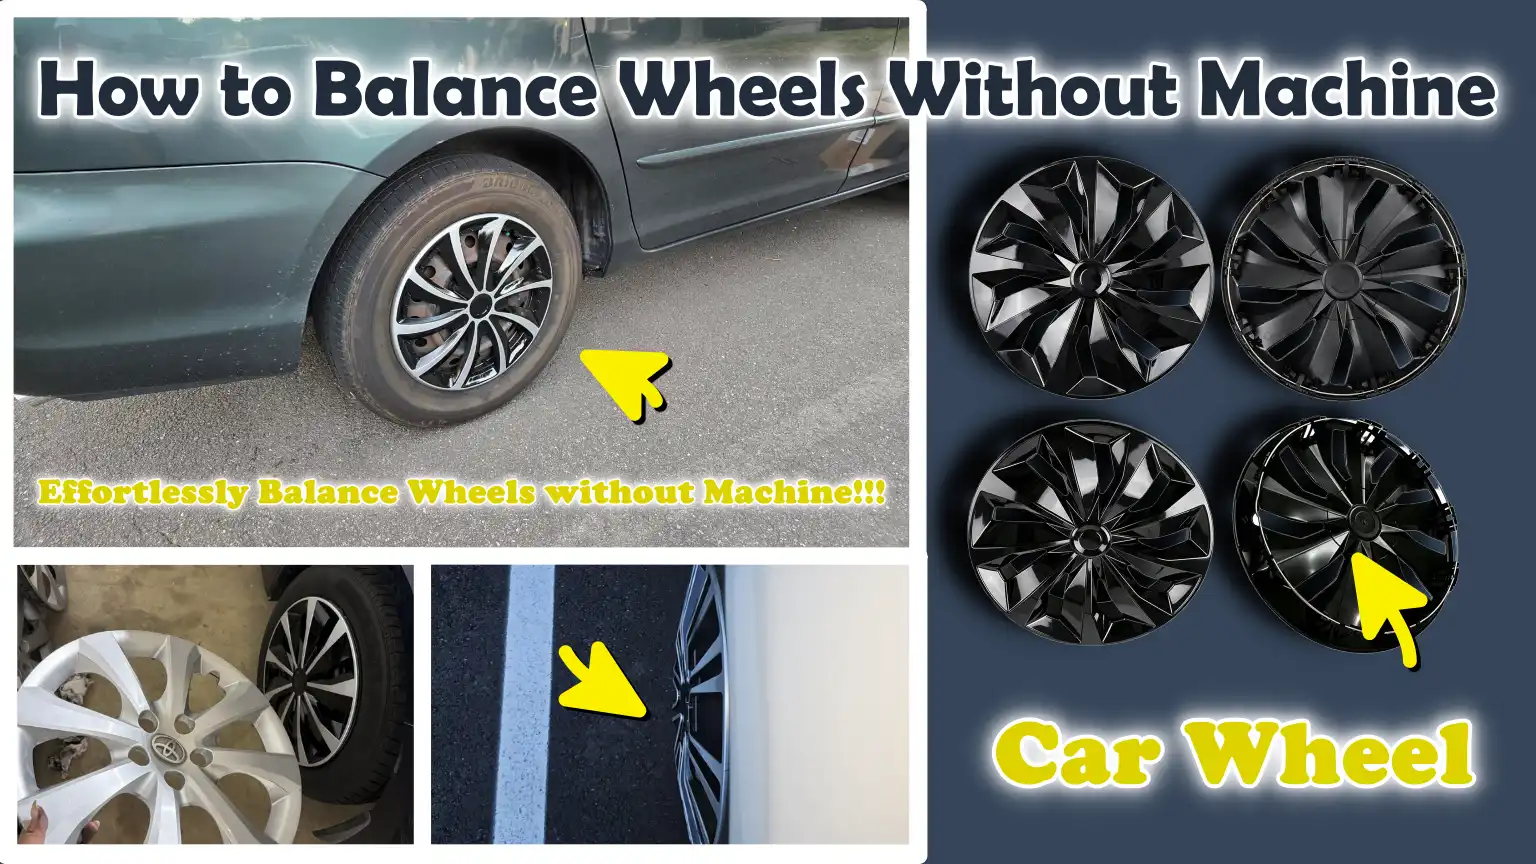
Now, that is the proper guide about How to Balance Wheels Without Machine, so that you can measure the weight very accurately and make useful adjustments without expensive equipment.
What Does Wheel Balancing Actually Do?
Wheel balancing is a process designed to ensure that the weight of a wheel and tire assembly is distributed evenly across its entire circumference, allowing it to rotate smoothly without any vibration.
In actual driving conditions, even a brand-new tire or rim may not be perfectly balanced, as it may contain minor manufacturing imperfections, the presence of a valve stem, or variations in rubber thickness.
At typical city speeds, this imbalance is not easily detected; however, as speed increases, particularly on highways, even a slight difference in weight becomes far more pronounced due to the repetitive forces generated by the rotating wheel.
For this reason, wheel balancing is considered a fundamental yet critical part of vehicle maintenance to ensure a comfortable and safe driving experience.
1. How Does Wheel Imbalance Affect Driving Performance?
When a wheel is unbalanced, it generates a repetitive vibration with every rotation.
At higher speeds, this vibration becomes far more perceptible, as the wheel is rotating hundreds of times per minute; this transforms even a minor weight discrepancy into a constant, persistent vibration.
This vibration can be felt through the steering wheel, the seats and even the floorboard, making the entire driving experience feel unstable or rough.
Although the vehicle may continue to operate normally, the driver may perceive a reduction in their control over the vehicle, particularly when changing lanes or driving at high speeds.
Over time, this rotational imbalance can also compromise the stability of the vehicle’s contact with the road surface, potentially having a subtly adverse effect on both grip and braking comfort.
2. Common Symptoms of Unbalanced Wheels
Symptoms of unbalanced wheels typically become clearly apparent once the vehicle reaches moderate to high speeds.
The most common symptom of this issue is vibration in the steering wheel, which intensifies as the vehicle’s speed increases.
If the imbalance lies in the rear wheels, the vibration is often felt in the seat or floorboard rather than in the steering wheel.
Many drivers also notice uneven or accelerated wear on certain sections of their tires; this occurs because the tire is not exerting uniform pressure on the road surface.
Another common symptom is a distinct “humming” or “buzzing” sound, which also grows louder as the vehicle gains speed.
In some instances, while driving, it may even feel as though the vehicle is slightly bouncing, even on a perfectly smooth road, a sensation that drivers often mistakenly attribute to a suspension issue.
3. How Does Wheel Balancing Help Protect Tires, Suspension and Steering Components?
By ensuring that every rotation of the wheel is perfectly smooth and uniform, wheel balancing reduces the unnecessary stress placed on the entire driving system.
When a wheel is unbalanced, it generates repetitive shocks and vibrations, forces that the suspension system must absorb thousands of times over, even during a short drive.
This excessive stress causes critical components such as: shock absorbers, wheel bearings, tie rods and steering joints, to undergo accelerated wear and deterioration.
Tires are also directly affected, as the heavier section of an unbalanced wheel exerts greater force on the road surface with every rotation; this results in uneven tire tread wear and, ultimately, a reduction in the tire’s overall lifespan.
Proper balancing distributes these forces evenly, thereby helping to extend tire life, ensure smoother steering and minimize long-term wear and tear on critical vehicle components.
4. The Difference Between Wheel Balancing and Wheel Alignment
Wheel balancing and wheel alignment are two distinct services that are often confused with one another, even though they address different issues.
The primary objective of wheel balancing is to evenly distribute the weight across the entire tire and wheel assembly, ensuring that they rotate uniformly and without any vibration.
Conversely, the main purpose of wheel alignment is to address the direction and angles of the wheels, ensuring they are correctly oriented so that the vehicle tracks in a perfectly straight line.
If a vehicle suffers from a balancing issue, the primary symptom is vibration, particularly when the vehicle is traveling at high speeds.
If the issue lies with alignment, the vehicle may pull to one side, the steering wheel may not remain centered and tire wear may be uneven.
Both of these services are crucial for safe and comfortable driving; while balancing ensures that the wheels rotate without obstruction, alignment ensures that the vehicle travels in the precise direction intended by the driver.
Is It Really Possible to Balance Wheels Without a Machine?
Balancing wheels without a machine is, in principle, possible; however, it is essential to understand its capabilities and limitations.
Professional balancing machines measure minute discrepancies in a wheel’s weight, often amounting to just a few grams, and pinpoint exactly where corrective weights need to be applied.
Without this equipment, manual balancing relies on basic physical principles, primarily by observing where the wheel naturally comes to rest when allowed to spin freely.
While this method can help mitigate minor vibrations, it cannot match the precision of workshop-grade machines, which are designed to perform accurate balancing at high speeds.
1. How Does Manual Balancing Work?
Manual wheel balancing operates on a simple principle: when a wheel is allowed to spin freely, its heaviest section will always settle at the lowest position.
By observing where the wheel repeatedly comes to rest, one can identify the heavy spot.
Small weights are then attached to the opposite side to equalize the weight distribution.
This process is repeated several times until the wheel no longer consistently settles at any specific point.
It is a fundamental mechanical method that utilizes gravity rather than electronic measurements.
2. Accuracy Compared to Shop-Grade Balancing Equipment
Compared to professional machines, manual balancing is significantly less precise.
Balancing machines spin the wheel at high speeds and employ sensors to detect even the slightest imbalance, often correcting issues that are invisible to the human eye.
In contrast, manual balancing is effective only at very low speeds or when the wheel is stationary; this means it cannot fully replicate the actual forces and stresses experienced while driving.
For this reason, professional balancing is considered more reliable, particularly for highway driving, where even a slight imbalance in weight can lead to significant vibrations.
3. Ideal Scenarios for Attempting Manual Balancing
Manual balancing is most effective in situations where the weight imbalance is minimal, or when an immediate, temporary workaround is required.
It can be helpful if a wheel weight has fallen off or if sudden vibrations have developed following a minor impact.
It is also beneficial for those looking to mitigate common vibrations before visiting a tire shop.
It works best for low-speed driving and daily city commuting, where the required level of precision is not as critical as it is during highway driving.
4. Limitations of Balancing Without Specialized Equipment
The primary limitation of manual balancing is its precision.
It fails to detect minor imbalances that affect vehicle performance, specially when the vehicle is traveling at high speeds.
Furthermore, it cannot replicate actual driving conditions, where centrifugal forces play a significant role.
Consequently, even if a stationary wheel appears balanced, it may still experience vibrations once on the road.
Manual balancing is not a complete substitute for professional equipment; rather than viewing it as a permanent solution, it should be regarded merely as a temporary or partial measure.
Tools
| Tools | Why It Is Needed | How to Use It |
|---|---|---|
| Floor Jack | It is used to safely lift the vehicle so that the wheel is relieved of ground pressure, allowing it to be removed and worked upon. | Position it directly beneath the vehicle’s designated lift point, then slowly pump it until the wheel is raised clear of the ground. |
| Jack Stands | It stabilizes the vehicle and prevents it from falling while you are working underneath or around it. | After lifting the vehicle with the jack, place these beneath sturdy support points, then slowly lower the vehicle onto them. |
| Lug Wrench | It assists in loosening and tightening the lug nuts that secure the tire. | Apply it to each lug nut; turn anti-clockwise to loosen and clockwise to tighten. |
| Chalk or Marker | It is used to mark the heavy spot on the wheel during manual balancing. | When the wheel comes to a natural stop during rotation testing, place a mark at its lowest point. |
| Adhesive Wheel Weights | These are small metal weights used to correct an imbalance by adding weight to the lighter section. | Carefully peel them off and adhere them to the inner rim of the wheel, directly opposite the heavy spot. |
| Gloves | It protects your hands from dirt, sharp edges and grease while handling the wheels. | Put them on before beginning work and keep them on throughout all stages of the task. |
| Tire Pressure Gauge | It ensures that the tire’s air pressure is correct, which affects the accuracy of the balancing process. | Press it onto the valve stem to check the pressure and adjust as necessary. |
| Flat Work Surface | It provides a stable and level surface, allowing the wheel to rotate and settle correctly during testing. | Always work on clean and level ground to ensure the wheel does not tilt to one side, thereby preventing errors during balancing. |
| Safety Equipment | This includes basic safety gear such as: eye protection or sturdy footwear, to prevent injuries. | Always wear this gear when lifting, carrying, or handling heavy wheels and tools. |
How to Ensure Safety By Taking Precautions Before Starting
Before attempting to balance wheels without the aid of machinery, safety is paramount, as you will be lifting a heavy vehicle and working in close proximity to moving parts.
Even a minor error while lifting the vehicle can result in serious injury or damage; therefore, every step must be executed with caution and in the correct sequence.
1. Park on Level Ground
Always begin by parking the vehicle on level and stable ground, as lifting a vehicle on an uneven surface can cause it to shift.
A level surface helps keep the jack and stands stable, thereby reducing the risk of slipping or tipping over during the process.
2. Engage the Parking Brake
When removing or servicing the wheels, the parking brake must be fully engaged to prevent the vehicle from rolling.
This adds an extra layer of stability and ensures that the vehicle remains stationary, particularly when one side of the vehicle has been lifted.
3. Use Wheel Chocks
Wheel chocks are small blocks placed on the ground behind the tires.
When the vehicle is lifted, these prevent it from sliding forward or backward.
If purpose-built chocks are not available, sturdy wooden blocks may be used; however, they must be positioned firmly and securely, not loosely.
4. Safely Lift the Vehicle
When lifting the vehicle, always use an appropriate floor jack and position it beneath the specific lift points recommended by the vehicle manufacturer.
Lift the vehicle slowly and steadily; do not rush this process.
As soon as the wheel clears the ground, immediately support the vehicle with jack stands for added safety.
5. Inspect the Condition of the Tires Before Balancing
Before beginning any balancing work, check the tires for any visible signs of damage such as: cracks, bulges, or uneven wear.
A damaged tire cannot be balanced properly and may remain unsafe even after the process is complete.
Furthermore, ensure that the tire pressure is correct, as incorrect pressure can affect the results of the balancing procedure.
6. Avoid Working Under an Unsupported Vehicle
Never place any part of your body beneath a vehicle that is supported solely by a jack, as jacks can fail suddenly or slip.
Before performing any work, always use jack stands to safely support the weight of the vehicle.
This is one of the most critical safety rules for any repair or maintenance work involving the wheels.
How to Balance Wheels Without Machine – Easy & Effective Guide
1. Inspect the Tire and Wheel
Before beginning the wheel balancing process without the aid of a machine, the first and most crucial step is to thoroughly inspect the tire and wheel.
This is because many vibration-related issues stem not merely from imbalance, but also from internal defects or uneven tire wear.
Conducting a careful inspection at this stage allows you to avoid wasting time attempting to balance a wheel that already possesses a structural defect or has improper air pressure.
Check for Uneven Tire Wear
First, carefully examine the entire tread surface (the contact area) of the tire.
If one section of the tire appears more worn than another, or if you observe patchy or wavy wear patterns, this may indicate a pre-existing issue with the wheel’s balance or alignment.
Uneven wear affects the tire’s “contact patch” (the area in contact with the road); consequently, vibrations may persist even after balancing, as the tire surface is no longer uniformly smooth.
Check the Wheel for Dents or Defects
Next, inspect the metal rim for any dents, bends, or cracks.
Even a minor bend in the rim can cause the wheel to rotate unevenly, creating the sensation of an unbalanced wheel, yet this cannot be fully corrected simply by adding weights.
This inspection is vital because a defective wheel can continue to generate vibrations regardless of how carefully you attempt to balance it; in some instances, the wheel may require repair or complete replacement.
Remove Dust and Dirt from the Rim
Thoroughly clean the wheel before conducting any checks related to balancing.
Accumulated dust, mud, small pebbles, or road tar can cause slight shifts in the wheel’s weight distribution.
Although these minor contaminants may seem insignificant, when the wheel spins at high speeds, even a tiny speck of dirt can disrupt its smooth rotation and lead to inaccurate balancing results.
A clean rim ensures that you are working with the wheel’s true weight.
Ensure Correct Tire Air Pressure
Finally, confirm that the air pressure in the tires matches the specifications recommended by the vehicle manufacturer.
Incorrect air pressure alters the tire’s shape and affects its contact with the road, potentially generating vibrations that mimic the symptoms of an unbalanced wheel.
Whether the tires are underinflated or overinflated, they can yield inaccurate results, even during manual balancing; therefore, always correct the air pressure before proceeding to the next step.
2. Remove the Wheel
Removing a wheel is a delicate task that must be performed in the correct sequence to ensure safety and prevent damage to the studs, nuts, or brake components.
This step prepares the wheel for balancing, giving you ample opportunity to inspect it thoroughly and work on it.
Safely Loosen the Lug Nuts
To begin, slightly loosen the lug nuts while the wheel is still on the ground, as the weight of the vehicle helps keep the wheel stable.
This prevents the wheel from spinning while you are applying force to it.
Turn each lug nut just enough to break its initial tightness; however, do not remove them completely at this stage, as doing so allows you to maintain control over the vehicle and ensures your safety.
Lift the Vehicle
Next, use a floor jack to slowly lift the vehicle at the specific lifting point recommended by the manufacturer.
Raise the vehicle only until the wheel is completely clear of the ground and then immediately secure the vehicle using a jack stand.
This is crucial because a jack alone is not designed to support the entire weight of the vehicle for an extended period and it is essential that the vehicle remains stable before any further work begins.
Remove the Wheel
Once the vehicle is safely lifted, completely remove the loosened lug nuts and carefully pull the wheel straight off the hub.
The wheel may feel slightly stuck due to rust or excessive tightness; gently rocking it back and forth will help it come off easily.
Avoid applying excessive force to the wheel to prevent damaging the studs or brake components located behind it.
Clean the Hub and Wheel Mounting Surfaces
After removing the wheel, clean the surface of the hub and the inner side of the wheel.
If dust, rust, or dirt is present in this area, the wheel will not seat properly when reinstalled; this can lead to issues such as imbalance or vibration later on.
Ensuring that the wheel mounting surfaces are clean and smooth guarantees that the wheel will seat correctly upon reinstallation, thereby making the balancing process even more precise.
3. Prepare a Basic Balancing Setup
Creating a stable setup is the most critical part of manual wheel balancing, as it allows the wheel to rotate freely, enabling you to observe how the weight is distributed.
Without a proper setup, the wheel will not rotate uniformly, which can lead to inaccurate results and the incorrect placement of balance weights.
Use an Axle Spindle or a Makeshift Balancing Stand
To begin, mount the wheel on a stable support such as: an axle spindle (provided the wheel remains firmly secured in a safe balancing position) or a sturdy makeshift stand, such as a straight rod or pipe passed through the center of the wheel.
The objective is to have the wheel rest on a single central pivot point with minimal friction, allowing it to rotate without obstruction.
This helps in naturally identifying the heaviest section of the wheel.
Position the Wheel to Allow for Free Rotation
Ensure that the wheel is positioned in such a way that it can rotate without making contact with any surrounding objects.
If it rubs against the stand or nearby items, it will not rotate naturally and will provide misleading indications regarding its balance.
Free rotation is essential because it allows gravity to pull the heaviest section downward; this is precisely how you detect an imbalance using a simple manual setup.
Ensure the Setup is Level and Stable
The entire setup must be stable and level to ensure that the wheel is not tilted in any direction.
If the stand is uneven, the wheel may consistently come to rest in the same position, even if it is actually balanced, which can lead to inaccurate results.
A stable base ensures that the wheel’s movement is influenced solely by gravity, thereby yielding more reliable results.
Allow the Wheel to Spin Naturally
Once everything is set up, gently spin the wheel and allow it to slow down on its own, without applying any force or pushing it in any specific direction.
As it begins to come to a halt, observe its behavior.
The manner in which it stops helps you identify where its heaviest section is located.
Repeating this process multiple times enhances accuracy, as a properly balanced wheel will come to rest in a different position each time, rather than stopping at the exact same spot.
4. Locate the Heavy Spot
Identifying the heavy spot is the fundamental principle of manual wheel balancing, as every wheel naturally rotates in such a way that its heaviest section comes to rest at the bottom.
This occurs due to the force of gravity acting upon an uneven weight distribution; by locating this specific spot, you can correct the imbalance by applying a counterweight (balancing weight) to the opposite side.
Allow the Wheel to Come to a Natural Stop
Begin by gently spinning the wheel, then allow it to slow down naturally without touching it or attempting to control its motion.
It is crucial to avoid any interference during this step, as even a slight nudge can alter the way the wheel comes to rest and lead to inaccurate results.
As the wheel loses momentum, it will gradually come to a halt, with its heaviest section naturally settling at the bottom.
Mark the Lowest Point with Chalk
Once the wheel has come to a complete stop, observe the point located closest to the ground.
Typically, this indicates the heavy spot, as gravity pulls the heavier section downward.
Use chalk or a marker to clearly mark this lowest point on the tire or rim so that you can easily identify it in subsequent steps.
Creating a distinct mark is essential, as you will use this specific reference point to compare the wheel’s resting position after repeated spins.
Repeat Multiple Times to Ensure Consistency
Do not rely on a single spin alone, as the wheel’s resting position can sometimes be misleading.
Spin the wheel several times and observe whether it comes to rest at the exact same spot each time.
If the wheel repeatedly comes to rest at, or very close to, that exact specific point, it confirms that this section is indeed heavier than the rest of the wheel.
Repeating this process minimizes the need for estimation and enhances the accuracy of the manual balancing procedure.
Confirm the Heavy Spot
After rotating the wheel several times, identify the section that most frequently comes to rest at the bottom and mark it as the “confirmed heavy spot”.
This is the area that requires correction by attaching a wheel weight to the opposite side.
Carefully confirming the heavy spot is crucial, as any error made at this stage can compromise the entire balancing process and lead to persistent vibrations even after adjustments have been made.
5. Add Wheel Weights
Adding wheel weights is the corrective step in manual wheel balancing, wherein you attempt to counteract the weight disparity identified in the previous stage.
The principle is straightforward: if one side of the wheel is heavier, you balance it by applying small weights to the opposite side, thereby allowing the wheel to rotate more uniformly.
This step requires patience, as even minor adjustments can have a significant impact on how the wheel spins.
Apply Small Adhesive Weights Directly Opposite The Heavy Spot
To begin, apply adhesive wheel weights directly opposite the heaviest section of the wheel, as this corresponds to the wheel’s lighter side.
These weights are designed to adhere firmly to the rim and help correct the imbalance by counteracting the uneven weight distribution.
Precise placement is crucial, as even a slight error in positioning can compromise the effectiveness of the balancing process.
Start with the Minimum Amount of Weight
Rather than adding too much weight all at once, start with a small amount; overcorrection can inadvertently create a new imbalance in the opposite direction.
The best approach is to make gradual adjustments and re-check the balance after each change, allowing you to slowly zero in on the precise balance point.
This cautious method helps the wheel spin more smoothly without any guesswork.
Press Firmly to Ensure a Secure Bond
Once the weights are in position, press them firmly against the rim to ensure they adhere securely.
If the weights are not properly bonded, they may detach while driving, potentially causing vibration issues to recur.
Applying sufficient pressure ensures that the adhesive establishes a strong bond with the metal surface, specially if the rim has been thoroughly cleaned prior to application.
Maintain Even Spacing When Necessary
If the imbalance is not fully corrected by a single weight, you may need to apply several smaller, additional weights, spaced evenly around the side opposite the imbalance, rather than attaching a single larger piece.
This allows the wheel to rotate more smoothly and prevents the creation of another heavy spot.
Maintaining even spacing ensures that the wheel remains balanced more naturally, thereby reducing the likelihood of uneven rotation while in motion.
6. Check the Balance
Checking the balance is the stage where you verify whether the adjustments you have made have successfully corrected the uneven weight distribution of the wheel.
This is crucial because the wheel’s balance is not always perfect on the first attempt and minor tweaks may be required to ensure the wheel spins even more smoothly.
The primary objective here is to ensure that when the wheel is allowed to spin freely, it does not repeatedly come to rest at the same heavy spot.
Spin the Wheel Again
To begin, gently spin the wheel once more, exactly as you did previously.
Allow it to slow down naturally; do not touch it or attempt to control its speed.
This will help you observe how the wheel behaves after the weights have been applied and whether the corrective measures you have taken are proving effective.
Observe the Stopping Point
Pay close attention to where the wheel comes to a stop.
If it repeatedly settles at the exact same spot where it stopped before, it indicates that the balance is still off and has not yet been fully corrected.
Conversely, if the wheel’s stopping point varies each time, it is a positive sign that the weight distribution is becoming more uniform and the wheel is approaching a state of proper balance.
Adjust the Weight Placement
If a specific section of the wheel appears heavier than the rest, make adjustments by slightly shifting the position of the weights or by adding a small amount of additional weight to the opposite side.
It is advisable to make minor adjustments rather than drastic changes, as this allows you to fine-tune the balance precisely without overcorrecting.
Every adjustment should be made with great care so that you can clearly observe its effect when you check the balance again.
Continue Repeating This Process Until the Wheel Stops Coming to Rest at the Exact Same Spot
Maintain this cycle of spinning the wheel, observing it and making adjustments until it begins to stop at different positions each time, rather than consistently stopping at the same spot.
When the wheel ceases to repeatedly settle on the same side, it indicates that the weight has been evenly distributed.
At this stage, the wheel is considered to be manually balanced, to the fullest extent possible using this method.
7. Reinstall the Wheel
Reinstalling the wheel is the final step, in which you securely mount the balanced wheel back onto the vehicle and tighten it properly to ensure it functions correctly on the road.
Even if the wheel is perfectly balanced, improper installation or insufficient tightening can lead to vibrations, safety hazards, or damage; therefore, this step must be executed with great care and in the correct sequence.
Mount the Wheel Back onto the Vehicle
Begin by lifting the wheel and aligning it squarely with the wheel hub; ensure that the wheel’s mounting holes align perfectly with the studs.
Gently push the wheel into place so that it sits flush against the hub surface without any gaps.
Proper seating of the wheel is crucial, as even a speck of dust or dirt between the wheel and the hub can interfere with the wheel’s rotation and compromise the balancing work you have just completed.
Properly Tighten the Lug Nuts
Once the wheel is properly seated, thread the lug nuts back onto the studs and initially tighten them by hand to ensure they do not cross-thread.
Subsequently, tighten them in a crisscross pattern to ensure that the pressure is distributed evenly across the entire wheel.
This prevents the wheel from sitting crookedly on the hub; if the wheel sits unevenly, it can cause vibrations, even if the wheel itself is balanced.
Carefully Lower the Vehicle
After tightening the lug nuts, slowly lower the vehicle back down to the ground using the jack.
Perform this step carefully to ensure that the wheel makes full contact with the ground in a controlled manner.
Once the full weight of the vehicle rests back on its tires, you can proceed to fully tighten the lug nuts.
Lowering the vehicle properly ensures that the wheel settles naturally into its correct position.
Tighten the Lug Nuts to the Specified Torque
Finally, use a torque wrench to tighten the lug nuts to the precise torque level recommended by the vehicle manufacturer.
This step is crucial; if the lug nuts remain loose, the wheel could come loose and detach while driving, whereas if they are overtightened, the studs could be damaged or the wheel mounting surface could become warped.
Applying the correct torque ensures that the wheel is securely fastened and that the vehicle is safe to drive following the balancing process.
So, How to Determine if a Wheel Is Properly Balanced
It is crucial to know whether or not a wheel is properly balanced, as proper balance directly impacts how smooth, safe and stable your vehicle feels on the road.
After completing manual balancing, you can assess the results by carefully observing the wheel’s behavior, whether it is being tested on a stand or driven on the road.
A properly balanced wheel will not exhibit a strong tendency to pull sharply to one side and will feel consistent while rotating, specially at higher speeds, where imbalances are typically most apparent.
1. The Wheel Stops at Different Positions
The clearest indication of a well-balanced wheel is that, when spun freely, it does not repeatedly come to rest at the exact same spot.
If the wheel remains heavier on one side, it will consistently stop with that heavier side positioned at the bottom.
As the balance improves, the wheel will stop at different positions each time, because the weight is distributed more uniformly around the rim.
This randomness demonstrates that no single section is pulling the wheel downward during rotation.
2. Reduced Steering Vibration
A balanced wheel significantly reduces the vibrations felt through the steering wheel.
When wheels are unbalanced, the steering often shakes, particularly as speed increases, because the uneven weight generates repetitive force with every rotation.
Following proper balancing, this vibration is either significantly reduced or completely eliminated, making the steering feel stable and controlled, even on smooth road surfaces.
3. A Smoother Ride at Highway Speeds
Wheel imbalance becomes most apparent when driving on the highway; because the wheels are rotating at high speeds, even minor discrepancies in weight are significantly amplified.
A properly balanced wheel delivers a smoother ride, as less vibration is transmitted into the cabin.
Occupants will perceive the vehicle as more stable and less jarring, even when maintaining high speeds over extended periods.
4. Improved Contact Between Tire and Road
Proper balancing helps the tire maintain uniform contact with the road surface as it rotates.
When a wheel is unbalanced, certain sections press down more heavily while others lift slightly, resulting in a lack of uniformity.
Once balanced, the tire rotates more evenly, thereby enhancing grip and stability.
This also makes braking feel more predictable, as the tire maintains more consistent contact with the road.
5. No Vibrations While Driving
Another key indicator of proper balancing is the absence of any vibrations or side-to-side wobbling while driving.
An unbalanced wheel can generate a subtle tremor, which becomes significantly more pronounced and perceptible at high speeds.
When the wheel is correctly balanced, this wobbling is completely eliminated and the vehicle tracks in a perfectly straight and stable line, free from any irregular movements or sensations of drifting.
Read More:
- How to Paint Alloy Wheels at Home
- How to Fix Scratched Alloy Wheels
- How to Protect Wheels From Corrosion
- How to Remove Brake Dust From Wheels
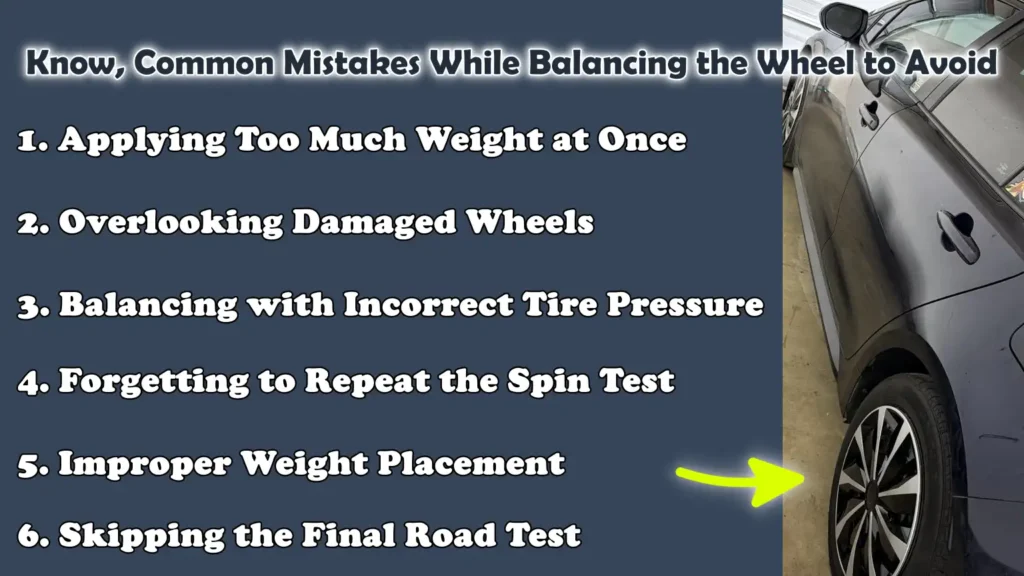
Know, Common Mistakes While Balancing the Wheel to Avoid
When balancing wheels without the aid of a machine, minor errors can easily lead to inaccurate results or even exacerbate existing vibrations.
As manual balancing requires a keen eye and precise adjustments, any oversight during this process can compromise the final outcome, thereby diminishing driving comfort and safety.
1. Applying Too Much Weight at Once
One of the most common mistakes is applying an excessive amount of weight to the wheel in a single attempt.
When you overcorrect, you merely shift the imbalance to the opposite side; rather than resolving the original issue, this creates a new vibration.
It is always advisable to start by applying very small increments of weight and gradually increasing them to ensure that the balancing process remains controlled and precise.
2. Overlooking Damaged Wheels
Another serious error is attempting to balance a wheel that is already damaged.
Bent rims, cracks, or uneven tire wear cannot be remedied simply by applying weights.
If the structural integrity of the wheel has been compromised, meaning it is no longer perfectly round or stable, no amount of balancing will completely eliminate the vibration.
Therefore, it is crucial to thoroughly inspect the wheel before balancing, as any structural defects must be repaired first.
3. Balancing with Incorrect Tire Pressure
Incorrect tire pressure can fundamentally alter the behavior of the wheel during the balancing process.
If a tire is underinflated or overinflated, its shape becomes distorted, creating misleading symptoms of imbalance.
This can lead you to apply weights in the wrong locations.
Maintaining the correct tire pressure ensures that the tire retains its proper shape, thereby allowing the balancing process to accurately simulate real-world driving conditions.
4. Forgetting to Repeat the Spin Test
Failing to perform the spin test multiple times is another common oversight that compromises accuracy.
Spinning the wheel just once is insufficient to confirm its balance, as the wheel may randomly come to rest at any position on a single or double rotation.
Repeating the test several times helps verify whether the wheel consistently stops at the same spot or if its behavior varies.
Without repetition, you might assume the wheel is balanced when, in reality, it is not.
5. Improper Weight Placement
Placing weights incorrectly on the wheel can exacerbate an imbalance rather than correcting it.
Weights must always be applied directly opposite the heaviest section; even a minor error in selecting the placement can impact the outcome.
If a weight is positioned too close to the wrong spot, it can introduce a new imbalance in the wheel, resulting in persistent vibrations while driving.
6. Skipping the Final Road Test
The final road test is crucial, as it reveals how the wheel performs under actual driving conditions.
Certain balance-related issues may not be apparent during static testing but become clearly evident when the vehicle is driven at higher speeds.
Skipping this step can leave hidden vibration issues unresolved; therefore, a thorough test drive helps ensure that the balancing process has been successful.
Does Manual Wheel Balancing Really Work?
Manual wheel balancing can be effective to a certain extent, but it is crucial to understand that it is a rudimentary method based on visual estimation rather than precise measurement.
It utilizes basic physics, primarily gravity, to identify heavy spots on the wheel and correct them by applying counterweights.
While helpful in mitigating minor vibrations, it cannot offer the same level of precision as the professional balancing machines used in workshops.
Plus, there’s scientific studies that shows that unbalanced wheels do not just affects the comfort but it directly increases mechanical wear in the steering and suspension systems as well, so even small imbalance conditions can creates repeated vibrations forces that travel through the entire vehicle structure that even reduces stability and long term component life as well.[¹]
1. How Accurate Can It Be?
The accuracy of manual balancing is limited, as it depends on how freely the wheel rotates and how carefully the user observes its resting position.
Even slight friction in the setup, uneven ground surfaces, or minor errors in marking the wheel can impact the results.
Unlike machines, which measure imbalances in grams while the wheel spins at high speeds, manual methods can only provide approximate corrections; this is why the final result may not always feel completely smooth when driving at high speeds.
2. Best for Correcting Minor Imbalances
Manual wheel balancing works best when the issue is minor such as: a wheel weight having fallen off, or when slight vibrations are felt after driving over rough roads or potholes.
In such cases, the imbalance is not severe; therefore, minor adjustments made using adhesive weights can result in smoother driving and reduced vibration during normal city driving.
It serves as a practical solution for making immediate, on-the-spot corrections in situations where professional balancing services are not readily available.
3. Situations Where It Cannot Resolve Vibration Issues
In cases where a wheel is bent, the tire exhibits uneven wear, or the imbalance is excessive, manual balancing is typically insufficient.
These issues create structural deficiencies that cannot be rectified merely by applying small weights.
Vibrations at high speeds, persistent shaking in the steering wheel, or uneven tire wear, fully resolving these problems often necessitates a professional inspection and machine balancing.
4. Professional vs DIY Results
Professional wheel balancing utilizes calibrated machines that detect precise weight discrepancies by spinning the wheel at high speeds, making the process highly accurate and reliable.
In contrast, DIY manual balancing relies on visual estimation and spinning the wheel at low speeds; consequently, it is less precise, although it can still prove useful for basic corrections.
While professional balancing ensures long-term stability and smooth performance, manual methods are more suitable as temporary or preliminary solutions for minor issues.
Conclusion – How to Balance Wheels Without Machine
So, when you understand wheel balance then it actually helps you to see how small physical differences can have a really noticeable impact at high speeds as well.
As a wheel rotates hundreds of times per minute while traveling on the road, even a slight imbalance in weight can generate persistent vibrations; this can lead to steering issues, premature tire wear and adverse effects on the long-term health of the suspension system.
Manual balancing techniques provide a practical understanding of this fundamental physics, enabling you to identify the heavier section of a wheel and rectify the imbalance through minor adjustments.
While this method can mitigate mild vibrations and prove useful in emergency situations or environments with limited resources, its precision remains limited compared to professional machine balancing, as machine balancing measures imbalances under actual rotational forces.
Consequently, manual balancing should not be viewed as a complete substitute for workshop-level precision, but rather as a complementary skill for performing basic corrections and troubleshooting.
In practice, the most reliable results are achieved through a combination of factors: conducting thorough inspections, maintaining proper tire pressure, performing careful manual checks when necessary and opting for professional balancing if the issue persists.
Now, that’s all from this guide about How to Balance Wheels Without Machine, so that you can comment down below.
Frequently Asked Questions
FAQ 1: Can you really balance wheels without a machine?
Answer: Yes, you can balance wheels without a machine, but only to a certain extent. The manual method involves identifying heavy spots on the wheel and applying small weights to the opposite side to correct the imbalance. This can help resolve minor vibration issues, particularly at lower speeds or during everyday driving. However, it cannot match the precision of professional machines, which measure imbalances while the wheel is spinning at high speeds. Therefore, while it serves as a useful basic or temporary solution, it is not a complete substitute for professional workshop balancing.
FAQ 2: How can you tell if your wheel is unbalanced?
Answer: An unbalanced wheel typically exhibits clear symptoms while driving. The most common sign is vibration in the steering wheel, specially when you reach higher speeds on the highway. If the rear wheels are affected, the vibration may be felt through the seat or the floorboard. You may also notice uneven tire wear, a slight wobbling sensation even on smooth roads, or a humming sound that intensifies as your speed increases. If left unaddressed, these signs often become more pronounced and obvious over time.
FAQ 3: Is manual wheel balancing safe?
Answer: When performed carefully and with the right tools, manual wheel balancing is generally safe; however, it should be regarded as a basic method. The primary safety risk lies not in the balancing process itself, but rather in improperly lifting the vehicle or mishandling the wheels. If a wheel is damaged or severely unbalanced, manual adjustments may not be sufficient; in such cases, it is safer to have the wheel inspected by a professional. For minor, everyday issues, this can be a safe method to temporarily reduce vibration.
FAQ 4: How long does manual wheel balancing last?
Answer: There is no fixed timeframe for manual wheel balancing, as its duration depends on driving conditions and the condition of the tires. If the wheel weights remain firmly in place and the tires do not develop any new wear or defects, the effects of the balancing can last for a considerable time. However, driving over potholes, traveling on rough roads, or having a wheel weight dislodge can cause an imbalance to return very quickly. Therefore, regular inspections are essential, specially if vibrations begin to be felt again.
FAQ 5: Can wheel balancing fix vibrations experienced while driving?
Answer: Yes, if the vibration felt while driving is caused by an uneven distribution of weight in the wheels, wheel balancing can resolve this issue. In many cases, a shaking steering wheel at high speeds is directly linked to an imbalance. However, not all vibrations are caused by wheel-balancing issues. Problems such as misalignment, bent rims, or worn suspension parts can also produce similar symptoms. Therefore, it is crucial to undergo a proper diagnosis before assuming that wheel balancing alone will solve the problem.
FAQ 6: How often should wheels be balanced?
Answer: Generally, wheels should be balanced whenever new tires are installed or whenever vibration issues begin to arise. Many drivers prefer to have their wheels balanced every 5,000 to 10,000 miles, or during their regular tire rotation schedule. If you frequently drive on rough roads or face potholes, you may require wheel balancing more often, as such conditions can disrupt the weight distribution of the wheels or alter the shape of the tires.
References:
[1] Sensing tyre pressure, damper condition and wheel balance from vibration measurements
https://journals.sagepub.com/doi/10.1243/0954407971526416

Hello Folks, Dean Shali here to help you out to solve the problems with your lovely vehicle, as i have lots of experience and knowledge about automotive industry as i woks directly with the customers and repair vehicles and i love to help the people to keep their cars safe and running smoothly.