Written By: Dean Shali
Fact Checked By: Sabré Cook
Reviewed By: Tamara Warren
So, whenever power windows doesn’t work then it is easy to blame and replace that expensive part but you need to first understand what actually goes wrong inside your car door.
As, power windows are one of the most commonly used electrical features in the modern vehicles, but they literally fails very frequently in cars.
Not only this, there’s studies and automotive service data that shows that the power window failures are usually caused by a combination of some electrical faults such as: blown out fuses or bad switches, even mechanical issues can be the culprit here such as: worn-out regulators or failing motors.
And, because these systems literally relies on multiple components that works together as a team, that’s why even a small fault in them also able to stop the entire window from functioning properly.
Additionally, there are common warning signs are available that power windows gives before even failing such as: slow movement, unusual noises or windows that stop responding completely; just don’t ignore these early symptoms as they often leads to more expensive repairs later on.
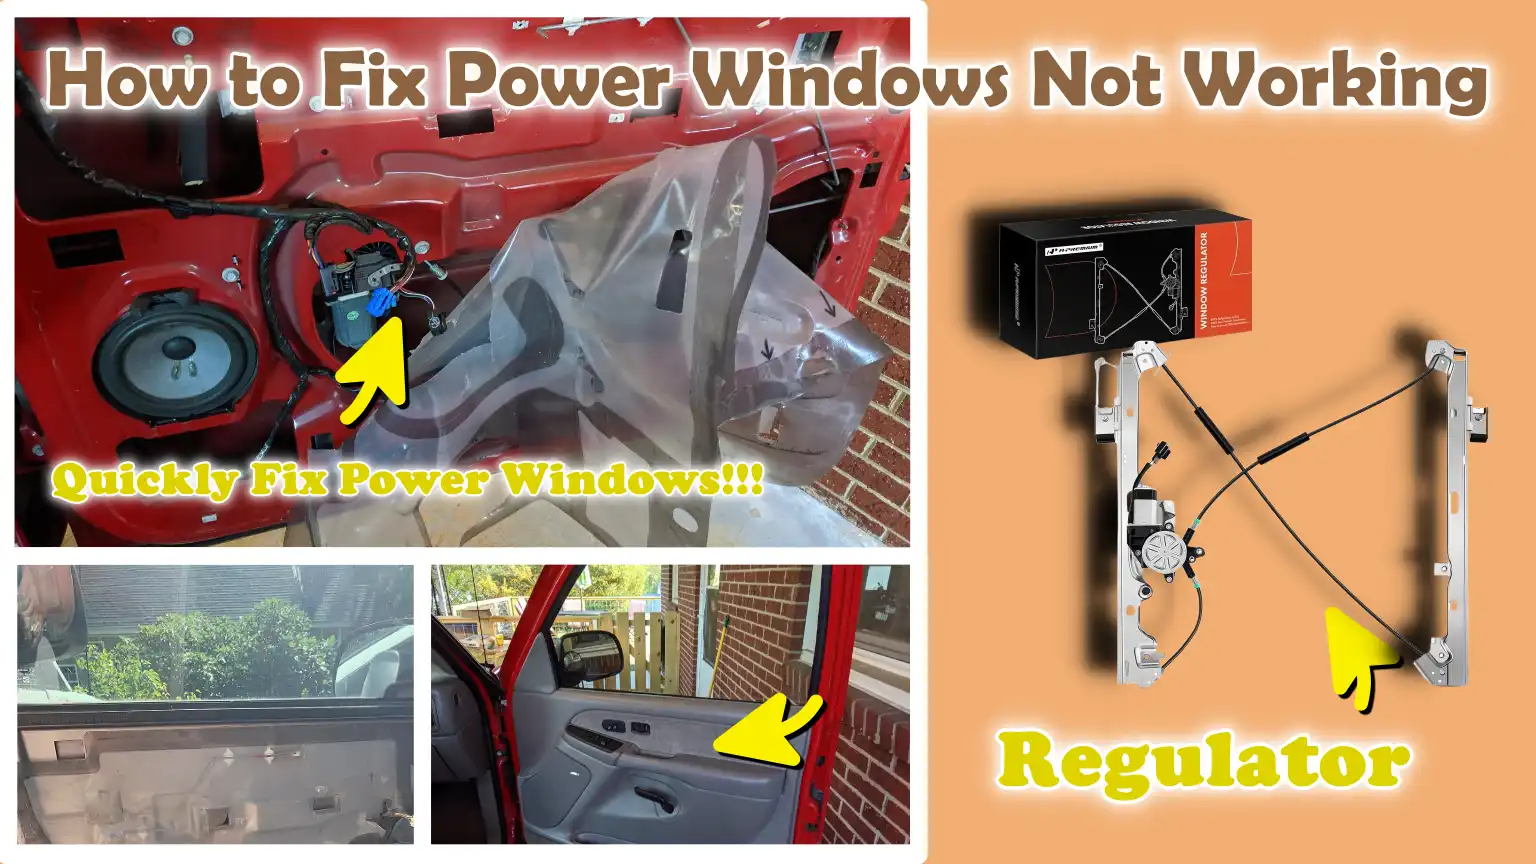
Now, in this guide you’ll learn How to Fix Power Windows Not Working that includes requirement of basic tools and identify the actual problem quickly to solve it later on with beginner friendly guide ahead.
Know, The Common Symptoms of Power Window Problems
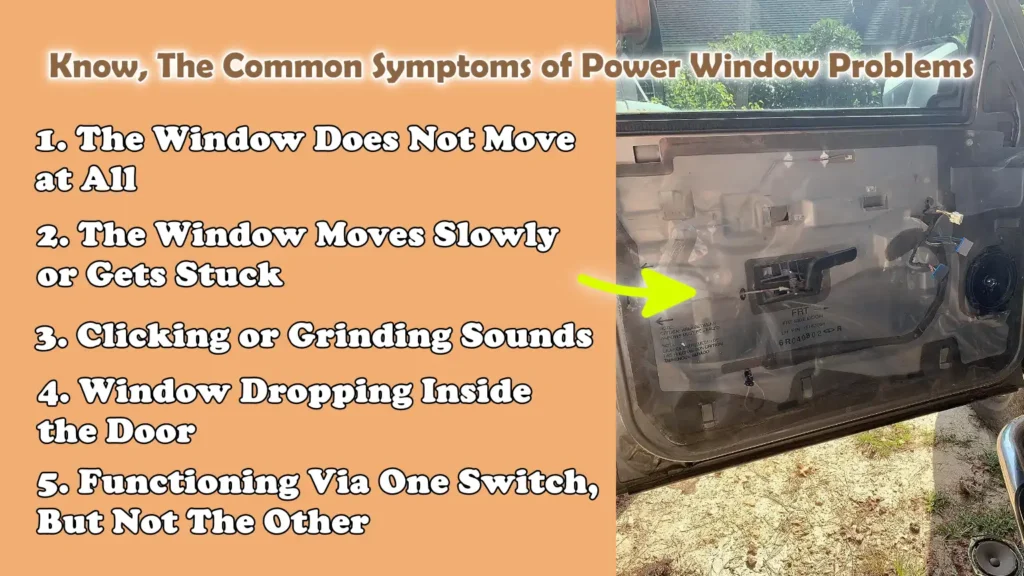
1. The Window Does Not Move at All
When a power window does not move whatsoever, it usually indicates that the electrical flow has been completely interrupted or that a major component has failed entirely.
In most vehicles, power windows rely on the combined operation of a fuse, a switch, wiring and a motor; therefore, if any one of these components ceases to function, the window will appear completely inoperable (dead).
A blown fuse can instantly cut off power, while a faulty switch may fail to transmit the necessary signals to the motor.
In some instances, the motor itself may burn out after years of use, particularly because window motors are small electrical devices that experience wear and tear over time.
Another common culprit is damaged wiring near the door hinges, where the wires flex every time the door is opened and closed.
This symptom is significant because, although it often appears to be a serious issue, in many cases, the problem can be diagnosed and resolved using relatively simple methods.
2. The Window Moves Slowly or Gets Stuck
A window that moves sluggishly or gets stuck often serves as an early warning sign that something within the system is wearing out or faced an obstruction.
Power windows are designed to operate smoothly and at a consistent speed; therefore, when they struggle to move, it typically points to mechanical friction or a weakening motor.
Dirt, dust, or debris may accumulate within the window tracks, hindering the glass from sliding properly.
Over time, the regulator, the mechanism responsible for raising and lowering the glass, may also wear out or become misaligned.
In cold weather, the glass may even freeze to the rubber seals, further exacerbating the obstruction.
A weakening motor may still be running, but it will lack the necessary power to operate the window effectively.
Ignoring this symptom can lead to total system failure, as the increasing strain will eventually cause the motor or regulator to burn out.
3. Clicking or Grinding Sounds
When pressing the window switch produces clicking or grinding sounds, it typically indicates an internal mechanical fault rather than an electrical issue.
These noises often originate from the window regulator, the mechanism that utilizes cables, gears, or plastic components to move the glass.
Over time, these parts can wear out, break, or become dislodged, resulting in strange noises during operation.
A “clicking” sound may signal that the motor is attempting to engage but is failing to connect properly with the mechanism; conversely, a “grinding” sound often points to broken or damaged gears.
This is a serious symptom, as it indicates that while the system is receiving power, its internal components are deteriorating.
Continuing to use the window in this condition can exacerbate the damage and may even cause the glass to suddenly drop down.
4. Window Dropping Inside the Door
If the window suddenly drops down inside the door panel, the cause is almost invariably a failure of the “window regulator.”
The regulator’s function is to support the glass in place and facilitate its movement up and down; when its cables snap or its components fail, the structural support holding the glass is lost.
This can occur without any prior warning, or it may happen following recurring symptoms such as erratic window operation or the presence of strange noises.
In many vehicles, the window regulator employs a cable-based system, which can wear out or snap over time due to constant use.
This symptom is not only inconvenient but also a matter of concern from a security standpoint, as it leaves the vehicle’s interior vulnerable to external weather conditions and the risk of theft.
To rectify this issue, it is typically necessary to replace the regulator, as temporary or makeshift repairs are often unreliable for securely holding the window in place.
5. Functioning Via One Switch, But Not The Other
When a power window operates using one switch but fails to respond to another, the problem typically lies with that specific switch or its associated wiring.
In most vehicles, a “master switch” is located on the driver’s side, while individual switches are situated on each door; all of these are interconnected via separate electrical circuits.
If the window functions correctly using the master switch but fails to respond to the switch located on the door, it often indicates that the door-mounted switch is defective or that its electrical contacts have worn out.
Conversely, if the situation is reversed, meaning the door switch works, but the master switch does not, the issue likely resides within the master control panel or its wiring.
This symptom proves highly useful for diagnostic purposes, as it clearly demonstrates that the motor and regulator components are still functioning properly.
Due to constant use, electrical switches can deteriorate over time; in such instances, replacing the switch is typically a simple and cost-effective solution.
What are The Main Causes of Power Window Failure
1. Blown Fuse
A blown fuse is one of the most common and easily rectifiable causes of power window failure.
In every car, fuses act as safety devices designed to protect the electrical system from damage caused by excessive current.
When an electrical load exceeding the circuit’s capacity passes through it, the fuse intentionally blows to prevent the wiring, switches, or motor from overheating or catching fire.
This means that if your power windows suddenly stop working completely specially if all windows fail simultaneously, the fuse should be the very first thing you check.
An electrical overload can be caused by a short circuit, aging components, or moisture ingress into the system.
The good news is that fuses are inexpensive and easy to replace; furthermore, many cars feature a fuse diagram that helps you locate the correct fuse.
Provided there are no other major underlying issues, replacing the fuse can immediately restore the window’s functionality.
2. Faulty Window Switch
The window switch is the component you press to raise or lower the glass and it plays a crucial role in transmitting electrical signals to the motor.
Over time, due to repeated use, sometimes amounting to thousands of operations over the entire lifespan of the vehicle, the switches can deteriorate internally.
Inside the switch, there are small metal contacts that may become dirty, loose, or corroded, thereby interrupting the flow of electricity.
A common symptom of a faulty switch is when the window operates correctly via the driver’s master control panel but fails to respond when using the switch located on the passenger door, or vice versa.
This discrepancy occurs because each switch operates on its own distinct circuit and set of connections.
In some cases, cleaning the contacts may resolve the issue; however, the most reliable solution is often simply to replace the switch.
As switches are relatively inexpensive and easy to replace, this is considered a common and easily fixable problem.
3. Faulty Window Motor
The window motor is a small electrical device responsible for raising and lowering the window; and, like any motor, it too can fail over time.
Whenever you operate the window, the motor rotates to drive the regulator; after years of repeated use, its internal components may weaken or wear out.
Symptoms of a faulty motor include: no sound being heard when the switch is pressed, a faint ‘click’ sound occurring without the window moving, or the window moving very slowly despite the battery being in good condition.
Sometimes, the motor may function intermittently, meaning it works occasionally but fails the rest of the time, which is a clear indication of internal wear.
Heat, moisture and general aging can also contribute to motor failure.
Once the motor stops working completely, it typically requires replacement, as repairing most standard car window motors is not a practical option.
4. Faulty Window Regulator
The window regulator is the mechanical system responsible for moving the glass up and down; working in conjunction with the motor, it controls the movement of the window pane.
Depending on the vehicle’s design, the regulator may utilize cables, gears, or scissor-like arms, all of which are under constant tension while in operation.
Over time, cables can fray and snap, plastic components may break and metal parts can bend or wear down.
When this occurs, the window may move unevenly, get stuck, emit strange noises, or even drop completely down inside the door panel.
A faulty regulator is one of the more serious causes of window failure, as it directly impacts the physical support of the glass itself.
Unlike minor electrical glitches, regulator issues typically necessitate the replacement of the component itself, as repairing damaged mechanical parts rarely proves to be a durable, long-term solution.
5. Broken Wiring or Loose Connections
Wiring plays a crucial role in transmitting power and signals between the switch, motor and other components; even a minor fault within this network can prevent the window from functioning.
One of the most common areas for wiring failure is the region surrounding the door hinges, where the wires flex every time the door is opened or closed.
Over time, this constant movement can cause the wires to fray and break internally, even if their outer insulation appears intact.
Loose connections, corrosion, or moisture can also disrupt the flow of electricity.
These issues often manifest as intermittent problems, where the window works only sporadically, making it even more difficult to pinpoint the true cause of the malfunction.
Resolving wiring issues may require repairing or splicing the wires; while this demands careful inspection, it offers the opportunity to fully restore the window’s functionality without the need to replace any major components.
6. Faulty Control Module – In Modern Cars
In modern vehicles, power windows are often controlled by an electronic control module.
This module manages signals, safety features and automated functions such as “one-touch up and down” operation.
Acting much like a miniature computer, the module processes inputs received from the switches and transmits commands to the motor.
If the control module malfunctions, whether due to a software glitch, an electrical surge, or the failure of an internal component, it can compromise the entire window system.
Consequently, the window may cease to function, behave erratically, or fail to execute its automated operations.
Compared to other common issues, problems involving the control module are typically more complex and may require specialized diagnostic tools to be accurately identified.
In some instances, the module may need to be reprogrammed or replaced.
Although this is a less frequent occurrence compared to other causes, it remains a significant consideration in newer vehicles, given the pivotal role that electronics play in their overall operation.
Tools
| Tool / Material | Why It Is Needed | How to Use It |
|---|---|---|
| Screwdriver Set | This tool is used to open door panels and remove the screws that hold components in place. Different cars feature different types of screws; therefore, a variety of screwdriver heads are required. | Select the correct screwdriver that fits snugly into the screw head. Turn it gently to avoid damaging the screw. Keep all removed screws in a single location to ensure they do not get lost. |
| Trim Removal Tool | This tool facilitates the removal of door panels without breaking plastic clips or scratching the surface. Using this tool is safer than using a metal screwdriver. | Gently insert the tool between the panel and the door frame, then apply slight pressure to disengage the clips. Work carefully around the edges of the panel. |
| Multimeter | This tool is used to verify whether power is reaching a specific switch or motor. It helps diagnose electrical issues, such as a complete power outage or low voltage. | Set the device to voltage mode, connect the probes to the wires or terminals and check whether current is flowing when the switch is activated. |
| Replacement Fuse | This is required when the original fuse blows due to an electrical overload. A blown fuse completely interrupts the power supply. | Locate the fuse box, remove the defective fuse and install a new fuse with the exact same rating. Ensure that the vehicle’s ignition is switched off before replacing the fuse. |
| Replacement Motor or Regulator | This is required when the motor malfunctions or the regulator mechanism breaks. These components are responsible for controlling the movement of the window. | Remove the door panel, detach the old part and install the new replacement part. Before testing its functionality, ensure that it is securely fastened. |
| Electrical Contact Cleaner | This cleans dirt, dust and rust from the switch and connector to ensure proper electrical conductivity. | Apply a small amount of spray to the switch or connector, allow it to dry and then re-test the system. Do not use an excessive amount of spray. |
| Safety Gloves | These protect your hands from sharp edges located inside the door and prevent injuries while you are working. | Put them on before beginning any repair work, specially when handling metal components or broken parts. |
How to Fix Power Windows Not Working – Quick & Easy Fixes
1. Check the Fuse
Locate the Fuse Box
The fuse box acts as a central hub where all of your car’s electrical systems, including the power windows, are controlled and protected.
In most vehicles, it is located under the dashboard on the driver’s side, inside the glove box, or sometimes within the engine compartment.
Manufacturers often provide a diagram on the fuse box cover or within the owner’s manual to help you easily identify each specific fuse.
Locating the fuse box correctly is crucial, as it allows you to access the fuse associated with the window system directly and without confusion.
Taking a few minutes to pinpoint the exact location will save you time and help prevent errors while working on the electrical system.
Identify the Window Fuse
Once you have accessed the fuse box, the next step is to identify the specific fuse that controls the power windows.
This information is clearly indicated in the fuse diagram, where it is often labeled as “PWR WND,” “Power Window,” or a similar designation.
Each fuse has a specific rating and slot, so it is essential to match it correctly with the diagram.
Identifying the correct fuse prevents you from accidentally removing or damaging other critical circuits within the vehicle.
In some cars, a single fuse may serve multiple windows, while in others, each window may have its own dedicated fuse; therefore, careful inspection is necessary.
If the Fuse is Blown, Replace It
After identifying the correct fuse, carefully remove it and inspect its condition.
A blown fuse typically features a broken metal strip inside or shows faint signs of scorching; this indicates that it has interrupted the flow of electricity to protect the system from an overload.
If the fuse has blown, replace it with a new fuse of the exact same rating, as using a fuse with a different rating can lead to electrical issues or safety hazards.
After installing the new fuse, turn on the ignition and operate the power window to check if it has started working again.
If the window functions correctly, the issue was simply a blown fuse; however, if the new fuse also blows or the window still does not work, it indicates a more significant electrical problem that requires further investigation.
2. Check the Window Switches
Test All Switches
Checking all the switches is a crucial step, as power windows are typically controlled by more than one switch, including the main control panel located on the driver’s side and individual switches situated on each door.
Each switch operates via its own set of electrical contacts, which can wear out over time due to repeated use.
By pressing every switch that controls the affected window, you can quickly determine whether the problem lies within the switch itself or elsewhere in the system.
For instance, if the window fails to respond to any of the switches, the issue is likely related to the power supply, wiring, or motor.
However, if the window operates when actuated by one switch but not by another, it clearly indicates that the non-functional switch has internal damage or that its contacts have worn out.
This simple check helps narrow down the problem without the need for any tools and saves time by preventing the unnecessary replacement of parts.
Swap with a Working Switch – If Possible
Swapping a suspected faulty switch with one that is known to be in good working order is the most reliable method for confirming whether the switch itself is the root cause of the problem.
Many cars utilize identical or similar switches for different windows, making this approach both practical and effective.
To do this, you carefully pry the switch out of the door panel using a trim tool, disconnect it and temporarily replace it with a switch that is already functioning correctly.
If the window begins to work after the switch has been swapped, it confirms that the original switch was defective and requires replacement.
Conversely, if the problem persists even after installing a known-good switch, it indicates that the issue lies elsewhere such as: in the wiring, motor, or regulator.
This method is widely used because it provides clear results without the need for any advanced equipment and it helps avoid guesswork when diagnosing electrical problems.
3. Check the Wiring
Inspect the Door Frame Wiring
The wiring located inside the door frame (or door jamb) is one of the most common areas where power window issues arise, as this section is subjected to constant movement every time the door opens and closes.
Over time, repeated flexing places stress on the wires, causing them to weaken internally or even snap completely, even if their outer insulation (sheathing) appears normal.
These wires serve to transmit electrical signals between the car’s body and the components located inside the door (such as the window motor and switches).
To inspect this area, gently examine the rubber boot (protective sleeve) that secures the wires between the door and the frame and carefully look for any signs of internal damage.
If a wire is severed or even slightly damaged, it can interrupt the electrical flow, potentially causing the window to stop working entirely or to malfunction.
Identifying issues in this specific area is crucial, as they are often hidden but can render the entire system completely inoperable.
Check for Cut Wires or Loose Connections
It is essential to conduct a thorough inspection for cut wires, damaged insulation, or loose connections, as even a minor interruption in the electrical circuit can prevent the power window from functioning correctly.
Inside the door panel, various connectors link the switches, motor and other components; if any of these connections become loose, corroded, or dirty, the electrical signal cannot reach its intended destination.
Cut or exposed wires can also lead to short circuits, which may cause fuses to blow or result in intermittent operation, where the window works sporadically or fails to respond consistently.
During the inspection, it is essential to carefully examine the wire insulation (outer layer), connector clips and terminal points to ensure that everything is secure and in good condition.
Resolving these issues may require reseating loose plugs, cleaning dirty contacts, or repairing damaged wires; in many cases, this simple step alone, without replacing any major components, is sufficient to restore the system to proper working order.
4. Check the Window Motor
Use a Multimeter to Check the Voltage
Using a multimeter to check the voltage is one of the most accurate methods for determining whether the window motor is receiving power.
The motor relies on a proper power supply to function correctly; if voltage is not reaching it, the problem typically lies not with the motor itself, but rather with the wiring, switch, or fuse.
To perform this check, it is usually necessary to remove the door panel to gain access to the motor connector.
Once the connector is visible, set the multimeter to measure voltage; then, while pressing the window switch, place the multimeter probes against the motor’s electrical terminals.
If the reading displays the correct voltage but the motor fails to run, it clearly indicates that the motor has failed internally.
Conversely, if there is no voltage, or if the reading is unstable, it implies that the problem lies elsewhere within the electrical path leading to the motor.
This method is widely utilized because it eliminates the need for guesswork and helps you avoid replacing components that are still functioning properly.
Listen for Sounds While Pressing the Switch
Listening carefully while pressing the window switch can provide significant clues regarding the condition of the motor and the overall system.
When the motor is functioning correctly, you will typically hear a faint humming sound as it operates to raise or lower the window.
If you press the switch and hear absolutely no sound at all, this often indicates that the motor is either not receiving power or has failed completely.
However, if you hear a “clicking” sound, it may suggest that the motor is attempting to engage but is unable to do so effectively, possibly due to an internal fault or an issue with the window regulator.
In some cases, a weak or struggling sound indicates that the motor is worn out and no longer possesses sufficient power to effectively operate the window.
This simple auditory check is helpful because it provides immediate information without the need for any tools and can guide you toward an accurate diagnosis before taking further steps.
5. Inspect the Window Regulator
Remove the Door Panel
Removing the door panel is essential to access the window regulator, as this component is located inside the door and is not visible from the outside.
The door panel serves as a protective shield and holds the switches, handles and trim in place; therefore, it must be removed with care to avoid breaking clips or damaging the wiring.
Most panels are secured by screws and plastic clips; once these are disengaged, the panel can be gently lifted upward to separate it from the door frame.
During removal, it is crucial to disconnect any electrical connectors attached to the switches or controls.
This step provides a clear view of the internal components of the window system, such as the regulator, motor and wiring.
Avoiding haste during this process helps prevent unnecessary damage and ensures that everything can be properly reassembled once the inspection or repair is complete.
Inspect the Cables and Tracks
Inspecting the window regulator’s cables and tracks helps identify mechanical issues that may prevent the window from functioning correctly.
The regulator’s function is to raise and lower the glass and it typically utilizes a cable system or a metal-arm mechanism to control this movement.
Over time, due to constant use and tension, the cables may become loose, fray, or snap entirely; meanwhile, the tracks, which guide the window’s movement, may become misaligned or clogged with dust, dirt and debris.
These issues can cause the window to move unevenly, get stuck, or make strange noises while operating.
A broken cable can cause the window to suddenly drop inside the door, as it no longer receives any structural support.
Carefully inspecting these components helps you determine whether the regulator is still functional or requires replacement.
In most cases, faulty regulator parts cannot be reliably repaired; therefore, replacing the entire unit is the safest and most effective solution.
6. Replacing Defective Parts
Steps for Replacing the Motor
Replacing the window motor becomes necessary when testing confirms that it is receiving power but is still failing to operate.
This indicates that the internal components of the motor have worn out or become defective.
The motor is typically attached to the regulator inside the door panel; therefore, it becomes accessible only after the door panel has been removed.
Once the motor is exposed, the electrical connector must be carefully disconnected to cut off the power supply and the mounting bolts securing the motor in place must be removed.
In many vehicles, the motor is very firmly attached to the regulator; consequently, it may need to be gently pried loose to avoid damaging surrounding components.
After removing the old motor, the new motor should be installed in the exact same position and securely tightened to ensure proper alignment.
It is crucial to firmly reconnect the wiring to ensure a consistent power supply to the motor.
Before reinstalling the door panel, it is essential to test the window to verify that the new motor is functioning correctly, specifically, that it raises and lowers the glass smoothly, without any hesitation or excessive noise.
This step ensures that the issue has been fully resolved and eliminates the need to reopen the door panel at a later time.
Steps for Replacing the Regulator
Replacing the window regulator becomes necessary when there is clearly visible mechanical damage such as: a broken cable, a bent arm, or a faulty track system, that prevents the unit from properly supporting or moving the window glass.
The function of the regulator is to hold the glass in place and guide its movement; Therefore, if this unit malfunctions, it will have a direct impact on the window’s operation and stability.
After removing the door panel, the window glass must be handled with extreme care and continuously supported to prevent it from falling while the regulator is being removed.
The regulator is typically secured with bolts or rivets, which must be removed before the unit can be extracted from the door.
Once the faulty regulator has been removed, the new regulator should be installed in the exact same position, ensuring that all mounting points are correctly aligned.
Subsequently, the window glass must be securely reattached to the new regulator so that it can move smoothly and uniformly along its track.
After all necessary components have been reassembled, the system should be tested to verify that it is functioning correctly and without any obstructions.
Proper installation is crucial, as even a minor misalignment can prevent the window from moving up and down correctly or place excessive strain on the motor over time.
How to Safely Remove a Door Panel
1. Locate Hidden Screws
Before removing a door panel, it is essential to locate all hidden screws, as most panels are secured not only by clips but also by screws situated in inconspicuous places.
These screws are typically found behind the door handle, inside the armrest, beneath small plastic covers, or near the edges of the panel.
Car manufacturers design them this way to ensure the panel remains sturdy and to minimize vibrations while driving.
If even a single screw is overlooked, attempting to force the panel off could result in broken plastic components or damaged mounting points.
Taking the time to carefully inspect these areas and gently remove any covers will make the task easier and prevent any damage.
It is also crucial to use a screwdriver of the correct size to avoid stripping the screw heads, as removing a stripped screw can be extremely difficult.
2. Use Trim Tools to Prevent Damage
To safely remove a door panel without damaging the plastic clips or the panel itself, using the appropriate trim removal tools is essential.
Door panels are typically secured by numerous clips that snap into the metal frame of the door; if excessive force is applied or the wrong tools are used, these clips can easily break.
Trim tools are designed with smooth edges, allowing you to insert them between the panel and the door frame to gently pry out the clips without causing scratches or cracks.
Applying slow, even pressure around the edges ensures that each clip disengages smoothly, one by one.
This method not only safeguards the panel but also ensures that the clips remain usable when the panel is reinstalled, a crucial step for securing the panel and preventing any rattling noises later on.
3. Properly Disconnect Electrical Connectors
Once the door panel has been loosened, it is essential to carefully disconnect all electrical connectors before completely removing the panel, as modern door panels often house wiring for power windows, locks and speakers.
These connectors are secured by clips or locking tabs, which must be gently pressed or released to prevent them from breaking.
Forcing the panel off without first detaching these wires can damage the connectors or even sever the wiring, potentially leading to further electrical issues down the road.
The best approach is to support the panel with one hand while using the other to disconnect each connector; this prevents any undue strain on the wires.
Keeping track of the specific location of each connector also makes the panel reinstallation process significantly easier.
Handling these connections with care ensures that all electrical functions continue to operate correctly once the panel is returned to its original position.
What are the Temporary Measures for Emergency Situations
1. Manually Raising the Window
When the power system fails and the window glass becomes stuck in the down position, manually raising the window can serve as a useful temporary solution.
In most cases, this is only possible if the window regulator is still partially functional and the glass has not completely detached.
By removing the door panel, or loosening it sufficiently to access the glass, you can carefully grasp the window with both hands and slide it upward along its tracks.
It is crucial to proceed slowly and with a steady, uniform motion; otherwise, if the pressure is uneven, the glass may tilt or jam.
This method works because the window tracks are designed to guide the glass correctly even without motor assistance; however, caution must be exercised to prevent the glass from breaking or the tracks from sustaining damage.
Once raised, the window should be secured to prevent it from sliding back down.
2. Securing the Window with Tape
Securing the window with tape is a quick and practical method for holding the glass in the closed position after it has been manually raised.
Strong adhesive tape such as: duct tape, as it can be applied from the interior side of the glass up to the upper edge of the door frame, ensuring the window remains firmly in place.
This technique helps protect the car’s interior from rain, dust and theft, particularly when the window operating system is non-functional.
It is essential to use multiple strips of tape and apply them firmly to ensure the glass does not slip.
Although this is not a permanent solution, it provides adequate support until proper repairs can be completed.
Care should also be exercised later when removing the tape to ensure that no marks are left behind on the glass or paint.
3. Disconnecting the Motor to Keep the Window Closed
Disconnecting the window motor can help keep the window fixed in place, particularly when the motor is faulty and the glass begins to move erratically.
In some instances, a defective motor may receive irregular electrical signals, causing the window to slide down on its own, even after having been manually positioned correctly.
By disconnecting the motor’s electrical connector, you prevent any unwanted movement and ensure that the window remains securely in place.
This step typically involves accessing the motor, which is usually located inside the door panel, and carefully unplugging the connector.
This serves as a simple yet effective precautionary measure, preventing further issues from arising until the motor or its associated components can be repaired or replaced.
Know, Estimated Power Window Repair Costs
1. Fuse: Low Cost
Repairing a blown fuse is typically the least expensive repair, as fuses are small protective components designed to fail before any major damage occurs to the electrical system.
In most cars, fuses are very inexpensive and can be replaced in just a few minutes without any specialized tools.
As a fuse merely regulates the flow of electricity, replacing it immediately restores power, provided there are no other underlying issues.
This makes it a very cost-effective solution, specially when the problem is diagnosed early.
However, if the new fuse blows again, it indicates a deeper electrical issue that requires further investigation.
2. Switch: Moderate Cost
Replacing a window switch incurs a moderate cost, as it involves both the price of the part and some labor charges.
Window switches are used repeatedly on a daily basis, causing their internal contacts to wear out over time.
When this occurs, the electrical signal cannot properly reach the motor and the window may stop functioning.
The cost for this is higher than that of a fuse because the switch is a more complex component; nevertheless, it is still considered an economical repair.
In many cases, it can be easily replaced without having to remove any other components, making it a practical solution for most car owners.
3. Motor: High Cost
The window motor is the essential component that actually moves the glass; replacing it typically incurs a high cost because it performs both mechanical and electrical functions simultaneously.
Over time, due to constant use, exposure to heat and internal wear, the motor may weaken and eventually fail.
There are two primary reasons for the high cost: the price of the motor itself and the labor required to access and extract the motor from inside the door panel.
As the door panel must be removed and the motor installed with great precision, this repair demands more time and technical expertise compared to simpler repairs.
Although it may be more expensive, replacing a faulty motor is often essential to fully restore the window’s functionality.
4. Regulator: High Cost
The window regulator is another critical component that can be expensive to replace, as it is responsible for controlling and supporting the movement of the glass.
Regulators typically consist of cables, gears, or metal arms; over time and with prolonged use, these components can wear out or break.
When a regulator fails, the window may become unstable, fail to move up or down properly, or even drop down inside the door panel, making its replacement absolutely necessary.
The cost of a regulator is often comparable to, or sometimes even higher than, that of the motor, as it constitutes a larger and more complex mechanical assembly.
Proper alignment during installation is also crucial to ensure correct operation, which further increases the overall labor involved in the repair process.
5. Professional vs DIY Comparison
The total cost of power window repair depends significantly on whether the work is performed by a professional technician or undertaken as a “Do It Yourself” (DIY) project.
Professional repairs include labor charges, which can drive up the cost, as technicians invest time in diagnosing the issue, removing the door panel and correctly installing the components.
This option offers convenience and minimizes the risk of errors, particularly when dealing with complex problems.
Conversely, performing repairs yourself can result in significant savings, as you only have to pay for the cost of the parts; however, this approach requires you to possess some basic tools, patience and a fundamental understanding of the system.
Simple tasks, such as replacing a fuse or a switch, are typically manageable for beginners, whereas replacing a motor or a regulator may require greater effort and caution.
Choosing between these two options depends on your comfort level, the tools at your disposal and the complexity of the problem.
When You Should Call An Mechanic
1. Complex Electrical Issues
When power window problems involve complex electrical faults, it is often best to call a professional, as diagnosing these issues without the proper knowledge and tools can be difficult.
Modern vehicles contain numerous electrical circuits, relays and connections, and for the window system to function correctly, all of these components must be in perfect working order.
Issues such as short circuits hidden within the vehicle’s body, intermittent power loss, or faulty wiring can be difficult to identify through visual inspection alone.
In many cases, these faults are not immediately apparent and require a systematic investigation using specialized diagnostic equipment.
Attempting to repair complex electrical issues without the necessary expertise can lead to further damage or recurring problems, ultimately increasing the total cost of repairs.
A professional technician can quickly pinpoint the root cause of the problem and ensure that the system is repaired safely and correctly.
2. Control Module Malfunctions
Control module malfunctions represent another situation where seeking professional assistance is strongly advised, as these modules function like miniature computers that govern the electronic systems found in modern cars.
They handle tasks such as operating automatic windows, engaging safety locks and coordinating the interaction between switches and motors.
When a control module fails, it is not merely a standard mechanical or electrical fault; rather, it stems from issues related to the internal electronics or software.
Diagnosing such a problem typically requires advanced diagnostic tools capable of reading error codes and analyzing system data.
In some instances, the module may need to be reprogrammed or replaced, a process that must be executed with great care and precision to ensure proper integration with the vehicle’s existing systems.
Without the right tools and technical knowledge, performing such repairs correctly is extremely difficult; therefore, seeking the assistance of a professional remains the safest and most reliable option.
3. Lack of Tools or Experience
If you lack the appropriate tools or experience, calling in a professional is a far more sensible step than risking damage to essential components.
Power window repair often requires removing door panels, handling electrical connectors and working with delicate parts such as glass and wiring.
Without the proper tools such as: trim removal tools or a multimeter, even simple tasks can become challenging, potentially leading to broken clips, scratched surfaces, or errors during reassembly.
Experience also plays a crucial role, as understanding how different parts interact with one another helps prevent mistakes during the repair process.
A professional possesses both the necessary tools and the practical expertise to complete the job efficiently and safely.
In such situations, enlisting the help of an expert saves time, reduces stress and helps you avoid the additional repair costs that could result from accidental damage.
Read More:
- How to Fix a Blown Fuse in a Car
- How to Fix Car Electrical Problems
- How to Pass a Car Emissions Test
- How to Fix Rotten Egg Smell in Car
- How to Diagnose a Bad Catalytic Converter
- How to Fix an Exhaust Leak
How to Prevent & Maintain Power Window
Plus, there’s research that shows that the most of the failures actually begins as small mechanical stresses that grows over the period of time and usage, indeed power window systems are designed in a way to handle the repeated daily use as well, but if there’s early warning signs such as: slow movement or unusual noise then it should never be ignore anyway possible, as they often indicate that there’s something deeper structural issues are developing inside the system.[¹]
1. Keep Window Tracks Clean
Keeping window tracks clean is the most effective way to ensure that your windows operate smoothly, as the glass slides up and down along these very tracks every time you use the window.
Over time, dust, dirt and small particles can accumulate inside the tracks, increasing friction and making it difficult to move the window.
This added resistance places excessive strain on the motor and regulator, potentially leading to premature wear or complete failure.
Regularly cleaning the tracks with a soft cloth or a mild cleaner reduces this friction, allowing the window to move with ease.
In some cases, applying a suitable lubricant can further enhance window movement and prevent it from sticking.
Regular cleaning not only improves window performance but also extends the overall lifespan of the entire window system.
2. Do Not Force Frozen Windows Open
When windows are frozen, it is crucial to avoid using the power windows, as attempting to force them open can cause severe damage to the motor and regulator.
In cold weather, moisture can freeze around the edges of the window, causing the glass to adhere tightly to the rubber seals.
In such a situation, when the switch is pressed, the motor attempts to move the glass but faces significant resistance.
This can place immense strain on the motor, potentially causing it to burn out, and may also result in the breakage of internal components within the regulator.
It is best to gently loosen the window before operating it, either by warming the area or by allowing the ice to melt naturally.
Taking this precaution helps prevent sudden malfunctions and saves you from incurring expensive repair costs.
3. Operate the Switch Gently
Using the window switch gently may seem like a minor habit, but over time, it plays a crucial role in maintaining the durability of the window system.
Inside the switch are tiny electrical contacts that send signals to the motor; if pressed too forcefully or too rapidly and repeatedly, these contacts can suffer from unnecessary wear and tear.
Forceful operation can damage internal contacts or loosen connections, potentially leading to window malfunctions or the complete failure of the switch.
Pressing the switch gently, and avoiding forceful or abrupt movements, ensures a consistent electrical flow, thereby extending the lifespan of the switch.
Exercising a little caution can prevent many common problems associated with switch failure.
4. Regularly Inspect Electrical Connections
Regularly inspecting electrical connections allows you to detect minor issues before they escalate into major malfunctions.
Power windows rely on a complex network of wires, connectors and other components; over time, factors such as heat, moisture and constant use can cause these parts to deteriorate.
Early signs of trouble such as: loose connections, minor corrosion, or poor electrical conductivity, may manifest as sluggish window operation or intermittent functionality.
By periodically checking fuses, inspecting for exposed wires and ensuring that connectors are securely seated, you can identify these issues in their early stages and rectify them before they impact the entire system.
Regular inspections enhance reliability, minimize the risk of sudden breakdowns and ensure that the power window system continues to operate efficiently for years to come.
Conclusion – How to Fix Power Windows Not Working
Now, you can understand how important it is to maintain the power window system as it literally affects your comfort and control as well.
Most problems stem from a few specific components such as: fuses, switches, motors, regulators, or wiring, and each of these parts usually exhibits distinct warning signs before failing completely.
By paying attention to early symptoms such as: sluggish operation, unusual noises, or erratic behavior, you can identify a problem before it becomes severe and costly.
The most important rule to remember is that it is always essential to thoroughly diagnose a component before replacing it; replacing parts without understanding the root cause often results in a waste of both time and money.
This guide demonstrates that, with a little care and patience, many power window issues can be resolved using a few common tools and simple techniques.
From checking fuses to testing motors and inspecting regulators, each step assists you in diagnosing the problem in a logical and systematic manner.
Furthermore, recognizing your limitations is equally important; for complex electrical faults or issues involving modern control systems, professional assistance may be required to prevent further damage.
Finally, regular maintenance such as: keeping the tracks clean and avoiding unnecessary strain on the system, as it can significantly extend the lifespan of your power windows.
So, that’s it from this guide about How to Fix Power Windows Not Working, if you still have questions then just comment down for more information.
Frequently Asked Questions
FAQ 1: Why isn’t my power window working at all?
When a power window stops working completely, it usually indicates a fault in the electrical system or the failure of a critical component. The most common causes include a blown fuse, a faulty window switch, wiring issues, or a failed motor. In many cases, the problem is minor such as: a blown fuse which interrupts the flow of electricity to protect the system. However, if the fuse is intact, the issue may be more serious and could require an inspection of the switch, wiring, or motor. Identifying the exact cause is crucial, as replacing components without proper diagnosis can lead to unnecessary expenses.
FAQ 2: Why does my car window move slowly or get stuck?
A window moving slowly or getting stuck often signals increased resistance within the system. This can occur when dirt and dust accumulate in the window tracks, making it difficult for the glass to slide up and down smoothly. This issue may also stem from a weakening motor, one that has lost power over time or a worn-out regulator that is no longer guiding the window correctly. In some situations, weather conditions such as: cold temperatures, as it can cause the rubber seals to stiffen, further increasing resistance. This problem should not be ignored; if the motor or regulator eventually fails completely, the window could stop working altogether.
FAQ 3: Why is my power window making ‘clicking’ or ‘grinding’ noises?
‘Clicking’ or ‘grinding’ noises typically point to a mechanical issue rather than an electrical one. These sounds often originate from the window regulator, which contains moving parts such as cables or gears. When these components become worn, break, or become dislodged, they can produce strange noises when the window is operated. A ‘clicking’ sound may indicate that the motor is attempting to function but is failing to engage properly; whereas a ‘grinding’ sound often suggests that internal components have broken or become damaged. Continuing to use the window in this condition can exacerbate the damage; therefore, it is best to diagnose the problem and have it repaired as soon as possible.
FAQ 4: Can I repair a power window myself?
Yes, provided you follow the correct procedures and utilize some basic tools, you can resolve many power window-related issues right at home. Minor problems such as: replacing a fuse or swapping out a faulty switch are typically straightforward and do not require extensive experience. Even tasks like checking the wiring or cleaning contact points can be performed with a little care and caution. However, more complex tasks such as: replacing the motor or regulator, that demand greater effort and precision. If you are comfortable working with automotive components and follow the outlined steps systematically, you can save money by performing the repairs yourself. Nevertheless, if the issue involves complex electrical systems, it is advisable to seek the assistance of a professional.
FAQ 5: How can I tell if the window motor is failing?
A failing window motor often exhibits distinct warning signs before ceasing to function entirely. If you press the switch and hear absolutely no sound, it may indicate that the motor is not receiving power or has completely stopped working. If you hear a faint or muffled sound, yet the window remains stuck in place without moving, the motor may be worn out and unable to generate the necessary force to move the window. In some cases, the motor may operate intermittently starting and stopping sporadically, which signals an internal fault. Testing the motor with a multimeter can verify whether it is receiving power, helping you determine if it needs to be replaced.
FAQ 6: Why does my window work with one switch but not with another?
This typically occurs when a specific switch is defective, while the rest of the system remains fully functional. Power window systems often feature a master control switch on the driver’s side, in addition to individual switches located on each door. If a window responds to one switch but not another, it indicates that the internal contacts within the faulty switch are worn out, or that there is an issue with its electrical connections. This serves as a useful diagnostic clue, as it confirms that the motor and regulator are still functioning correctly and that the problem is confined solely to the switch. Replacing the defective switch usually resolves the issue.
References:
[1] Automotive power window mechanism failure initiated by overload
https://www.sciencedirect.com/science/article/abs/pii/S1350630713000459

Hello Folks, Dean Shali here to help you out to solve the problems with your lovely vehicle, as i have lots of experience and knowledge about automotive industry as i woks directly with the customers and repair vehicles and i love to help the people to keep their cars safe and running smoothly.