Written By: Dean Shali
Fact Checked By: Sabré Cook
Reviewed By: Tamara Warren
Basically, a brake booster vacuum leak is one of those problems that can quietly reduce the braking performance of your vehicle and what makes it more threatening is that: even it is not necessary to show obvious warning lights.
That’s why you need to understand how important it is to identify and fix it in time.
Because, the brake booster is designed to use the engine vacuum pressure that makes the braking way more easier, so when a leak develops, that extra assistance disappears and the brake pedal suddenly feels really hard and difficult to press.
And, this literally increases the effort needed to stop the car and even increases the stopping distance, so in the emergency situations it becomes really dangerous.
As well as, in many vehicles: the same vacuum system is also connected to engine functions, so that a leak can cause the rough idling, poor fuel efficiency or unusual hissing sounds whenever you press that brake pedal.
But, you will be pleased to know that most of the time brake booster vacuum leaks are simple caused by cracked hoses, loose connections or having a faulty check valve, that can be diagnosed and fixed with the right approach.
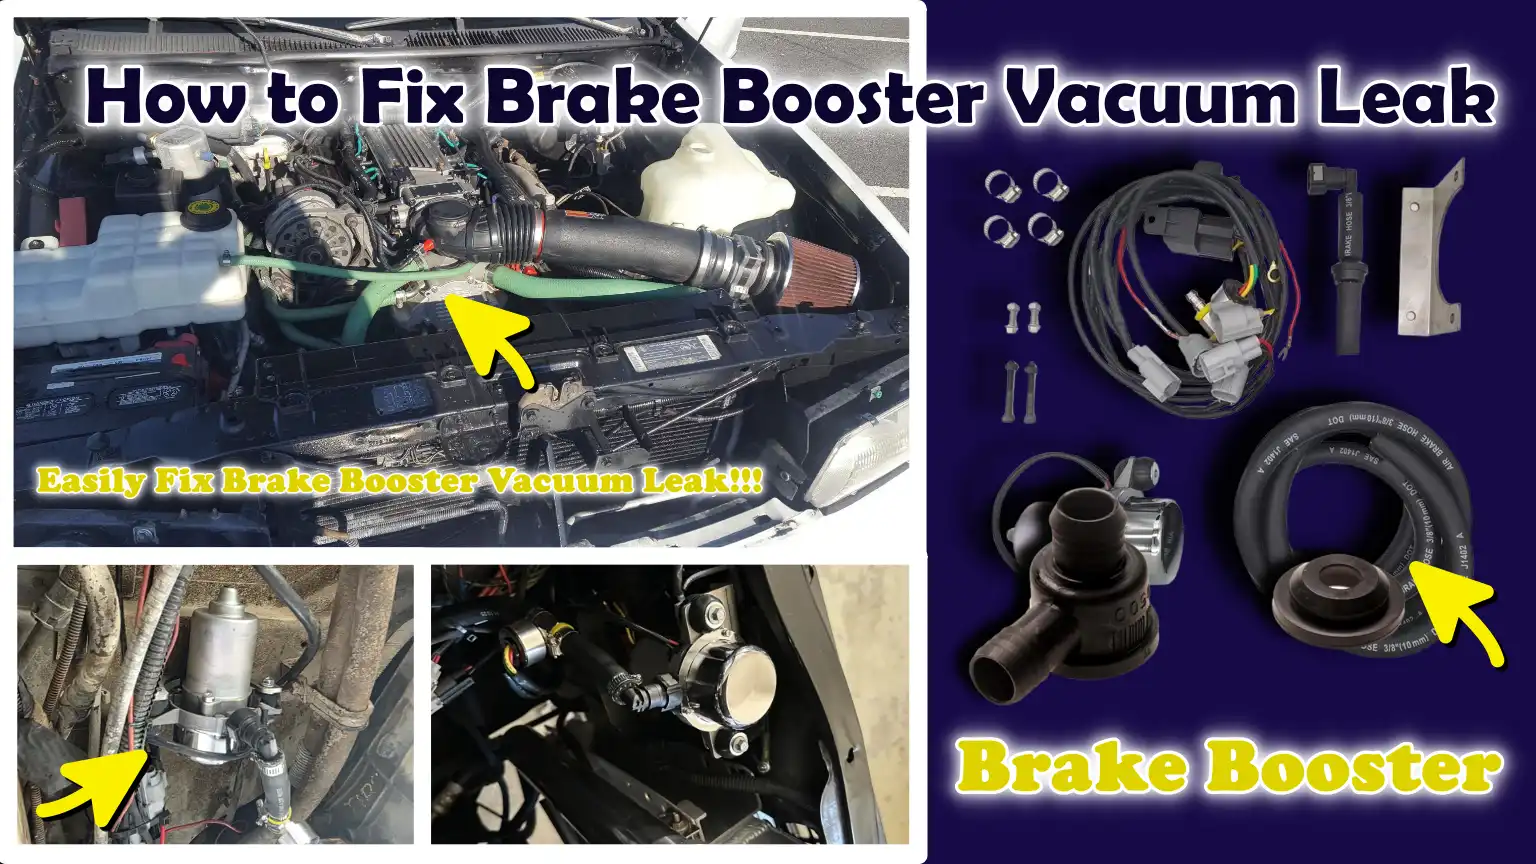
Furthermore, this is the guide that actually shows you How to Fix Brake Booster Vacuum Leak so that you can keep your driving safe and controlled throughout the journey.
Why Fixing a Brake Booster Vacuum Leak Is Essential?
1. Reduced Braking Power and Safety
A brake booster vacuum leak directly diminishes the amount of assistance provided to your braking system, meaning your car no longer receives the extra force necessary to stop quickly and safely.
Under normal conditions, the brake booster utilizes engine vacuum to multiply the pressure you apply to the pedal, making braking effortless and effective, even at high speeds.
When a leak occurs, this assistance is weakened or completely lost; consequently, it takes longer for the vehicle to come to a stop and the driver is required to exert significantly more physical effort.
This increase in stopping distance can be dangerous in sudden braking situations, particularly in heavy traffic or emergencies where an immediate response is critical.
Repairing the leak restores proper braking power, ensuring that your vehicle stops exactly as you intend, without requiring excessive physical exertion on your part or compromising your safety.
2. The Brake Pedal Becomes Stiff
One of the most noticeable and immediate effects of a vacuum leak is the brake pedal becoming stiff or hard, a sensation that feels distinctly different from the pedal’s normal, smooth and effortless operation.
This occurs because the booster is no longer able to utilize vacuum pressure to assist your foot’s input; consequently, you must apply significantly more physical force to achieve the same braking effect.
Many drivers describe this sensation as though the brakes have failed, even though the mechanical components of the braking system may still be fully functional.
Over time, this can lead to driver fatigue specially in stop-and-go traffic, and may erode confidence while driving.
Repairing a vacuum leak restores the normal feel of the brake pedal, making braking easier, more predictable and more comfortable.
3. Engine Performance Issues May Arise
A vacuum leak in the brake booster not only affects the braking system but can also disrupt engine operation, as it allows unmetered air to enter the intake system.
This excess air alters the air-fuel mixture, causing the engine to run “lean” (too much air, too little fuel).
Consequently, the engine may experience rough idling (vibration while the vehicle is stationary), unstable RPM, or, in some cases, the engine may even stall completely.
You may observe that the engine RPM fluctuates slightly when you depress the brake pedal; this is a definitive sign of a vacuum leak within the booster system.
In modern vehicles, this issue can also trigger a warning light or lead to a general decline in fuel efficiency.
Repairing the leak restores the proper air-fuel balance, allowing the engine to run smoothly and efficiently without any sudden interruptions.
4. Prevents Further Damage to Brake System Components
Ignoring a brake booster vacuum leak can lead to accelerated wear and damage to other components of the braking system over time.
When the booster is not functioning correctly, greater physical force is required to depress the brake pedal, placing excessive strain on components such as the master cylinder, brake lines and brake pads.
This increased pressure accelerates wear and tear, reduces the lifespan of these components and can result in higher repair costs in the future.
In some instances, moisture or debris may also infiltrate the system through a faulty hose, further compromising the overall performance of the braking system.
By having vacuum leaks repaired in a timely manner, you safeguard the entire braking system, maintain consistently good performance and avoid unnecessary damage that could negatively impact both your safety and repair costs.
Know, Common Symptoms of a Brake Booster Vacuum Leak
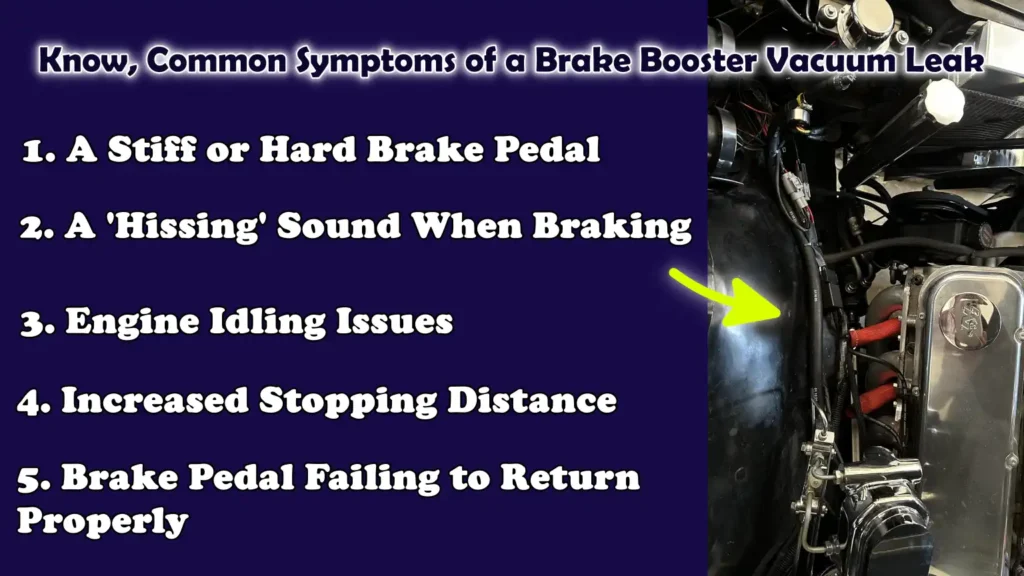
1. A Stiff or Hard Brake Pedal
A stiff or hard brake pedal is one of the most common and easily recognizable symptoms of a brake booster vacuum leak.
Typically, the brake booster utilizes vacuum pressure generated by the engine to reduce the physical effort required to depress the brake pedal, making the pedal feel easier and more comfortable to operate.
When a leak occurs, this assistance is diminished or completely lost, causing the pedal to become stiff and difficult to depress.
You may feel as though you need to apply significantly more force with your foot to slow the vehicle down, particularly at low speeds or during repeated braking.
This change in pedal feel is often sudden and should not be ignored, as it directly impacts how quickly and safely your vehicle can come to a stop.
2. A ‘Hissing’ Sound When Braking
A distinct ‘hissing’ sound heard when you press, or hold down, the brake pedal is a sure sign of a vacuum leak within the brake booster system.
This sound occurs when air is drawn into the system due to a crack, a loose connection, or a defect in the booster’s internal diaphragm (membrane).
Depending on the size of the leak, this sound may be faint or loud and it is typically heard coming from the dashboard area or the engine bay (the area surrounding the engine).
If the ‘hissing’ sound persists even while holding the brake pedal down, it indicates a continuous loss of vacuum; this reduces braking assistance and if left unaddressed, the problem can become even more severe over time.
3. Engine Idling Issues
A vacuum leak in the brake booster can also affect how your engine runs, as it allows unmetered, excess air to enter the intake system.
This disrupts the air-fuel balance necessary for the engine to run smoothly.
Consequently, when the vehicle is stationary, you may experience irregularities in engine operation (rough idling), fluctuations in engine RPM, or slight vibrations.
In some cases, pressing the brake pedal may cause a slight change in engine speed; this is a strong indication that a leak exists within the vacuum system itself.
Repairing the leak restores the engine’s proper balance and ensures its smooth operation.
4. Increased Stopping Distance
When the brake booster does not receive the correct amount of vacuum pressure, it fails to generate the necessary additional force required to effectively assist in braking.
This means that it will take longer for your car to come to a complete stop, particularly during sudden braking situations.
Even if the brakes themselves are mechanically sound, the reduced braking assistance renders them less responsive and increases the time required for them to react.
This increase in stopping distance can be dangerous in real-world driving conditions such as: in heavy traffic or during emergency braking situations, where every second counts.
Fixing the vacuum leak restores normal braking responsiveness and ensures safe braking performance.
5. Brake Pedal Failing to Return Properly
Another symptom of a vacuum leak is that the brake pedal does not easily return to its original position after being depressed.
This can occur when the internal pressure balance within the brake booster is disrupted due to an air leak.
The pedal may feel somewhat stuck, slow to return, or exhibit irregularities in its movement, which can affect how the brakes engage and disengage.
Over time, this can lead to uneven braking or difficulties while driving.
Repairing the leak restores the proper vacuum function within the booster, allowing the pedal to move freely and return to its normal position after every use.
Know, The Main Causes of Brake Booster Vacuum Leaks
1. Cracked or Deteriorated Vacuum Hose
A leaking vacuum hose is one of the most common causes of vacuum issues, as it directly transmits engine vacuum to the brake booster and is constantly exposed to heat, pressure and the aging process.
Over time, its rubber material can dry out, harden, or soften, leading to the formation of small cracks or holes that allow air to infiltrate the system.
Even a minor crack can reduce vacuum pressure to a level that negatively impacts braking performance.
In many vehicles, this hose is situated in close proximity to the engine, an environment characterized by extremely high temperatures, which accelerates its deterioration.
Regular inspection of this component is crucial, as defects are often not immediately visible to the naked eye; furthermore, replacing a faulty hose is often a simple and cost-effective solution that effectively restores the proper flow of vacuum.
2. Faulty Check Valve
The check valve is a small yet critical component responsible for regulating the direction of airflow between the engine and the brake booster.
Its primary function is to allow vacuum to enter the booster while simultaneously preventing air from flowing back out, particularly when the engine is turned off or operating under heavy load.
When this valve malfunctions, it may become stuck in either an open or closed position, thereby disrupting the vacuum supply.
A faulty check valve can cause the vacuum stored within the booster to dissipate, resulting in a stiff brake pedal and a reduction in the level of braking assistance provided.
In some instances, cracks may develop within the valve itself, leading to a slow and persistent vacuum leak.
Given that it is relatively easy to remove and inspect, checking this valve is an essential step when diagnosing vacuum-related braking issues.
3. Leaking Brake Booster Diaphragm
Inside the brake booster lies a flexible diaphragm, which utilizes vacuum pressure to generate the necessary force to assist in braking.
If this diaphragm becomes worn, torn, or damaged, it fails to effectively contain the vacuum, resulting in an internal leak.
This type of leak is particularly critical because it cannot be detected through external visual inspection and typically necessitates the replacement of the entire brake booster unit.
A leaking diaphragm often produces a persistent “hissing” sound when the brake pedal is depressed; furthermore, a continuous vacuum leak can also adversely affect engine performance.
As the diaphragm plays a pivotal role in facilitating the braking process, any malfunction within it leads to a significant reduction in braking efficiency.
4. Loose or Damaged Hose Connections
Even if the vacuum hose itself is in good condition, loose or improperly seated connections can still lead to a vacuum leak.
Over time, engine vibrations and daily driving conditions can cause hose fittings to loosen slightly, creating minute gaps through which air can infiltrate the system.
In some instances, particularly in older vehicles, connectors or plastic fittings may become worn or brittle and subsequently break.
These leaks often go unnoticed due to their minute size; nevertheless, they can diminish the overall vacuum pressure supplied to the brake booster.
Ensuring that all connections are tight and properly sealed is a simple yet essential step in maintaining a leak-free system.
5. Intake Manifold Vacuum-Related Issues
The brake booster relies on the vacuum generated by the intake manifold; Therefore, any issue within the manifold system can adversely affect brake performance.
If there is a leak in the intake manifold, damaged gaskets, or a problem with the associated vacuum lines, the overall vacuum level within the system may drop.
This means that the brake booster does not receive the vacuum necessary to function correctly, even if the booster itself is in good condition.
Engine-related issues such as: improper air intake or poor sealing, as it can also destabilize the vacuum supply.
To ensure a stable and reliable vacuum source for proper brake operation, it is crucial to identify and resolve any issues related to the intake manifold.
Tools
| Tool/Material | Why It Is Needed | How to Use It |
|---|---|---|
| Vacuum Hose – Replacement | The vacuum hose transmits engine vacuum to the brake booster. If the old hose is cracked, soft, or leaking, it is essential to replace it to restore proper vacuum pressure and braking assist. | Carefully detach the old hose from both ends. Match its length and diameter to the new hose. Firmly press the new hose onto the fittings to ensure a tight and secure connection, leaving no room for air leaks. |
| Hose Clamps | Hose clamps help create a tight seal between the vacuum hose and its connection points. Without proper clamping, air leaks can occur, even if the hose itself is new. | Slide the clamp onto the hose before connecting it. Position it at the point where the hose meets the fitting, then use a screwdriver to tighten it until the hose is securely seated, without causing any damage. |
| Screwdriver Set | A screwdriver is required to loosen or tighten hose clamps, as well as to remove small components during inspection and repair. Having screwdrivers of various sizes ensures that you can work on different types of clamps. | Select the correct size and type, typically a flathead or Phillips. Use it to loosen the clamp before removing the hose and to securely tighten the clamps after installing the new components. Avoid overtightening to prevent damage. |
| Pliers | Pliers are useful for gripping, pulling, or adjusting tight hoses and clamps that cannot be easily handled by hand. They assist in removing components that are stuck or will not budge despite applied force. | If the hoses are stuck to the fittings, use a pair of pliers to gently twist and pull them free. Pliers can also assist in compressing spring-style clamps, allowing them to be released or securely fastened in place. Apply steady pressure to prevent the hoses from tearing. |
| Brake Cleaner Spray | Brake cleaner removes dirt, oil and debris from hoses, fittings and surrounding areas. A clean surface facilitates leak detection and ensures a proper seal during reassembly. | Spray the cleaner onto the hose connections and adjacent components. Allow it to dry quickly. Use it prior to inspection so that any cracks or leaks are clearly visible and use it again after repairs to keep the area clean. Avoid spraying on hot surfaces. |
| Hand Vacuum Pump – Optional but Helpful | A hand vacuum pump allows you to verify whether the brake booster and vacuum lines are capable of holding pressure. This helps confirm the presence of any leaks and pinpoint their exact location. | Connect the pump to the vacuum hose or directly to the booster. Pump it to generate a vacuum and observe whether the pressure remains steady. If the pressure drops, it indicates a leak somewhere in the system that requires repair. |
How to Detect a Brake Booster Vacuum Leak
1. Perform a Basic Brake Pedal Test
Begin with a simple test to quickly determine whether the brake booster is functioning correctly.
First, turn off the engine and pump the brake pedal several times until it becomes firm; this releases all the vacuum stored inside the booster.
Next, keep your foot pressed firmly on the brake pedal and start the engine.
In a properly functioning system, the pedal should sink slightly downward as soon as the engine starts, as the booster begins to draw in fresh vacuum.
This slight downward movement indicates that the booster is assisting your braking effort.
If the pedal does not move or feels very stiff, it implies there is an issue with the vacuum supply or a leak within the system that is preventing it from operating correctly.
2. Listen for Sounds of a Vacuum Leak
A highly effective method for detecting a vacuum leak is to listen carefully for specific sounds while pressing the brake pedal.
With the engine running, press and hold the brake pedal and listen for any “hissing” sounds (resembling escaping air) coming from behind the dashboard or from the engine bay (where the brake booster is located).
This hissing sound occurs when air is being drawn into the system through a leak.
Depending on the severity of the leak, this sound may be continuous or audible only when the pedal is depressed.
A distinct and persistent hissing sound is a definitive sign of a vacuum leak that requires repair.
3. Visually Inspect the Vacuum Hose
Next, closely inspect the vacuum hose that connects the engine to the brake booster.
Check the entire length of the hose for any cracks, cuts, soft spots, or signs of wear.
Pay special attention to bends or connection points, as these areas are most prone to deterioration.
Additionally, check to ensure that the hose is not loose at its fittings and look for any accumulated oil or grime that could be hiding minor leaks.
Even a tiny crack can compromise vacuum pressure and negatively impact braking performance; therefore, any damaged hose should be replaced to ensure a proper seal.
4. Inspect the One-Way Check Valve
The one-way check valve plays a crucial role in maintaining the vacuum inside the brake booster; therefore, it must be inspected if a leak is suspected.
Carefully disconnect the valve from the vacuum hose and test it by blowing air through both ends.
Air should flow easily in one direction and be completely blocked in the other.
If air flows in both directions, or remains blocked in both directions, the valve is defective and requires replacement.
A faulty check valve can cause the stored vacuum to dissipate, resulting in a stiff brake pedal and reduced braking assistance.
5. Use a Vacuum Pump – Optional
For a more precise and thorough assessment, a handheld vacuum pump can be used to determine whether the brake booster is capable of maintaining vacuum pressure.
Disconnect the vacuum hose from the booster and connect the pump directly to the booster port.
Pump to generate a vacuum and observe the gauge reading.
If the booster is in good condition, the pressure should remain stable for a period of time.
If the vacuum drops rapidly, it indicates an internal leak, typically caused by a defective diaphragm inside the booster.
This test helps confirm whether the problem lies within the booster itself or elsewhere in the vacuum system.
How to Fix Brake Booster Vacuum Leak – Easy Guide
1. Replace a Faulty Vacuum Hose
One of the most common symptoms of a vacuum leak is a defective hose; the good news is that, with a little care, this is usually an easy fix.
First, locate the hose that runs from the engine intake manifold to the brake booster.
Gently detach the hose from both ends; twist it slightly to loosen it, as pulling too hard could damage the fittings.
Compare the old hose with the new one to ensure that the length and diameter match exactly, as even a slight difference in size can prevent a proper seal from forming.
Firmly press the new hose onto both connection points until it seats correctly and appears flush.
Ensure that the hose has no kinks or crimps, as these can restrict airflow and reduce vacuum pressure.
A properly installed hose restores airflow and immediately improves braking performance.
2. Tighten or Replace Hose Clamps
Even if the hose itself is in good condition, air can still leak from the vacuum system.
Inspect all the clamps securing the hose to ensure they are properly seated at every connection point where the hose attaches to the vehicle’s components.
Depending on the type of clamp, use pliers or a screwdriver to tighten them, ensuring that the hose is held firmly but not pinched.
If any clamp appears rusted, worn, or unable to maintain sufficient tension, it should be replaced with a new clamp to ensure a reliable seal.
Proper installation is crucial, as vacuum-assisted braking systems rely entirely on airtight connections; even the slightest gap can compromise the braking assistance provided.
3. Replace a Faulty Check Valve
The check valve regulates the direction of airflow and helps maintain the vacuum inside the brake booster; therefore, replacing a defective valve is essential to restore proper functionality.
To do this, pull the valve out of the hose or the grommet attached to the booster.
Note the orientation in which it was installed, as the new valve must be inserted in the exact same direction to ensure proper operation.
Insert the new valve into its place, ensuring that the plastic fitting and the hose are securely reconnected.
A properly functioning check valve ensures that the vacuum remains contained within the booster reservoir and prevents backflow, thereby providing consistent braking assistance even when engine conditions fluctuate.
4. Tighten Loose Connections
Loose or improperly seated connections, no matter how minor, as it can lead to subtle yet critical leaks, negatively impacting the overall efficiency of the system.
Inspect all connection points between the brake hose, the check valve and the brake booster to verify that they are securely fastened and properly seated.
If any connection is loose, carefully tighten it to ensure a proper fit.
In some instances, worn rubber ends or grommets may need to be replaced to achieve a proper seal.
Taking the time to secure every connection is vital, as the vacuum system relies entirely on a perfect seal; Even a minor leak can compromise vacuum pressure and lead to clearly noticeable issues with braking performance.
5. Replace the Brake Booster – If Necessary
If all external components such as: hoses, fittings and check valves, are in good condition, yet the problem persists, the issue likely lies within the brake booster itself.
Over time, the internal diaphragm can wear out or deteriorate, resulting in a persistent vacuum leak that cannot be remedied externally.
In such cases, replacing the brake booster ensures that the vehicle receives proper braking assistance.
This procedure involves disconnecting the booster from the master cylinder and the brake pedal linkage and then installing a new unit in its place.
While this approach offers a more definitive solution, diagnosing an internal fault within the booster can be quite challenging; furthermore, driving with a defective booster can significantly compromise braking safety and control.
How to Test Brake Booster After Repairs
1. Start the Engine and Check the Brake Pedal Feel
After completing the repairs, start the engine and immediately check how the brake pedal feels under your foot.
In a properly functioning system, the pedal should feel smooth, slightly soft and easy to depress without requiring excessive force.
When you press the pedal, it should travel downward in a controlled and uniform manner; this indicates that the brake booster is receiving adequate vacuum and is assisting your input.
If the pedal still feels stiff or does not respond correctly, it may mean that the vacuum leak has not been fully resolved or that there is another issue within the system.
Taking a moment to carefully assess the pedal’s feel helps confirm that the brake assist function has returned to normal operation following the repairs.
2. Confirm That There Is No ‘Hissing’ (Air Leakage) Sound
While the engine is still running, press and hold the brake pedal and listen carefully for any unusual sounds.
A properly sealed vacuum system should operate silently, without any hissing (air-escaping) noises.
If you previously heard a hissing sound due to a leak, it should now have ceased completely following the repairs.
Pay close attention to the area surrounding the brake booster and vacuum hose connections, as even a minor residual leak can generate a faint sound.
If the hissing persists, it indicates that air is still entering the system from somewhere; you should re-inspect the connections and components to ensure they are properly sealed.
3. Conduct a Short ‘Road Test’
Once the pedal feel and sound checks appear normal, move the vehicle to a safe location and conduct a short, controlled road test.
Drive at low to moderate speeds and apply the brakes, first gently, then a little more firmly, to observe how the vehicle responds.
The braking should feel smooth, predictable and require only normal effort, without any sudden stiffness or delay.
This step is crucial because it allows you to test the system under actual driving conditions, where a consistent vacuum supply and brake assist are essential for safe operation.
Refrain from driving at high speeds until you are completely confident that the braking system is functioning correctly.
4. Check for Consistent Braking Performance
During and after the road test, pay close attention to how consistent the braking performance feels across various situations.
Whenever the brake pedal is depressed, it should provide an identical response every single time, exhibiting no sudden stiffness or looseness.
The vehicle should come to a stop in a perfectly straight line without any hesitation and the stopping distance should feel consistent with how it was prior to the onset of the issue.
A consistent response is a primary indicator that the vacuum system is properly sealed and functioning correctly.
If you notice any changes in the pedal feel or braking response, it could signal an underlying issue; further investigation is necessary to ensure complete safety and reliability.
Read More:
- How to Test Brake Booster Functionality
- How to Lubricate Brake Caliper Pins Properly
- How to Rebuild Brake Caliper at Home
- How to Check Brake Caliper Piston Movement
- How to Resurface Brake Rotors at Home
- How to Fix Brake Rotor Runout
- How to Check Brake Disc Runout
- How to Prevent Brake Fluid Boiling
- How to Diagnose Brake Fluid Boiling
- How to Fix Brake Pedal Sinking Slowly
- How to Check Brake Pad Wear Sensor
- How to Measure Brake Pad Thickness Without Removing Wheel
- How to Replace Brake Pads
Know, About the Common Mistakes to Avoid
1. Ignoring Small Vacuum Leaks
Many people overlook minor vacuum leaks because the car still seems drivable; however, even a small leak can gradually diminish the functionality of the brake booster over time.
A tiny crack in a hose or a slightly loose connection can slowly deplete the vacuum pressure necessary for proper brake assistance.
This can result in a stiff brake pedal, increased stopping distances and excessive strain on the braking system.
Small leaks often worsen due to heat and vibration, eventually escalating into major problems that are far more expensive to repair later on.
Addressing even minor leaks immediately ensures that braking performance remains robust and reliable, while also preventing future damage.
2. Using Incorrectly Sized Hoses
Using an incorrectly sized vacuum hose is a common error that can cause leak issues to persist even after repairs have been performed.
If the hose is too loose, it will fail to seal properly, allowing air to infiltrate the system.
Conversely, if it is too tight, it may not seat correctly on the fitting or could suffer damage during installation.
For a proper fit, both the inner diameter and the length of the hose must precisely match the required specifications.
A correctly installed hose ensures a secure connection, maintains proper vacuum flow and prevents unnecessary strain on surrounding components.
Choosing the right size is a simple step, yet it is absolutely crucial for ensuring a long-lasting repair.
3. Failing to Inspect the Check Valve
Many people focus solely on the hoses while overlooking the check valve, despite the fact that the check valve plays a crucial role in maintaining vacuum pressure within the brake booster.
If the check valve is faulty, it may allow air to flow in the wrong direction or fail to retain vacuum pressure when the engine is shut off.
Consequently, braking assistance is diminished and the brake pedal may feel stiff, particularly during repeated braking.
As removing and inspecting the check valve is a simple task, skipping this step prevents accurate diagnosis of the issue, leading to recurring problems.
Regularly inspecting the valve ensures that the entire system functions correctly.
4. Replacing the Booster Without Identifying the Root Cause
Replacing the brake booster without confirming the actual root cause of the problem is a costly and unnecessary mistake.
Many vacuum-related issues do not stem from the booster itself, but rather from smaller, inexpensive components such as hoses or valves.
If the booster is replaced without proper investigation, the true source of the leak may remain unresolved; consequently, the problem will persist despite the time and money invested in repairs.
Performing a few basic checks such as: observing pedal response, listening for signs of leaks and testing vacuum pressure, helps pinpoint the issue accurately and facilitates the identification of the underlying problem.
This approach ensures that only the defective component is replaced, thereby guaranteeing that the repair is executed correctly on the very first attempt.
How to Prevent and Maintain Brake Booster to Avoid Future Vacuum Leaks
Plus, there’s research that confirms that having proper booster opoeration actually helps it to maintain consistent braking force and improves the response time during the critical situations, so whenever a vacuum leak occurs, then this efficiency is actually reduced that makes it harder to stop the vehicle quickly and safely.[¹]
1. Inspect Hoses Regularly
Regularly inspecting vacuum hoses is the easiest and most effective way to prevent future leaks.
These hoses are made of rubber and are constantly exposed to engine heat, pressure fluctuations and vibrations, causing them to deteriorate gradually.
Over time, they may develop small cracks, become brittle, or lose their elasticity, all of which can lead to vacuum leaks.
By inspecting the hoses every few months or during routine maintenance, you can detect early signs of damage, such as surface cracks, looseness, or soft spots.
Replacing worn-out hoses before they fail completely ensures that proper vacuum pressure is maintained and that the brake booster continues to function efficiently.
2. Use High-Quality Replacement Parts
Using high-quality parts is crucial when repairing or replacing any component of the vacuum system.
Low-quality hoses or valves may look identical on the surface, but they often fail to withstand the harsh conditions of extreme heat and pressure over time.
Inferior materials can quickly become brittle, lose their shape, or fail to form a proper seal, leading to recurring leak issues.
High-quality parts are designed to better withstand engine operating conditions and provide a more reliable, long-lasting seal.
Investing in superior parts reduces the likelihood of future problems and ensures consistent braking performance over time.
3. Avoid Exposure to Excessive Heat
Excessive heat generated by the engine is a primary cause of the premature deterioration of vacuum hoses and related components.
When hoses are exposed to high temperatures for prolonged periods, the rubber can dry out, crack, or become brittle, thereby increasing the risk of vacuum leaks.
To mitigate this risk, ensure that hoses are properly routed and do not come into contact with hot engine components, such as exhaust parts.
In some instances, heat shields or protective sleeves can be utilized to shield the hoses from direct heat exposure.
Managing heat exposure helps extend the lifespan of vacuum components and ensures that the system continues to function correctly.
4. Inspect During Regular Brake Servicing
Incorporating an inspection of the vacuum system into your regular brake servicing routine is a prudent way to prevent unexpected issues.
Whenever brake pads, rotors, or other brake components are inspected or replaced, it presents an excellent opportunity to also check the vacuum hoses, connections and check valves.
As these components work in conjunction with the brake booster, their condition has a direct impact on braking performance.
A quick inspection performed during routine servicing can help identify minor issues before they escalate into major problems.
This approach saves time, reduces repair costs and ensures that the entire braking system remains safe and reliable.
Conclusion – How to Fix Brake Booster Vacuum Leak
Now, with this guide you can easily restore that you can easily restore the vacuum pressure in your brake booster that can completely change how your car feels and responds on the road.
The brake booster plays a crucial role in reducing the physical effort required to bring your car to a halt and even a minor vacuum leak can compromise this assistance, increase stopping distances and make driving more difficult.
By recognizing common symptoms such as: a stiff brake pedal, hissing sounds, or rough engine idling, you can identify the problem before it escalates into a serious issue.
Most vacuum leaks stem from minor faults such as: cracked hoses, loose connections, or faulty check valves, meaning they can often be repaired using basic tools and a careful inspection.
Taking the time to accurately diagnose the problem, perform the necessary repairs and subsequently test the system ensures that your braking system functions exactly as it should.
Regular maintenance and preventive checks further help to prevent future leaks and maintain the system’s reliability.
Now, that’s all from this guide about How to Fix Brake Booster Vacuum Leak, also you can comment for more information regarding this guide.
Frequently Asked Questions
FAQ 1: What happens if there is a vacuum leak in the brake booster?
Answer: When a vacuum leak occurs in the brake booster, it is unable to properly utilize engine vacuum to assist with braking. This means you have to press the brake pedal much harder than usual. This makes stopping the car more difficult and can increase the stopping distance, specially in emergency situations. You may also hear a ‘hissing’ sound (like escaping air) when applying the brakes, or you might notice that the engine’s idle speed is erratic. Over time, this issue can worsen and negatively impact both braking performance and engine efficiency. Therefore, it is crucial to have it repaired as soon as possible.
FAQ 2: Can I still drive with a brake booster vacuum leak?
Answer: Technically, you can drive the vehicle, but it is unsafe and should be avoided if at all possible. The brakes will still function; however, due to the lack of proper assistance from the booster, you will have to exert significantly more force to bring the vehicle to a stop. This can be dangerous in heavy traffic or in situations requiring sudden braking, where a quick response is critical. Driving with a vacuum leak also places excessive strain on your braking system, which could lead to further damage down the road. It is always best to have this issue resolved before resuming regular driving.
FAQ 3: How can I tell if my brake booster or vacuum hose is faulty?
Answer: You can identify this problem by checking for specific symptoms and performing a few simple tests. If the brake pedal feels stiff, you hear a ‘hissing’ sound when applying the brakes, or the engine’s idle speed fluctuates when the pedal is depressed, there is likely a vacuum leak. Additionally, inspect the vacuum hose for any cracks, loose connections, or signs of wear. If the hose appears to be in good condition, the issue may lie with the check valve or the brake booster itself. A standard pedal test or the use of a vacuum pump can help pinpoint exactly which specific component is at fault.
FAQ 4: What causes a brake booster vacuum leak?
Answer: The most common causes include cracks or wear in the vacuum hose, loose connections, a faulty check valve, or a defective diaphragm inside the brake booster. Engine heat, the aging of rubber components and constant pressure fluctuations can cause these parts to deteriorate over time. Even a minor defect can allow air to enter the system, resulting in a loss of vacuum pressure. Regular inspections and maintenance can help prevent these issues from occurring.
FAQ 5: How much does it cost to fix a brake booster vacuum leak?
Answer: The cost depends on the specific component causing the problem. Replacing a vacuum hose or clamp is typically inexpensive and can often be done at home using just a few basic tools. A new check valve is also affordable and relatively easy to install. However, if the brake booster itself needs to be replaced, the cost can be significantly higher, as the component is expensive and the installation process is more complex. Addressing minor issues in a timely manner can help you avoid costly repairs in the future.
FAQ 6: How long does it take to fix a vacuum leak in the brake booster system?
Answer: The time required depends on the nature of the repair being performed. Replacing a vacuum hose or tightening connections may take less than an hour. Replacing a check valve is also a quick and straightforward task. However, replacing the brake booster yourself can take several hours, as it involves removing and reinstalling numerous components. Before undertaking any repair work, accurately diagnosing the problem saves time and ensures that the issue is resolved completely.
FAQ 7: Does a vacuum leak affect engine performance?
Answer: Yes, a vacuum leak can affect engine performance because it allows an excessive amount of unmetered air to enter the engine. This can disrupt the air-fuel mixture balance, potentially causing the engine to vibrate while idling, resulting in unstable RPMs, or leading to reduced fuel efficiency (mileage). In some cases, you may notice fluctuations or changes in engine behavior when you press the brake pedal; this indicates that the leak is connected to the brake booster system. Repairing the leak restores smooth engine operation.
FAQ 8: How can I check the brake booster at home?
Answer: You can check it using a simple test: First, turn off the engine and pump the brake pedal several times until it becomes firm (hard). Next, keep your foot on the pedal and start the engine. If the pedal depresses slightly, it indicates that the booster is functioning correctly. If it remains firm, there may be a vacuum-related issue. You can also listen for a “hissing” sound (like escaping air) or use a “hand vacuum pump” to verify whether the booster is capable of holding pressure. These checks allow you to diagnose the problem without the need for specialized tools.
References:
[1] Research of the vacuum brake booster working process
https://www.researchgate.net/publication/379057268_Research_of_the_vacuum_brake_booster_working_process

Hello Folks, Dean Shali here to help you out to solve the problems with your lovely vehicle, as i have lots of experience and knowledge about automotive industry as i woks directly with the customers and repair vehicles and i love to help the people to keep their cars safe and running smoothly.