Written By: Dean Shali
Fact Checked By: Sabré Cook
Reviewed By: Tamara Warren
Do you know that: even a small dirt or rust on a rim can stop a tire from sealing perfectly and that can even cause constant air loss as well.
So, every time you mount a tire on a wheel, then there is bead seating process that decides if you drive the vehicle with safety, comfort and performance or not.
Basically, the tire bead is the reinforced edge of the tire that must lock in tightly against the rim in terms to create an complete airtight seal, specially in the modern tubeless tires this is really important as tubeless tires literally relies entirely on this contact to hold the air pressure.
But, if this seal is not formed perfectly, then the result could be really harsh such a: sow air leaks, uneven tire pressure, vibration at low speeds and in some of the cases it literally becomes unsafe to drive due to the sudden pressure loss as well.
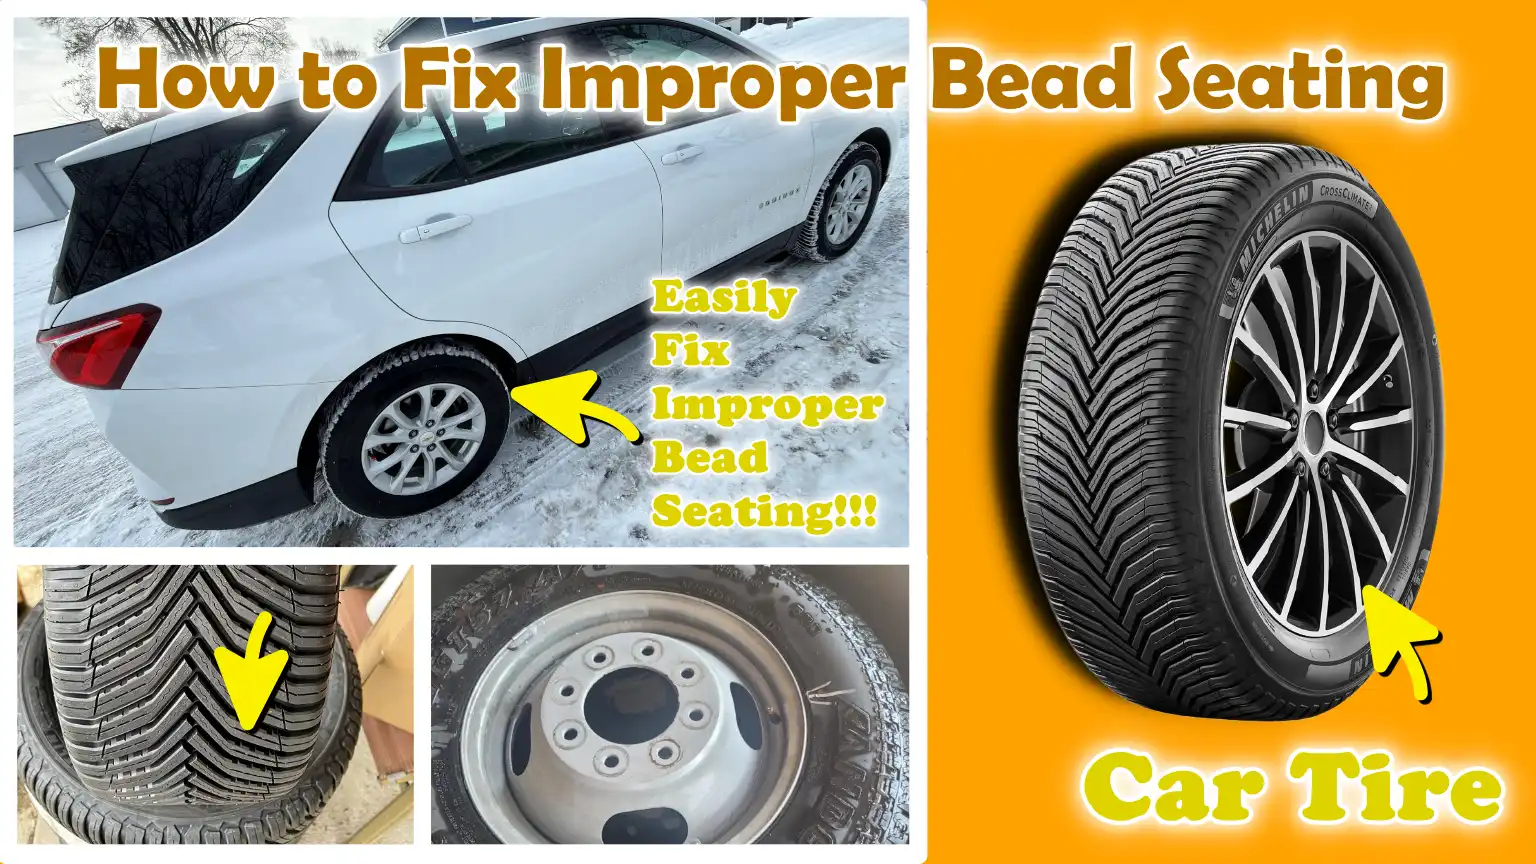
Now, in this guide you’ll learn How to Fix Improper Bead Seating so that you can know about the symptoms and method to restore a proper airtight seal between the tire and the rim so your vehicle’s wheel performs exactly as they intended to do.
Know, Common Causes of Improper Bead Seating
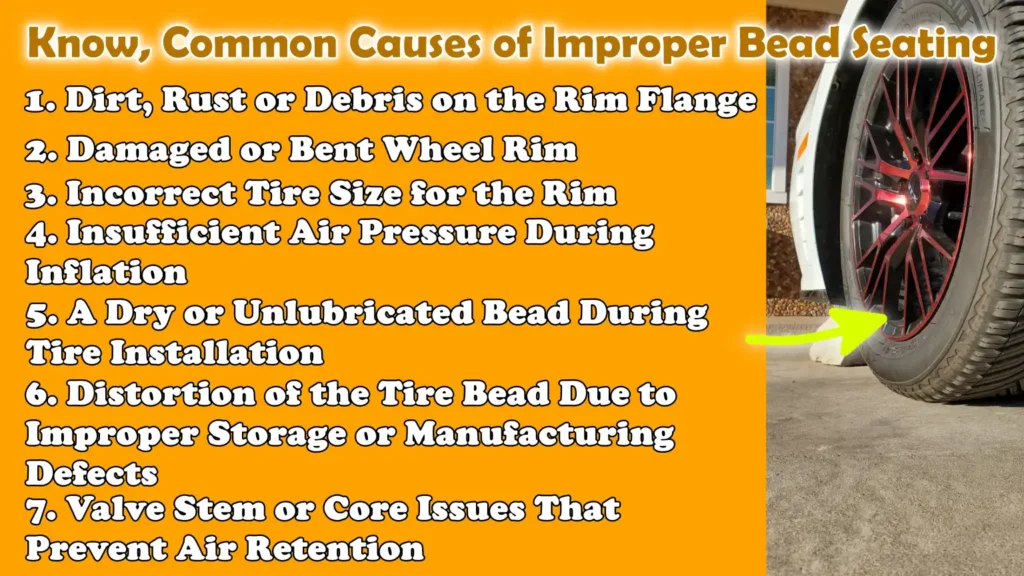
1. Dirt, Rust or Debris on the Rim Flange
The rim flange is the outer edge of the wheel where the tire bead seats and forms a seal.
This area must be clean, as even a thin layer of dirt, fragments of old rubber, road dust, or rust can prevent the tire from making complete contact with the metal surface.
When the bead seats against an uneven or dirty surface, tiny air gaps can form; air slowly escapes through these gaps, a problem that is often difficult to detect initially.
In many cases, drivers continue to inflate their tires without realizing that the root cause of the problem lies at the interface where the tire meets the rim.
Rusting is particularly common on older steel wheels, as moisture can accumulate around the bead seat over time.
To ensure the tire seals properly, the flange must be smooth, clean and free of any obstructions that could hinder direct contact.
2. Damaged or Bent Wheel Rim
A bent wheel rim distorts the shape of the bead seat, meaning the tire can no longer fit uniformly around the wheel.
This often occurs after striking potholes, curbs, or road debris.
Even a minor bend can create a low spot where the tire bead cannot exert sufficient pressure to form an airtight seal.
Some rims may also develop cracks or suffer damage to their edges, further exacerbating the problem.
A bent rim is not always immediately visible, but its symptoms often include recurring air leaks in a specific tire, a visible gap between the tire and the wheel, or vibrations felt while driving.
If the wheel has sustained any physical damage, simply cleaning it or inflating the tire may not resolve the issue, as the sealing surface will no longer be intact.
3. Incorrect Tire Size for the Rim
Every tire is designed to fit within a specific range of wheel widths and diameters.
If the tire size does not match the wheel correctly, the bead will never seat properly, regardless of how much air is pumped into it.
If the tire is too narrow, it will not stretch sufficiently; conversely, if it is too wide, it will fail to exert adequate pressure against the bead seat.
Even if this mismatch appears minor, an incorrect size prevents the formation of a proper seal, compromises stability while driving and leads to abnormal tire wear.
Therefore, it is crucial to use the correct tire size specified by the vehicle manufacturer.
When the tire and wheel sizes do not match, the bead may seat correctly on one side but fail to seal completely on the other.
4. Insufficient Air Pressure During Inflation
When mounting a tire, sufficient air pressure is required to push the bead outward until it seats fully against the rim.
If the air pressure builds up too slowly or the airflow is too weak, the bead may get stuck midway and fail to lock properly into place.
This often occurs when using small, home-use air compressors, which are incapable of delivering a rapid and forceful stream of air.
If the tire does not seat correctly, visible gaps may appear along the tire’s edges, or the air may escape just as quickly as it was pumped in.
Many tire installation technicians temporarily remove the valve core during the initial inflation process to facilitate proper seating; This allows air to flow in more rapidly, helping the bead expand and seat itself in its proper position quickly.
If the air pressure is insufficient, the tire may appear to be mounted, but it will fail to seal correctly.
5. A Dry or Unlubricated Bead During Tire Installation
As air is introduced and the tire bead expands, it must slide smoothly into its designated position.
If the bead remains dry, friction between the rubber and the metal prevents it from advancing uniformly.
Consequently, one section of the tire may seat correctly, while another section remains stuck lower down on the rim.
Applying the appropriate lubricant to the bead reduces friction, allowing the tire to seat itself correctly without damaging the rubber.
Some individuals use soapy water to facilitate the bead’s movement; however, lubricants specifically formulated for tire installation are generally safer and more effective.
In the absence of lubrication, the bead may snag on the rim flange, preventing the tire from sealing properly and creating a risk of air leakage.
6. Distortion of the Tire Bead Due to Improper Storage or Manufacturing Defects
If tires are stored improperly for an extended period, particularly if they are not stacked correctly or are subjected to excessive pressure, they may lose their original shape.
The tire bead is reinforced internally by strong wires; however, if a tire remains in an incorrect position for too long, the bead may become slightly deformed.
If the bead becomes distorted, it cannot seat properly against the rim, even if the wheel itself is in perfect condition.
In some instances, a manufacturing defect may result in the bead having an irregular shape right from the start.
Diagnosing such an issue can be challenging, as the tire may appear completely normal until an attempt is made to mount it.
If the bead is deformed, simply inflating the tire will not ensure a complete seal; consequently, the tire may need to be inspected by a specialist or replaced entirely.
7. Valve Stem or Core Issues That Prevent Air Retention
Occasionally, the bead may be seated correctly, yet the tire continues to lose air, a problem that can often be attributed to a faulty valve stem or valve core.
This can create the illusion that air is leaking from the bead, whereas, in reality, the actual issue lies elsewhere.
The valve stem is the component through which air is introduced into the tire, while the small valve core housed within it regulates the airflow.
If the valve core is loose, damaged, or obstructed by debris, air may leak out gradually, leading one to suspect that the bead has not seated properly.
Furthermore, the rubber valve stems found on older wheels can develop cracks, allowing air to leak from their base.
As these two issues are the primary causes of low tire pressure, it is crucial to inspect the valve before assuming that the fault lies with the bead.
Minor issues related to the valve can often be resolved immediately, whereas fixing a problem with the bead typically requires deflating the tire and reseating it properly.
How to Ensure Safety By Taking Precautions Before Starting
1. The Importance of Correct Inflation Safety Limits
Inflating a tire may seem simple, but if the pressure exceeds safe limits while attempting to seat the bead, it can be dangerous.
During installation, the bead can suddenly snap into place with great force, specially when the pressure rises rapidly.
Every tire sidewall bears a “maximum inflation pressure” marking; exceeding this limit can damage the tire’s structural integrity or cause it to burst suddenly.
When seating the bead, pressure should always be increased gradually while simultaneously monitoring how the tire interacts with the rim.
Staying within safe limits ensures the safety of both the tire and the individual working on it.
2. Using a Tire Cage or Safety Enclosure During Inflation
A tire cage is a protective metal enclosure used in professional shops to secure a wheel while inflating a tire to high pressure.
It is designed to minimize the risk of injury should the tire or rim fail while the bead is being seated.
This is particularly critical for large tires, although passenger vehicle tires can also explode with tremendous force if something goes wrong.
If the tire bead slips or the rim harbors hidden damage, the internal pressure can cause the tire to separate suddenly and violently.
Professional technicians frequently utilize safety enclosures because they understand the immense force that compressed air can generate.
If a safety cage is available, it adds another essential layer of protection.
3. Avoiding the Dangers of Overinflation
Overinflating a tire, pumping in more air than necessary, is a common mistake made in an attempt to force the bead into place.
Many people assume that applying excessive pressure will resolve the issue; however, overinflating a tire can stretch the bead, damage the internal cords, or even cause the tire to burst.
If the bead does not seat properly within the normal pressure range, there is usually an underlying problem such as: dirt, a lack of proper lubrication, or damage to the rim.
Continuously adding air without identifying the root cause can create a dangerous situation.
Rather than forcing the issue by subjecting the tire to excessive pressure, it is far better to stop, inspect the wheel and address the actual problem.
4. Wearing Eye Protection and Gloves
Working with tires involves compressed air, sharp metal edges and the movement of rubber under pressure; therefore, basic safety precautions are paramount.
Safety glasses help protect the eyes from dust particles, rust flakes, or sudden gusts of air escaping from the bead area.
Gloves reduce the risk of cuts from the sharp edges of the rim and assist in lifting and handling heavy wheels.
During inflation, the bead may shift rapidly, potentially causing a loud noise or causing lubricant to splatter outward.
Wearing simple safety gear makes this process safer and helps prevent unnecessary injuries during inspection and repair tasks.
5. When to Avoid DIY Repairs and Visit a Professional Shop
Certain issues related to tire bead seating should not be attempted as DIY repairs at home.
If the wheel is bent, there is visible damage to the tire’s sidewall, or the bead fails to seal even after proper cleaning and lubrication, professional equipment may be required.
Tire shops are equipped with high-flow inflation tools, mounting machines and inspection methods capable of detecting hidden damage within the rim.
Attempting to force a repair on a damaged tire or wheel can pose a safety risk.
If the tire continues to lose air despite repeated repair attempts, or if cracks or severe corrosion are visible on the wheel, having it inspected by a professional is the safer and more reliable option.
Tools
| Tools | Why It Is Needed | How to Use It |
|---|---|---|
| Air Compressor With Pressure Gauge | This is the primary tool used for inflating tires; it facilitates the outward movement of the tire bead, ensuring it seats correctly on the rim and establishes a proper seal. The integrated pressure gauge allows you to monitor the pressure during inflation, a critical function, as insufficient pressure prevents the bead from seating properly, while excessive pressure can be hazardous. A steady flow of air also aids in the uniform expansion of the tire during the mounting process. | Connect the air hose to the tire valve and begin inflating the tire gradually. Continuously monitor the pressure gauge as the tire fills with air. Periodically pause to verify that the bead is sliding uniformly around the rim. Continue inflating until the bead is firmly seated in place and the tire pressure reaches a safe operating level. |
| Bead Seating Lubricant or Soapy Water | Lubrication facilitates the smooth sliding of the tire bead onto the rim during inflation. Without it, the rubber may adhere to the metal surface, preventing it from seating fully. This can result in gaps within the tire assembly, thereby creating a risk of air leakage. Using the appropriate lubricant also reduces friction and minimizes the risk of damaging the tire bead during installation. | Prior to inflation, apply a thin layer of lubricant to both edges of the tire bead and to the rim flanges. Spread the lubricant evenly using a cloth or a brush. Once the lubricant has been applied, inflate the tire to allow the bead to seat easily and correctly into its designated position. Avoid using an excessive amount of lubricant, as an excess of fluid can make it difficult to properly inspect the tire assembly. |
| Valve Core Tool | The valve core regulates the flow of air entering the tire. Initially, removing this component while inflating the tire increases the airflow, allowing the tire bead to seat itself in place more rapidly. This is particularly useful when the tire is having difficulty sealing properly, as the increased airflow pushes the bead outward more effectively. | Insert the tool into the valve stem and carefully rotate it to extract the valve core. Inflate the tire briefly to seat the bead; once the tire assumes its proper shape, reinstall the valve core. Subsequently, inflate the tire in the standard manner and set the pressure to the correct level. |
| Tire Pressure Gauge | Once the bead is properly seated, this tool assists you in verifying the precise internal pressure of the tire. Compressor gauges are not always entirely accurate; therefore, it is beneficial to cross-check the final reading using a separate pressure gauge. Maintaining the correct pressure is crucial for safe driving and for extending the lifespan of your tires. | After inflation, firmly press the gauge onto the valve stem. Read the pressure measurement and compare it against the recommended PSI (pressure) specifications for your vehicle. Add or release air as necessary until the reading matches the correct specifications. Recheck the pressure after a few minutes to ensure that the tire is retaining air. |
| Jack and Jack Stands | These tools are used to safely lift and support the vehicle while the wheel remains attached. A jack is used to raise the car, while jack stands serve to stabilize the vehicle while you are inspecting or removing a tire. This ensures that the vehicle remains stable and secure while you are working on it. | Use a jack to lift the vehicle at the designated lifting points. Once the vehicle has been raised, place jack stands beneath secure support points on the chassis before proceeding to remove the wheel. Never work underneath or in the vicinity of a vehicle that is supported solely by a jack. |
| Bead Blaster or Air Blast Tank | This is an optional tool used when standard airflow is insufficient to seat the tire bead in place. It releases a sudden and powerful blast of air, which pushes the tire outward and helps establish an initial seal. It is typically used for tires that do not seat easily, or where there is a significant gap between the bead and the rim. | Position the nozzle near the gap between the tire bead and the rim. Release a controlled blast of air to push the bead outward. Once the bead makes contact with the air and a seal begins to form, continue inflating the tire using a standard air compressor. This tool must be used with caution, as the force of the airflow is extremely high. |
How to Fix Improper Bead Seating – Effective Method to Lower the Work by 50%
1. Deflate and Inspect the Tire
The first step is to release all the air from the tire so that the bead separates from the rim and becomes loose.
This makes it easier to properly inspect the seating area and ensures that the pressure of any trapped air does not interfere with the repair process.
Once the air has been released, examine both sides of the tire where the bead meets the wheel.
Look for visible gaps, uneven sections, or areas where the bead appears to be seated lower than the rest of the tire.
Additionally, check the rim flange and the tire bead for dirt, rust, dried sealant, or any signs of damage, as even a small amount of debris can prevent the tire from sealing correctly.
2. Clean the Rim and Bead Area
Cleaning the sealing surface is one of the most critical steps in resolving bead seating issues.
Dirt, rust and dried lubricant can create tiny gaps that allow air to leak out slowly, even if the tire appears to be seated correctly.
Carefully wipe down the rim flange and remove all debris from the metal edge where the tire seals.
It is equally important to clean the tire bead itself, as dust or fragments of old rubber can affect how it settles into place.
The goal is to create a smooth contact surface between the tire and the wheel, allowing the bead to seat and lock uniformly.
3. Apply Lubricant
Lubricant helps the bead slide into its correct position on the rim during inflation, rather than sticking to the rim’s surface.
Apply either a specialized bead lubricant or a small, even amount of soapy water to the edges of the bead.
This involves both the inner and outer surfaces of the tire where it comes into contact with the wheel.
The lubricant reduces friction and helps the bead slide into its correct position as the pressure increases.
Apply only a thin layer; excessive fluid can cause the tire to slip or make it difficult to determine whether the bead has fully seated in place.
4. Reseat the Tire
Before reinflating, ensure that the tire is seated evenly around the wheel.
If one side is crooked or pushed too far inward against the rim, the bead will not seat uniformly during inflation.
Manually adjust the tire so that it appears centered and balanced on the wheel on both sides.
Ensure that the valve stem stands upright and is not being pushed to one side by the tire.
Proper alignment at this stage increases the likelihood of the tire sealing correctly and avoids the need for repeated inflation attempts.
5. Inflate the Tire Correctly
Begin inflating slowly and observe how the bead slides around the rim.
As the pressure rises, the bead should move outward toward the edge of the wheel.
In many cases, a distinct “pop” sound is heard, indicating that the bead has seated properly, this is normal.
Increase the pressure gradually and remain within the safe pressure limits specified on the tire’s sidewall.
If the bead does not move and air leaks from around the rim, a sudden, rapid burst of air pressure may be required to push the bead outward sufficiently to create a seal.
6. Check for Bead Seating
After inflation, carefully inspect the tire before driving.
Most tires feature a molded line near the sidewall, which should appear to be at a uniform distance from the rim all the way around.
If any section appears too close or too far away, the tire bead may not yet be seated correctly.
Spin the wheel and inspect it from both the inner and outer sides; it is possible that everything looks fine on one side while appearing uneven on the other.
There should be no visible gaps, depressions, or uneven sections around the rim.
7. Set the Pressure to the Correct Level
Once the bead is fully seated in place, set the tire pressure to the correct operating level.
If the pressure exceeded the standard limit during the bead-seating process, slowly release the excess air until the pressure matches the PSI recommended by the tire manufacturer.
For an accurate reading, use a separate tire pressure gauge rather than relying solely on the display built into the compressor.
After setting the correct pressure, let the tire sit for a few minutes and then check it again.
If the pressure drops, or if you hear a continuous “hissing” sound (indicating escaping air), check for air leaks around the bead and the valve stem before reinstalling the wheel.
How to Identify if the Bead Is Not Seated Correctly
1. Air Leaking from the Rim Edge
The clearest indication that the bead is not seated correctly is the escape of air from the point where the tire meets the rim.
This often produces a faint ‘hissing’ sound, particularly immediately after inflating the tire.
In some instances, the air leaks so slowly that you may not hear any sound; nevertheless, the tire pressure will drop over the course of a few hours or days.
An easy way to check for this is to spray soapy water along the rim edge and observe whether bubbles form at any specific spot.
If bubbles appear continuously, it signifies that the bead is not sealing properly against the wheel and air is escaping through a small gap.
2. The Tire Appearing Bulged or the Sidewall Line Appearing Uneven
A correctly seated tire appears uniform around the entire circumference of the wheel and the distance between the line molded into the sidewall and the rim should remain consistent all the way around.
If any section of the tire appears slightly raised, depressed inward, or uneven, it is possible that the bead has not yet seated correctly in its designated position.
This can occur when only a portion of the bead locks into place, while the remaining section remains stuck lower down on the rim.
As the tire may appear perfectly normal on one side, it is essential to thoroughly inspect the wheel by slowly rotating it.
If any bulge or unevenness in the line is observed, it indicates that the bead needs to be re-seated correctly.
3. Continuous Pressure Loss
If the tire continues to lose air steadily even after installation, there is a very high probability that the bead has not seated correctly.
The pressure in a properly seated tubeless tire should remain stable unless there is a puncture or a defect in the valve.
When the bead is not properly seated, air gradually leaks out from the rim’s edge.
Consequently, the tire often begins to feel soft within just a day or two, even if it was initially inflated to the correct pressure.
Frequent re-inflation may temporarily alleviate this issue; however, the air leakage will persist until the bead is properly seated or the underlying cause of the leak is resolved.
4. Vibration at Low Speeds
Improper bead seating can also affect how uniformly the tire sits on the wheel, thereby altering the wheel’s balance and rotational dynamics.
If a section of the tire is not fully seated, the wheel will not rotate smoothly and will begin to vibrate, particularly at low speeds, where even minor imbalances can be easily perceived.
The driver may experience a slight vibration in the steering wheel, the vehicle’s floor, or the seat, even if the tire pressure appears to be completely normal.
This occurs because the tire’s profile is not uniform around the rim.
If vibration begins immediately after a tire is installed, checking the bead seating should be one of the initial steps in the troubleshooting process.
Read More:
Learn Some, Advanced Solutions for Difficult Bead Seating Issues
Basically, there’s engineering studies that shows that the bead-to-rim seal is precisely designed contact system where pressure must remain even all around the entire wheel, so whenever one section of the bead fails to contact the rim in proper way, but the seal weakens, it increases the risk of slow leaks, vibration and poor tire performance over the time as well.[¹]
1. Using a Bead Blaster or High-Airflow Methods for Seating
Some tires fail to seat because the gap between the bead and the rim is so wide that a standard air compressor cannot establish an initial seal.
In such cases, a bead blaster can prove invaluable; it directs a powerful blast of compressed air directly into that gap.
This sudden, high-velocity airflow forces the tire bead outward, pressing it firmly against the rim and helping it begin to hold pressure.
This method is commonly employed in tire shops for challenging installations, particularly when the tire sidewalls are stiff or when the bead has contracted inward due to prolonged storage.
It works quickly, but due to its immense force, it must be used with caution; if the wheel or tire is compromised, this procedure can pose a safety hazard.
2. Removing and Reinstalling the Tire with Improved Lubrication
If the bead fails to seat after multiple attempts, the best course of action is often to remove the tire and restart the installation process from scratch.
During the initial installation, the bead may have become slightly twisted or may have stuck to the rim due to insufficient lubrication.
Removing the tire allows you to carefully inspect the bead edges and apply a fresh, uniform layer of lubricant to both sides.
A proper reinstallation often resolves the issue, as the tire can then slide more easily into place and seat itself while being inflated.
This also serves as an excellent opportunity, prior to inflation, to verify that the tire is correctly positioned within the wheel’s drop center.
3. Checking the Rim for Signs of Deformation
A wheel may appear perfectly sound from the outside, yet harbor a subtle defect that compromises the integrity of the bead seal.
Even a minor imperfection in the rim can cause a specific section to sit slightly higher or lower than the rest, preventing the bead from seating uniformly.
This often occurs after hitting potholes forcefully or scraping against a curb.
Carefully inspect the rim’s edge; rotate the wheel to check for any wobbling or irregularities in its shape.
In many instances, a bent rim prevents the bead from seating properly at a specific spot, no matter how hard you try to inflate the tire.
If the rim is not perfectly round, the tire will not seat correctly until the wheel is either repaired or replaced.
4. Replacing a Faulty Valve Stem or Tire
If the bead appears to be seated correctly, yet the tire continues to lose air, the issue may stem from a defective valve stem or a hidden flaw within the tire itself.
If the valve stem has cracked, it will leak air gradually, creating the illusion that the bead has not seated properly.
It is also possible that the internal valve core has come loose or become worn out.
In some cases, improper installation can cause the tire bead to stretch, tear, or sustain permanent damage, thereby preventing it from sealing effectively.
When this occurs, replacing the defective component is often the only reliable solution.
A new valve stem is an inexpensive item and replacing a damaged tire is a safer option than repeatedly attempting to reinflate it, as such repeated attempts ultimately fail to resolve the underlying leak issue.
Conclusion – How to Fix Improper Bead Seating
So, a tire can be new, undamaged and properly inflated, but still it can fail if bead never sealed the way it should be.
The bead creates an airtight seal between the tire and the rim; even a minor imperfection in this seal can lead to gradual air loss, vibrations, uneven tire wear and compromised driving safety.
For this reason, issues related to bead seating should never be overlooked, particularly after a new tire has been installed or an existing tire has been remounted.
Many instances of air loss, which may outwardly resemble a puncture, are, in reality, caused by improper contact between the tire bead and the rim flange.
Fortunately, if the root cause of the problem is accurately identified, improper bead seating can typically be corrected.
In many cases, the issue stems from minor factors, such as rust on the rim, installing the tire without lubricant (dry installation), insufficient airflow during inflation, or the tire not being properly positioned during the inflation process.
By thoroughly cleaning the wheel, using appropriate lubricant, inspecting the condition of the bead and inflating the tire within safe pressure limits, this problem can often be resolved without the need to replace the tire itself.
So, that’s all from this guide and you can ask related queries below.
Frequently Asked Questions
FAQ 1: Why won’t the tire bead seat properly?
Answer: Improper bead seating typically occurs when the tire bead fails to make full contact with the rim, thereby preventing the formation of a completely airtight seal. This can be caused by dirt, rust, old rubber residue, or damage to the rim flange. In some cases, the tire may be the wrong size for the rim, or the bead may fail to seat because the air pressure applied during installation was insufficient. A lack of lubrication is also a common culprit, as the rubber can stick to the wheel and stop short of locking into its correct position.
FAQ 2: How can I tell if my tire bead hasn’t seated properly?
Answer: A tire that hasn’t seated correctly often exhibits several clear signs. You may notice that the tire is losing air, even if there is no visible puncture; alternatively, you might hear a distinct “hissing” sound of escaping air coming from the vicinity of the rim flange. The tire’s sidewall may also appear uneven, particularly if one section of the bead is seated lower than the rest. Another indicator is vibration felt while driving, as a displaced bead prevents the tire from rotating uniformly. You can verify whether the bead is seated evenly by inspecting the molded line running around the tire’s sidewall.
FAQ 3: Can an improperly seated bead cause a slow air leak?
Answer: Yes, an improperly seated bead is a common cause of slow air leaks. The function of the bead is to create a robust seal between the tire and the rim. If even a small section of the bead fails to seal correctly, air can gradually escape over time. Due to this type of leak, tire pressure often decreases gradually over a few hours or days, rather than deflating immediately and completely. Many drivers mistake this for a puncture, whereas the actual problem lies in the seal between the tire and the wheel.
FAQ 4: Is it safe to drive if the tire bead is not seated correctly?
Answer: Driving with an improperly seated tire bead is not recommended, as air may leak from the tire while the vehicle is in motion. A poor seal can also affect how the tire sits on the wheel, potentially leading to issues such as vibrations, uneven tire wear and reduced vehicle control. In more severe cases, if the bead is not seated correctly, the tire could experience a sudden blowout, specially if it strikes a pothole or a curb. It is much safer to have this issue resolved before embarking on a long-distance journey.
FAQ 5: Can I fix an improperly seated tire bead myself at home?
Answer: Yes, provided there is no damage to the tire or the wheel, many issues related to an improperly seated bead can be resolved at home. This process typically involves deflating the tire, cleaning the rim flange, applying bead lubricant and properly reinflating the tire. A good air compressor and accurate air pressure monitoring are essential. However, if the wheel is bent, the tire bead is damaged, or the tire fails to seal after several attempts, visiting a professional repair shop is the better option.
FAQ 6: Why is lubricant needed when mounting a tire?
Answer: Lubricant helps the tire bead slide easily into place as the air pressure pushes it outward. Without lubricant, the rubber can stick to the rim and stop short of reaching the sealing area. This prevents the tire from seating properly, which can lead to air leaks. Tire mounting lubricant is specifically formulated for this purpose, although many people temporarily use soapy water as a substitute. Its primary function is to reduce friction, allowing the tire bead to seat correctly in its designated position.
References:
[1] Numerical Simulation for the Tire-Rim Interface for a Radial Passenger Tire
https://saemobilus.sae.org/papers/numerical-simulation-tire-rim-interface-a-radial-passenger-tire-890641

Hello Folks, Dean Shali here to help you out to solve the problems with your lovely vehicle, as i have lots of experience and knowledge about automotive industry as i woks directly with the customers and repair vehicles and i love to help the people to keep their cars safe and running smoothly.