Written By: Dean Shali
Fact Checked By: Sabré Cook
Reviewed By: Tamara Warren
If brake doesn’t fully release when you step off the pedal then it is quietly damaging your entire braking system.
Yes, brake dragging is a common problem that happens whenever the brake pads do not fully release from the rotor after you take your foot off the brake pedal.
Because, in the properly working braking system: the hydraulic pressure actually pushes the pads against the rotor that actually slows the vehicles and then that pressure literally releases so that the wheels can spin freely again.
So, when this release does not happens in complete way, as even slightly: then the brakes continues to create that friction.
That’s why, with this constant friction that generates the heat and over the period of time that heat can damage the brake pads, rotors, calipers and even nearby components such as: wheel bearings and tires as well.
If, the driver notice signs such as: vehicle is pulling to one side, a burning smell after driving, reduced fuel economy or wheels that actually feels unusually hot, then these are the symptoms of brake dragging and you don’t want to put that extra stress on the entire braking system, RIGHT!
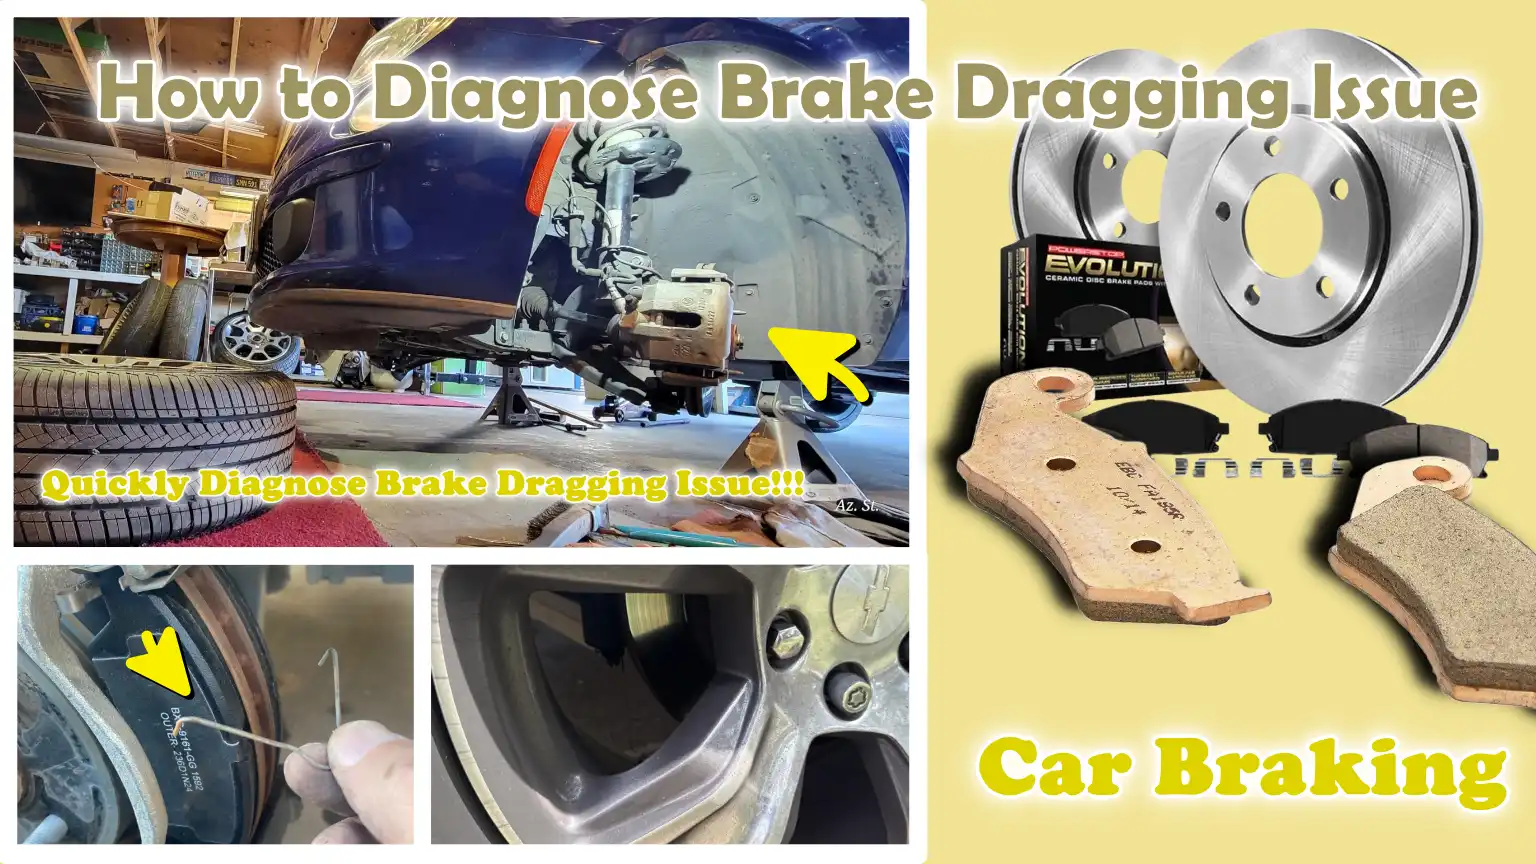
That’s why, in this guide you’ll learn How to Diagnose Brake Dragging Issue and improve the overall vehicle performance as well.
What is Brake Dragging?
Brake dragging is a condition in which the brake pads or shoes remain in contact with the rotating components of the wheel even after the driver has released the brake pedal.
In a properly functioning braking system, depressing the pedal generates hydraulic pressure within the brake lines, pushing the brake pads against the rotor to slow the vehicle down.
As soon as the pedal is released, this pressure should dissipate immediately, allowing the pads to retract slightly from the rotor so that the wheel can spin freely without any obstruction.
This slight retraction is crucial, as even light and continuous contact can generate friction.
When brake dragging occurs, this retraction process fails to complete fully and the pads remain in constant contact, continuously rubbing against the rotor.
This constant contact generates unwanted friction, leading to an increase in heat.
Over time, this heat can become excessive enough to damage the brake pads, warp the rotors, reduce braking efficiency and even adversely affect adjacent components such as wheel bearings and tires.
Consequently, the engine is forced to work harder to propel the vehicle, resulting in increased fuel consumption and making the vehicle feel sluggish or heavy to drive.
In many cases, the driver may not immediately detect this issue because the vehicle may still appear to be operating normally; however, internal damage continues to accumulate.
Brake dragging can be caused by issues such as stuck calipers, seized slide pins, clogged brake hoses, or a failure of internal pressure to release properly.
Understanding this condition is vital because, although it may begin as a minor mechanical issue, if left undetected and uncorrected, it can quickly escalate into a serious safety hazard.
Know, The Common Symptoms of Brake Dragging
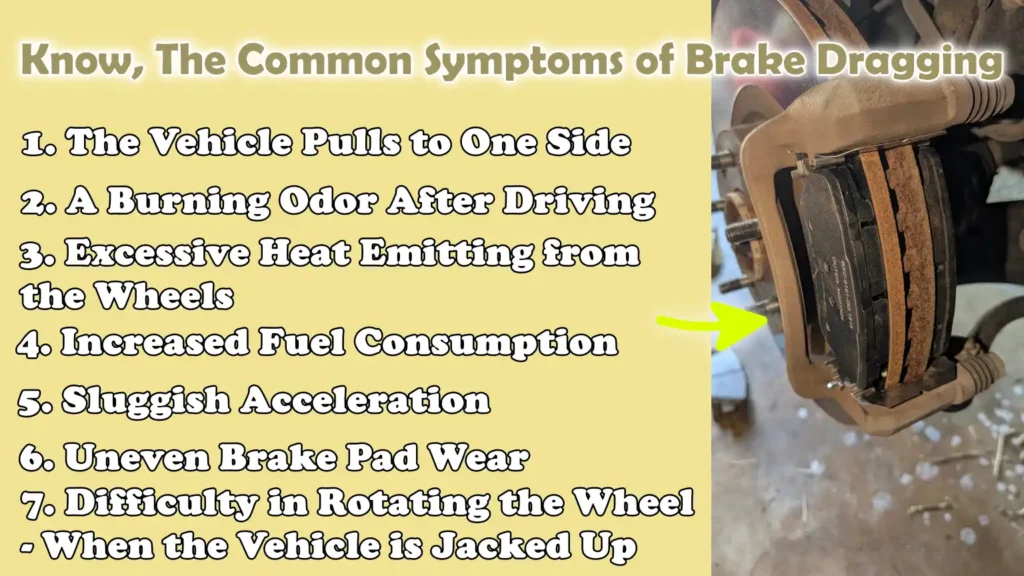
1. The Vehicle Pulls to One Side
One of the most noticeable symptoms of brake dragging is that, while driving, even if the steering wheel is held straight, the vehicle gradually begins to pull to one side.
This typically occurs when one specific wheel experiences greater braking force compared to the others because the brake on that particular side fails to disengage properly.
The continuous friction generated at that wheel creates resistance, causing the vehicle to drift in that direction.
Over time, this can also impact steering control and tire wear, making driving less stable and more fatiguing, particularly at higher speeds.
2. A Burning Odor After Driving
Detecting a strong, burning smell after driving for a while is a clear indication that something is overheating and brake dragging is a common culprit.
When brake pads remain in contact with the rotors, they continuously generate heat, which can cause the brake material to emit a pungent, unpleasant odor.
This smell is often more pronounced after city driving or navigating stop-and-go traffic, where the brakes are applied frequently.
Ignoring this warning sign can lead to serious damage, as excessive heat can significantly accelerate the wear and tear of brake components.
3. Excessive Heat Emitting from the Wheels
Wheels affected by brake dragging often become significantly hotter than normal.
In a properly functioning system, brakes heat up only during use and then cool down relatively quickly.
However, when dragging occurs, heat continues to build up because the friction never ceases.
If you carefully inspect the wheels after driving, you may notice that one specific wheel feels considerably hotter than the others.
In severe cases, this heat can even alter the color of the rotor or damage adjacent components, such as seals and bearings.
4. Increased Fuel Consumption
Due to brake dragging, the engine is forced to work harder to propel the vehicle forward, as the brakes are constantly creating resistance.
This additional load leads to increased fuel consumption, meaning you may notice a decline in mileage without any apparent cause.
Even slight dragging can impact fuel economy over time, particularly during long-distance journeys.
Consequently, brake dragging becomes not merely a mechanical issue but also an economic one, as it drives up fuel costs.
5. Sluggish Acceleration
When brakes fail to fully disengage, the vehicle may feel sluggish or heavy during acceleration.
This occurs because a portion of the engine’s power is wasted in overcoming the resistance generated by the dragging brakes.
Drivers often describe this sensation as the car feeling less responsive, or requiring greater throttle input to reach normal driving speeds.
This symptom can easily be mistaken for an engine or transmission issue; therefore, an accurate diagnosis is essential.
6. Uneven Brake Pad Wear
Brake dragging often causes one set of brake pads to wear down significantly faster than the other.
As the affected pads remain in constant contact with the rotor, they are subjected to increased friction and heat, resulting in accelerated wear.
This uneven wear pattern serves as a strong indicator of an underlying issue within the braking system such as: a stuck caliper or a seized slide pin.
If left unaddressed, this can necessitate frequent brake replacements and lead to increased maintenance costs.
7. Difficulty in Rotating the Wheel – When the Vehicle is Jacked Up
Brake dragging can be detected through a simple physical inspection: jack up the vehicle and attempt to rotate the wheel by hand.
Under normal circumstances, the wheel should spin freely without any significant obstruction and very little resistance should be felt.
However, if brake dragging is occurring, the wheel will feel tight, be difficult to rotate, or come to a rapid halt after being spun.
This is the most direct and reliable method for confirming the presence of brake dragging, as it clearly demonstrates that the brake components are failing to disengage as they should.
Know, the Main Causes of Brake Dragging
1. Stuck Brake Caliper
A stuck brake caliper is one of the most common causes of brake dragging; this typically occurs when the caliper piston fails to return to its original position after the brakes have been applied.
Inside the caliper, the piston is designed to push the brake pads against the rotor when hydraulic pressure is applied and to retract slightly once that pressure is released.
Over time, exposure to heat, moisture and road debris can lead to rust formation or dirt accumulation around the piston and its seals.
This causes the piston to become stiff or jam completely, preventing it from releasing properly.
Even a minor obstruction can keep the brake pads pressed slightly against the rotor, resulting in constant friction, heat generation and accelerated pad wear.
This condition often deteriorates gradually and, if left unaddressed, can lead to excessive heat buildup and compromised braking performance.
2. Jammed Caliper Slide Pins
Caliper slide pins allow the brake caliper to move freely from side to side, ensuring that both brake pads engage and disengage evenly.
These pins require proper lubrication to function correctly.
When the lubricant dries out or becomes contaminated with dirt and moisture, the pins can become stiff or jam completely.
This hinders the caliper’s movement, causing one of the brake pads to remain pressed against the rotor even after the brake pedal has been released.
Consequently, uneven pressure is generated, leading to brake dragging on one side.
This issue is particularly common in vehicles that have not undergone regular brake maintenance.
As a result, the brake pads on the affected wheel often wear unevenly and excessive heat is generated.
3. Collapsed or Clogged Brake Hose
Brake hoses transport hydraulic fluid from the master cylinder to the calipers and are designed to withstand high pressure while remaining flexible.
Over time, due to age, heat and fluid contamination, the inner lining of the hose can deteriorate.
When this occurs, the hose may collapse internally or become partially clogged.
This creates a one-way restriction: while fluid can reach the caliper when the brakes are applied, it cannot flow back properly when the pedal is released.
Consequently, pressure remains trapped inside the caliper, causing the brake pads to remain engaged with the rotor.
This type of problem is often difficult to identify externally, as the hose may appear normal on the outside while internally obstructing the flow of fluid.
4. Master Cylinder Malfunction
The master cylinder is responsible for generating and releasing hydraulic pressure within the braking system.
When functioning correctly, it transmits pressure to the brakes when the pedal is depressed and releases that pressure when the pedal is released.
However, if an internal fault exists such as: worn seals or a blocked return port, the pressure may not be fully released.
This leads to a condition known as “residual pressure,” wherein some pressure remains within the brake lines even after the braking process has concluded.
This residual pressure can cause one or more brakes to remain partially engaged, thereby increasing the likelihood of a seized brake.
In many instances, this issue can affect multiple wheels simultaneously; therefore, checking for this condition is a crucial step when diagnosing the problem.
5. Parking Brake-Related Issues
The parking brake system is designed to keep the vehicle stationary when parked; however, if it fails to fully disengage, it can lead to seized brakes.
This can occur due to a stuck or corroded cable, particularly in regions characterized by high humidity and dirt accumulation.
Over time, the cable may lose its smooth operation and fail to return to its normal resting position after use.
In some instances, the parking brake adjustment may also be incorrect, resulting in residual tension on the brake components even after the brake has been released.
This persistent tension generates friction at the wheels, leading to excessive heat buildup and accelerated component wear.
Parking brake-related issues are often overlooked, yet they can serve as a hidden cause of brake seizure, particularly in the rear brakes.
6. Contaminated or Aged Brake Fluid
Brake fluid plays a crucial role in transmitting hydraulic pressure within the braking system; however, its quality can deteriorate over time.
A critical factor is that brake fluid naturally absorbs moisture from the air, a characteristic known as its ‘hygroscopic property.’
The accumulation of moisture within the fluid lowers its boiling point and can lead to internal corrosion of brake components such as: calipers, cylinders and lines.
This corrosion can cause components to seize or restrict their proper movement, thereby creating a risk of brake lock-up.
Old or degraded fluid may also become viscous, hindering proper fluid flow and disrupting the process of applying and releasing the brakes.
To prevent these issues and ensure the proper functioning of the braking system, it is essential to replace the brake fluid periodically.
7. Improper Installation of Brake Pads
Improper installation of brake pads is another common cause of brake lock-up, particularly following recent brake servicing.
Brake pads are designed to fit securely within the caliper bracket while allowing for smooth movement as brake pressure is applied or released.
If the pads are installed too tightly within the bracket, fitted without the correct clips, or if incorrect components are used, they may fail to retract properly to their original position after the brakes are applied.
The presence of dirt, rust, or a lack of cleanliness in the pad mounting areas can also prevent the pads from seating correctly.
Consequently, the pads fail to disengage completely and remain in constant contact with the rotor.
Even a minor error while installing brakes can lead to constant friction, noise, uneven pad wear and excessive heat generation; therefore, proper pad installation is a crucial aspect of brake maintenance.
Tools
| Tool Name | Why It Is Needed | How to Use It |
|---|---|---|
| Jack and Jack Stands | These items are essential for safely lifting the vehicle off the ground, allowing you to inspect the wheels and rotate them. Working solely with a jack is unsafe, as the jack could fail; therefore, jack stands are used to stabilize the vehicle and prevent accidents. | To lift the vehicle, position the jack at the designated lifting points; then, place the jack stands beneath sturdy parts of the vehicle (such as the frame). Slowly lower the vehicle onto the jack stands and ensure that it is stable before beginning your work. |
| Lug Wrench | This tool is used to loosen and tighten wheel nuts, enabling you to remove the wheel and access the brake components. It is not possible to properly inspect the brakes without first removing the wheel. | Before lifting the vehicle, turn the lug wrench anti-clockwise to loosen the nuts. Once the vehicle is lifted, completely remove the nuts and pull the wheel off. When reinstalling the wheel, use this same tool to securely tighten the nuts. |
| Infrared Thermometer – Optional but Useful | This tool allows you to measure the temperature of a wheel without physical contact. It is extremely useful for identifying a brake that is sticking or binding, as the temperature of such a wheel will be significantly higher than that of the other wheels. | After driving the vehicle for a short distance, aim the thermometer directly at each wheel or brake rotor to measure its temperature and then compare the readings. If the temperature on one side is significantly higher, it indicates that the brake on that side is sticking. |
| Brake Cleaner | Brake cleaner is used to remove dirt, grease and brake dust from brake components. It is much easier to identify faults or defects on clean parts; Furthermore, it prevents issues such as brake jamming or sticking caused by the accumulation of dirt and debris. | Spray the cleaner directly onto the brake components (such as calipers, rotors and brackets). Allow the dirt to run off and let the parts dry thoroughly before proceeding with inspection or reassembly. Avoid spraying the cleaner on painted surfaces. |
| Basic Hand Tools | These tools include items such as wrenches, sockets and screwdrivers; they are required for removing brake components and inspecting parts like calipers or slide pins. These tools are essential for conducting a proper and comprehensive inspection of the brake system. | Use tools of the correct size to loosen bolts and carefully remove the brake components. Keep track of all removed parts and, once the inspection is complete, reassemble them in the correct sequence. |
| Protective Gloves | Gloves protect your hands from sharp edges, hot surfaces and hazardous substances such as brake dust or cleaning chemicals. It is crucial to prioritize your safety above all else when performing any work related to the brake system. | Put on your gloves before beginning the work and keep them on while handling tools or brake components. If they become damaged or too soiled to be used safely, replace them. |
How to Take Safety Precautions Before Inspection
1. Work on a Level Surface
Before beginning any brake inspection, it is crucial to ensure that the vehicle is parked on a flat and level surface.
This keeps the vehicle stable and eliminates the risk of it rolling or shifting while you are working.
When a car is parked on an uneven or sloped surface, its weight is not evenly balanced, which increases the risk of sudden movement specially when the vehicle has been lifted.
Even the slightest movement can be dangerous when the wheels have been removed or when your hands are near the brake components.
A level surface allows you to lift the vehicle evenly, making the inspection more accurate and safe.
2. Use Jack Stands Correctly
Relying solely on a jack while working underneath or around a vehicle is unsafe, as jacks are designed strictly for lifting, not for supporting weight over extended periods.
Jack stands provide sturdy support, ensuring the vehicle remains stable even after being lifted.
If jack stands are not used, there is a serious risk of the vehicle falling, which could result in severe injury.
It is essential to place the stands beneath strong structural points on the vehicle, such as the frame or designated support points.
Once the stands are in place, the vehicle should be slowly lowered onto them and its stability must be verified before any work begins.
This step is vital for ensuring a safe and controlled inspection.
3. Allow the Brakes to Cool Down
Brakes can become extremely hot during normal driving, particularly if there is an issue involving “dragging” (friction).
This heat is generated by the friction between the brake pads and the rotors; in some cases, the temperature can rise to such a level that touching the components poses a risk of severe burns.
Before inspecting or touching any brake component, it is crucial to allow sufficient time for the brakes to cool down completely.
This not only prevents burns but also enables a more accurate assessment of the components’ condition, as heat can temporarily affect their operational characteristics.
Working on cool brakes makes the task safer and allows for a more thorough inspection.
4. Wear Safety Gear
Wearing appropriate safety gear is an essential part of working on any brake system.
Brake components may have sharp edges and brake dust can contain fine particles that may cause harm if they come into contact with your skin or are inhaled.
Gloves help protect your hands from cuts, heat and chemicals, while safety glasses shield your eyes from dust and debris that may fly up during inspection or cleaning.
Using the right safety equipment minimizes the risk of injury and allows you to work with greater confidence and comfort while identifying potential issues.
How to Diagnose Brake Dragging Issue – Easy Way
1. Conduct a Road Test
The first step in diagnosing a brake dragging issue is to carefully drive the vehicle and observe how it behaves under normal driving conditions.
While driving, pay close attention to any tell-tale signs such as: the vehicle pulling to one side, a sensation of resistance during acceleration, or a burning smell after driving a short distance.
These serve as early indicators that one or more brakes are not releasing properly.
It is also helpful to note whether the vehicle feels sluggish or requires excessive effort to maintain speed.
Applying light pressure to the brakes while driving a short distance is often sufficient to reveal these symptoms.
This step is crucial as it provides a real-world perspective on how the problem manifests during typical usage.
2. Check for Temperature Differences
Following the road test, checking the temperature of each wheel can help pinpoint which specific brake is dragging.
Under normal circumstances, all wheels should be at approximately the same temperature after driving.
However, if one wheel feels significantly hotter than the others, it typically indicates that continuous friction is occurring within that specific brake assembly.
You can carefully place your hand near the wheel to gauge the heat; however, this must be done with extreme caution to avoid burns.
A safer and more accurate method is to use an infrared thermometer, which allows you to measure the surface temperature without any physical contact.
A distinct difference in temperature serves as a strong indication that brake dragging is occurring at that particular wheel.
3. Lift the Vehicle and Rotate the Wheels
Once the vehicle has cooled down, the next step is to safely lift it and check how easily each wheel rotates.
When you attempt to spin a wheel by hand, it should turn quite freely, facing only slight resistance caused by the normal contact of the brake pads.
If a wheel feels tight, stops prematurely, or requires significant effort to rotate, it indicates that the brake is not fully disengaging.
This is one of the most direct and reliable methods for confirming brake dragging.
Comparing all four wheels will help you clearly identify which specific wheel is affected.
4. Inspect the Brake Caliper Functionality
The brake caliper plays a crucial role in engaging and disengaging the brake pads; therefore, it must be inspected with great care.
A properly functioning caliper allows the piston to extend when the brakes are applied and then retracts it slightly once the pressure is released.
If the piston becomes seized due to dirt, rust, or internal defects, it will fail to retract properly, causing the brake pads to remain in constant contact with the rotor.
During the inspection, look for signs of uneven movement, sticking, or difficulty in pushing the piston back into its housing.
A caliper that does not move freely is a common cause of brake dragging.
5. Check the Slide Pins
The slide pins allow the caliper to move freely and uniformly, ensuring that both brake pads engage and disengage correctly.
These pins should move smoothly and be properly lubricated.
If they become dry, dirty, or corroded, they can seize up and restrict the movement of the caliper.
As a result, one of the brake pads remains pressed against the rotor, leading to brake dragging.
To inspect these components, the pins are removed to verify whether they move freely.
If they feel stiff or stuck, they require cleaning, lubrication, or replacement.
Properly functioning slide pins are essential for balanced braking performance.
6. Check the Condition of the Brake Hoses
Brake hoses can sometimes deteriorate internally without showing any visible signs of external damage.
Over time, the inner lining of the hose may collapse or become obstructed, preventing the brake fluid from flowing back properly after braking.
This creates a situation where pressure remains trapped inside the caliper, causing the brake to remain engaged.
A common method for diagnosing this issue is to slightly loosen the bleeder valve when the wheel is binding.
If fluid escapes and the wheel suddenly begins to spin freely, it indicates that the hose is obstructing the return flow of the fluid.
7. Check for Brake Fluid Pressure Release
Checking how the brake fluid pressure releases is a crucial step in identifying the root cause of brake dragging.
When the brake pedal is released, the pressure within the system should dissipate immediately.
If pressure persists within the line, the brake may remain applied.
By carefully loosening the bleeder valve, you can check for any trapped pressure.
If the wheel begins to spin freely once the pressure is relieved, it confirms that there is an internal issue within the system preventing the fluid from flowing back correctly.
This could be caused by a clogged hose or an internal defect within the master cylinder.
8. Inspect the Parking Brake System
When the parking brake system is not in use, it should be fully disengaged.
If any residual tension remains within the system, it can cause the brakes to drag.
This often occurs when the parking brake cable becomes corroded, stretches, or is improperly adjusted.
During an inspection, verify that the cable moves freely and returns to its normal resting position after the brake is applied.
Furthermore, ensure that none of the brake components associated with the parking system are binding.
Even slight tension can generate continuous friction, leading to brake overheating and premature wear.
9. Check Master Cylinder Functionality
The master cylinder regulates the flow and release of hydraulic pressure throughout the entire braking system.
If an internal fault exists such as: worn seals or a clogged return port, the cylinder may fail to fully release pressure after the brakes are applied.
Consequently, residual pressure remains trapped within the brake lines, causing one or more brakes to remain slightly engaged.
This type of issue often affects multiple brakes rather than just a single one.
To inspect the master cylinder, it is essential to observe how the system responds when pressure is released and to ensure that the brake fluid can flow back freely.
A faulty master cylinder can be a subtle, yet serious, underlying cause of brake dragging.
How to Identify Which Wheel Is Seizing
1. Comparing Temperatures
The most accurate and practical method for identifying a seized brake is to compare the temperatures of all four wheels after driving the vehicle for a short period.
In a properly functioning braking system, all wheels should heat up uniformly and subsequently begin to cool down at the same rate.
However, when a brake seizes, it generates continuous friction, causing excessive heat to accumulate at that specific wheel.
Consequently, the affected wheel becomes significantly hotter than the others.
You can carefully place your hand near each wheel to sense the heat, but using a non-contact infrared thermometer is a safer and more accurate way to measure the temperature.
A distinct difference in temperature serves as a strong and reliable indication that the hot wheel is experiencing a seized-brake issue.
2. Locating the Source of Odor or Smoke
Another useful method is to pinpoint the exact source of any burning odor or visible smoke after driving the vehicle.
A seized brake continuously generates heat, which can cause the brake pads and surrounding components to emit a pungent, burning smell.
In more severe cases, faint smoke may even be seen rising from the area of the affected wheel.
By walking around the vehicle and inspecting the components of each wheel, you can often identify where the odor is strongest.
The wheel emitting the most intense smell, or where smoke is visible, is typically the one suffering from the seized-brake issue.
This method is particularly helpful when the problem has progressed significantly and the effects of the heat are clearly evident.
3. Wheel Spin Test
Performing a wheel spin test is the most direct and straightforward method to pinpoint exactly which wheel is binding.
After safely lifting the vehicle and allowing the brakes to cool down, each wheel should be rotated by hand.
Under normal conditions, the wheel should spin freely without any obstruction; only a slight resistance, resulting from the normal contact of the brake components, should be perceptible.
If a wheel feels tight, is difficult to rotate, or comes to an immediate halt after being spun, it indicates that the brake on that specific wheel is not disengaging properly.
By comparing all the wheels against one another, it becomes easy to identify the wheel exhibiting abnormal resistance.
This method provides clear physical confirmation of a brake-binding issue and assists in pinpointing the precise location of the problem.
Read More:
- How to Fix Internal Master Cylinder Leak
- How to Test Brake Master Cylinder Pressure
- How to Replace Brake Booster
- How to Fix Brake Booster Vacuum Leak
- How to Test Brake Booster Functionality
- How to Lubricate Brake Caliper Pins Properly
- How to Rebuild Brake Caliper at Home
- How to Check Brake Caliper Piston Movement
- How to Resurface Brake Rotors at Home
- How to Fix Brake Rotor Runout
- How to Check Brake Disc Runout
- How to Prevent Brake Fluid Boiling
Know, The Common Diagnostic Errors to Avoid
1. Misdiagnosis of ABS-Related Issues
A common error is to attribute brake dragging (brakes sticking) problems to the Anti-lock Braking System (ABS).
Although the ABS is designed to prevent the wheels from locking up during hard braking, it is rarely the actual cause of persistent brake dragging.
Many drivers, and even some novice technicians, assume that any warning light or brake malfunction is linked to the ABS, whereas the true cause may be mechanical such as: a seized caliper or trapped hydraulic pressure.
Brakes often drag even when the pedal is not being depressed, whereas the ABS only activates under specific braking conditions.
Understanding this distinction can help avoid unnecessary repairs and prevent the replacement of components that have no bearing on the actual problem.
2. Overlooking the Condition of the Brake Fluid
Brake fluid plays a critical role in building and releasing pressure within the braking system; yet, it is often overlooked during the diagnostic process.
Over time, brake fluid absorbs moisture from the air, which can lead to internal corrosion and diminished performance.
Contaminated or aged fluid can cause components such as calipers and cylinders to seize, resulting directly in brake dragging.
If the fluid is not inspected, the root cause of the problem may remain hidden, even after other components have been checked or replaced.
A proper diagnosis should always include an assessment of the brake fluid’s condition, color and age to ensure that the fluid itself is not the underlying cause of the issue.
3. Replacing Parts Without Confirming the Root Cause
Another major mistake is replacing brake components without thoroughly investigating the actual cause of the brake sticking.
For instance, many people immediately replace the brake caliper the moment they observe a problem; however, the actual issue might stem from a clogged brake hose or a faulty master cylinder.
This approach not only results in a waste of money but also fails to fully resolve the underlying problem.
Braking systems function as an interconnected network of components; consequently, a single defective part can adversely affect the others.
Proper diagnosis involves examining and verifying every potential cause before replacing any component, thereby ensuring that the problem is resolved correctly on the very first attempt.
4. Failing to Inspect Both Sides
Focusing solely on one side of the vehicle is another error that can lead to an incomplete diagnosis.
Even if the problem is clearly evident on a single wheel, it remains essential to inspect the opposite side as well for the sake of comparison.
Brakes are designed to operate symmetrically on both sides; therefore, any discrepancy between the two can provide crucial clues regarding the true cause of the malfunction.
For example, differences in wear patterns, temperature variations, or the degree of resistance can help pinpoint the actual reason behind brake dragging.
If one side is left unexamined, another underlying issue may be overlooked, or the overall condition of the braking system could be misdiagnosed.
Inspecting both sides ensures a more accurate and reliable diagnosis.
Understand, When to Repair and When to Replace Components
1. Rebuild or Replace the Caliper
Deciding whether to rebuild or replace a brake caliper depends on its overall condition and the extent of any internal damage.
If the caliper’s main housing is in good condition and the issue is limited to worn seals or slightly stuck pistons, it can often be rebuilt.
Rebuilding involves replacing internal seals, dust boots and sometimes the pistons to restore proper movement and sealing integrity.
Provided there is no excessive corrosion or severe structural damage, this can be a cost-effective solution.
However, if the caliper exhibits severe corrosion, pitting on the piston surface, fluid leaks, or symptoms of repeated sticking even after cleaning, replacement is the better option.
A faulty caliper cannot maintain proper pressure control; replacing it ensures reliable braking performance and safety.
In many cases, replacement is considered the preferable course of action, as it saves time and minimizes the risk of future malfunctions.
2. The Need to Replace Hoses
Brake hoses may appear sound on the outside yet be deteriorated internally; this is why they are a common, and often hidden, cause of brake dragging.
When the inner lining of a hose collapses or becomes obstructed, it traps brake fluid pressure and prevents the fluid from returning properly.
Unlike other components, brake hoses cannot be repaired once they have deteriorated internally.
If a hose is suspected of causing pressure buildup, it should always be replaced rather than reused.
Uneven braking, delayed brake release, or a wheel only freeing up when pressure is relieved via the bleeder valve, all these symptoms often point to a faulty brake hose.
Replacing the hoses ensures proper fluid flow and correct pressure release, a critical prerequisite for the proper functioning of the brakes.
3. When is a Complete Brake Service Necessary?
A complete brake service becomes necessary when multiple components show signs of wear, damage, or contamination.
This includes situations where brake pads have worn unevenly, rotors have overheated or warped, the brake fluid has aged or become contaminated, or moving parts such as: slide pins, have dried out or seized.
As all these components work together as a single system, repairing just one part may not fully resolve the underlying issue.
A comprehensive service typically involves replacing brake pads, resurfacing or replacing rotors, cleaning and lubricating all moving parts and completely flushing and replacing the brake fluid.
This approach restores the entire system to its optimal operating condition and helps prevent recurring problems.
When a problem has persisted for a long time, or when the overall condition of the braking system has deteriorated, opting for a complete brake service is often the best course of action.
Estimated, Cost of Diagnosing and Repairing Brake Dragging
1. DIY vs Professional Diagnosis
The cost of diagnosing brake dragging depends on whether you perform the inspection yourself or take the vehicle to a professional.
A DIY (Do-It-Yourself) inspection is typically less expensive, as it primarily requires only a few basic tools and a small amount of time.
If you already possess equipment such as a jack, jack stands and hand tools, your only additional expenses might be for minor supplies like brake cleaner or gloves.
Therefore, for simple tasks such as: rotating the wheels, performing a visual inspection and conducting basic tests, the DIY approach is an excellent option.
However, to avoid errors, this method requires considerable caution and at least a basic understanding of automotive mechanics.
Conversely, obtaining a professional diagnosis at a repair shop is generally more expensive, as it encompasses costs for both labor and specialized diagnostic expertise.
Technicians utilize the appropriate tools and leverage their experience to identify the problem quickly and accurately, thereby minimizing the risk of a misdiagnosis.
The cost of a professional diagnosis can vary depending on the specific shop and location; however, relative to the total cost of the actual repairs, it typically falls within a moderate range.
Although this initial expense may seem high at first glance, it proves to be a cost-effective measure in the long run, as it prevents the unnecessary replacement of perfectly functional components.
2. Common Repair Costs for Specific Components
The cost of repairing brake dragging depends on which specific component is causing the issue and the severity of the problem.
A seized brake caliper represents one of the most expensive repairs, particularly if it requires complete replacement rather than just servicing, as the cost involves both the parts themselves and the associated labor.
Replacing brake hoses (pipes) is typically inexpensive; however, if they are causing excessive pressure buildup within the brake system, repairing them becomes absolutely essential.
Repairing slide pins is often the most economical option because, provided they are not severely damaged, simply cleaning and lubricating them is sufficient to resolve the issue.
Replacing brake fluid is also quite affordable, yet it remains a crucial maintenance task; this is because any dirt or impurities within the fluid can adversely affect the entire braking system.
If multiple components such as: pads, rotors and calipers, have become worn or damaged, the total repair cost can rise significantly, as this may necessitate a comprehensive servicing of the entire brake system.
Overall, addressing a problem in its early stages helps keep repair costs to a minimum; conversely, delaying repairs can lead to increased expenses, as the heat and friction generated during braking can inflict further damage upon various other brake components.
How to Prevent Brake Dragging Issues
Also, there’s studies that confirms that the impropoer piston retraction and trapped hydraulic pressure are actually the major causes of continuous brake contact, that shows that why it is important to diagnose it by checking both caliper movement and fluid pressure release, rather than focusing on a single component.[¹]
1. Regular Brake Inspections
The most effective way to prevent brake dragging issues before they even begin is to conduct regular brake inspections.
Brakes are subjected to heat, dust, moisture and constant use, meaning their condition can deteriorate over time without any obvious warning signs.
During an inspection, checking the thickness of the brake pads, the condition of the rotors and the movement of the calipers and slide pins helps identify incipient problems such as: uneven wear or restricted movement, in a timely manner.
By identifying these minor issues promptly, they can be rectified before they escalate into serious problems like brake dragging or overheating.
Regular inspections also help maintain the balance of the braking system, thereby improving overall safety and vehicle control.
2. Timely Fluid Replacement
Brake fluid plays a crucial role in the smooth operation of the braking system and replacing it at regular intervals is essential for preventing problems.
Over time, brake fluid absorbs moisture from the air, which diminishes its effectiveness and can lead to corrosion within the internal components of parts such as the calipers and master cylinder.
This corrosion can cause components to seize, preventing proper pressure release, a common cause of brake dragging.
Replacing (flushing) the brake fluid removes accumulated moisture and contaminants, restoring the fluid to its optimal performance level and protecting internal components.
Adhering to the recommended schedule for fluid replacement ensures that the braking system continues to function reliably and minimizes the risk of hidden damage.
3. Proper Component Lubrication
Many brake components rely on unrestricted movement to function correctly, particularly the caliper slide pins and the contact points where the brake pads are seated.
Proper lubrication at these specific points, particularly the use of the correct type of grease, is essential to prevent components from seizing and to ensure their movement remains smooth and consistent.
Without lubrication, dust and rust can accumulate, causing parts to stick or move erratically, a primary cause of brake dragging issues.
Applying the appropriate lubricant during routine maintenance ensures that components can move freely and return to their original position immediately after braking.
This simple step plays a crucial role in preventing friction-related problems and extending the overall lifespan of the braking system.
4. Use of High-Quality Brake Components
The quality of brake components has a direct impact on both the performance and the longevity of the braking system.
Low-quality or incompatible parts may not fit correctly or may wear out prematurely, thereby increasing the likelihood of issues such as “brake dragging.”
High-quality brake pads, rotors, hoses and other components are engineered to meet rigorous standards and are designed to withstand heat and pressure more effectively.
These parts also provide a superior fit and smoother operation, ensuring that the brakes engage and disengage exactly as intended.
Investing in high-quality components reduces the risk of recurring problems and, over time, enhances both the safety and reliability of the vehicle.
Conclusion – How to Diagnose Brake Dragging Issue
So, whenever a braking system that does not fully release then it is quietly working against your vehicle every time you drive.
Brakes are designed to apply pressure when needed and then release completely, allowing the vehicle to move freely without obstruction.
When this delicate balance is even slightly disrupted, continuous friction ensues, generating excessive heat, accelerating component wear, reducing fuel efficiency and, in severe cases, potentially leading to a complete loss of braking capability.
The issue of sticking brakes is particularly concerning because it often develops gradually, manifesting through subtle signs such as the vehicle pulling slightly to one side, a faint burning odor, or uneven heat distribution, yet, over time, it can inflict damage upon multiple components and significantly escalate repair costs.
There are numerous benefits to learning the correct, step-by-step method for diagnosing a sticking brake issue.
This approach enables you to pinpoint the precise root cause of the problem, rather than relying on guesswork or replacing parts unnecessarily.
Whether the issue stems from a seized caliper, a clogged hose, degraded brake fluid, or a lack of lubrication, proper inspection and testing will reveal the underlying cause.
This systematic methodology not only saves money but also ensures that the problem is resolved correctly on the very first attempt.
Rather than making hasty conjectures, accurate diagnosis is always the paramount priority.
Regular maintenance plays a pivotal role in preventing issues such as sticking brakes.
Keeping brake components clean, maintaining proper lubrication and replacing brake fluid at prescribed intervals are all essential tasks that help ensure the braking system operates smoothly and efficiently.
Furthermore, the use of high-quality components and regular inspections reduces the likelihood of sudden mechanical failure.
Also, you can ask related questions below.
Frequently Asked Questions
FAQ 1: What is brake dragging and why does it happen?
Answer: Brake dragging occurs when brake pads or shoes fail to fully disengage even after you lift your foot off the brake pedal; consequently, they remain in contact with the rotors or drums while the vehicle is in motion. This happens when a component within the braking system prevents pressure from releasing properly, or when parts are unable to move freely. Common causes include stuck caliper pistons, dry or seized slide pins, clogged brake hoses, or old brake fluid, all of which can lead to internal damage. Even slight, constant contact generates friction, creating heat and accelerating component wear over time.
FAQ 2: Is it safe to drive with dragging brakes?
Answer: Driving with dragging brakes is unsafe, specially over long distances or at high speeds. Although the vehicle may remain drivable, the constant friction generates heat, which can damage brake components and degrade braking performance. In severe cases, this can increase stopping distances or even lead to complete brake failure. It can also affect steering control, causing the vehicle to pull to one side. You should only drive with this issue if it is absolutely necessary, and then only for very short distances; the problem should be diagnosed and repaired as soon as possible.
FAQ 3: How can I tell if my brakes are dragging?
Answer: You can detect brake dragging by observing specific signs while driving and after coming to a stop. After driving for a while, the vehicle may feel sluggish or heavy, pull to one side, or emit a burning smell. You may also notice that a specific wheel feels significantly hotter than the others. Another simple method is to lift the vehicle and attempt to spin the wheels by hand. If a wheel feels particularly difficult to rotate or stops prematurely, it is likely dragging. These signs help you detect a problem before it leads to major damage.
FAQ 4: Why does one wheel drag more than the others?
Answer: When only a single wheel is dragging, it typically indicates that the issue lies specifically within that particular wheel assembly. This can be caused by a stuck caliper, seized slide pins, or a clogged brake hose, which traps hydraulic pressure within that specific brake assembly. As the brake components for each wheel operate independently, a malfunction in a specific component often affects only that particular wheel. Therefore, to pinpoint the exact location of the problem, it is essential to compare the condition of all the wheels during your inspection.
FAQ 5: Can a brake dragging problem resolve itself?
Answer: Brake dragging does not resolve on its own; in fact, it tends to worsen over time. The components involved are mechanical and hydraulic in nature; therefore, if a part becomes seized or defective, it will continue to cause problems until it is repaired. In reality, continued use can exacerbate the issue, leading to excessive heat generation, accelerated component wear and potential damage to other parts. To avoid higher repair costs in the future, the best course of action is to diagnose and fix the problem as soon as possible.
FAQ 6: How does brake dragging affect fuel efficiency?
Answer: Brake dragging creates constant resistance, forcing the engine to exert greater effort to propel the vehicle forward. This increased strain leads to higher fuel consumption, even if the resistance is minor. Over time, this can significantly reduce fuel efficiency, specially when driving in the city, where frequent braking is required. Resolving this issue restores the vehicle’s performance to normal levels and improves fuel economy.
FAQ 7: What is the quickest way to detect brake dragging?
Answer: The quickest way to detect brake dragging is to drive the vehicle for a short period and then check the temperature of each wheel. The wheel with the highest temperature is typically the one experiencing the brake dragging issue. Subsequently, the vehicle can be lifted to manually rotate each wheel; this confirms exactly which specific wheel is facing resistance. These simple steps help pinpoint the root cause of the problem before proceeding to a more detailed inspection of components such as calipers, hoses and fluids.
References:
[1] Piston Retraction-Induced Braking Drag Mechanism of Commercial Vehicle Disc Brake Under Dynamic Working Conditions
https://www.researchgate.net/publication/401769405_Piston_Retraction-Induced_Braking_Drag_Mechanism_of_Commercial_Vehicle_Disc_Brake_Under_Dynamic_Working_Conditions

Hello Folks, Dean Shali here to help you out to solve the problems with your lovely vehicle, as i have lots of experience and knowledge about automotive industry as i woks directly with the customers and repair vehicles and i love to help the people to keep their cars safe and running smoothly.