Written By: Dean Shali
Fact Checked By: Sabré Cook
Reviewed By: Tamara Warren
It is true that: a properly working brake booster makes actual difference between a safe stop and a risky one.
As, modern vehicles literally relies on a properly functioning brake system and the brake booster actually plays a critical role in to make the braking process both safe and effortless.
So, this is basically a component that uses engine vacuum pressure to multiply the force you apply on the brake pedal; which means you don’t have to press hard to stop your car in effective way.
As well as, whenever the brake booster starts to fail: then you can notice something such as: hard pedal, reduced braking power or a slight hissing sound that can cause by a vacuum leak.
Not only this, these are the common symptoms that can quickly lead to the longer stopping distances and unsafe driving conditions if you ignore them completely.
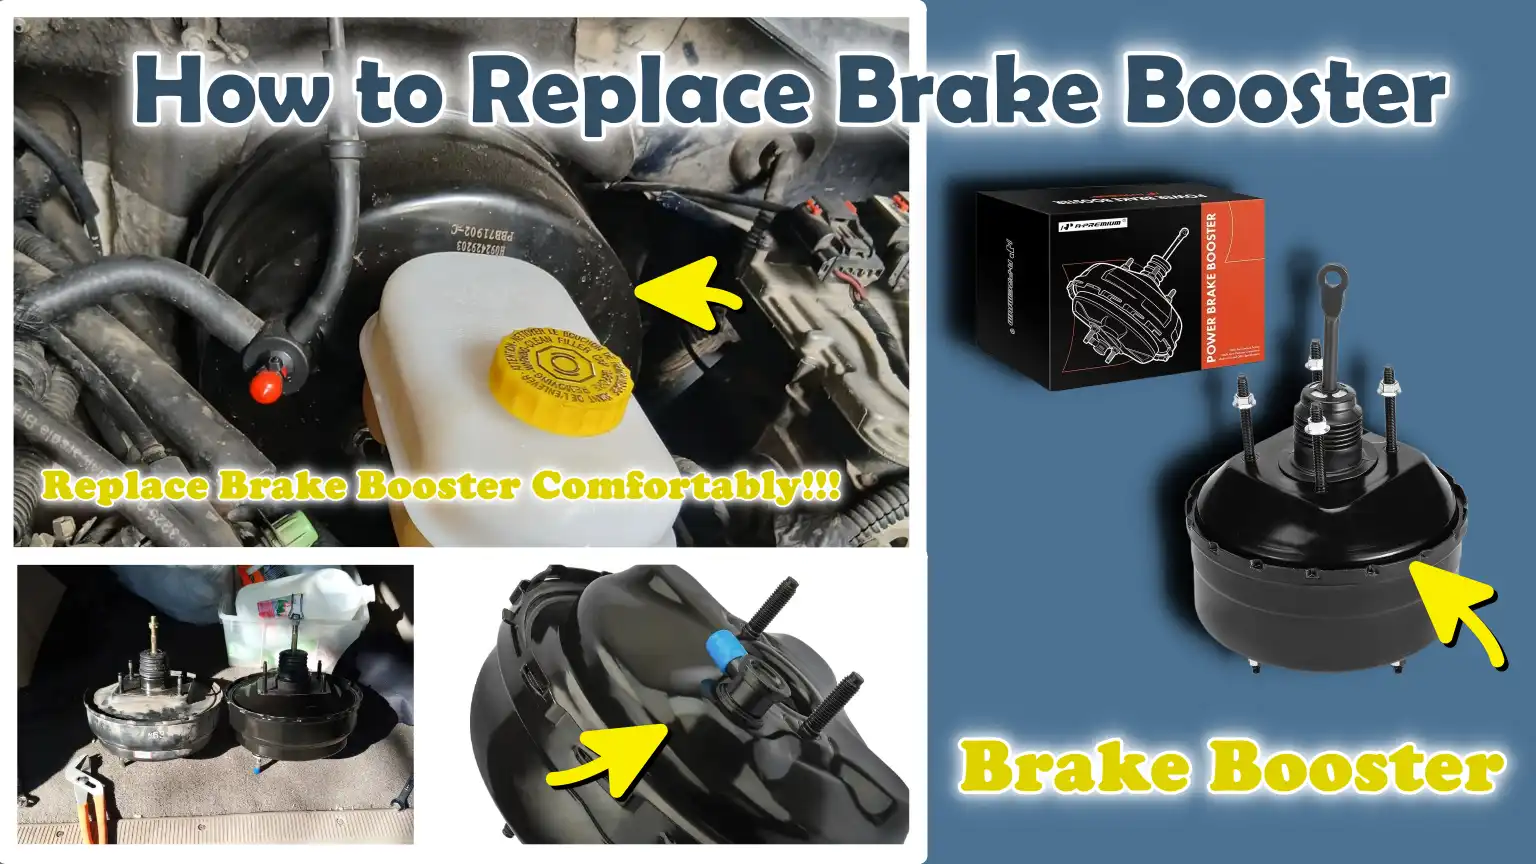
Now, in this guide you’ll learn How to Replace Brake Booster so that you can easily recognize early warning signs and replace it with clear instructions that even beginner can follow.
Know, Signs That Shows Your Brake Booster Needs Replacement
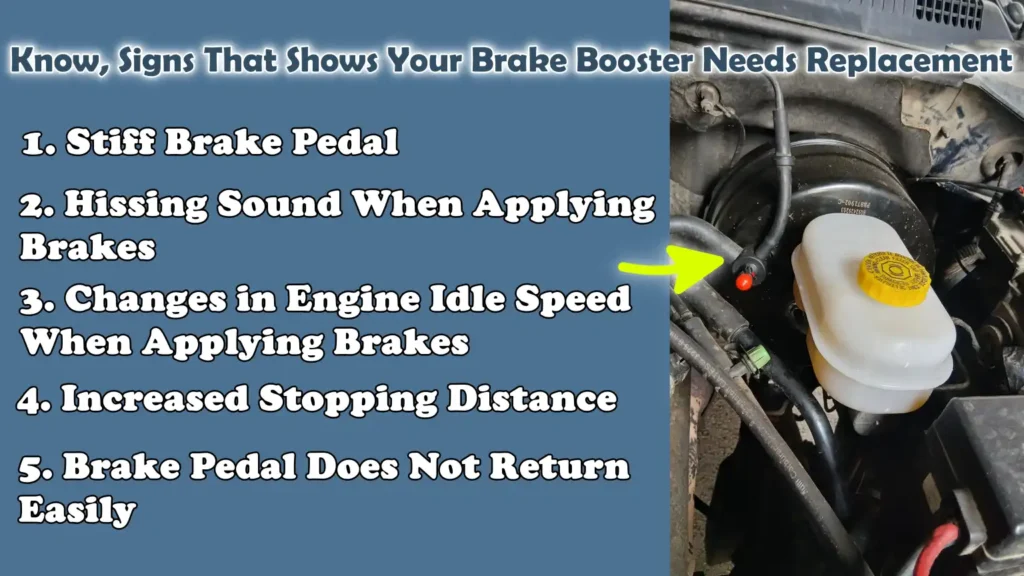
1. Stiff Brake Pedal
The most common and easily recognizable sign of a failing brake booster is a stiff brake pedal.
Typically, the booster utilizes engine vacuum to reduce the physical effort required to depress the brake pedal, making braking feel effortless and smooth.
When the booster fails, this assistance is lost and you must exert significantly more force to slow down or stop the vehicle.
This can be uncomfortable and fatiguing, specially in heavy traffic, and it may also compromise your ability to react quickly in emergency situations.
If your brake pedal suddenly feels stiff, or if it requires more effort than usual to depress, it is a definitive sign that the brake booster is no longer functioning correctly.
2. Hissing Sound When Applying Brakes
A distinct “hissing” sound heard when you depress the brake pedal is often caused by a vacuum leak within the brake booster.
The booster relies on sealed vacuum pressure to function properly; any defect in its internal diaphragm or seals can allow air to escape.
This escaping air produces a characteristic hissing sound, particularly when the brake pedal is engaged.
Although this sound may seem minor at first, it serves as a clear warning that the booster is losing its ability to assist with braking.
Ignoring this symptom can lead to a further deterioration in braking performance over time.
3. Changes in Engine Idle Speed When Applying Brakes
The brake booster is directly connected to the engine’s vacuum system; therefore, any malfunction within the booster can impact the way the engine runs.
If you observe that the engine’s idle speed becomes erratic, drops, or fluctuates when you depress the brake pedal, it may be due to a vacuum leak within the booster.
This occurs because an excessive amount of air enters the engine system, thereby disrupting the proper air-fuel balance.
In some instances, the engine may even stall while braking at low speeds.
This is a clear indication that the issue is not merely mechanical but is also impacting engine performance and it requires immediate attention.
4. Increased Stopping Distance
A failing brake booster compromises the efficiency of your braking system, potentially increasing the distance required to bring your vehicle to a complete stop.
Even if the brakes are still functional, a lack of adequate assistance means you may be unable to generate the necessary braking force quickly enough to stop the vehicle in time.
This situation becomes particularly hazardous during emergency braking scenarios, where every second and every inch counts.
If you feel that your car is taking longer than usual to come to a halt, even when you are pressing the brake pedal firmly, it is possible that the brake booster is weakening; in such cases, it should be inspected or replaced.
5. Brake Pedal Does Not Return Easily
A properly functioning braking system ensures that when you release the brake pedal, it returns smoothly to its original resting position.
If the brake pedal feels sluggish in returning, seems to stick slightly, or fails to return consistently, it may signal an internal issue within the brake booster.
This can be caused by wear and tear on internal components or an imbalance in the vacuum pressure inside the unit.
A pedal that does not return properly can compromise the uniformity of braking and cause the brakes to drag; this can lead to brake overheating and accelerate the wear of other components.
This symptom should not be ignored, as over time, it can lead to even more serious problems within the braking system.
Tools
| Tool/Material | Why It Is Needed | How to Use It Properly |
|---|---|---|
| Socket Set | A socket set is required to remove and install the bolts that secure the brake booster and master cylinder in place. These bolts are typically tightened very firmly and are located in areas where a standard wrench cannot easily fit. | Select the correct socket size that fits snugly onto the bolt. Attach it to a ratchet and turn it slowly to prevent the bolt head from becoming rounded. For a secure grip, always keep the socket perfectly aligned with the bolt head. |
| Wrench Set | Wrenches are useful for gripping or loosening nuts in tight spaces where sockets cannot reach. They are also helpful when you need to rotate one side while holding the other side stationary. | Select the correct wrench size and ensure that it sits fully and securely on the nut. To prevent the nut from slipping or becoming damaged, apply steady pressure rather than sudden force. |
| Ratchet and Extensions | A ratchet allows you to turn bolts quickly without having to remove and re-position the tool after every turn, while extensions help you reach bolts that are hidden behind the brake booster or located deep within the assembly. | Attach the appropriate socket to the ratchet and use extensions to access hard-to-reach areas. Turn the ratchet in a controlled manner and use the directional lever on the ratchet to reverse the turning direction as needed. |
| Screwdrivers | Screwdrivers are used to remove clamps, covers, or small components associated with the brake system such as: hose clamps or interior trim panels. | Depending on the type of screw, use the appropriate screwdriver, either a flathead or a Phillips. Apply firm pressure to the head of the screw and turn it slowly to prevent it from stripping or becoming damaged. |
| Pliers | Pliers are required to remove the clips, pins and vacuum hoses connected to the brake booster. These tools provide a secure grip for pulling or holding these small components. | Use the pliers to gently squeeze and pull the clips or hoses. Avoid applying excessive force, as this can damage plastic connectors or rubber hoses. |
| Torque Wrench | A torque wrench ensures that bolts are tightened to the correct specifications, which is crucial for ensuring the safety and proper sealing of brake components. | Determine the recommended torque values for your specific vehicle. Tighten the bolts until you hear a distinct “click” sound from the wrench; this indicates that the bolt has reached the correct tightness. |
| Brake Fluid | If the fluid level drops during this procedure, brake fluid may be required to top up the system. Maintaining the correct fluid level is essential for safe braking. | Check the fluid reservoir level after installing the components. Slowly add the correct type of brake fluid, taking care to avoid spills, as spilled fluid can damage paint and other parts. |
| New Brake Booster | This is the primary replacement component that restores proper braking assistance when the original booster fails. | Position the new booster correctly against the firewall, align the mounting holes and secure it using the bolts. Ensure that the push rod is properly connected to the brake pedal. |
| New Gasket or Seal | A gasket or seal ensures that there are no vacuum leaks between the booster and the mounting surface, which is essential for proper operation. | Before tightening the bolts, position the gasket evenly between the booster and the mounting surface. Ensure that it sits perfectly straight and does not become twisted or damaged during installation. |
Easily Ensure Safety By Taking Precautions Before Starting Work
1. Park on Level Ground
Before commencing any work on the brakes, always park your vehicle on a level and stable surface.
This is crucial because even a slight incline in the ground can cause the vehicle to roll, specially when you are working in the vicinity of the brake system.
A stable surface keeps the vehicle balanced and minimizes the risk of sudden movement while you are working under the hood or inside the cabin.
This simple step provides you with better control while working and prevents accidents that could result from the vehicle shifting unexpectedly.
2. Engage the Parking Brake
Engaging the parking brake adds another layer of safety, as it locks the rear wheels and ensures the vehicle remains firmly anchored in place.
Even if the vehicle is already in gear or in ‘Park’ mode, the parking brake provides additional holding power to keep the vehicle stationary.
This becomes even more critical when you are working on brake components, as the process may require temporarily detaching parts of the system.
A properly engaged parking brake ensures that the vehicle remains secure and does not move while you are performing the work.
3. Disconnect the Battery
Disconnecting the battery, specifically the negative terminal, before starting work is a vital safety measure.
It prevents sudden electrical hazards such as: short circuits or the unintentional activation of components, that can occur while working near the engine.
This is essential because modern vehicles contain numerous electrical connections and even a minor error can result in damage or injury.
Disconnecting the battery creates a safer working environment and protects both you and your vehicle’s electrical system.
4. Wear Gloves and Safety Glasses
Wearing gloves and safety glasses protects you from common hazards such as sharp edges, dirt, brake fluid and small debris.
The surfaces of brake components can be rough and tools may slip while you are working, potentially causing cuts or injuries to your hands.
Safety glasses help shield your eyes from dust, rust particles, or fluid splashes, specially when you are working under the dashboard or near the engine.
Using the appropriate safety gear makes the entire process safer and more comfortable.
5. Avoid Working on a Hot Engine
Before beginning any repair work, always allow the engine to cool down completely.
Engine components can become extremely hot during operation and touching them too soon poses a risk of burns or injury.
Working on a hot engine makes it difficult to handle components safely and also increases the risk of damaging other surrounding parts.
Waiting for the engine to cool down ensures that you can work more safely throughout the entire process, while also maintaining better focus and control.
How to Replace Brake Booster – Easy Yet Effective Guide
1. Disconnect the Battery
Before you begin, electrically secure the vehicle by disconnecting the negative terminal of the battery.
This step prevents accidental short circuits, protects sensitive electronic components and minimizes the risk of sparks while working inside the engine bay.
Always loosen the negative terminal first and move the cable away from the battery to ensure it cannot accidentally make contact again.
This simple precaution creates a safe working environment and allows you to focus on the mechanical tasks without electrical concerns.
2. Locate the Brake Booster
The brake booster is typically mounted on the firewall, a metal partition that separates the engine bay from the cabin.
It is situated directly behind the master cylinder and is usually a round, black component.
Locating its exact position is crucial, as several other components are connected in its vicinity.
Take a moment to observe how everything is connected, including vacuum hoses and mounting points, as this will make the removal and installation process much smoother and more precise.
3. Remove the Master Cylinder
Carefully separate the master cylinder from the brake booster, ideally without disconnecting the brake lines.
Keeping the lines connected helps prevent air from entering the brake system; otherwise, you may need to bleed the brakes later.
Once the mounting bolts have been removed, gently slide the master cylinder forward slightly to create enough clearance to access the brake booster located behind it.
Handle it with care and avoid bending or straining the brake lines, as they are critical for the proper functioning of the brake system.
4. Disconnect the Vacuum Hose
Gently pull to remove the vacuum hose connected to the brake booster.
This hose supplies the vacuum pressure necessary for the brake booster to function; therefore, it is a critical connection.
While removing it, inspect the hose for cracks, signs of deterioration, or loose fittings, as any defect could lead to a vacuum leak and compromise braking efficiency.
If the hose shows signs of wear, replacing it at this stage can help ensure optimal performance and prevent future issues.
5. Disconnect the Brake Pedal Linkage
Enter the vehicle and locate the point where the brake booster’s push rod connects to the brake pedal.
This connection is typically secured by a clip or a pin.
Carefully remove the clip and slide out the pin to disengage the linkage.
This step is essential as it separates the booster from the pedal assembly.
Do not rush this process, as the space beneath the dashboard can be cramped; keeping track of small components like the clip will make the reassembly process much easier.
6. Remove the Booster Mounting Nuts
Depending on your vehicle’s specific design, return to either the engine bay or the area beneath the dashboard to locate the mounting nuts that secure the brake booster to the firewall.
These typically consist of three or four nuts that hold the booster firmly in place.
Use the appropriate tools to carefully remove them.
Once these nuts are removed, the booster will no longer be attached to the vehicle; therefore, ensure that you are prepared to support it as you proceed to remove it.
7. Remove the Old Brake Booster
After disconnecting all linkages and removing the mounting nuts, carefully pull the old brake booster out of the engine bay.
You may need to slightly adjust its angle to extract it without damaging surrounding components.
Do not rush or force it out, as doing so could damage adjacent parts such as wiring or hoses.
Removing it gently helps you better understand how to position the new booster during installation.
8. Install the New Brake Booster
Position the new brake booster in place, aligning it directly with the mounting holes located on the firewall.
Ensure that it is perfectly straight and seated correctly, as proper alignment is essential for its proper functioning.
Gently slide it into position, ensuring that the push rod aligns correctly with the brake pedal linkage inside the cabin.
A correctly installed booster ensures smooth pedal operation and optimal braking performance.
9. Reconnect the Pedal Linkage and Mounting Nuts
Reconnect the brake pedal linkage by inserting the pin back into place and securing it with the clip.
Next, tighten the mounting nuts that fasten the booster to the firewall.
Ensure that everything is secure, but avoid overtightening, as this can strip the threads or damage the components.
Proper tightening ensures that the booster remains firmly anchored in place and operates safely under pressure.
10. Reconnect the Master Cylinder and Vacuum Hose
Carefully return the master cylinder to its original position and securely bolt it to the new brake booster.
Ensure that it is properly seated and tightly fastened.
Reconnect the vacuum hose securely to prevent any leaks.
This step re-establishes the connection between the braking system and the booster, allowing them to function exactly as intended.
11. Reconnect the Battery
Finally, reconnect the negative terminal of the battery to restore power to the vehicle.
Tighten the connection securely to ensure a stable power supply.
Once the battery is connected, you can test the braking system to verify that everything is functioning correctly.
This final step completes the installation process and prepares the vehicle for safe operation.
How to Test a New Brake Booster
1. Press the Brake Pedal Before Starting the Engine
Before starting the engine, and while the engine is still off, press the brake pedal several times.
The pedal should feel firm and should become slightly firmer with each subsequent press.
This occurs because no vacuum assistance is available and you are relying entirely on mechanical force.
This step helps confirm that the braking system is properly maintaining pressure and has no internal leaks.
A firm pedal feel at this stage is a good indication that the basic braking system is functioning as expected.
2. Start the Engine While Pressing the Pedal
Now, gently keep your foot pressed on the brake pedal and start the engine.
As soon as the engine starts, the brake booster begins utilizing vacuum pressure to assist with braking.
You should feel the pedal sink slightly beneath your foot without applying any additional force.
This subtle shift indicates that the booster is functioning correctly and providing assistance.
If the pedal does not move at all or feels exactly the same as before, it may be a sign that the booster is not receiving vacuum pressure or is not operating properly.
3. Check for Smooth Braking Response
After confirming basic functionality, move the vehicle to a safe area to conduct a careful and controlled test drive.
Press the brake pedal just as you normally would and observe how the car responds.
Braking should be smooth, consistent and require minimal effort.
There should be no unusual noises such as: a “hissing” sound, and the pedal should quickly return to its normal position after being released.
Pay attention to how easily the vehicle slows down and comes to a stop.
A properly functioning brake booster will provide a consistent braking force, making the driving experience feel safe and controlled.
Know, The Common Mistakes During Replacement of Brake Booster to Avoid Later On
Plus, there’s recent scientific study on the vacuum brake boosters that confirms that the braking system efficiency is directly linked to the vehicle safety, as there’s significant number of road accidents actually associated with the poor braking performance, so this research shows that the vacuum brake boosters actually improve the braking effectiveness as it optimizes the pressure distribution and system response as well, even experimental rsults shows that only about a 6% difference between theoretical and real-world performance, that proves that the reliability and accuracy of the booster systems in real conditions, that’s why you need to maintain the boosters that literally enhances the overall braking safety and system efficiency as well.[¹]
1. Forgetting to Reconnect the Vacuum Hose
One of the most common mistakes is forgetting to reconnect the vacuum hose to the brake booster after installation.
This hose is critical because it supplies the vacuum pressure that helps the booster reduce the physical effort required to depress the brake pedal.
If left disconnected or connected loosely, the brake pedal will feel extremely stiff and the booster will not function at all.
In some cases, a vacuum leak can even lead to engine performance issues.
Before starting the engine, always double-check that the hose is securely attached and free of any cracks or looseness.
2. Damaging the Brake Lines
Brake lines are vital components that transmit brake fluid under high pressure and even a minor error can lead to major problems.
When the master cylinder is temporarily set aside, many people inadvertently bend, twist, or place excessive strain on these lines.
Damaged brake lines can result in fluid leaks, reduced braking power, or even complete brake failure.
To avoid this, always handle the master cylinder with care and avoid pulling it too far away from its mounting position.
Keeping the lines connected and stable preserves the integrity of the entire braking system.
3. Failing to Properly Secure the Pedal Linkage
For the system to function correctly, it is essential that the connection between the brake booster push rod and the brake pedal is securely fastened.
If the retaining clip or pin is not installed properly, the connection may loosen or detach while the vehicle is in motion.
This can lead to fluctuations in braking performance or, in severe cases, result in a complete loss of braking control.
Always ensure that the linkage is properly connected, the pin is fully inserted and the retaining clip is securely locked in place.
Taking a few extra moments to secure this connection can prevent serious safety-related issues.
4. Skipping Final Testing
Skipping the final testing phase after installation is a mistake that can jeopardize both the driver and the vehicle.
Even if everything appears to be installed correctly, minor issues such as: vacuum leaks, loose connections, or improper seating, may still exist.
Testing the brake pedal both before and after starting the engine ensures that the booster is functioning as intended.
Conducting a careful road test in a safe environment verifies that the braking response is smooth and reliable.
It is absolutely crucial to dedicate sufficient time to a thorough inspection to ensure that the repair has been executed correctly and safely.
Read More:
- How to Fix Brake Booster Vacuum Leak
- How to Test Brake Booster Functionality
- How to Lubricate Brake Caliper Pins Properly
- How to Rebuild Brake Caliper at Home
- How to Check Brake Caliper Piston Movement
- How to Resurface Brake Rotors at Home
- How to Fix Brake Rotor Runout
- How to Check Brake Disc Runout
- How to Prevent Brake Fluid Boiling
Effective Tips for Making Replacement of Brake Booster Job Much Easier
1. Take Photos Before Removing Parts
Before removing any component, take clear photos of the brake booster area, including the master cylinder, vacuum hoses and pedal linkage.
These photos serve as a visual reference during reassembly and help you remember the correct placement and orientation of each part.
Modern vehicles often have limited space and many connections can look identical; therefore, having a reference helps avoid confusion later on.
This simple step can save time, minimize errors and give you greater confidence when putting everything back together.
2. Label Bolts and Clips
When removing bolts, nuts and clips, it is extremely helpful to label them or group them separately.
Different bolts may vary slightly in length or thread type and mixing them up poses a risk of improper fit or damage during reinstallation.
You can use small containers or bags and label them according to their original location.
This method keeps everything organized and makes the reassembly process much easier and faster, specially if the job takes longer than expected.
3. Use a Flashlight When Working Under the Dashboard
Accessing the brake pedal linkage by working under the dashboard can be challenging due to limited space and poor lighting.
Using a good flashlight allows you to clearly see connection points, clips and pins.
Proper illumination reduces the likelihood of overlooking small parts or installing them incorrectly.
It also minimizes eye strain and helps you maintain better control while maneuvering tools in tight spaces.
4. Work Slowly and Carefully
Taking your time and working carefully is one of the most essential tips for successfully completing any repair job.
Rushing through the process can lead to mistakes such as: loose connections, damaged parts, or missed steps.
As brake system components are directly linked to your safety, every step must be executed with the utmost care and patience.
Working in a systematic manner allows you to double-check your work, handle parts gently and ensure that everything is installed correctly to guarantee safe and reliable braking.
Conclusion – How to Replace Brake Booster
So, now you have clearly understood that how important it is to maintain the brake booster as it gives you full control over your vehicle in every situation.
The brake booster plays a direct role in reducing the physical effort required to bring your vehicle to a halt, meaning it has a profound impact on both safety and driving comfort.
When it begins to fail, symptoms such as a stiff brake pedal, increased stopping distances, or strange noises serve as clear warning signs that should never be ignored.
Addressing this issue in a timely manner not only restores smooth and reliable braking but also prevents undue strain on other critical components, such as the master cylinder and the entire braking system.
By observing safety precautions, utilizing the appropriate tools and verifying your work through proper testing, you can complete this task with complete confidence.
So, that’s all from this guide on How to Replace Brake Booster also you can comment down below for more information.
Frequently Asked Questions
FAQ 1: What exactly does a brake booster do in a car?
Answer: A brake booster utilizes vacuum pressure generated by the engine to help reduce the physical effort required to depress the brake pedal. Without it, you would have to apply significantly more force with your foot to bring the car to a stop. It makes braking smoother, lighter and more controlled, specially during sudden stops. Even if the booster fails, the brakes will still function; however, they become extremely difficult to operate and significantly less effective.
FAQ 2: Can I drive with a faulty brake booster?
Answer: Technically, you can drive with a faulty brake booster, but it is unsafe and should be avoided. A defective booster causes the brake pedal to become very stiff, meaning you will have to exert a great deal of force to stop the vehicle. This can increase your reaction time in emergency situations and result in a longer stopping distance. Over time, this can also place excessive strain on other components of the braking system, potentially exacerbating the problem.
FAQ 3: How long does it take to replace a brake booster?
Answer: For most vehicles, replacing a brake booster typically takes between two and four hours, depending on your level of experience and the specific design of the vehicle. In some cars, the replacement process is straightforward, while in others, it may take longer due to limited space under the dashboard. Rather than rushing, it is far more important to work slowly and carefully, specially as this is a critical safety-related task.
FAQ 4: Do I need to bleed the brakes after replacing a brake booster?
Answer: In most cases, if you do not disconnect the brake lines from the master cylinder, you do not need to bleed the brakes. If you carefully set the master cylinder aside without disconnecting it from the braking system, air will not enter the lines. However, if a brake line becomes disconnected or air infiltrates the system, bleeding the brakes becomes necessary to restore proper braking pressure.
FAQ 5: What are the main signs of a failing brake booster?
Answer: The most common signs include: a stiff brake pedal, a “hissing” sound when applying the brakes (as if air is escaping), increased stopping distances and fluctuations in the engine’s idle speed while braking. Some drivers also notice that the pedal does not return to its original position easily. These symptoms typically develop gradually; therefore, it is crucial to pay attention to them and address the issue before it poses a safety risk.
FAQ 6: How much does it cost to replace a brake booster?
Answer: The cost depends on the type of vehicle and whether you perform the work yourself or hire a professional. The price of a brake booster can range from moderate to expensive, depending on the vehicle model; however, if you have the work done at a repair shop, labor charges can significantly increase the total cost. Performing the work yourself can save money, but only if you possess the proper tools and are capable of completing the task correctly and safely.
FAQ 7: Why do brake boosters fail?
Answer: Brake boosters typically fail due to wear and tear on the internal diaphragm, vacuum leaks, or general deterioration over time. Heat, aging and constant use can weaken the internal components. Cracks in the vacuum hose or faulty seals can also compromise the booster’s ability to maintain adequate vacuum pressure. Regular inspections can help detect these issues before they lead to total system failure.
FAQ 8: How can I tell if the new brake booster is working correctly?
Answer: You can test the new booster by depressing the brake pedal before starting the engine to gauge its firmness; then, while keeping the pedal depressed, start the engine. If the pedal sinks slightly, it indicates that the booster is functioning properly. During a test drive, the brakes should feel smooth and responsive, requiring very little effort to engage. You should not hear any strange noises or feel any stiffness.
FAQ 9: Is replacing a brake booster a difficult task for beginners?
Answer: Replacing a brake booster is a somewhat challenging task; however, for beginners who exercise patience and follow instructions carefully, it is certainly an achievable undertaking. The most difficult part of the job involves working under the dashboard, where the pedal linkage must be disconnected and subsequently reconnected. With a few basic tools, proper safety precautions and close attention to detail, many people can successfully complete this task right at home.
References:
[1] Research of the vacuum brake booster working process
https://www.researchgate.net/publication/379057268_Research_of_the_vacuum_brake_booster_working_process

Hello Folks, Dean Shali here to help you out to solve the problems with your lovely vehicle, as i have lots of experience and knowledge about automotive industry as i woks directly with the customers and repair vehicles and i love to help the people to keep their cars safe and running smoothly.