Written By: Dean Shali
Fact Checked By: Sabré Cook
Reviewed By: Tamara Warren
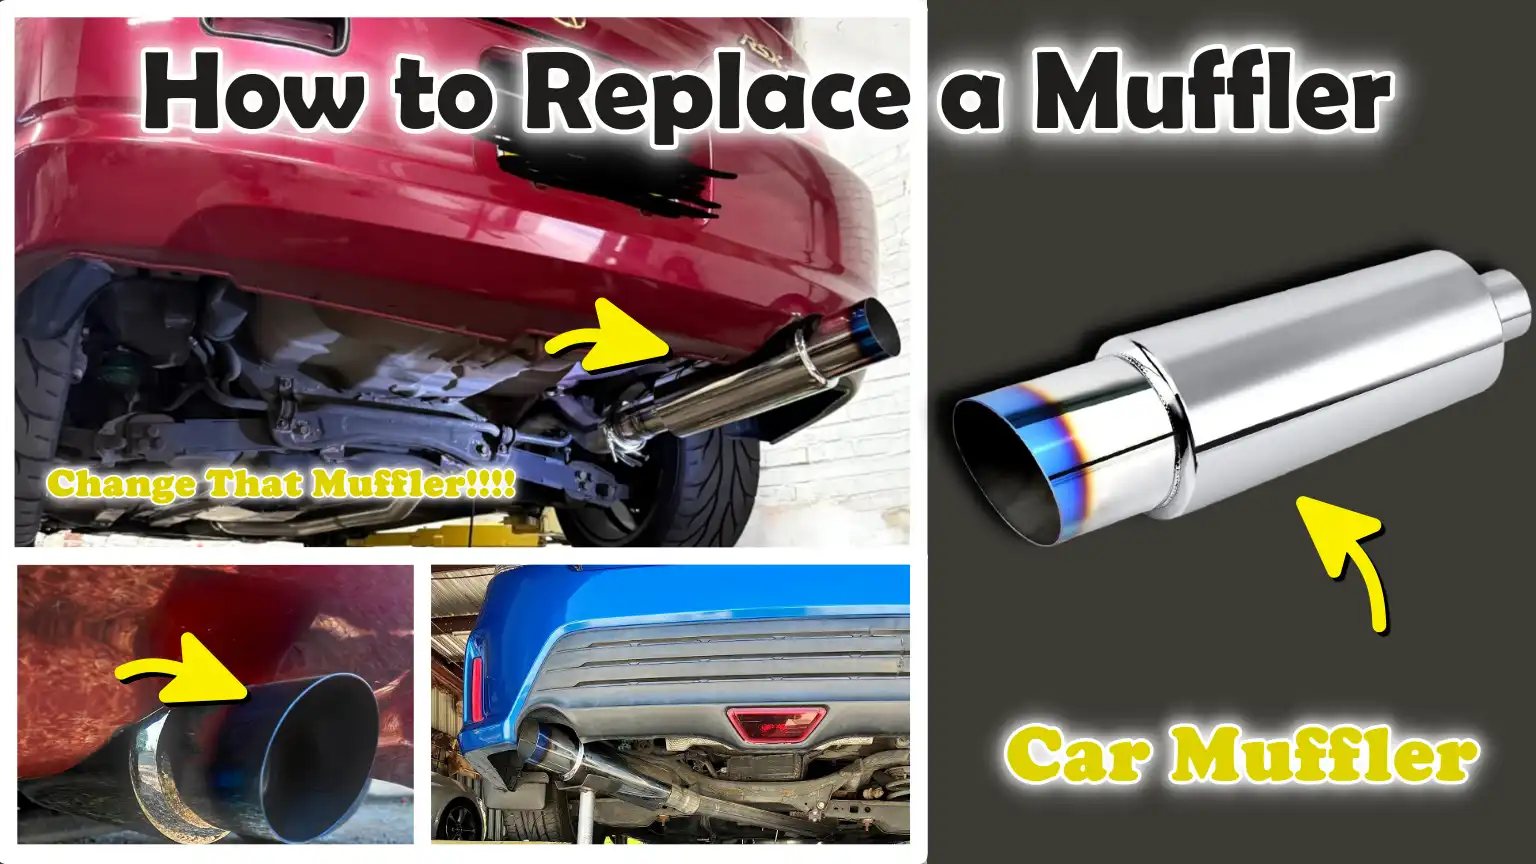
The Muffler is the part of your car’s exhaust system that actually reduces noise, controls all kinds of harmful emissions and actually helps them to maintain optimal engine performance as well.
But, if mufflers becomes rusty, if there’s cracks or holes due to the exposure to the moisture, road salt and high temperatures, then it can behave like a nonsense that can lead to loud noises, vibrations, reduces fuel efficiency and the risk of harmful exhaust leaks are always there.
Just, recognize the signs of a failing muffler early and you can actually avoid costly repairs and potential safety hazards as well.
Now, in this guide you’ll learn How to Replace a Muffler, that includes knowledge of proper tools, having safety measures and easy to follow method for diagnosing worn-out muffler to safely removal of the old and installation of a new one.
Common Signs That You Need to Replace Your Muffler
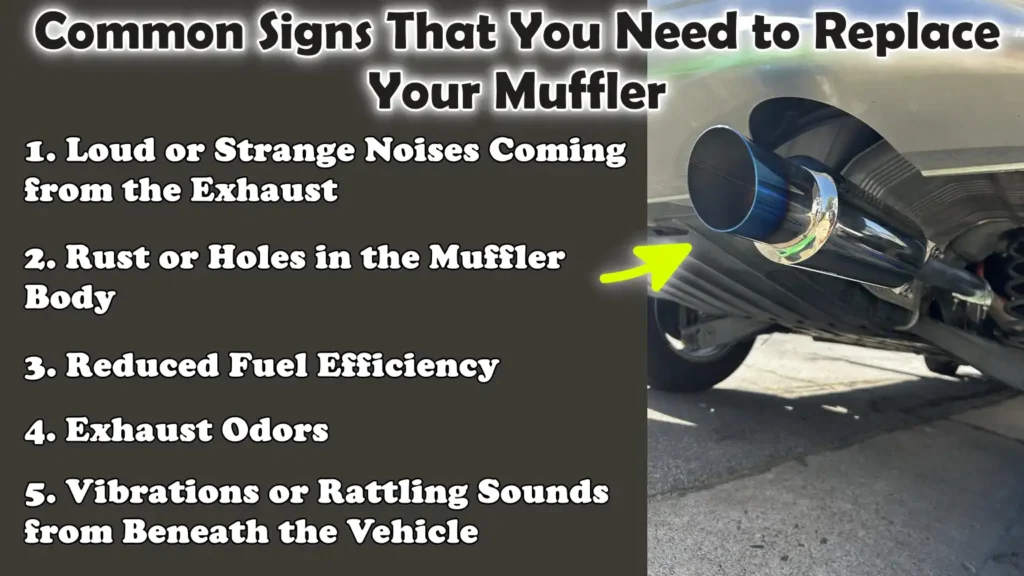
1. Loud or Strange Noises Coming from the Exhaust
The most common and easily recognizable sign of a failing muffler is a sudden increase in the volume of the exhaust sound.
A properly functioning muffler is designed to reduce and regulate the noise generated by the engine’s combustion process, ensuring that your car runs quietly and smoothly.
When the muffler develops cracks, internal defects, or holes, it is unable to properly absorb sound, resulting in loud rumbling, hissing, or popping noises.
This change typically occurs gradually; however, in some cases such as: when an internal component breaks, the noise level can escalate very rapidly.
Ignoring this issue not only makes driving uncomfortable but may also signal deeper problems within the exhaust system that could ultimately impact engine performance.
2. Rust or Holes in the Muffler Body
Mufflers are constantly exposed to heat, moisture, dust and road salt, making them highly susceptible to rust and corrosion.
Over time, this corrosion can weaken the metal and create visible holes or cracks on the surface.
Even small holes can allow exhaust gases to escape before being properly filtered, thereby compromising the efficiency of the exhaust system.
In many cases, corrosion begins from the inside out, often due to moisture accumulation, and gradually spreads outward, making it difficult to detect early on.
Conducting regular visual inspections of your muffler can help you identify these issues before they become severe.
However, once holes begin to appear, replacing the unit is usually the most reliable and long-lasting solution.
3. Reduced Fuel Efficiency
A faulty muffler can obstruct the proper flow of exhaust gases, directly impacting your engine’s operational efficiency.
When exhaust gases cannot exit the system freely, the engine is forced to work harder to maintain its performance, resulting in increased fuel consumption.
This means you may find yourself visiting the gas station more frequently, even if you haven’t altered your driving habits.
While there can be numerous reasons for a decline in fuel efficiency, a defective muffler or a clogged exhaust system is a common, and often overlooked, cause.
Repairing or replacing the muffler restores proper airflow, allowing the engine to operate more efficiently and resulting in fuel savings.
4. Exhaust Odors
Any strong or unusual odor emanating from your vehicle, particularly near the cabin or from underneath the car, could be a serious warning sign of a problem with the muffler.
The primary function of the muffler and exhaust system is to safely expel harmful gases, such as carbon monoxide, from the vehicle.
If gas leaks occur due to cracks or holes, these gases can disperse into unintended areas and may even seep into the passenger cabin.
This not only creates an unpleasant odor but, if left unaddressed, can also pose a serious health risk.
Any exhaust-related odors should be investigated immediately; replacing a faulty muffler is often essential for safe driving.
5. Vibrations or Rattling Sounds from Beneath the Vehicle
Strange vibrations or rattling sounds emanating from beneath your vehicle could indicate that the muffler or its supporting components have become loose or damaged.
The muffler is held in place by hangers and clamps; if these parts become worn or break, the muffler may vibrate excessively while the vehicle is in motion.
This movement can cause metal components to collide with one another, resulting in a rattling sound, a noise that becomes even more pronounced when accelerating or driving on rough roads.
In some instances, loose internal components within the muffler itself can also produce similar sounds.
Addressing these vibrations in a timely manner can prevent further damage to the exhaust system and help avoid costly repairs in the future.
Tools
| Tool / Material | Why It Is Needed | How to Use It Properly |
|---|---|---|
| Socket Set | This tool helps you remove and tighten the bolts and clamps that hold the muffler and exhaust pipe together. Without it, you cannot safely detach the old muffler. | Select the correct socket size that fits snugly onto the bolt. Turn it slowly to prevent damaging the bolt. Maintain steady pressure while loosening or tightening. |
| Wrench | This is useful for holding nuts in place or for working in tight spaces where a socket tool cannot easily reach. | Firmly position the wrench onto the nut or bolt. Turn it in the correct direction and maintain a strong grip to prevent it from slipping. |
| Car Jack | This lifts your car so that you can access the muffler located underneath it. This is essential because the exhaust system is mounted beneath the vehicle. | Position the jack under the car at the designated lifting point. Raise it slowly and carefully until you have sufficient clearance to work. |
| Jack Stands | This keeps the car safely elevated while you are working. Relying solely on the jack is unsafe, as it could fail or slip. | After lifting the car, place the jack stand beneath a sturdy support point. Gently lower the car onto the stand before beginning your work. |
| Lubricant (like WD-40) | This loosens rusted or seized bolts and clamps, a very common occurrence in exhaust systems due to exposure to heat and moisture. | Spray the lubricant onto the bolts and joints. Wait a few minutes to allow it to penetrate and loosen the rust before attempting to remove the components. |
| Hacksaw or Pipe Cutter | This becomes necessary if the old muffler is welded in place or is so heavily rusted that it cannot be easily removed. It facilitates a clean and precise cut through the pipe. | First, mark the specific location where the cut is to be made. Cut slowly and steadily, maintaining a consistent pace. Keep your hands steady and wear the necessary safety gear to prevent injury. |
| Replacement Muffler – OEM | OEM stands for ‘Original Equipment Manufacturer’ (genuine parts). These parts are designed to perfectly match your car, ensuring a precise fit and delivering optimal performance. | Install it in the exact same manner as the old muffler was installed. Secure it tightly using clamps or bolts, in accordance with the specific design requirements of your vehicle. |
| Replacement Muffler – Aftermarket | These alternatives are often more affordable or are designed with a greater focus on performance. They offer a wider range of options to choose from, although their installation may occasionally require minor modifications. | Before installing the part, be sure to verify its size and compatibility. Carefully align and position it to prevent leaks or improper seating. |
| Gloves | When working underneath the car, protect your hands from sharp edges, heat and grime. | Keep them on throughout the entire work process, specially when handling metal components or using cutting tools. |
| Safety Glasses | When working underneath the vehicle, protect your eyes from falling rust particles, dust, or debris. | Put them on before going underneath the car and keep them on until the work is completely finished. |
| Protective Clothing | This protects your skin from dirt, rust and the potential risk of burns from hot exhaust components. | Wear full-sleeved clothing and avoid wearing loose-fitting clothes, as they can get caught in tools or vehicle parts. |
How to Ensure Safety During Replacement of Car Muffler
1. Ensuring the car is on a level, stable surface
Before beginning any work on your muffler, it is crucial to park your car on a level and stable surface.
This ensures that the vehicle does not roll or shift while you are working underneath it.
Even a slight incline can cause the car to move suddenly, specially when it has been lifted.
A stable surface also helps the jack and jack stands maintain a firm grip on the car without slipping.
Always turn off the engine, engage the parking brake and, if possible, keep the wheels pointed straight ahead for added stability.
Taking this simple step significantly reduces the risk of accidents and makes the entire process safer and easier.
2. Using jack stands instead of relying solely on the jack
Car jacks are designed to lift a vehicle, but they are not intended to support the car’s weight for extended periods while you are working underneath it.
Relying solely on a jack can be dangerous, as it may lose pressure or slip without warning.
Jack stands provide sturdy and stable support, keeping the car safely elevated.
After lifting the car with a jack, you should always place jack stands beneath the designated support points and slowly lower the vehicle onto them.
This establishes a secure foundation and protects you from serious injury while working underneath the car.
3. Wearing appropriate safety gear
Working on a muffler involves handling metal parts, rust, dirt and sometimes sharp objects; therefore, wearing appropriate safety gear is essential.
Gloves help protect your hands from cuts and burns, while safety goggles shield your eyes from dust, rust particles, or debris that may fall while working underneath the vehicle.
Wearing clothing that completely covers your skin also reduces the likelihood of injury.
Although these simple safety measures may seem basic, they play a crucial role in preventing accidents and ensuring your comfort while working.
4. Waiting for the Exhaust to Cool Down Before Starting Work
The exhaust system, including the muffler, becomes extremely hot while the car is running and can remain hot for a considerable time even after the engine has been turned off.
Touching these components too soon poses a risk of severe burns.
It is absolutely essential to wait for the exhaust system to cool down completely before beginning any work.
In most cases, waiting at least 30 to 60 minutes is a safe practice.
You can carefully check whether the system is still hot by bringing your hand close to the muffler, without actually touching it.
Giving the system sufficient time to cool down ensures your safety and allows you to work with greater comfort and confidence.
How to Prepare Your Vehicle – Easy Way
1. Safely Lifting the Vehicle
Before replacing the muffler, properly lifting your vehicle is one of the most critical steps, as it provides safe and clear access to the exhaust system located underneath the car.
You should always use the appropriate car jack at the specific lifting points outlined in your vehicle’s owner’s manual; lifting from an incorrect location can damage the vehicle or render it unstable.
Lift the vehicle slowly and carefully, ensuring that it remains balanced at all times.
Once lifted, place jack stands beneath sturdy support points and gently lower the vehicle onto them so that its entire weight rests on the stands.
This step is vital, as it prevents sudden drops and allows you to work comfortably and without risk.
Additionally, ensure there is sufficient clearance beneath the vehicle to allow for easy movement of your hands and tools, enabling you to complete the task more efficiently.
2. Locating the Muffler and Exhaust System
Before removing anything, you must clearly identify the location of the muffler and understand how it connects to the rest of the exhaust system.
The muffler is typically situated near the rear of the vehicle, connected to a series of pipes.
These pipes channel exhaust gases from the engine toward the rear of the vehicle.
This piping assembly includes components such as the catalytic converter and resonator, all of which work together to regulate emissions and noise levels.
Understanding this configuration helps avoid confusion and ensures that you do not accidentally remove the wrong component.
Take a few minutes to visually trace the exhaust piping from the engine all the way to the rear of the vehicle, observing how the muffler is connected.
This preliminary inspection will provide you with a clear understanding of the system’s configuration and make the replacement process significantly easier.
3. Inspecting Hangers and Clamps
Hangers and clamps are small yet critical components that securely hold the muffler and exhaust pipes in place.
Over time, due to constant exposure to heat and vibration, these parts can wear out, corrode, or become loose.
Before beginning the replacement process, carefully inspect the rubber hangers supporting the muffler and the metal clamps that firmly hold the pipe joints together.
If a hanger is broken or stretched, it may fail to adequately support the new muffler, potentially leading to rattling noises while driving or causing the muffler to shift out of position.
Similarly, damaged or corroded clamps cannot properly seal the pipe joints, which may result in exhaust gas leaks.
Inspecting these components in advance allows you to replace any defective parts immediately, thereby ensuring a secure fit and long-term durability for the new muffler.
How to Remove the Old Muffler
1. Spraying Penetrating Oil on Bolts and Clamps to Loosen Rust
Before attempting to remove the muffler, it is crucial to address any rusted bolts and clamps; as exhaust components are constantly exposed to heat, water and dirt, they tend to seize up over time.
Spraying a penetrating oil such as: WD-40, helps break down the rust and allows the oil to seep into the tight spaces between the metal parts.
This makes it significantly easier to turn the bolts without breaking them.
After spraying, you should wait at least a few minutes to allow the oil to take effect.
For heavily rusted parts, applying the oil multiple times and allowing it more time to penetrate can make a significant difference.
This simple step minimizes the risk of damaging the bolts and saves time during the removal process.
2. Removing Exhaust Clamps or Bolts
Once the bolts and clamps have been loosened, the next step is to carefully separate the muffler from the rest of the exhaust system.
Most mufflers are secured using metal clamps or bolts, which hold the pipes tightly together to prevent leaks.
Using a properly sized socket or wrench, turn the bolts slowly and steadily to avoid stripping or breaking them.
If a bolt feels excessively tight, do not force it, as this could cause it to snap and make the job even more difficult.
Instead, apply a little more penetrating oil and try again.
Taking your time during this step ensures that no damage is inflicted upon the surrounding exhaust components, allowing them to be reused if necessary.
3. Carefully Removing the Muffler from the Hangers
Even after removing the clamps or bolts, the muffler remains suspended by rubber hangers, which support its weight and dampen vibrations.
Over time, these hangers can stiffen or wear out, making them difficult to detach.
To safely remove the muffler, you must gently slide it out of the hangers while simultaneously supporting its weight with your hands.
Pulling too forcefully can damage the rubber or cause the muffler to drop suddenly.
In some cases, applying a small amount of lubricant to the hanger rods can make sliding the muffler out significantly easier.
Carefully removing the muffler prevents damage to surrounding components and ensures that the process remains smooth and controlled.
4. Tips for Stuck or Rusted Mufflers
Often, a muffler can become stuck due to excessive rust or because the pipes have seized together tightly over time.
When this occurs, patience and the use of proper techniques are essential.
Reapplying penetrating oil and gently rocking the muffler back and forth can help loosen the joint.
If it still does not budge, lightly tapping the joints with a rubber mallet can break the grip of the rust without damaging the pipes.
In some particularly stubborn cases where the muffler cannot be separated, it may be necessary to cut the pipe using a hacksaw or a pipe cutter.
When cutting, it is crucial to select the correct location and make a clean, straight cut to ensure that the new muffler fits properly.
Handling stuck components with care prevents unnecessary damage and ensures that the replacement process is completed successfully.
How to Install the New Muffler
1. Comparing the Old and New Mufflers for a Proper Fit
Before installing a new muffler, it is crucial to carefully compare it with the old one to ensure that its size, shape and mounting points match those of the original muffler.
Even a slight discrepancy in pipe diameter or length can create installation difficulties or lead to exhaust leaks later on.
The positioning of the inlet and outlet ports must be identical to those of the old muffler to ensure a seamless connection with the existing exhaust piping.
It is also essential to verify the placement of the hanger rods, as they must align and fit correctly into the corresponding rubber mounts located beneath the vehicle.
Spending a few minutes comparing the two components can prevent installation errors and ensure that the new muffler fits properly without requiring any major modifications.
2. Sliding the New Muffler into Position and onto the Hangers
Once you have confirmed a proper fit, the next step is to carefully maneuver the new muffler into its designated location beneath the vehicle.
Begin by aligning the hanger rods with the rubber hangers and gently sliding them into place.
This step supports the weight of the muffler and keeps it stable while you connect the exhaust pipes.
It is important to hold the muffler firmly and handle it with care to avoid damaging the hangers or any surrounding components.
If the fit feels a bit tight, applying a small amount of lubricant to the hanger rods can make this process easier.
Proper positioning during this stage ensures that the muffler remains securely anchored in place, thereby minimizing the likelihood of it shifting or rattling later on.
3. Tightening Clamps and Bolts
Once the muffler is in place, you must secure it to the exhaust pipe using clamps or bolts.
These connections must be sufficiently tight to prevent any exhaust gases from escaping.
Position the clamps evenly around the pipe joints and tighten them gradually, ensuring that the joint remains straight.
If using bolts, tighten them firmly, but do not overtighten, as excessive force can strip the bolt threads or crush the pipe.
A secure connection is critical; even a minor gap can lead to noise, reduced performance and the leakage of harmful gases from the system.
Taking your time during this step ensures a robust and leak-proof connection.
4. Ensuring Proper Alignment and Adequate Clearance
The final step involves verifying that the new muffler is correctly aligned and maintains sufficient clearance from other parts of the vehicle.
The muffler and pipes must not come into contact with the vehicle’s body, suspension, or other components, as this can result in vibrations, rattling noises, or even damage while driving.
There should be a small but distinct gap surrounding the muffler to allow heat to dissipate safely.
Before fully tightening all clamps and bolts, make any necessary minor adjustments to their positioning.
Proper alignment not only enhances performance but also ensures a quiet and comfortable driving experience, free from unnecessary noise or vibration.
Read More:
- How to Fix an Exhaust Leak
- How to Replace an Exhaust System
- How to Fix Grinding Gears
- How to Replace a Clutch
- How to Change Transmission Fluid
How to Check Your Work With the New Muffler
1. Checking for Leaks or Loose Connections
After installing a new muffler, it is crucial to carefully inspect all connections to ensure that everything is properly sealed.
Even a small gap between pipes or a slightly loose clamp can allow exhaust gases to escape, potentially reducing performance and emitting harmful fumes.
You should closely examine every joint where the muffler connects to the exhaust system, ensuring that all clamps and bolts are securely tightened and correctly positioned.
An easy way to check for leaks is to feel for escaping air around the joints while the engine is running; however, this must be done cautiously and from a safe distance, as exhaust gases can be extremely hot.
A properly sealed system will not only keep the car quiet but also ensure that harmful gases are safely vented away from the vehicle.
2. Safely Lowering the Car
Once you are confident that everything is properly connected, the next step is to safely and in a controlled manner lower the car back down to the ground.
Begin by using the jack to lift the vehicle slightly so that you can remove the jack stands.
After removing them, use the jack to slowly lower the car, ensuring that it descends smoothly and evenly.
Lowering the vehicle suddenly or unevenly can cause it to shift or place unnecessary stress on the newly installed components.
Before proceeding to the next step, it is essential to ensure that the car is completely stable on the ground, this is vital both for safety and for maintaining accuracy while performing a final check of your work.
3. Starting the Engine to Check for Noise and Vibration
The final step is to start the engine and observe the sounds and sensations emanating from the vehicle.
A properly installed muffler will significantly reduce noise and produce a smooth, steady exhaust note, free from any loud rumbling or rattling.
Listen carefully for any unusual sounds, as they may indicate a loose connection or misalignment.
You should also pay attention to vibrations, particularly those originating from beneath the vehicle, as excessive vibration could mean that the muffler is not securely fastened or is making contact with another component.
Allow the engine to run for a few minutes and, if possible, lightly depress the accelerator to observe how the exhaust system performs under a light load.
This final check helps confirm that the installation was successful and that your vehicle is operating safely, quietly and efficiently.
How to Maintain Your Muffler to Extend Its Life Period
Plus, there’s data that shows that you should never ignore damaged muffler, as large portion of vehicle noise comes from the exhaust system, so even if there’s small muffler damage can lead to some noticeable increase in sound, that’s why you should replace the muffler to ensure the vehicle always stays within the safe noise limits and provides a truly comfortable driving experience throughout the journey.[¹]
1. Avoid Short Trips That Cause Moisture Buildup
Short trips may seem harmless, but they are one of the primary causes of premature muffler failure.
When you start your car, moisture is generated inside the exhaust system as a natural byproduct of fuel combustion.
On short trips, the muffler does not get hot enough to completely evaporate this moisture, causing water to remain trapped inside the system.
Over time, this trapped moisture leads to internal corrosion, which often remains invisible until significant damage has already occurred.
Occasionally taking your car on longer trips raises the temperature of the exhaust system, allowing the moisture to evaporate and keeping the interior of the muffler dry.
This simple habit can significantly extend the lifespan of your muffler.
2. Regular Inspections for Rust and Damage
Regularly inspecting your muffler is a highly effective way to catch minor issues before they escalate into major problems requiring expensive repairs.
As the muffler is located underneath the car, it is constantly exposed to dirt, water and road salt, all of which accelerate the corrosion process.
By visually inspecting the muffler every few weeks, or during routine maintenance, you can spot early warning signs such as surface rust, small cracks, or loose connections.
Detecting these issues early allows you to fix minor flaws before they develop into holes or major leaks.
Regular inspections not only help extend the life of the muffler but also ensure that your exhaust system continues to operate safely and efficiently.
3. Use of Anti-Rust Coatings or Products
Applying anti-rust coatings or protective products can provide an additional layer of defense against corrosion.
These coatings are designed to shield metal surfaces from moisture and environmental damage, the primary causes of rust formation.
When applied correctly, they create a barrier that slows down the rusting process and helps maintain the structural integrity of the muffler over time.
It is crucial to clean the muffler’s surface thoroughly before applying any coating to ensure proper adhesion and effective performance.
While these products cannot make a muffler last forever, they can significantly extend its lifespan and reduce the likelihood of premature deterioration, particularly in regions with high humidity or where frequent exposure to water is common.
Know, The Common Problems With Muffler & Their Easy Solutions
1. Damaged Hangers
Muffler hangers are small yet crucial components that hold the exhaust system in place and absorb vibrations generated while driving.
These hangers are typically made of rubber and are designed to be flexible; however, due to constant exposure to heat and movement, they can wear out, crack, or stretch over time.
When a hanger fails, the muffler may sag or hang lower than usual, placing excessive strain on the exhaust pipes and joints.
If left unaddressed, this can lead to further damage.
You may notice unusual movement beneath the vehicle or hear a rattling sound while driving over rough terrain.
Replacing worn or broken hangers is a simple yet essential maintenance task that helps keep the muffler stable and prevents more serious issues within the exhaust system.
2. Post-Installation Exhaust Leaks
Exhaust leaks following the installation of a new muffler are a common issue, particularly if the joints have not been properly sealed.
These leaks typically occur at the points where the muffler connects to the exhaust pipes.
If the clamps are not tightened sufficiently or the pipes are not aligned correctly, exhaust gases can escape through small cracks or gaps.
This can result in a hissing sound, reduced engine performance and even allow harmful gases to escape into areas where they should not reach.
In some instances, you may also observe a decrease in fuel efficiency.
To resolve this issue, it is essential to double-check all clamps and bolts, ensuring they are tightened uniformly, and to verify that the pipes are securely connected to one another.
A proper seal ensures that the exhaust system operates both efficiently and safely.
3. Misaligned Muffler: Rattling or Rubbing Sounds
A misaligned muffler can generate excessive noise while driving and become a significant source of annoyance.
If the muffler is not positioned correctly during installation, it may come into contact with the vehicle’s body, suspension components, or other parts located beneath the vehicle.
This can result in rattling sounds, particularly when the engine is running or when the vehicle is traveling over rough terrain.
In more severe cases, if the muffler hangs too low, it may scrape against the ground, creating a risk of damage to both the muffler and the vehicle itself.
Proper alignment of the muffler is crucial, as the exhaust system requires adequate clearance to safely manage the heat and vibrations it generates.
Correcting the muffler’s position, and ensuring that all hangers and clamps are securely tightened, as it can resolve this issue and restore a comfortable, quiet driving experience.
Conclusion – How to Replace a Muffler
Literally, you can easily fix those muffler and save hell lot of dollars by preventing from bigger repairs later on, that also eliminated louder noise and serious safety risks as well.
The muffler plays a crucial role in reducing noise, controlling harmful emissions and ensuring your engine runs efficiently; therefore, keeping it in good condition is essential for both performance and safety.
By recognizing common symptoms of failure such as: excessive noise, rust, leaks and vibrations, you can take timely action and avoid larger, more costly problems.
Following the correct procedure to remove the old muffler, carefully installing the new one and verifying your work ensures that your exhaust system functions properly and safely.
Certain simple habits such as: performing regular maintenance, avoiding short trips and checking for any damage, as it can also extend the lifespan of your muffler.
So, that’s it from this guide about How to Replace a Muffler, now if you still have unsolved queries; then just comment it down.
Frequently Asked Questions
FAQ 1: What does a muffler do in a car and why is it important?
The muffler is an essential component of your car’s exhaust system that reduces the loud noise generated during the engine’s combustion process. It utilizes a series of chambers and tubes to control and dampen sound waves, ensuring that your car operates quietly. In addition to noise reduction, it also assists in safely channeling harmful exhaust gases away from the vehicle. A properly functioning muffler makes driving more comfortable, improves engine efficiency and helps your car comply with noise and emission standards. Without a properly functioning muffler, your car would be excessively loud and less safe to drive.
FAQ 2: How do I know if my muffler needs to be replaced?
You can identify a faulty muffler by paying attention to a few common signs. If your car suddenly becomes significantly louder than usual, it often indicates that the muffler has deteriorated. You may also observe rust, holes, or cracks on the body of the muffler itself. Other indicators include a strong odor emanating from the exhaust, increased fuel consumption, or vibrations and rattling noises coming from underneath the car. If you notice any of these symptoms, it is advisable to have the muffler inspected and replaced if necessary to prevent further damage.
FAQ 2: Can I replace the muffler myself at home?
Yes, provided you have the basic tools and adhere to proper safety protocols, you can replace the muffler yourself at home. This process involves safely lifting the vehicle, removing the old muffler and installing the new one with correct alignment and secure connections. However, you should exercise caution when working underneath the vehicle and ensure that the exhaust system has cooled down completely before you begin the work. If the bolts are heavily rusted or the muffler is welded in place, the task may become more difficult and could require additional tools or the assistance of a professional.
FAQ 3: How long does a muffler typically last?
On average, a muffler can last anywhere from 5 to 7 years; however, its lifespan depends on driving conditions and maintenance. Mufflers in cars driven primarily for short trips may deteriorate more rapidly, as moisture tends to accumulate inside the exhaust system. Exposure to water, dirt and road salt can also lead to corrosion over time. Regular inspections and proper care can help extend the life of your muffler and prevent the need for premature replacement.
FAQ 4: What happens if I drive with a damaged muffler?
Driving with a damaged muffler can lead to a variety of issues. The most significant problem is excessive noise, which can make driving uncomfortable and may even be illegal in certain jurisdictions. A damaged muffler can also result in exhaust leaks, allowing harmful gases such as: carbon monoxide to seep into the vehicle’s cabin. This poses a serious health risk. Furthermore, a malfunctioning exhaust system can negatively impact engine performance and fuel efficiency.
FAQ 5: How much does it cost to replace a muffler?
The cost of replacing a muffler can vary depending on your car’s make and model, as well as the specific type of replacement muffler you choose. A standard replacement muffler is typically more affordable, whereas high-performance or aftermarket options may come with a higher price tag. If you choose to replace the muffler yourself, you can save on labor costs. However, if you hire a professional to perform the work, the total expense will include both parts and labor charges. While costs may vary, replacing a muffler is generally less expensive than repairing a major fault in the exhaust system later on.
FAQ 6: Do I need to replace other exhaust parts along with the muffler?
In some cases, you may only need to replace the muffler; however, it is always a good idea to inspect other parts of the exhaust system at the same time. Components such as clamps, hangers and pipes can wear out or rust right alongside the muffler. If these parts are damaged, replacing them simultaneously ensures a better fit and helps prevent future issues. This also helps maintain a proper seal and improves the overall performance of the exhaust system.
FAQ 7: Why is my new muffler still making noise after installation?
If your new muffler is still making noise, the cause is usually loose connections, misalignment, or minor leaks within the exhaust system. Even a small gap between pipes can produce rattling or clanking sounds. It is essential to check all clamps and bolts to ensure they are securely tightened. Additionally, verify that the muffler is not coming into contact with any other part of the vehicle, as this can cause vibrations. Resolving these minor issues typically resolves the problem, allowing the vehicle to run quietly once again.
References:
[1] A review on acoustic performance analysis of reactive muffler
https://www.sciencedirect.com/science/article/abs/pii/S221478532202404X

Hello Folks, Dean Shali here to help you out to solve the problems with your lovely vehicle, as i have lots of experience and knowledge about automotive industry as i woks directly with the customers and repair vehicles and i love to help the people to keep their cars safe and running smoothly.