Written By: Dean Shali
Fact Checked By: Sabré Cook
Reviewed By: Tamara Warren
Just listen this: a vehicle’s entire electrical system actually depends on a connection no wider than your finger, that’s why if there’s any kind of corrosion then it can be enough to disrupt that connection completely.
As well as, it is really important that electricity must travel freely from the battery to the starter motor and the rest of the electrical system as well.
Otherwise, it will slow down the cranking and dim the electrical system such as: advanced computers, sensors and electronic controls as well.
So, corrosion on the battery cables seen in white, blue or green deposit as well, all around the battery terminals that can gradually increases the electrical resistance, that restricts the current flow, reduces the charging efficiency and literally creates a wide range of performance issues as well.
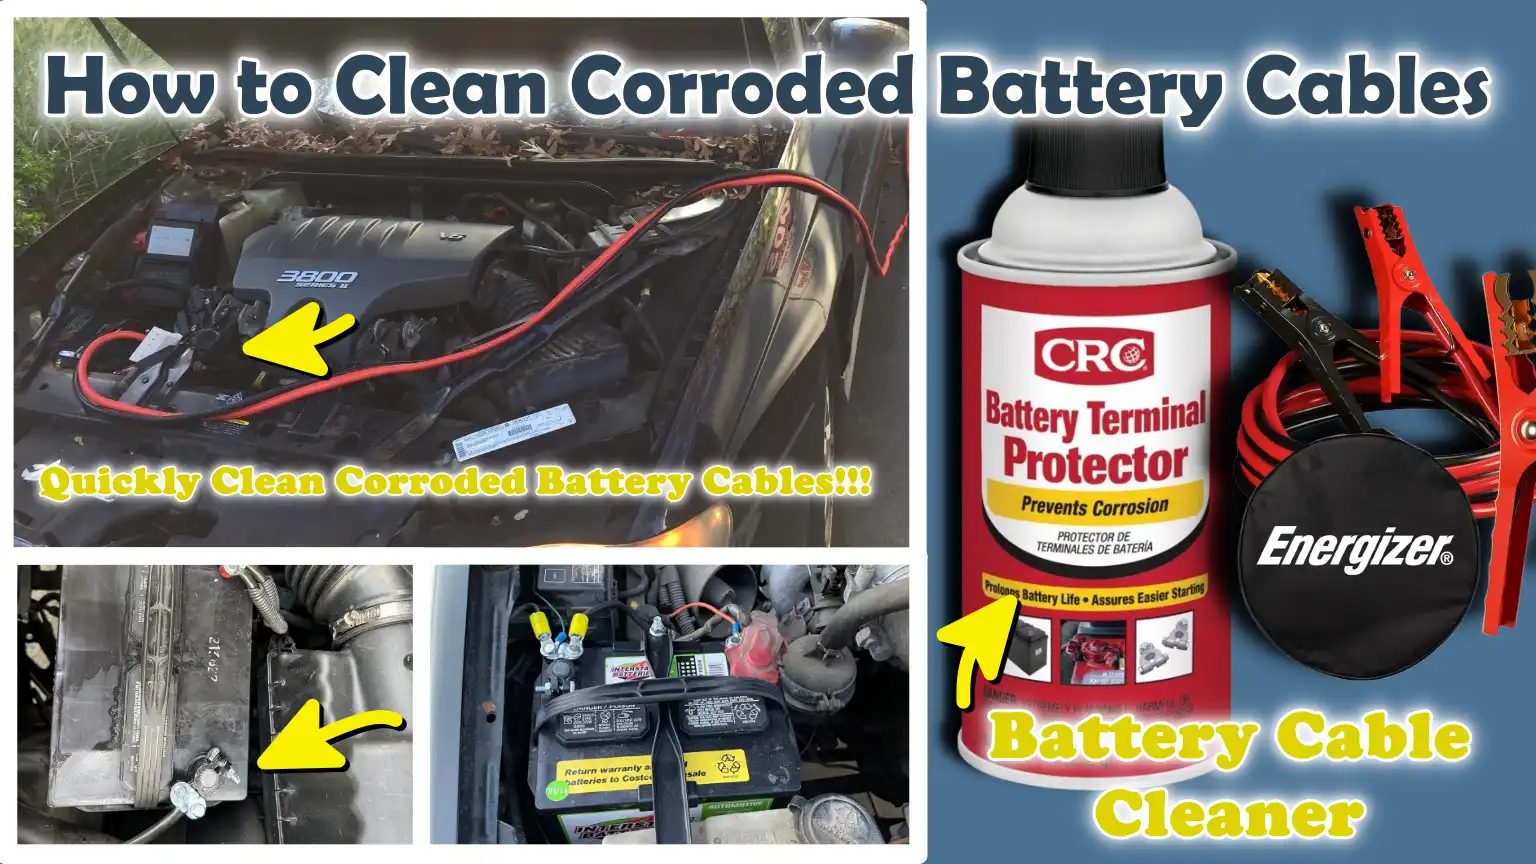
Now, in this guide you’ll learn How to Clean Corroded Battery Cables, so that you can end the corrosion to the battery cable itself and restrict them to spread into the cable ends and connectors as well.
Why Do Battery Cables Corrode?
Battery cables corrode when battery acid fumes, moisture, heat and contaminants present in the surrounding environment react with the battery’s metal terminals and cable connections.
This corrosion typically manifests as a white, blue, or green powdery layer, which obstructs the flow of electricity between the battery and the vehicle.
As corrosion accumulates, electrical resistance increases, leading to slow engine cranking, difficulty starting the vehicle, charging issues and an overall decline in battery performance.
Understanding the primary causes of corrosion allows you to prevent damage and keep your battery connections in good working order.
1. Battery Acid Leaks
Battery acid leakage is one of the most common causes of corrosion on battery cables.
Lead-acid batteries contain an electrolyte solution composed of sulfuric acid and water.
During normal battery operation, a small amount of acid fumes may escape through the battery vents and settle on the surrounding terminals and cable ends.
When this acid reacts with the metal surfaces, corrosion begins to form.
Acid leakage can become even more severe if the battery develops cracks, seals deteriorate, vent caps become loose, or excessive pressure builds up inside the battery.
Older batteries are more prone to emitting electrolyte fumes.
Even a small amount of leaked acid can initiate the corrosion process, which gradually degrades the electrical connections and negatively impacts battery performance.
2. Overcharging Issues
When a battery becomes overcharged, it can release excessive amounts of hydrogen and oxygen gases.
As these gases escape the battery, they often carry acidic fumes with them, which accumulate around the terminals and cable connections.
This accelerates the corrosion process and leads to the formation of deposits at a rate far faster than normal.
Overcharging issues are often caused by a faulty alternator, voltage regulator, or charging system.
In addition to promoting corrosion, excessive charging can also reduce the battery’s lifespan and damage its internal components.
If corrosion appears repeatedly on the terminals, it may be an indication that the charging system needs to be inspected.
3. Age and Wear
As a battery ages, corrosion-related problems tend to increase.
After several years of use, the battery’s seals, vents and internal components naturally wear down, allowing larger quantities of electrolyte fumes to escape.
This creates an ideal environment for corrosion to form around the battery terminals and cable ends.
Older batteries are also subjected to greater heat, vibration and environmental stressors, all of which contribute to corrosion.
If corrosion returns quickly even after cleaning, it may signify that the battery is nearing the end of its useful life and requires a thorough inspection.
4. Moisture and Environmental Factors
Another primary cause of corrosion on battery cables is moisture.
Humidity, rainwater, condensation and road spray can accumulate around battery terminals, creating conditions that accelerate chemical reactions on metal surfaces.
When moisture combines with dirt, dust and acidic gases emitted by the battery, the corrosion process can occur very rapidly.
Environmental factors can further exacerbate this problem.
Road salt used during winter, the salty air in coastal regions and high humidity levels can significantly accelerate the corrosion process.
Seasonal temperature fluctuations also contribute to this by increasing condensation and battery gassing, making it essential to inspect the battery regularly throughout the year.
Signs Shows That Your Battery Cables Are Corroded
Corrosion on battery cables does not always cause an immediate vehicle breakdown.
In many cases, it develops gradually, presenting warning signs that become increasingly evident over time.
Corrosion acts as a barrier between the battery and the vehicle’s electrical system, disrupting the proper flow of electricity.
As this obstruction grows, the battery may struggle to deliver the necessary power to the starter motor, lights and various electronic components.
By recognizing the early signs of battery cable corrosion, you can address the issue before it escalates, thereby avoiding situations involving a failure to start or costly electrical repairs.
1. White, Blue, or Green Deposits on the Terminals
The most obvious sign of battery cable corrosion is the accumulation of a white, blue, or green powdery substance around the battery terminals or cable ends.
These deposits form when battery acid fumes react with metal components to create corrosive compounds.
Although these deposits may appear dry and flaky, they can significantly compromise the electrical connection between the battery and the cables.
The presence of even a small amount of corrosion indicates that a chemical reaction is taking place and should be remedied before it spreads further.
2. Slow Engine Starting
If the engine turns over (cranks) more slowly than usual when you attempt to start the vehicle, corroded battery cables may be obstructing the flow of electricity.
The starter motor requires a substantial amount of power to turn the engine over and corrosion increases electrical resistance within the connection.
Consequently, the starter may not receive its full operating voltage, resulting in a slow start or a delay in the engine firing up.
This symptom is often one of the earliest indicators of an issue with the battery connections.
3. Difficulty Starting the Vehicle
Faulty battery cables can make starting the vehicle difficult, particularly in cold weather when the battery is already under increased strain.
It may require multiple attempts to crank the engine; the engine might hesitate before starting, or it may fail to start altogether.
As corrosion diminishes the battery’s ability to conduct electricity, the starter motor and ignition system do not receive the necessary power to function correctly.
4. Dim Headlights and Electrical Issues
When corrosion interferes with battery connections, all of the vehicle’s electrical components may receive reduced voltage.
Consequently, the headlights may appear dimmer than usual, specially while the engine is cranking or when multiple electrical accessories are in use.
Drivers may also notice dim interior lights, sluggish power windows, malfunctioning electronics, or erratic behavior in various electrical systems.
These issues often arise because the vehicle is not receiving a consistent supply of electrical power.
5. Dashboard Battery Warning Light
A lit battery warning light on the dashboard can sometimes serve as an indicator of corrosion on the battery cables.
When corrosion prevents the charging system from functioning properly, the battery fails to charge effectively even while the engine is running.
The vehicle’s monitoring system detects abnormal voltage levels and triggers the warning light.
Although this light may also signal issues with the alternator or the battery itself, corroded battery cable connections should always be inspected during the troubleshooting process.
6. Intermittent Power Loss
One of the most frustrating signs of corrosion on battery cables is intermittent power loss.
Severely corroded or loose connections can cause the electrical contact to suddenly disconnect and reconnect.
Consequently, lights may flicker, power to accessories may be temporarily interrupted, a warning light on the dashboard may suddenly illuminate, or starting the vehicle may suddenly become difficult.
As the connection is intermittent, these symptoms can appear and disappear without warning; as a result, diagnosing the problem becomes difficult until the battery cables have been thoroughly inspected.
Tools
| Tools | Why It Is Needed | How to Use It |
|---|---|---|
| Safety Glasses | Battery corrosion may contain acid residues, which can become airborne when rubbed or cleaned. Even tiny particles can cause irritation or injury to your eyes. Safety goggles help protect your eyes from corrosion, dust, cleaning solutions and sudden splashes. | Put on safety goggles before opening the hood and keep them on throughout the entire cleaning process. Ensure they fit properly and completely cover your eyes. |
| Protective Gloves | Battery corrosion often contains acidic compounds that can cause skin irritation. Gloves also protect your hands from dirt, grime, sharp metal edges and cleaning chemicals. | Put on chemical-resistant or heavy-duty work gloves before touching the battery, terminals, or cleaning solution. Keep them on until the work is completely finished. |
| Baking Soda | Baking soda is the most effective and economical way to neutralize battery acid. It helps halt the chemical reaction that causes corrosion and makes it easier to remove accumulated residue. | To prepare the cleaning solution, mix a small amount of baking soda with water. Apply it directly to the corroded areas and allow it to react with the accumulated residue before scrubbing. |
| Water | Water helps dissolve the baking soda, activate the cleaning solution and rinse away loosened corrosion and residue. Clean water also helps prevent residue from accumulating on the terminals. | Mix water with the baking soda to create the cleaning solution. After scrubbing, use a small amount of water to rinse away any remaining residue, then thoroughly dry the area. |
| Battery Terminal Cleaner | Battery terminal cleaner is specifically formulated to remove accumulated corrosion, dirt, grease and oxidation from battery connections. It can clean stubborn residues more effectively and rapidly compared to standard household cleaning solutions. | Following the product instructions, spray or apply the cleaner directly onto the battery terminals and cable ends. Allow it to sit for the recommended duration before scrubbing and wiping it clean. |
| Wire Brush or Battery Terminal Brush | Rust often adheres firmly to metal surfaces and cannot be removed merely by wiping. A wire brush helps restore contact with the bare metal by physically removing rust deposits. | Gently scrub the battery terminals and cable ends until the rust is removed and the clean metal surfaces become visible. Avoid applying excessive force, as this could damage the terminals. |
| Clean Rags or Paper Towels | After cleaning, any moisture and rust residue must be completely removed. A clean cloth or paper towel helps dry the terminals and removes any remaining grime, thereby preventing the risk of future corrosion. | Use these materials to wipe away loose rust, excess cleaning solution and moisture. Continue wiping until the battery terminals and cable ends are completely clean and dry. |
Ensure Safety Before Cleaning Battery Cables
Cleaning corroded battery cables is generally a simple maintenance task, but it should never be undertaken without proper safety precautions.
A vehicle’s battery stores a significant amount of electrical energy and contains sulfuric acid, which can cause injury if not handled correctly.
Furthermore, batteries can emit hydrogen gas during normal operation and under certain conditions, this gas is highly flammable.
Taking a few minutes to prepare properly can help prevent electrical short circuits, exposure to chemicals and accidental damage to the battery or the vehicle.
Adhering to these safety precautions will make the cleaning process safer, easier and more effective.
1. Park the Vehicle Safely
Before beginning any battery maintenance work, park the vehicle on a level and stable surface.
A level parking area helps ensure that the vehicle does not shift unexpectedly while you are working under the hood.
Engage the parking brake and place the transmission in ‘Park’ mode for automatic vehicles, or in gear for manual vehicles.
If the vehicle has been driven recently, allow the engine compartment to cool down before touching any components.
It is also essential to work in a well-ventilated area, as batteries can emit gases that should not be allowed to accumulate in enclosed spaces.
2. Turn Off the Engine and Electronics
Always turn off the engine completely before cleaning the battery cables.
Even when the engine is not running, the battery remains connected to various electrical systems; therefore, it is also a good idea to turn off the headlights, interior lights, radio, climate controls and any other accessories.
This reduces the risk of electrical sparks and prevents unnecessary power drain while you are handling the battery connections.
Never attempt to disconnect or clean battery cables while the engine is running.
3. Wear Safety Gear
Safety gear is an essential part of battery maintenance, as accumulated corrosion may contain acid residues that can cause irritation to the skin and eyes.
Safety goggles help protect your eyes from dust, corrosion particles and accidental splashes during the cleaning process.
Safety gloves act as a barrier between your skin and the potentially harmful substances present on the battery terminals.
Wearing appropriate safety gear not only enhances safety but also allows you to work around battery components with greater confidence.
4. Avoid Contact with Battery Acid
Battery acid is highly corrosive and can damage skin, clothing, painted surfaces and vehicle components.
Corrosion often accumulates around battery terminals as acidic fumes emitted by the battery react with surrounding metal parts.
If you observe any wet spots, leaking fluid, or excessive corrosion, avoid touching the area directly.
If battery acid comes into contact with your skin, immediately and thoroughly rinse the affected area with plenty of clean water.
If acid splashes into your eyes, they must be rinsed immediately with water and you should seek medical attention without delay.
5. Stay Away from Sparks and Open Flames
Vehicle batteries can generate hydrogen gas while charging and during normal operation.
Although the volume is typically small, hydrogen is highly flammable and can ignite if it comes into contact with sparks, open flames, or burning objects such as cigarettes or cigars.
Avoid using tools near the battery that could generate sparks and never smoke while performing battery maintenance.
Properly isolating the battery cables and exercising caution when working with metal tools helps minimize the risk of sudden fires.
6. Check the Battery for Any Damage
Before cleaning the terminals, carefully inspect the battery for any signs of external damage.
Look for cracks in the battery casing, bulges, electrolyte leakage, damaged terminals, or loose connections.
Cleaning a damaged battery may not be safe and it may instead require replacement.
Visible damage, as well as excessive corrosion, often indicates a more serious internal issue that must be resolved before attempting to service the battery.
Identifying these problems early can prevent battery failure and enhance the overall safety of the vehicle.
How to Clean Corroded Battery Cables – Easy & Effective Guide
Cleaning corroded battery cables is an essential maintenance task that helps restore proper electrical flow between the battery and the vehicle.
Corrosion creates resistance, which can reduce the power required to start the vehicle, negatively impact charging performance and lead to various electrical issues.
By properly cleaning the battery terminals and cable connections, you can enhance reliability, minimize voltage loss and help extend the lifespan of both the battery and the electrical components.
Following the steps outlined below will ensure that this task is completed safely and effectively.
1. Locate the Battery
The first step is to locate the vehicle’s battery.
In many vehicles, the battery is situated under the hood, typically near one of the front corners of the engine compartment.
However, some manufacturers place the battery in the trunk, under the rear seat, or beneath a cargo floor panel to optimize weight distribution and conserve space within the engine compartment.
Before accessing the battery, ensure that the vehicle is parked in a safe location, the engine is turned off and the surrounding area is well-ventilated.
If necessary, consult the owner’s manual to determine the exact location of the battery.
2. Inspect the Battery and Cables
Before touching any connections, carefully inspect the battery and cables.
Look for signs of corrosion, which typically appear as a white, blue, or green powdery buildup, concentrated around the terminals and cable ends.
Check to see if the corrosion is minor and limited solely to the surface, or if it is extensive enough to cover a significant portion of the connections.
Additionally, inspect the cable insulation for cracks, cuts, melted sections, or signs of wear.
Identifying these issues early helps determine whether a simple cleaning will resolve the problem or if repairs will also be necessary.
3. Disconnect the Negative Battery Cable
Always disconnect the negative battery cable first.
The negative terminal typically bears a minus sign (-) and is often connected to a black cable.
Removing the negative cable first minimizes the risk of a short circuit should a tool accidentally come into contact with a metal part of the vehicle.
Carefully loosen the terminal clamp, lift the cable off the battery post and position it so that it cannot accidentally touch the terminal again.
4. Disconnect the Positive Battery Cable
After removing the negative cable, disconnect the positive battery cable.
The positive terminal usually features a plus sign (+) and is often connected to a red cable.
Loosen the clamp and carefully lift it off the battery post.
Avoid twisting or pulling the cables excessively, as the ends of older cables may have become brittle due to corrosion and age.
Once both cables are disconnected, the battery terminals can be cleaned more safely and thoroughly.
5. Prepare a Cleaning Solution
A simple mixture of baking soda and water is one of the most effective methods for cleaning battery corrosion.
Baking soda helps neutralize acidic residue and makes it easier to remove the corrosion.
Mix a small amount of baking soda into water until a cleaning solution is formed.
Commercially available battery terminal cleaners can also be used; these are specifically formulated for removing corrosion.
When used correctly, both methods can be effective.
6. Apply the Cleaning Solution
Apply the cleaning solution directly to the battery terminals, cable ends and any areas showing signs of corrosion.
As soon as the solution comes into contact with the acidic corrosion, you may observe bubbling or foaming.
This reaction indicates that the baking soda is neutralizing the acidic deposits.
Allow the solution to sit on the affected areas for a short while so that it can loosen the corrosion and facilitate the cleaning process.
7. Scrub Away the Corrosion
Use a wire brush or a specialized battery terminal brush to thoroughly scrub and clean the battery terminals and cable ends.
The goal is to remove all visible corrosion and expose the clean metal surfaces, thereby ensuring a strong electrical connection.
Pay particular attention to the interiors of the cable connectors, as corrosion often hides in these hard-to-reach areas.
Continue scrubbing until the terminals and connectors appear clean and free of any deposits.
8. Rinse and Wipe Clean
Once the corrosion has been removed, carefully rinse away the remaining cleaning solution and residue.
Wipe down the terminals, cable ends and surrounding areas with a clean cloth or paper towel.
It is crucial to remove all remaining residue, as any leftover contaminants could lead to future corrosion.
After cleaning, ensure that all components are completely dry before reconnecting the cables.
9. Check the Cables for Any Damage
After removing the corrosion, inspect the cables even more closely for any hidden damage.
Look for frayed wires, loose terminal ends, cracked insulation, or corrosion that extends deep into the cable strands.
Internal corrosion can reduce the cable’s ability to conduct electricity, even if it appears clean on the outside.
If the cable feels brittle (easily breakable), appears swollen, or looks severely degraded, replacing it, rather than merely cleaning it, may be the better long-term solution.
10. Apply Protective Measures to Prevent Corrosion
After cleaning, apply a protective product to prevent future corrosion.
Many technicians use dielectric grease, battery terminal protectant sprays, or anti-corrosion washers.
These products create a protective barrier that helps keep moisture, dirt and acidic fumes away from the metal surfaces.
Applying protective measures after cleaning significantly slows down the formation of new corrosion and extends the lifespan of the battery connections.
11. Reconnect the Positive Battery Cable
First, reconnect the positive battery cable by firmly attaching the connector to the positive battery terminal.
Tighten the terminal clamp until it is secure and does not move when shaken by hand.
A properly tightened connection helps ensure efficient electrical flow and reduces the likelihood of future electrical issues.
12. Reconnect the Negative Battery Cable
Once the positive cable is securely connected, reconnect the negative battery cable.
Place the connector onto the negative terminal and tighten it securely.
Connecting the negative cable last minimizes the risk of an accidental short circuit occurring during the connection process.
Once both connections are securely established, verify that the cables are properly seated and do not wobble.
13. Inspect the Vehicle
The final step involves inspecting the vehicle to confirm whether the cleaning process was successful.
Start the engine and observe how much faster it cranks compared to before.
Check to ensure that the headlights, interior lights, dashboard display and other electrical components are functioning normally.
If the engine’s starting performance has improved and electrical issues have been resolved, it indicates that corrosion was indeed impeding the flow of electricity.
Regular inspection and cleaning help maintain the efficient operation of the battery system and prevent future problems.
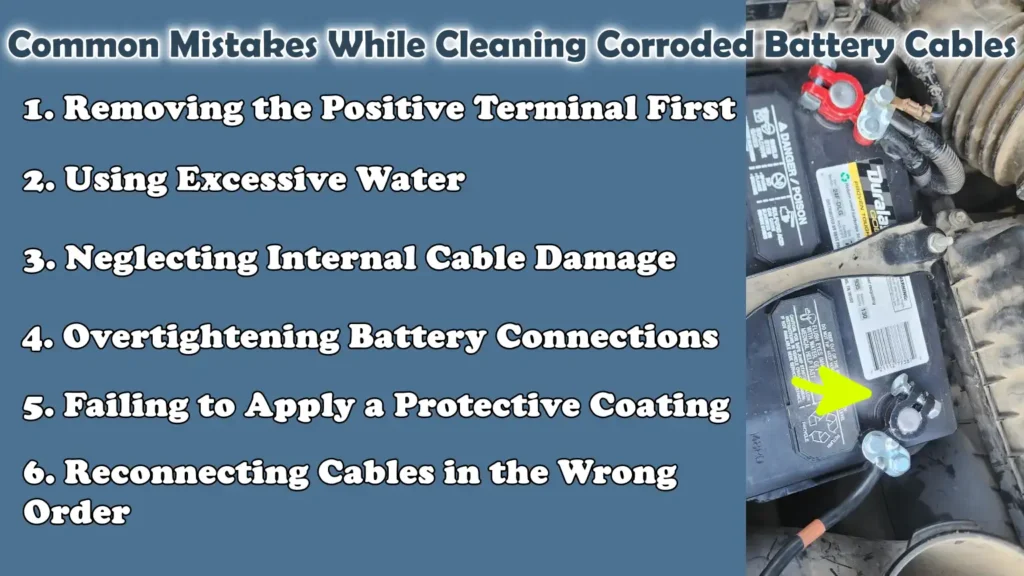
Common Mistakes While Cleaning Corroded Battery Cables
Cleaning corroded battery cables is a relatively simple task; however, certain common mistakes can pose safety hazards, damage battery components, or compromise the effectiveness of the cleaning process.
Many battery-related issues persist even after cleaning because essential steps are either overlooked or executed incorrectly.
Understanding these mistakes helps ensure safe repairs, robust electrical connections and long-lasting results.
Adhering to the correct procedures also reduces the risk of future starting difficulties, charging issues and premature battery failure.
Not only this, there’s research into the battery electrical connections that shows that connection resistance literally plays a major role in overall battery performance, so whenever the corrosion develops on the battery terminals and cable ends, then the electrical resistance increases and the power delivery becomes less efficient, that’s why cleaning corroded battery cables actually helps you to restore the proper electrical contact, that allows the electricity to flow more freely between the battery and vehicle systems, this can totally improve the starting performance, charging efficiency and overall electrical reliability as well.[¹]
1. Removing the Positive Terminal First
One of the most common mistakes is removing the positive battery terminal before disconnecting the negative terminal.
The negative terminal is connected to the vehicle’s chassis; this means that if a metal tool comes into contact with both the positive terminal and any metal part of the vehicle, a short circuit can occur.
This can result in sparks, damage to electrical components, or even personal injury.
For safety reasons, the negative cable should always be disconnected first and reconnected last.
Following this sequence minimizes the risk of accidental electric shock while working around the battery.
2. Using Excessive Water
Water is useful for mixing cleaning solutions and rinsing away corrosion, but using too much water can create problems.
Excessive water can spread residual corrosion particles to surrounding components, seep into electrical connectors and become trapped in areas where it promotes future corrosion.
Modern vehicles often house numerous sensitive electrical components near the battery and excessive moisture can significantly increase the risk of electrical malfunctions.
Use only as much water as is necessary for cleaning and ensure that the battery terminals, cable ends and surrounding areas are completely dry before reconnecting the cables.
3. Neglecting Internal Cable Damage
Many people focus solely on the visible corrosion around the battery terminals while overlooking what is happening inside the cables themselves.
Corrosion can penetrate beneath the insulation and spread into the copper strands within the cable.
Even if everything appears clean and intact on the outside, internal corrosion can increase electrical resistance and impede the flow of current.
If a cable near the connector appears swollen, brittle, discolored, or heavily corroded, it is essential to inspect it carefully.
If the cable itself has deteriorated internally, simply cleaning the terminal will not resolve the problem.
4. Overtightening Battery Connections
It is crucial that battery terminals are securely connected; however, overtightening them can cause damage.
Overtightening can lead to broken battery terminals, deformed cable connectors, stripped fastener threads, or a weakened connection over time.
A damaged terminal may no longer provide proper electrical contact and may require replacement.
The correct approach is to tighten the connection until it is secure and does not move when tested by hand.
A properly connected terminal ensures optimal electrical flow without placing excessive stress on the battery components.
5. Failing to Apply a Protective Coating
Many vehicle owners successfully clean their battery terminals but subsequently forget to apply any form of anti-corrosion protection.
Clean metal surfaces are susceptible to moisture, dirt and acidic fumes, which can cause the corrosion process to resume very rapidly.
Applying dielectric grease, a battery terminal protectant spray, or anti-corrosion washers helps create a barrier between the metal components and the environment.
This simple step can significantly slow down future corrosion and reduce the need for battery maintenance.
6. Reconnecting Cables in the Wrong Order
The sequence used when reconnecting battery cables is just as critical as the sequence used when disconnecting them.
Reconnecting the negative cable before the positive cable increases the risk of an accidental short circuit if a tool comes into contact with the vehicle’s metal components while tightening the positive terminal.
The safest procedure is to reconnect the positive cable first, followed by the negative cable last.
This method helps minimize electrical hazards and ensures that the battery is reconnected in accordance with standard automotive safety protocols.
Read More:
Conclusion – How to Clean Corroded Battery Cables
Now, you have understood the importance of having strong electrical connection that gives you the every successful engine start, that’s why maintaining clean battery cables actually plays a really big role in the process as it affects every electrical system in your vehicle straightaway.
The battery serves as the primary source of electrical power in a vehicle; even a thin layer of corrosion on the terminals or cable ends can increase resistance, impede the flow of current and make it difficult for the battery to deliver power to critical components.
Over time, this can lead to slow engine starts, difficulty cranking the vehicle, dim lights, charging issues and other electrical malfunctions, problems for which many drivers mistakenly blame a faulty battery or starter.
The good news is that cleaning corroded battery cables is one of the most effective and cost-efficient maintenance tasks you can undertake.
By identifying corrosion early, safely disconnecting the battery, thoroughly removing accumulated buildup, inspecting the cables for any signs of damage and applying a protective coating, you can re-establish robust electrical connections and help your battery operate more efficiently.
And, that’s it from this guide and you can comment down below for more information.
Frequently Asked Questions
FAQ 1: How do you clean corroded battery cables?
Answer: Cleaning corroded battery cables involves safely disconnecting the battery, removing accumulated corrosion and restoring a clean electrical contact between the battery and the cable connections. Most vehicle owners use a mixture of baking soda and water, as it helps neutralize acidic corrosion and loosen deposits from the terminals and cable ends. After applying the solution, the corrosion can be removed by scrubbing with a wire brush or a battery terminal brush. Once the deposits have been removed, the terminals should be rinsed, thoroughly dried and protected with an anti-corrosion product. Proper cleaning helps improve electrical conductivity, starting performance and battery reliability.
FAQ 2: Why do battery cables corrode?
Answer: Battery cable corrosion is typically caused by battery acid fumes, moisture, heat and chemical reactions involving metal components. During normal operation, lead-acid batteries can emit small amounts of acidic fumes that settle on nearby terminals. When these fumes react with metal surfaces, corrosion begins to form. Other contributing factors include battery aging, overcharging, faulty battery seals, high humidity, exposure to road salt and poor maintenance. Over time, corrosion can impede electrical flow and cause various issues related to starting and charging.
FAQ 3: Can corroded battery cables cause starting problems?
Answer: Yes, corroded battery cables are a common cause of starting problems. The starter motor requires a large amount of electrical current to crank the engine. Dirt creates resistance within the battery connections, making it difficult for electricity to flow from the battery to the starter. Consequently, the engine may crank slowly, hesitate before starting, or fail to start altogether. In severe cases, dirt can generate so much resistance that it completely prevents the starter from receiving sufficient power.
FAQ 4: Is baking soda safe for cleaning battery corrosion?
Answer: Baking soda is generally considered one of the safest and most effective methods for cleaning battery corrosion. It works by neutralizing the acidic residue that causes the corrosion and helps loosen the buildup on the battery terminals and cable ends. When mixed with water, baking soda creates a mild cleaning solution that is easy to apply and inexpensive to use. It is widely recommended because, when used correctly, it effectively removes corrosion without causing any damage. After cleaning, the area should be lightly rinsed and thoroughly dried.
FAQ 5: How often should battery cables be cleaned?
Answer: Battery cables should be inspected regularly and cleaned whenever corrosion becomes visible. For most vehicles, checking the battery terminals every few months is a good maintenance practice. Vehicles driven in humid climates, coastal areas, or regions where road salt is commonly used may require more frequent inspections, as corrosion tends to develop more rapidly under these conditions. Regular cleaning helps maintain strong electrical connections and prevents corrosion from becoming severe enough to negatively impact the vehicle’s performance.
FAQ 6: What color is battery corrosion?
Answer: Battery corrosion typically appears as a white, blue, or green powdery substance surrounding the battery terminals and cable connections. Its specific color depends on the substances involved in the chemical reaction. White corrosion often results from the accumulation of lead or sulfates, while blue or green corrosion may appear on copper cable terminals and connectors. Regardless of the color, any visible corrosion should be cleaned off, as it can hinder electrical conductivity and exacerbate battery-related issues.
References:
[1] Electrical resistances of soldered battery cell connections
https://portal.fis.tum.de/en/publications/electrical-resistances-of-soldered-battery-cell-connections/

Hello Folks, Dean Shali here to help you out to solve the problems with your lovely vehicle, as i have lots of experience and knowledge about automotive industry as i woks directly with the customers and repair vehicles and i love to help the people to keep their cars safe and running smoothly.