Written By: Dean Shali
Fact Checked By: Sabré Cook
Reviewed By: Tamara Warren
You need to understand this fact that: a car’s alternator is actually the small generator that quietly powers almost every electrical feature in your goddamn vehicle whenever you drive that.
Literally, alternator is to generate the electricity which is basic need to power the modern essential functions such as: headlights dashboard instruments, ignition systems, sensors, infotainment units and battery charging as well.
Also, it is true that the alternator works by converting mechanical energy from the engine into that useful electrical energy through the help of the electromagnetic induction, that actually allows the battery to stay fully charged and the vehicle’s electronics to functions as they meant to be.
But, if you are facing problems such as: dim headlights, if your vehicle’s battery warning light is on the dashboard, if your vehicle’s always gets difficulty during the starting the car or some electrical accessories is misbehaving, then it is the often caused by the faulty alternator and that’s why you need to fix or replace it.
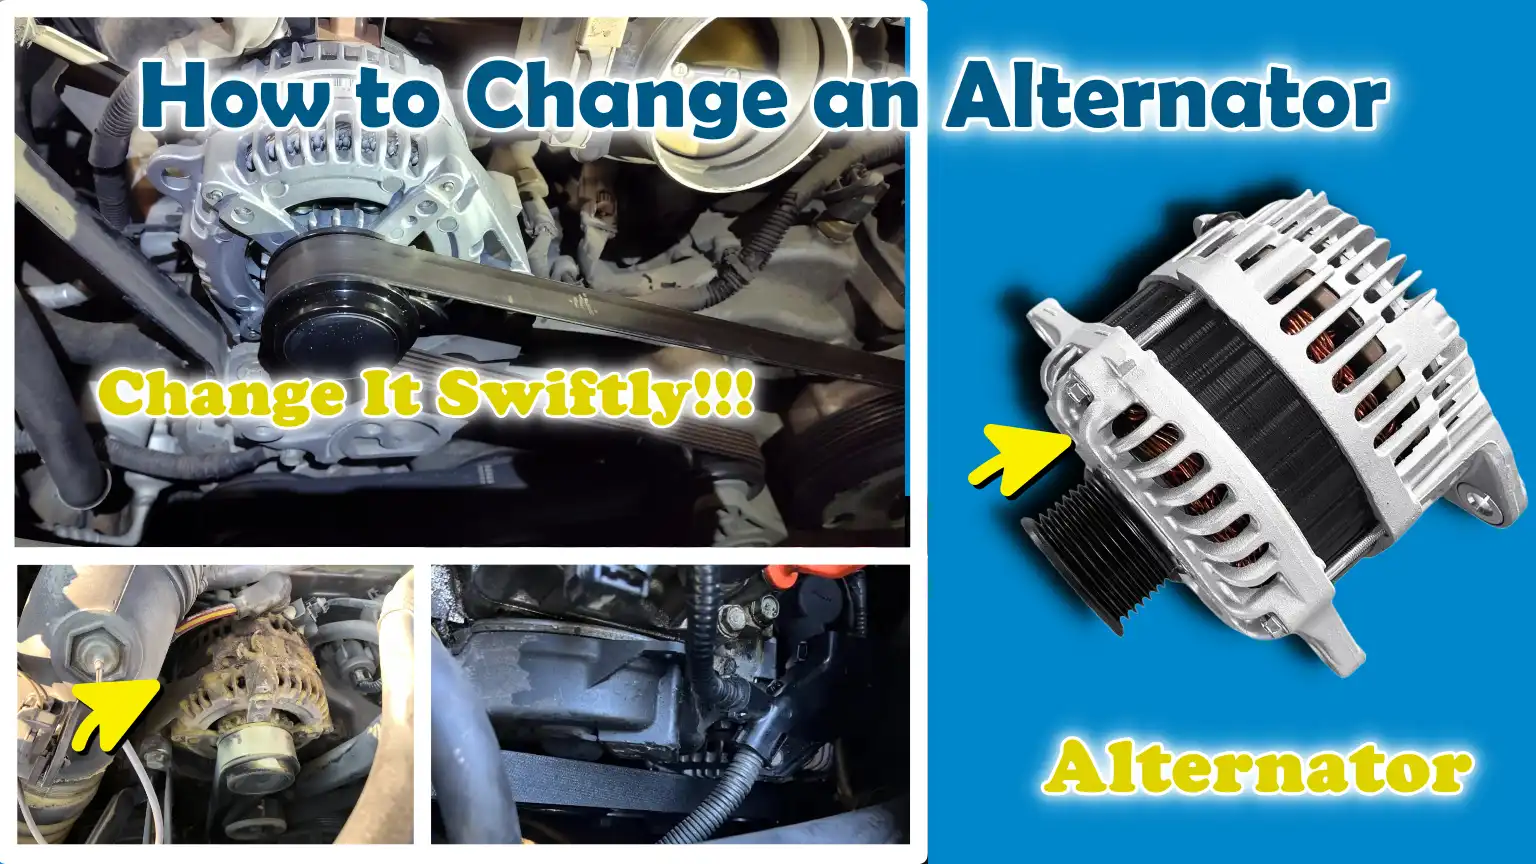
So, is the guide on How to Change an Alternator, so that you can easily prevent unexpected breakdowns here and there and save the repair costs as well, which is good for your pocket.
What Does an Alternator Do in a Car?
The alternator is an essential part of the vehicle’s charging system and its primary function is to generate electricity when the engine is running.
Although the battery helps start the engine, it cannot power the entire car alone for long.
Once the engine starts, the alternator begins to operate, generating the electricity needed to run vital systems like headlights, dashboard instruments, the engine control unit, sensors, power windows, infotainment systems and many other electronic components found in modern vehicles.
Most passenger vehicles use a 12-volt electrical system and the alternator typically supplies between 13.5 and 14.8 volts to keep the battery properly charged when the engine is running.
If the alternator stops working properly, the battery will gradually lose its charge and symptoms may include dim lights, a warning indicator on the dashboard, or difficulty starting.
Because modern cars rely heavily on electricity for safety, performance and comfort features, the alternator plays a crucial role in ensuring smooth and reliable operation.
1. Basic Function of the Alternator
The alternator’s basic function is to convert the mechanical energy generated by the engine into electrical energy that the vehicle can use.
When the engine is running, it generates rotational motion and this motion is transmitted to the alternator via a belt connected to the engine’s crankshaft.
When the alternator rotates, it generates electricity that powers the car’s electrical system and keeps the battery charged.
This process is crucial because the battery is primarily designed to start the engine and provide short-term power.
Once the engine is running, the alternator becomes the vehicle’s main power source.
It continuously sends electrical current through the charging system to provide the energy needed to power the lights, ignition system, sensors and electronic modules.
Without a working alternator, the battery will quickly lose power and the vehicle will eventually stop running.
2. How an Alternator Works
An alternator generates electricity using the engine’s rotation through a principle called electromagnetic induction.
When the engine runs, a drive belt, often called a serpentine belt, turns a pulley connected to the alternator.
This rotational motion rotates internal components that create a magnetic field inside the alternator.
As the magnetic field moves across coils of wire, it generates electrical current.
The electricity generated within the alternator is initially alternating current, which must be converted to direct current for use in the vehicle’s electrical system.
A voltage regulator inside the alternator carefully controls the electrical output to ensure the voltage remains within a safe range.
This regulation is necessary because too low a voltage will prevent the battery from charging properly, while too high a voltage can damage sensitive electronic systems in the vehicle.
Through this controlled process, the alternator continuously produces steady electricity while the engine is running.
3. Parts of an Alternator
An alternator is made up of several important internal and external parts that work together to efficiently generate electricity.
The rotor is the rotating part inside the alternator that creates a magnetic field when it rotates.
Surrounding the rotor is the stator, which contains coils of wire that generate electricity when the magnetic field passes through it.
The voltage regulator is responsible for controlling how much electricity the alternator sends to the battery and electrical system, ensuring that the voltage remains stable and safe for the vehicle.
Another important part is the rectifier, which converts the alternating current generated within the alternator into direct current that the car’s electrical system can use.
Outside the alternator, a pulley connects to the engine belt and allows the alternator to rotate when the engine is running.
Many alternators also have a cooling fan to help remove heat generated during operation, as the process of generating electricity naturally generates heat.
Together, these components ensure the alternator can reliably generate power and keep the vehicle’s battery charged while the engine is running.
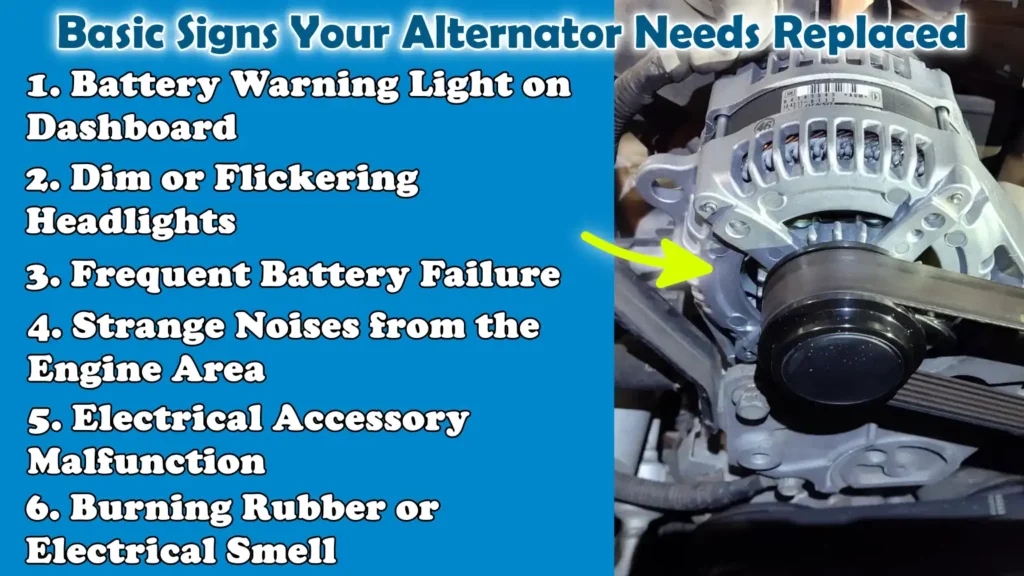
Basic Signs Your Alternator Needs Replaced
A bad alternator usually gives off several warning signs before it completely fails.
Because the alternator is responsible for generating electricity and keeping the battery charged when the engine is running, any problems can impact multiple parts of the vehicle simultaneously.
Modern cars rely heavily on the electrical system for engine management, safety systems, lighting and comfort features, so a weak alternator can quickly cause major problems.
Drivers may see warning lights on the dashboard, experience dim lights, or notice strange electrical behavior inside the car.
In many cases, these symptoms appear gradually as the alternator begins to produce less power than the vehicle needs.
Recognizing these warning signs early is crucial, as replacing the alternator before it completely fails can prevent sudden failures and battery damage.
Understanding the most common symptoms can help drivers take quick action and keep their vehicles reliable.
1. Battery Warning Light on Dashboard
One of the earliest and most common signs of alternator problems is the appearance of a battery warning light on the dashboard.
Many people assume this light always indicates a bad battery, but in many cases, it actually indicates a problem with the charging system.
When the engine is running, the alternator should provide enough power to keep the battery fully charged.
If the alternator begins to deliver less voltage than expected, the vehicle’s onboard computer detects a problem and turns on the battery warning light.
In most cars, the alternator should provide approximately 13.5 to 14.8 volts when the engine is running.
If the voltage drops below this level, the battery may not be charging properly and a warning light will alert the driver.
Ignoring this signal can cause the battery to gradually lose power until the car eventually stops starting or running.
2. Dim or Flickering Headlights
Dim or flickering headlights are another common sign that the alternator may be failing.
Headlights require a regular power supply to maintain consistent brightness.
When the alternator isn’t delivering enough power, the lights can dim significantly, specially when the car is idling or when multiple electrical devices are being used at the same time.
In some cases, drivers may also notice that the lights become brighter when they drive faster and dim when the engine is slower.
This is because the alternator’s output is not consistent and varies with engine speed.
Flickering of interior lights, dashboard lights, or the instrument panel display may also be the cause.
These lighting problems often indicate that the alternator is not delivering consistent power.
3. Frequent Battery Failure
If your car’s battery repeatedly fails even after replacing or recharging it, the alternator may be the root cause of the problem.
The battery is primarily designed to start the engine and provide short-term power.
Once the engine starts, the alternator must recharge the battery and power the entire vehicle.
If the alternator is weak or failing, the battery will not receive sufficient charge while driving.
Over time, this lack of constant charging can lead to complete battery drain.
Many drivers mistakenly replace the battery multiple times, unaware that the alternator is the faulty part.
Frequent battery failure or the need for regular jump-starts are sure signs that the alternator should be inspected and possibly replaced.
4. Strange Noises from the Engine Area
Strange noises coming from the engine area can sometimes indicate internal problems with the alternator.
The alternator contains moving parts such as bearings and a rotating rotor.
If these parts become worn or damaged, they can produce grinding, rattling, or rattling noises when the engine is running.
Worn bearings inside the alternator are a common cause of a loud noise that may become louder as the engine speed increases.
In some cases, a loose or worn drive belt attached to the alternator pulley can also cause squealing noises.
These noises should never be ignored, as they often indicate mechanical wear in the alternator, which can eventually lead to complete failure.
5. Electrical Accessory Malfunction
Modern vehicles have many electrical accessories that rely on the alternator for power.
These include power windows, air conditioning systems, infotainment displays, navigation systems, heated seats, windshield wipers and charging ports for mobile devices.
When the alternator begins to fail, these accessories may not function properly because they are not receiving a consistent power supply.
Drivers may notice slow power windows, malfunctioning dashboard displays, weak air conditioning fans, or audio systems that suddenly shut down.
In more advanced vehicles, the engine control system may also display warning messages related to electrical malfunctions.
Because these systems rely heavily on constant voltage, a bad alternator can affect multiple features simultaneously.
6. Burning Rubber or Electrical Smell
A burning smell coming from the engine bay can sometimes indicate a problem with the alternator or its associated components.
If the drive belt connected to the alternator is worn, misaligned, or too tight, it can cause excessive friction and a burning rubber-like smell.
In other cases, overheating of the wires or electrical components inside the alternator can cause a strong burning electrical smell.
This can occur when the alternator is working harder than normal due to internal damage or an electrical overload.
Heat buildup inside the alternator can damage its internal components and eventually cause it to fail completely.
If the driver notices a burning smell while the engine is running, it’s important to have the charging system checked immediately to prevent further damage to the vehicle.
Tools
| Tool or Item | Why It Is Needed | How to Use It |
|---|---|---|
| Jumper Cables | These are used when the car’s battery is too weak to start the engine. These cables help transfer power from the other vehicle’s battery. | Connect one red clamp to the positive terminal of the bad battery and the other red clamp to the positive terminal of the good battery. Connect one black clamp to the negative terminal of the good battery and the other black clamp to an unpainted metal surface in the engine bay of the bad car. Then start the running car and try to start the bad car. |
| Portable Jump Starter | This is useful when there are no other vehicles nearby. It can provide enough power to start the engine on its own. | Connect the red clamp to the positive battery terminal and the black clamp to the negative terminal or metal ground. Turn on the jump starter and start the vehicle. Once the engine starts, safely disconnect the clamps. |
| Jumper Cable Thickness | Thicker cables allow for faster power flow, resulting in faster engine starts and less heat generation. | Choose cables with a lower gauge number because they are thicker and conduct electricity better. This results in better starting performance. |
| Jumper Cable Length | A longer cable makes it easier to connect two vehicles, even if they can’t be parked very close to each other. | Place the two vehicles close together but not touching each other. Use the cable’s length to comfortably reach both batteries without tugging on the wires. |
| Cable Clamps | Good clamps provide a strong electrical connection and prevent power loss during power transfer. | Fix each clamp firmly to the correct battery terminal so it grips the metal tightly and doesn’t slip during the jump start. |
| Safety Gloves | These protect your hands from sudden sparks, battery acid, dirt and sharp engine parts. | Wear gloves before touching battery terminals or jumper cables. This reduces the risk of a mild electric shock or battery residue coming into contact with your skin. |
| Safety Glasses | Sometimes, gas or small sparks may be released when connecting cables to a car battery. Eye protection reduces the risk of injury. | Wear goggles before connecting or removing jumper cables and keep them on until the process is complete. |
| Safe Vehicle Spacing | Touching the vehicle during a jump start can cause electrical grounding and increase the risk of sparks. | Park the running vehicle close enough to allow access to the cables, but ensure the vehicles do not physically touch each other. |
How to Be on the Safe Side
Before replacing an alternator, it’s crucial to take basic safety precautions to protect yourself and prevent damage to your vehicle.
The alternator is directly connected to the car’s electrical system and is powered by the moving engine belt, which means careless work can result in electric shock, a short circuit, or injury from moving engine parts.
A car’s engine generates a lot of heat while running and some metal parts in the engine bay can remain very hot for several minutes after the engine is turned off.
Furthermore, the battery stores electrical energy and if tools accidentally touch the wrong terminal, a spark can occur.
Taking a few simple safety steps before beginning the repair can significantly reduce these risks.
Proper preparation includes ensuring the vehicle is parked, the power is safely disconnected and the engine area is cool enough to work.
Following these precautions not only ensures a safe repair process but also helps prevent accidental damage to vital electrical components inside the vehicle.
1. Park on a Level Area
Before beginning any engine repair, parking the vehicle on a level and stable surface is one of the first safety measures.
A level surface prevents the vehicle from rolling or sliding while working in the engine compartment.
When the car is parked on a slope, even the slightest movement can cause instability, specially if the parking brake is not strong enough to hold the vehicle securely.
A stable surface also makes it easier to organize tools and prevents parts from rolling.
Many professional mechanics prefer to work on a flat garage floor or paved driveway because these areas provide better stability and safer working conditions.
After parking the car on a level area, the parking brake should be firmly applied to add another layer of safety and prevent sudden movement of the vehicle.
2. Turn off the engine completely
Before you begin replacing the alternator, it’s essential for safety.
The alternator is connected to the engine via a serpentine belt, which moves rapidly when the engine is running.
Accidentally starting the engine while someone is working near the belt or pulley can cause serious injury.
The engine also powers several electrical systems and working near these systems while they are active can increase the risk of electrical problems.
By turning off the engine and removing the ignition key, you ensure the engine won’t accidentally start during repairs.
This simple step allows you to work more safely around moving parts and electrical connections in the engine bay.
3. Disconnect the Car Battery
Disconnecting the car battery is one of the most important safety steps when working on any part of the vehicle’s electrical system.
The alternator is directly connected to the battery and charging system, which means the wires connected to it are constantly providing power.
If the battery remains connected, tools touching these wires or metal parts could cause sparks or short circuits.
Short circuits can damage electrical components, blow fuses, or, in extreme cases, even start small fires.
To prevent this, the negative battery terminal is usually disconnected first, as this breaks the vehicle’s electrical circuit.
Once the battery is disconnected, the risk of sudden electrical contact is greatly reduced, allowing you to safely remove and install the alternator.
4. Let the Engine Cool
Another important safety precaution is to let the engine cool before beginning repairs.
When a car’s engine is running, its temperature can reach approximately 90 to 105 degrees Celsius and many metal parts inside the engine bay become extremely hot.
Touching parts like the exhaust manifold, radiator, engine block and nearby hoses immediately after the engine is running can cause burns.
The alternator itself can become hot as it generates heat while generating electricity.
Waiting at least 20 to 30 minutes after turning off the engine allows most of these parts to cool to a safe temperature.
This cooling period makes it easier to work comfortably in the engine compartment and greatly reduces the risk of accidental burns when removing or installing parts.
How to Change an Alternator – Working Method
Replacing an alternator is a common vehicle repair that many car owners can perform with basic tools and a little attention to detail.
The alternator is responsible for generating electricity when the engine is running and keeping the battery charged so that the vehicle’s electrical system functions properly.
When the alternator fails, the battery gradually loses power and the car may eventually stop running.
Fortunately, in many vehicles, the alternator is mounted outside the engine, making it easier to remove and replace than an internal alternator.
The process involves disconnecting the electrical system, removing the belt that drives the alternator, removing the old unit and replacing it with a new one.
While the exact location and bolt positions may vary slightly depending on the vehicle model, the general steps are very similar for most cars.
Following a clear step-by-step process helps avoid mistakes and ensures that the new alternator works properly after installation.
1. Disconnect the Battery
The first and most important step before removing the alternator is to disconnect the vehicle’s battery.
The alternator is directly connected to the battery and charging system, which means there’s always electrical current in its wiring.
If the battery remains connected, touching metal parts or electrical wires with tools could cause a spark or short circuit.
To prevent this, the negative battery terminal should always be removed first, as this safely breaks the vehicle’s electrical circuit.
The negative terminal is usually marked with a minus sign and is often connected to a black cable.
Once the negative cable is disconnected, the risk of accidental electrical contact is greatly reduced, making working in the engine compartment much safer.
2. Locate the Alternator
After disconnecting the battery, the next step is to locate the alternator inside the engine bay.
In most vehicles, the alternator is located near the front or side of the engine so that it is driven by a serpentine belt.
It typically consists of a round metal housing with cooling openings and a pulley attached to the belt.
The serpentine belt is a long rubber belt that runs between several pulleys and powers parts like the alternator, power steering pump and air conditioning compressor.
Because the alternator must rotate when the engine is running, its pulley is always connected to this belt system.
Clearly identifying the alternator before removing it helps avoid confusion with other nearby parts.
3. Remove the Serpentine Belt
The alternator cannot be removed while the serpentine belt is attached to its pulley, so the belt must be loosened and removed first.
Most vehicles use a spring-loaded belt tensioner that keeps the belt tight when the engine is running.
A belt tensioner tool or breaker bar can be used to rotate the tensioner and relieve the pressure on the belt.
Once the tension is relieved, the belt can be carefully removed from the alternator pulley.
It’s helpful to remember the belt’s routing before removing it, as it must follow the correct path when reinstalled.
Many vehicles have a belt routing diagram somewhere inside the engine bay to help with proper installation.
4. Disconnect Electrical Connections
After removing the belt, the electrical connections connected to the alternator must be disconnected.
The alternator typically has a main power cable that supplies electrical current to the battery and a wiring harness that connects it to the vehicle’s charging system controls.
The main charging cable is often secured with a nut and covered with a protective rubber cap.
After removing the nut, the cable can be lifted from the terminal.
The wiring harness is usually attached with a plastic clip that can be gently pressed to remove the connector.
Carefully removing these electrical connections can prevent damage to the wires and ensure they are reconnected correctly during installation.
5. Remove the Alternator Mounting Bolts
After disconnecting the electrical connections, the alternator must be removed from its mounting bracket.
Most alternators are secured by two or more mounting bolts that hold the unit firmly against the engine.
These bolts may be located at the top and bottom of the alternator housing.
Using the appropriately sized socket wrench, the bolts can be loosened and removed one by one.
After removing the bolts, the alternator can be gently lifted or slid from its bracket.
Because the alternator contains metal parts and magnets inside, it may feel heavier than expected, so it’s helpful to hold the unit firmly when removing it from the engine bay.
6. Install the New Alternator
After removing the old alternator, the new alternator can be installed in its original location.
It is important to ensure that the replacement alternator matches the original model so that the mounting points, pulley alignment and electrical connections fit correctly.
The new unit should be carefully placed into the mounting bracket where the old alternator was installed.
Once properly aligned, the mounting bolts can be inserted and tightened to securely hold the alternator in place.
Evenly tightening the bolts keeps the alternator stable and ensures that the pulley is in proper alignment with the serpentine belt system.
7. Reconnect the Electrical Connections
Once the new alternator is securely mounted, the electrical connections must be reconnected.
The wiring harness should be plugged into its connector until it locks into place.
This connection allows the vehicle’s charging system to monitor and control the alternator’s electrical output.
The main charging cable should then be reconnected to the alternator terminal and secured with a retaining nut.
This cable supplies power from the alternator to the battery and the rest of the vehicle’s electrical system.
For reliable charging performance, it’s important to ensure these connections are tight and properly connected.
8. Reinstall the Serpentine Belt
Once the electrical connections are secure, the serpentine belt must be reinstalled on the alternator pulley.
The belt should be positioned around the engine pulley as shown in the vehicle’s belt routing diagram.
Using the belt tensioner tool again, the tensioner can be loosened enough to allow the belt to return to the alternator pulley.
Once the belt is in place, slowly releasing the tensioner provides the correct belt tension.
Correct belt tension is crucial, as a loose belt can slip and cause charging problems, while a too-tight belt can cause unnecessary wear on the alternator bearings.
9. Reinstall the Battery
Once the alternator and belt are fully installed, the battery can be reinstalled to restore power to the vehicle.
Connect the positive battery terminal first, followed by the negative terminal.
This sequence helps reduce the chance of accidental sparks when reconnecting the battery.
Once both cables are securely connected, the vehicle’s electrical system will restart.
Once the battery is reconnected, the alternator will begin charging the battery as soon as the engine starts.
10. Start the Engine and Test
The final step is to start the engine and verify that the new alternator is working properly.
When the engine is running, the serpentine belt should rotate the alternator pulley smoothly without any strange noises.
The battery warning light on the dashboard should turn off immediately after the engine starts.
This indicates that the charging system is functioning properly.
For a more accurate check, you can use a multimeter to measure the battery voltage with the engine running.
A working alternator typically produces approximately 13.5 to 14.8 volts.
If the voltage is in this range and all electrical systems operate normally, the alternator replacement has been completed successfully.
How to Test a New Alternator
After installing a new alternator, it’s crucial to test it to ensure the charging system is functioning properly.
The alternator’s primary function is to generate electricity when the engine is running and keep the battery fully charged.
If the alternator doesn’t generate enough voltage, the battery will gradually lose power, which can lead to vehicle starting problems or electrical failure.
On the other hand, if the alternator generates too much voltage, it can damage sensitive electronic components such as the engine control unit, sensors, lights and infotainment system.
Testing the alternator immediately after installation helps ensure it’s operating within the correct voltage range and delivering consistent power to the vehicle.
The easiest and most reliable way to check alternator performance is to use a multimeter to measure the battery voltage under different engine conditions.
1. Using a Multimeter
A multimeter is a simple electrical testing device used to measure voltage, current and resistance in an electrical system.
Mechanics and technicians commonly use it to diagnose problems with a vehicle’s charging system.
To test the alternator, the multimeter is set to measure direct current voltage and its probes are placed on the battery terminals.
The red probe touches the positive terminal and the black probe touches the negative terminal.
The first reading should be taken with the engine off, as this indicates the battery’s resting voltage.
Next, start the engine and measure the voltage again while the engine is running.
If the alternator is functioning properly, the voltage reading will increase as it begins to deliver power and charge the battery.
This simple test helps confirm whether the new alternator is producing the correct amount of power.
2. Expected Voltage Range
Understanding the expected voltage range helps determine whether the alternator and battery are functioning properly.
When the engine is off, a healthy and fully charged car battery typically shows a voltage reading of around 12.6 volts.
This level indicates that the battery has stored enough electrical energy for normal operation.
When the engine starts and the alternator begins producing power, the voltage should increase to a higher level.
In most vehicles, a properly functioning alternator delivers power between approximately 13.7 and 14.7 volts when the engine is running.
This range is important because it recharges the battery and powers the vehicle’s systems.
If the voltage remains around 12 volts when the engine is running, it means the alternator is not charging the battery.
If the voltage rises significantly above the normal range, it could be a problem with the voltage regulator.
Checking these readings helps ensure that the new alternator is working properly and that the vehicle’s charging system is stable and reliable.
Know, What are the Common Mistakes to Avoid Them Early
Replacing an alternator is a task many car owners can easily perform, but some common mistakes can cause serious problems if overlooked.
The alternator is directly connected to the vehicle’s electrical system and is also part of the engine’s belt drive system.
Therefore, improper installation can cause electrical damage, mechanical problems, or poor charging performance.
Many problems after alternator replacement occur not because the new alternator is defective, but because small installation steps were missed or performed incorrectly.
Understanding these common mistakes helps drivers complete the repair more safely and ensures that the new alternator works properly.
Reliable operation of a vehicle’s charging system requires attention to electrical connections, bolt tightness and the correct placement of belts.
1. Forgetting to Disconnect the Battery
One of the most common mistakes made during alternator replacement is forgetting to disconnect the battery before beginning the repair.
The alternator is connected directly to the battery via a charging cable, which carries a high electrical current when the vehicle is running.
If the battery is connected, accidentally touching the alternator terminals or nearby metal parts with a metal tool could cause a spark or short circuit.
A short circuit can damage electrical components, blow fuses, or, in extreme cases, damage wiring.
Disconnecting the negative battery terminal first safely breaks the vehicle’s electrical circuit and greatly reduces the risk of an electrical accident.
This simple step protects both the repairer and the vehicle’s sensitive electronics.
2. Installing the Wrong Alternator Model
Another mistake that can cause serious problems is installing an alternator that doesn’t match the vehicle’s specifications.
Alternators are designed with different mounting points, electrical connectors and power output levels depending on the engine type and vehicle model.
If the alternator doesn’t match the original design, it may not fit properly in the mounting bracket or align properly with the serpentine belt.
Furthermore, different vehicles require different electrical output levels, as modern cars often power multiple electronic systems.
Installing an alternator with the wrong voltage or amperage rating can cause poor charging or electrical system problems.
Always check the correct part number and ensure the alternator is compatible with the specific vehicle model to avoid installation problems and ensure optimal charging performance.
3. Incorrect Serpentine Belt Routing
The serpentine belt plays a vital role as it transfers engine power to various components such as the alternator, power steering pump and air conditioning compressor.
A common mistake when replacing an alternator is reinstalling the belt incorrectly or routing it incorrectly around the pulleys.
If the belt doesn’t follow the correct routing pattern, it may slip, make noise, or fail to rotate the alternator properly.
When the alternator pulley doesn’t rotate properly, the alternator can’t generate enough electricity to charge the battery.
Most vehicles have a belt routing diagram inside the engine compartment that shows the correct path of the belt around each pulley.
Following this diagram carefully ensures the belt operates all parts properly and prevents unnecessary wear and damage.
4. Not Tightening the Mounting Bolts Properly
Tightening the alternator’s mounting bolts properly is another important step that should never be overlooked.
The alternator must be securely attached to its bracket because it experiences constant vibration and rotational forces when the engine is running.
If the mounting bolts are left loose, the alternator may move slightly during operation, causing belt alignment issues or strange noises.
Over time, this movement can damage the mounting bracket or surrounding parts.
Overtightening the bolts can also damage the threads or alternator housing.
Using the correct tools and tightening the bolts to the required level ensures that the alternator remains stable and aligned with the belt system during normal engine operation.
Proper bolt installation helps maintain reliable charging performance and prevents mechanical problems later.
How to Maintain the New Alternator to Last Longer – Great Tips
Even, there’s modern engineering research that shows that the automotive alternators are becoming more advanced as the vehicles itself relies on more electronic systems, as the studies on the new alternator technologies actually demonstrates that having the stable power generation and efficient conversion of mechanical energy into the electricity, as literally now-a-days modern cars depends on the dozens of the electronic components, that’s why when you replace a failing alternator is really important to maintaining the proper vehicle operation and prevention of electrical system failures as well.[¹]
An alternator is designed to last for many years, but its lifespan depends heavily on how well the vehicle’s electrical and mechanical systems are maintained.
In most modern vehicles, alternators typically last approximately 80,000 to 150,000 miles, although some in good condition can last even longer.
The alternator works every time the engine is run, constantly generating power for various components such as the headlights, engine control system, air conditioning and charging ports.
Due to its constant operation, it experiences heat, vibration and mechanical stress over time.
Proper vehicle maintenance can greatly reduce this stress and help the alternator function optimally for longer.
Simple habits like keeping the battery healthy, managing electrical loads, checking belt condition and repairing fluid leaks can significantly improve the life of the alternator and prevent unexpected charging system failures.
1. Keep the Battery in Good Condition
Keeping your car’s battery in good condition is one of the most important ways to protect the alternator.
The battery and alternator work together as part of the vehicle’s charging system.
The battery stores electrical energy and helps start the engine, while the alternator recharges the battery and powers the vehicle’s electrical system once the engine is running.
If the battery becomes weak or damaged, the alternator has to work harder to maintain a charge.
This increased workload can cause the alternator to overheat and fail quickly.
Regularly checking battery health, cleaning corrosion from battery terminals and replacing old batteries before they wear out can reduce stress on the alternator and help keep the electrical system stable.
2. Avoid Excessive Electrical Load
Modern vehicles use many electrical devices and running too many of them simultaneously can put excessive demands on the alternator.
Excessive electrical load occurs when multiple systems, such as headlights, heated seats, air conditioning fans, defrosters, audio systems and charging ports, are operating simultaneously.
The alternator must generate enough power to support all these systems and charge the battery.
When power demands are high, the alternator works harder and generates more heat.
Excessive heat is a major cause of damage to the alternator’s internal components, specially the voltage regulator and rectifier.
Using electrical accessories wisely and avoiding unnecessary power consumption when the engine is idling can help reduce stress on the alternator.
3. Check Belt Tension Regularly
The alternator is driven by a serpentine belt, which transfers mechanical energy from the engine to rotate the alternator pulley.
If the belt is loose, worn, or damaged, it can slip on the pulley and prevent the alternator from rotating at the proper speed.
When the alternator rotates too slowly, it cannot generate enough electricity to properly charge the battery.
This can lead to poor charging performance and ultimately damage the alternator.
Regularly checking the condition of the serpentine belt helps ensure it remains properly aligned and maintains the correct tension.
Replacing a worn belt before it breaks is an important preventative maintenance step that helps keep the alternator functioning properly.
4. Fix Oil Leaks Quickly
Oil leaks inside the engine bay can also shorten the life of the alternator.
The alternator contains internal electrical parts and bearings that must remain clean and dry to function properly.
When engine oil leaks from surrounding parts, such as the valve cover or gasket, it can drip onto the alternator housing.
Over time, oil contamination can damage internal parts, attract dirt and debris and interfere with the alternator’s cooling process.
Excessive oil buildup can also affect the bearings inside the alternator, causing strange noises or premature wear.
Quickly fixing oil leaks protects not only the alternator but also many other sensitive parts in the engine compartment.
Keeping the engine area clean and free of fluid leaks helps maintain proper airflow and cooling for the alternator, allowing it to operate reliably for longer.
Read More:
Conclusion: How to Change an Alternator
Now, its been clear that having a working charging system actually ensures that every electrical feature in a vehicle works in efficient way such as: from starting the engine of your vehicle to the powering modern onboard technology.
The alternator plays a vital role in a car’s electrical system, generating electricity when the engine is running and keeping the battery charged.
Without a properly functioning alternator, vital systems like headlights, dashboard electronics, power steering and even the engine control unit don’t receive the power they need to function properly.
Therefore, identifying alternator problems early and knowing how to replace the unit correctly can save both time and money by preventing unexpected failures.
A properly functioning alternator ensures that the battery remains charged and the entire electrical system functions properly.
When an alternator begins to fail, drivers may notice warning signs such as dimming headlights, a battery warning light on the dashboard, strange noises coming from the engine area, or malfunctioning electrical parts.
Ignoring these signs can eventually lead to a complete battery drain and the vehicle becoming unstartable.
By learning the correct replacement procedure and understanding the importance of proper belt tension, secure electrical connections and correct installation, vehicle owners can repair their car’s charging system and maintain reliable performance.
So, that’s it from this guide on How to Change an Alternator and you can ask related questions below.
Frequently Asked Questions
FAQ 1: What does an alternator do in a car?
The alternator is an essential part of a car’s electrical system. Its primary function is to generate electricity when the engine is running. This electricity powers various parts of the car, such as the headlights, dashboard instruments, radio, air conditioning system and other electronic components. Additionally, the alternator charges the car’s battery so that it is fully charged and ready to start the engine the next time you drive. The alternator works by converting mechanical energy from the engine into electrical energy. When the engine runs, a belt connected to the engine turns the alternator pulley. This movement creates an electrical current within the alternator, which is then sent to the battery and the rest of the vehicle’s electrical system. Without a functioning alternator, the battery will quickly lose its charge and the car will stop running when the battery power is depleted.
FAQ 2: How do I know if my alternator needs replacing?
There are several warning signs that can indicate a bad alternator. One of the most common is the appearance of a battery warning light on the dashboard. This light often resembles a small battery symbol and may come on when the charging system isn’t working properly. Another common sign is dim or flickering headlights, specially when driving at night. Because the alternator powers the lights, dim lights can indicate that the alternator isn’t producing enough electricity. You may also notice electrical problems such as slow power windows, a weak air conditioning fan, or problems with the radio and dashboard electronics. In some cases, a bad alternator can cause strange noises from the engine area, such as grinding or rattling noises. These noises may be caused by worn internal parts or a faulty pulley. If these signs appear, it’s important to have the alternator checked or tested, as a completely failed alternator can prevent the car from running.
FAQ 3: Can I drive a car with a bad alternator?
Driving with a bad alternator is not advisable because the car relies on it for power. When the alternator stops working properly, the battery becomes the sole source of electricity. However, a car battery is not designed to power the entire vehicle for long periods of time. Once the battery begins to drain, various electrical systems can malfunction. Headlights may dim, dashboard displays may go off and the engine may not run properly because electronic systems are not receiving enough power. Eventually, the battery will lose all its charge and the engine will stop completely. In some cases, a car with a bad alternator can drive for a short distance, but this usually depends on the condition of the battery and how much power the car is using. Because the car can suddenly stall, it’s always safer to repair or replace the alternator as soon as possible.
FAQ 4: How long does an alternator typically last?
Most alternators are designed for 7 to 10 years, or approximately 100,000 to 150,000 miles of driving. However, actual lifespan depends on many factors, such as driving conditions, vehicle type and maintenance habits. Frequent short trips, high electrical loads and bad weather can put increased strain on the alternator and reduce its lifespan. For example, using multiple electrical components at the same time, such as headlights, heated seats, audio systems and charging devices, can increase the alternator’s workload. Proper vehicle maintenance can help extend the alternator’s life. Keeping the battery in good condition, maintaining proper belt tension and promptly repairing oil or coolant leaks can prevent damage and keep the alternator working efficiently for many years.
FAQ 5: Is replacing an alternator difficult?
Replacing an alternator can be difficult depending on the vehicle’s design. In many cars, the alternator is located in the front of the engine and easily accessible. In these cases, replacing the alternator can be a simple mechanical task that can be performed with basic tools and care. However, in some modern vehicles, the alternator may be located in a more cramped area of the engine compartment. This may require removing other parts, such as protective covers, intake parts, or brackets, before accessing the alternator. Because of this, the difficulty level can range from easy to somewhat difficult. For those with basic mechanical knowledge and who follow the correct repair steps, alternator replacement can be completed safely. However, if someone is unsure about the process, having a professional mechanic do the work is always a reliable option.
References:
[1] Development of Automotive Permanent Magnet Alternator with Fully Controlled AC/DC Converter
https://www.mdpi.com/1996-1073/11/2/274

Hello Folks, Dean Shali here to help you out to solve the problems with your lovely vehicle, as i have lots of experience and knowledge about automotive industry as i woks directly with the customers and repair vehicles and i love to help the people to keep their cars safe and running smoothly.