Written By: Dean Shali
Fact Checked By: Sabré Cook
Reviewed By: Tamara Warren
The starter motor have responsibility to start the engine in perfect way and if it fails then your engine even refuse to start at all or make annoying sounds if it does.
As whenever you turn the key or press that start button in your car, then it is a small but powerful device known as “Starter Motor” that begins its magic and does the job for you to start the vehicle’s engine.
Basically, the starter motor uses electricity from the car’s battery that spins the engine’s crankshaft so the engine cab begin to up and running on its own.
And, without having a proper working starter motor, the engine won’t even start at the first place.
Not only this, there’s common warning signs are available for having a bad starter motor: clicking sound are coming when you turn the key on, engine is slowly cranking, grinding noises appears or the engine it not turning over at all cost.
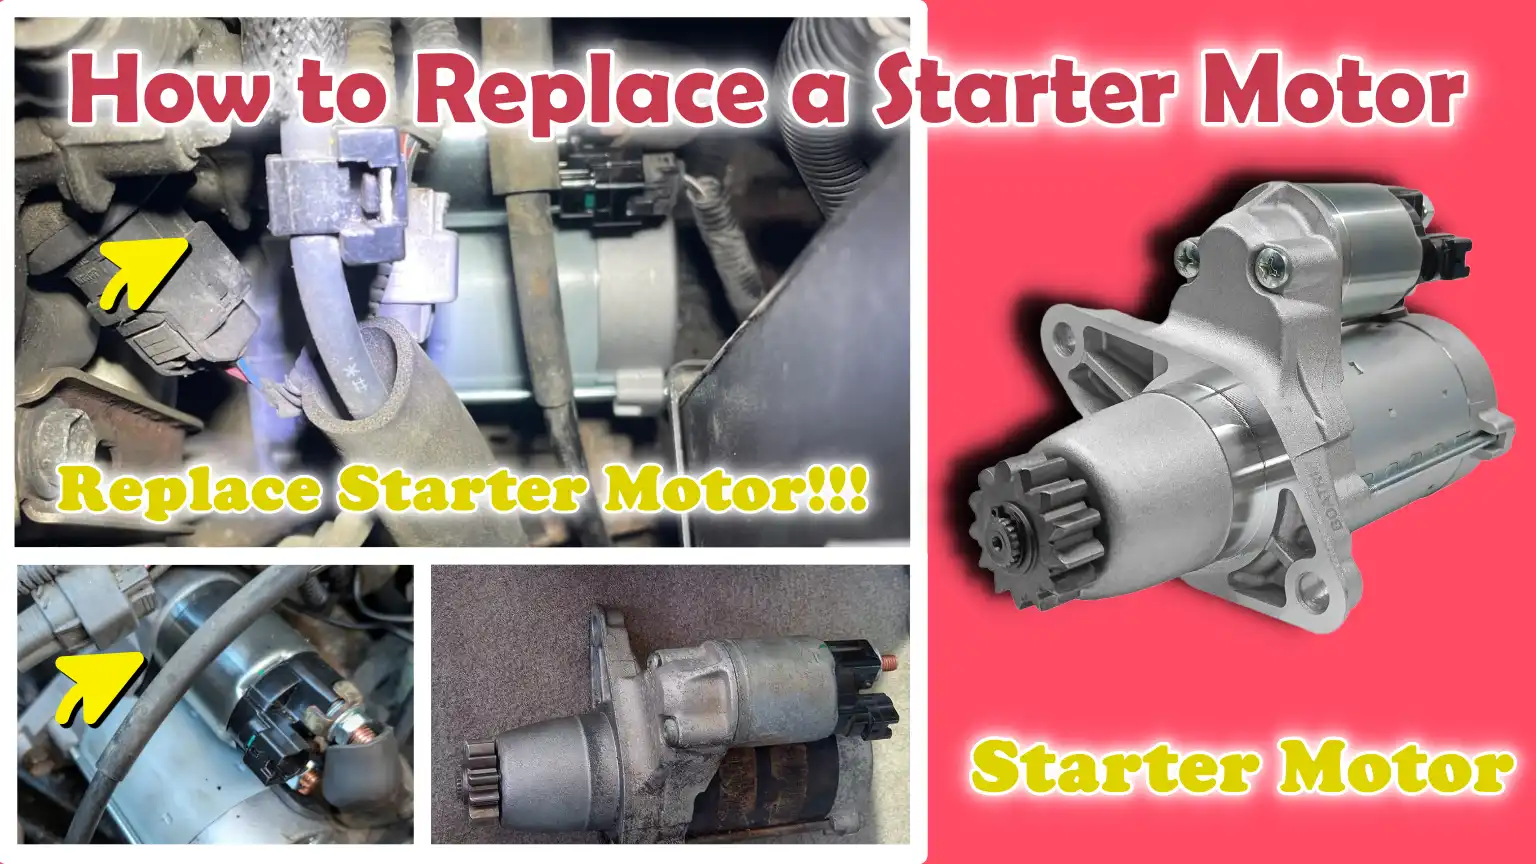
That’s why, we have come with this guide about How to Replace a Starter Motor, so that you can identify the symptoms and replace them with the easy methods mentioned in this guide.
Understand, What Is a Starter Motor?
A starter motor is a powerful electric motor used to start the engine in vehicles.
Internal combustion engines cannot start on their own because the engine must first rotate to draw air and fuel into the cylinder and begin the combustion process.
The starter motor provides this initial rotation.
When the driver turns the ignition key or presses the start button, power from the car’s battery is supplied to the starter motor through the ignition system.
The starter motor then rotates rapidly and transfers force to the engine, causing the crankshaft to rotate.
This initial rotation allows the pistons to rotate inside the cylinders, drawing in air and fuel and initiating the combustion process that keeps the engine running.
Even though the starter motor only operates for a few seconds each time the engine is started, it performs a very demanding task.
It must generate a lot of torque to overcome the engine’s internal resistance, specially when the engine is cold.
Because of this heavy workload, starter motors are made with robust electrical and mechanical components that can handle high current and high stress.
However, over time, repeated starting cycles, engine overheating and normal wear can weaken or damage starter motor components.
Understanding how a starter motor works and its location helps drivers identify starting problems early and fix them before they become serious.
1. Basic Functions of a Starter Motor
Converting Electrical Energy into Mechanical Energy
The starter motor’s primary function is to convert electrical energy from the vehicle’s battery into mechanical energy to power the engine.
A standard car battery provides approximately 12 volts of electrical power, but the starter motor draws a very high current, often several hundred amps, for a short time when the engine starts.
When power is applied to the starter motor, it passes through coils and windings inside the motor, creating a magnetic field.
This magnetic field interacts with internal parts like the armature, causing the motor to spin faster.
As the armature rotates, the electrical energy stored in the battery is converted into rotational mechanical force.
This rotational motion provides the power needed to turn the engine’s crankshaft.
The conversion of electrical energy into mechanical motion occurs very quickly, typically within a few seconds of turning on the ignition.
This process allows the starter motor to deliver a powerful burst of rotational power that starts the engine running.
Without this energy conversion process, the engine would remain completely stationary and unable to initiate the combustion cycle that powers the vehicle.
Connecting the Flywheel to Crank the Engine
Another important function of the starter motor is to connect the engine’s flywheel so that the engine can start cranking.
The flywheel is a large, round metal disc that is directly connected to the engine’s crankshaft.
The flywheel has small teeth on its outer edge that allow it to engage with the starter motor’s small gear, called the pinion gear.
When the driver turns the ignition key, the starter solenoid pushes the pinion gear forward so that it engages with these teeth on the flywheel.
Once the pinion gear engages with the flywheel, the starter motor’s rotational motion is transferred to the flywheel.
This turns the flywheel, which in turn turns the crankshaft connected to it.
As the crankshaft begins to rotate, pistons move up and down inside the engine cylinders.
This movement helps the engine draw in air and fuel, compress the mixture and ignite it with the spark from the spark plug.
Once the engine has successfully started and is running on its own power, the starter motor automatically disengages from the flywheel so that the engine can continue running without interruption.
2. Main Parts of a Starter Motor
Starter Solenoid
The starter solenoid is an electromagnetic switch that controls the flow of electricity from the battery to the starter motor.
When the ignition key is turned, a small electrical signal is sent to the solenoid.
This signal activates an internal electromagnetic coil, which creates a magnetic field.
The magnetic force then moves a metal plunger inside the solenoid.
This plunger performs two important functions simultaneously.
First, it pushes the starter motor’s pinion gear forward so it can engage the flywheel.
Second, it closes the heavy electrical contacts that allow the large amount of current from the battery to flow directly to the starter motor.
Because the starter motor requires a large electrical current to operate, the solenoid acts as a safe and controlled switch that manages this power.
Without the solenoid, controlling the large electrical current required by the starter motor would be difficult.
If the solenoid fails, the starter motor lacks the necessary power to operate, often resulting in a clicking sound when the ignition key is turned.
Pinion Gear
The pinion gear is a small but crucial part of the starter motor.
It is a small metal gear attached to the starter motor’s shaft.
Its primary purpose is to connect the rotating starter motor to the engine’s flywheel.
When the starter motor engages, the solenoid pushes the pinion gear forward so that it engages with the flywheel’s teeth.
Once the gear engages, the starter motor’s rapid rotation reaches the flywheel, causing it to rotate and begin turning the engine’s crankshaft.
Once the engine is running, the pinion gear quickly retracts and disengages from the flywheel.
This automatic disengagement is crucial because if the pinion gear remained engaged while the engine was running at high speeds, it could cause serious damage to both the starter motor and the flywheel.
Armature
The armature is the central rotating part of the starter motor and is responsible for creating the motor’s rotational motion.
It consists of a shaft surrounded by a coil of wire and housed within the motor housing.
When electricity flows through the coils in the armature, it interacts with the magnetic field created by permanent magnets or electromagnetic coils inside the motor.
This interaction creates a rotational force that causes the armature to rotate rapidly.
As the armature rotates, it transfers its motion to the starter motor’s drive shaft and pinion gear.
Because the armature must rotate at very high speeds and handle high electrical currents, it is designed with durable materials that can withstand heat, friction and repeated use.
If the armature becomes damaged or worn, the starter motor may rotate slowly or stop working altogether.
Brushes
Brushes are small carbon components inside the starter motor that help transmit electrical current to the rotating armature.
Because the armature rotates continuously when the starter motor is running, a direct wire connection is impossible.
Instead, carbon brushes exert gentle pressure on a rotating part called the commutator.
This contact transfers power from the stationary electrical system to the rotating armature.
Over time, these brushes gradually wear out due to friction and electrical heat.
When the brushes become excessively worn, they no longer maintain proper contact with the commutator.
This prevents proper electrical flow to the armature, causing the starter motor to run intermittently or fail completely.
Worn brushes are one of the common causes of starter motor failure.
Housing
The housing is the outer protective casing that surrounds and supports all the internal parts of the starter motor.
It is typically made of strong metal, such as steel or aluminum, to ensure durability and safety.
The housing keeps the internal parts properly aligned and protects them from external damage, dirt, moisture and engine heat.
Because the starter motor is typically located near the engine and transmission, it operates in an environment that can be very hot and dirty.
The strong metal housing helps protect sensitive internal parts, such as the armature, brushes and wiring, from these harsh conditions.
Additionally, the housing helps dissipate heat generated during starter operation, improving the starter motor’s overall reliability and lifespan.
3. Where is the starter motor located?
Usually near the transmission bell housing
In most vehicles, the starter motor is mounted near the transmission bell housing.
The bell housing is the part of the transmission that connects directly to the engine.
This location is important because the starter motor must be close enough to connect to the engine flywheel, which is located at the junction with the transmission behind the engine.
By placing the starter motor near the bell housing, manufacturers ensure that the starter’s pinion gear can easily reach the flywheel teeth.
The starter motor is securely mounted in this location using strong bolts that keep it properly aligned with the flywheel.
Correct alignment is crucial because even the slightest misalignment can cause the gears to wear out or engage incorrectly.
Connected to the engine flywheel
The starter motor is specifically designed to engage with the engine flywheel during the starting process.
The flywheel is a heavy metal disc that’s attached to the engine’s crankshaft and it plays a vital role in storing rotational energy and helping the engine run smoothly.
The flywheel has small gear teeth on its outer edge that allow it to mesh with the starter motor’s pinion gear.
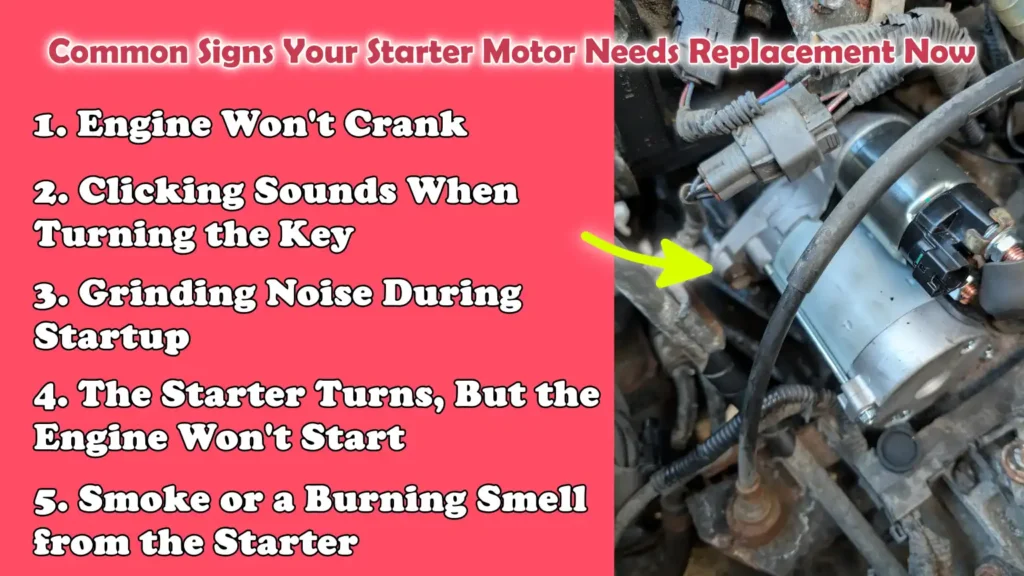
Common Signs Your Starter Motor Needs Replacement Now
The starter motor is one of the most crucial parts of a vehicle’s starting system, as it’s responsible for turning the engine over when you try to start the car.
When the starter motor begins to fail, the engine may struggle to start or may not start at all.
Recognizing these warning signs early can help drivers avoid unexpected breakdowns and costly repairs.
Starter motors typically wear out gradually due to wear and tear inside the motor, electrical problems, worn gears, or overheating from repeated starting attempts.
In many vehicles, the starter motor can last 100,000 to 150,000 miles, but this lifespan can vary depending on driving habits, weather conditions and the overall health of the vehicle’s electrical system.
When a starter motor begins to fail, it often shows obvious symptoms, such as strange noises, slow engine cranking, or the engine not starting at all.
Understanding these symptoms helps drivers quickly identify whether the starter motor needs to be replaced and take action before the problem becomes more serious.
1. Engine Won’t Crank
The most common and obvious sign of a starter motor failure is that the engine won’t crank at all.
Cranking is the process by which the starter motor turns the engine’s crankshaft to drive the pistons inside the cylinder.
When the engine won’t crank, it means the crankshaft isn’t rotating and the combustion process that powers the engine isn’t starting.
In many cases, drivers turn the key or press the start button and nothing happens except for dashboard lights.
This often indicates that power is being supplied to the vehicle, but the starter motor isn’t converting that electricity into mechanical motion.
There are several reasons why a starter motor can fail to crank the engine.
Internal parts like the armature, brushes, or solenoid can wear out after years of use.
Electrical connections can also become loose or damaged, preventing sufficient current from reaching the starter motor.
In some cases, the starter motor may receive power but not generate enough torque to overcome the engine’s compression.
When this happens, the engine stalls completely.
If the battery is fully charged and the vehicle still won’t crank, the starter motor is often one of the first parts mechanics check.
2. Clicking Sounds When Turning the Key
A clicking sound when turning the ignition key is another common symptom of a starter motor problem.
Many drivers hear a clicking or rapid clicking sound when trying to start the vehicle.
This sound usually comes from the starter solenoid, the part responsible for connecting battery power to the starter motor.
When the key is turned, the solenoid receives an electrical signal and attempts to activate the starter motor.
If the starter motor isn’t working properly, the solenoid may repeatedly try to engage, causing a clicking sound.
This clicking sound often occurs when the starter motor isn’t receiving enough electrical current to operate normally.
Sometimes a weak battery is the cause, but if the battery is fully charged, the problem may be with the starter motor itself.
Worn brushes, faulty wiring, or a faulty solenoid can prevent the motor from receiving the high electrical current needed to start the engine.
Because of this, the solenoid keeps trying to engage the motor, causing a clicking sound that drivers can hear.
Repeated clicking sounds during startup are a major warning sign that the starter system needs inspection.
3. Grinding Noise During Startup
A grinding sound during startup is a serious warning sign that should never be ignored.
This noise usually occurs when the starter motor’s pinion gear doesn’t mesh properly with the engine’s flywheel.
The flywheel has small teeth on its outer edge and these teeth are designed to engage smoothly with the starter motor’s gears.
When everything is working properly, the gears engage smoothly and the engine starts cranking without any strange noises.
However, if the starter motor’s gears are worn, damaged, or misaligned, the gears may rub against each other instead of engaging properly.
This causes a loud grinding noise when the engine starts.
In some cases, the grinding noise may occur only occasionally at first, but as the starter motor wears out, it becomes more frequent.
If this problem is ignored for too long, it can damage the flywheel teeth as well as the starter motor’s gears.
Because replacing a flywheel can be more expensive and difficult than replacing a starter motor, it’s important to address any grinding noises immediately.
4. The Starter Turns, But the Engine Won’t Start
Another symptom of a malfunctioning starter motor is when the motor spins but the engine won’t start.
In this situation, the driver may hear the motor revving rapidly when the ignition is turned on, but the engine itself won’t crank or start.
This usually means the starter motor is running, but the pinion gear isn’t engaging properly with the flywheel.
This problem often occurs when the starter drive mechanism is worn or damaged.
The pinion gear can’t move forward to engage with the flywheel teeth.
Because of this, the starter motor spins smoothly without turning the engine.
When this happens, the vehicle won’t start because the crankshaft isn’t rotating.
Drivers may notice that the starter motor makes a louder or harsher noise than usual when it spins nonstop.
If this symptom occurs repeatedly, it usually indicates that the starter motor assembly needs repair or replacement.
5. Smoke or a Burning Smell from the Starter
Smoke or a burning smell coming from the starter area is a clear sign that something is wrong with the starter motor or its electrical system.
The starter motor uses a very high electrical current, often several hundred amps, to generate enough torque to turn the engine.
When the electrical components inside the motor wear out or are overloaded, they can generate excessive heat.
This heat can burn wiring insulation, internal coils, or other components, causing smoke or a strong burning smell.
Overheating can occur for a variety of reasons.
A common cause is repeated attempts to start the engine when the starter motor is already worn out.
Each attempt forces the motor to draw more electrical current, increasing the heat inside the unit.
Bad wiring, a short circuit, or a stuck starter solenoid can also cause a constant flow of electrical current, causing the motor to overheat.
If you smell smoke or a burning smell when starting, it’s important to stop trying to start the vehicle immediately.
Continuing to run a faulty starter motor can cause serious electrical damage and even pose a fire hazard.
Having the starter motor inspected and replaced if necessary can prevent further damage to the vehicle’s electrical system.
Know, What are The Common Causes of Starter Motor Failure
The starter motor is considered a strong and reliable component, but like any mechanical or electrical device, it can fail after years of use.
The starter motor operates every time the driver starts the vehicle and each start exposes it to high electrical current and mechanical stress.
In most vehicles, the starter motor can operate thousands of times over its lifetime.
Repeated use gradually wears down the internal components of the starter motor.
Engine heat, exposure to dirt and moisture and electrical problems can also damage the starter system over time.
When the starter motor begins to fail, drivers may experience symptoms such as slow cranking, clicking noises, grinding noises, or the engine failing to start at all.
Understanding the common causes of starter motor failure can help drivers identify the problem early and take the right steps to repair or replace the starter before it fails completely.
1. Worn Starter Brushes
Starter brushes are small but vital parts inside the starter motor that allow electricity to flow to the rotating armature.
These brushes are typically made of carbon because carbon conducts electricity and reduces friction.
The brushes gently apply pressure to a rotating part called the commutator, which sends electrical current to the armature coil.
When the starter motor receives power from the battery, electricity flows through the brushes to the armature, causing the motor to rotate and generating the mechanical force needed to crank the engine.
Over time, the constant friction between the brushes and the commutator gradually wears the brushes down.
Each time the starter motor operates, a small amount of brush material is worn away.
After thousands of engine starts, the brushes can become so small or worn that they can no longer maintain proper contact with the commutator.
When this happens, electrical current cannot reach the motor properly, causing the starter motor to rotate slowly, run intermittently, or fail completely.
Worn brushes are one of the most common reasons why older starter motors stop working properly.
2. Bad Starter Solenoid
The starter solenoid plays a crucial role in controlling the starter motor.
It acts as a powerful electrical switch that connects the vehicle’s battery to the starter motor when the driver turns on the ignition.
When the ignition system sends a small electrical signal to the solenoid, it activates an electromagnetic coil inside the solenoid.
This magnetic force moves a metal plunger, which performs two essential functions: it pushes the starter motor’s pinion gear forward so that it engages with the engine’s flywheel and it also closes the electrical contacts that allow excess battery current to flow to the starter motor.
If the starter solenoid fails, the starter motor may not receive the electrical power it needs to run.
A faulty solenoid may fail to connect the starter gear to the flywheel, or it may not supply the necessary current to the motor.
This often results in symptoms such as a clicking sound when the ignition key is turned, but the engine won’t crank.
Sometimes the solenoid may become stuck or not disengage properly, causing the starter motor to run longer than necessary.
Because the solenoid is a key control component of the starter system, any malfunction in this part can prevent the engine from starting.
3. Electrical Wiring Problems
The starter motor relies on a strong electrical connection between the battery, ignition system and starter assembly.
If the wiring supplying power to the starter motor is damaged or loose, the motor may not receive the electrical power it needs to operate properly.
The starter motor requires a very high current, often several hundred amps, to generate the torque needed to crank the engine.
Even minor wiring problems can reduce the amount of current reaching the motor.
Electrical wiring problems can occur for a variety of reasons.
Battery cables can become loose due to vibration from the engine.
Metal connectors can corrode over time due to moisture, road salt, or dirt.
The insulation around the wires can also crack or break over time after exposure to heat from the engine compartment.
When these problems occur, electrical resistance in the circuit increases, reducing power to the starter motor.
Because of this, the starter may turn slowly, make a clicking noise, or not work at all.
Regularly inspecting the battery cables and starter wiring can help prevent starter failure from these electrical problems.
4. Oil or Dirt Contamination
The starter motor is typically located near the engine and transmission, which means it operates in a location exposed to heat, dust and engine fluids.
Over time, oil leaks or dirt buildup can damage the starter motor and affect its performance.
Oil leaks from the engine or transmission can drip onto the starter motor housing and eventually onto internal components.
When oil mixes with dust and dirt, it can form a thick layer of dirt that obstructs the movement of internal components.
Dirt inside the starter motor can cause several problems.
Dirt and oil can increase friction between moving parts, making it difficult for the motor to rotate smoothly.
Electrical contacts can also become dirty, preventing the flow of electricity within the motor.
In severe cases, oil contamination can damage the insulation surrounding the electrical windings, leading to overheating or electrical failure.
Because of these risks, keeping the engine compartment clean and promptly repairing oil leaks can help protect the starter motor and extend its life.
5. Age and High Mileage
One of the most common causes of starter motor failure is age and high mileage.
Every time a driver starts a vehicle, the starter motor must perform a powerful mechanical task.
Over the life of a vehicle, a starter motor can be used thousands of times.
Each starting cycle generates heat, vibration and mechanical stress within the motor.
Gradually, this repeated stress causes wear and tear on internal components.
As the starter motor ages, components such as brushes, bearings and electrical contacts deteriorate.
Metal components can also weaken from years of exposure to engine heat.
In vehicles that are driven frequently or used in stop-and-go traffic, the frequent engine starts can cause rapid starter wear.
In many vehicles, starter motors typically last 100,000 to 150,000 miles, although some can last longer depending on maintenance and driving conditions.
When a vehicle reaches high mileage and begins to experience starting problems, replacing the starter motor is often the most reliable way to get the engine starting reliably.
Tools
| Tool or Material | Why It Is Needed | How to Use It |
|---|---|---|
| Socket Wrench Set | Starter motors are typically held in place by sturdy mounting bolts. When installing a new starter motor, these bolts must be removed to remove and reinstall the old starter. A socket wrench set helps remove these bolts quickly and safely. | Choose a socket that matches the size of the bolts on the starter motor. Attach the socket to the wrench handle and place it over the bolt head. When installing, turn the wrench anti-clockwise to loosen the bolts and clockwise to tighten them. |
| Ratchet and Extensions | Starter motors are often located in tight spaces near the engine and transmission. Ratchets help remove bolts quickly, while extensions help reach bolts that are difficult to reach with a normal wrench. | If the bolt is deep or difficult to reach, use a socket extension. Connect the extension to the ratchet handle. Place the socket on the bolt and turn the ratchet back and forth to loosen or tighten the bolt without removing the tool each time. |
| Screwdrivers | Some electrical connectors, covers, or clamps near the starter motor may be secured with screws. A screwdriver helps remove these parts so you can safely access the starter motor. | Choose the correct screwdriver tip that matches the screw head. Insert the tip firmly into the screw and turn it anti-clockwise to remove the screw. Turn it clockwise when reinserting it. |
| Jack and Jack Stands | In many vehicles, the starter motor is located under the engine. Raising the vehicle gives you enough space to access the starter motor. Jack stands keep the vehicle stable and safe while you work. | Place the jack under the vehicle’s recommended lifting point and slowly raise the car. Once raised, place jack stands under the car’s frame and secure the car by slowly lowering it onto the stands before working underneath. |
| Replacement Starter Motor | If the existing starter motor is damaged or worn, it must be replaced to ensure proper engine starting. Installing a new starter motor ensures reliable engine cranking. | Compare the new starter motor to the old one to ensure that the size, bolt holes and electrical connections match. Place the new starter in the mounting area, secure it with bolts and reconnect the electrical wires. |
| Safety Gloves | Working around the engine can expose your hands to sharp metal edges, dirt, grease and hot parts. Gloves help protect your hands and improve grip when handling tools or parts. | Wear gloves before beginning any repair work. Wear these to protect your hands when removing bolts, handling the starter motor and working around engine parts. |
| Safety Glasses | When working under the vehicle or around the engine, dirt, rust particles, or small metal fragments may fall. Safety glasses protect your eyes from injury during repairs. | Wear safety glasses before beginning any repair, specially when working under the vehicle. Keep them on throughout the process to protect your eyes from falling debris or dust. |
How to Ensure Safety Before Replacing a Starter
Replacing a starter motor is a task many vehicle owners can perform with the right tools and basic mechanical knowledge, but safety should always be paramount before beginning the work.
The starter motor is directly connected to the vehicle’s electrical system and is usually located near the engine and transmission.
Due to its location, repairs may require working around electrical wiring, heavy metal parts and hot engine parts.
If proper safety precautions are not taken, there is a risk of electric shock, burns, or injury from a moving or unstable vehicle.
Taking a few simple safety steps before beginning the repair can significantly reduce these risks and make the process safer and easier.
These precautions include disconnecting the car’s battery to stop the flow of electricity, parking the vehicle in a stable location to prevent it from moving, using jack stands to safely support the vehicle if it needs to be lifted and allowing the engine to cool down so you don’t come into contact with extremely hot parts.
Following these basic safety precautions helps create a safe working environment and protects both the repairer and the vehicle.
1. Disconnect the Car Battery
One of the most important safety steps before replacing the starter motor is to disconnect the car battery.
The starter motor is powered directly from the vehicle’s battery through a thick cable that carries a very high electrical current.
In fact, the starter motor can draw several hundred amps of power when running.
If the battery remains connected while working on the starter motor, there is a risk of accidental electrical contact.
This could cause a spark, an electrical short circuit, or damage the vehicle’s electrical system.
Disconnecting the battery prevents power from flowing through the starter circuit while working.
The safest method is to first disconnect the negative battery terminal.
The negative terminal is usually marked with a minus sign and is connected to the vehicle’s chassis ground.
Removing this connection breaks the electrical circuit and prevents power from reaching the starter motor.
This simple step greatly reduces the risk of electrical shock and prevents the starter motor from being accidentally activated while removing it.
2. Park on a Level Surface
Another important safety precaution is to park the vehicle on a level and stable surface before beginning any repair work.
When the car is parked on a slope or uneven ground, it is more likely to roll or move while you work.
If you are working underneath the vehicle or handling heavy parts like the starter motor, even the slightest movement can be dangerous.
A flat surface helps keep the vehicle stable and balanced.
It also makes it easier to safely lift the vehicle if you need to access the starter motor from underneath.
When the car is parked on level ground, the car’s weight is evenly distributed over all four wheels, reducing the risk of rolling.
Additionally, it’s a good idea to put the transmission in park for automatic vehicles or in first gear for manual vehicles and engage the parking brake to keep the vehicle safe while working.
3. Use Jack Stands for Safety
In many vehicles, the starter motor is located under the engine, near the transmission bell housing.
This means the vehicle may need to be lifted to safely access the starter motor.
Although a car jack can lift the vehicle off the ground, it isn’t designed to support the vehicle for long periods of time.
Relying solely on the jack can be dangerous as the jack can lose pressure or slip, potentially causing the vehicle to overturn.
Jack stands are designed to safely support the vehicle after it has been lifted.
After jacking the vehicle, the jack stands should be placed under a strong structural point in the vehicle’s frame.
The vehicle is then slowly lowered onto the stands so that they bear the weight instead of the jack.
This creates a strong support system that allows you to work safely underneath the vehicle.
Using jack stands is an important safety measure as they greatly reduce the risk of the vehicle falling during repairs.
4. Let the Engine Cool
Allowing the engine to cool before replacing the starter motor is another important safety step.
During normal operation, the engine and surrounding parts can become extremely hot.
After driving, parts like the exhaust manifold, engine block and surrounding metal parts can remain hot for extended periods.
Because the starter motor is located near the engine and transmission, it is often near these hot surfaces.
Working near hot engine parts can cause burns or injury if the engine has not cooled properly.
Waiting for the engine to cool allows the metal parts to return to a safe temperature.
In most cases, it’s best to wait at least thirty minutes to an hour after turning off the engine before beginning the repair.
This cooling period helps protect your hands and arms while working in the engine compartment.
It also makes the repair process more comfortable and safe overall.
How to Replace a Starter Motor – Guide That Bring Life to Your Engine
Replacing a starter motor is a repair that many car owners can perform with basic tools and attention.
The starter motor is responsible for starting the engine when the ignition key is turned, allowing the engine to begin the combustion process.
Because it handles high electrical current and mechanical force, the starter motor eventually wears out after years of use.
When it wears out, the engine may not crank, or you may hear clicking or grinding sounds during startup.
Learning how to replace a starter motor can help ensure reliable engine starts and save money on repair costs.
However, it’s important to follow each step carefully and work safely, as the starter motor is connected directly to the vehicle’s battery and is usually located in a tight space near the engine and transmission.
1. Disconnect the Battery
Before touching the starter motor or any electrical wiring, the first and most important step is to disconnect the car’s battery.
The starter motor draws a lot of power from the battery, often several hundred amps when the engine starts.
If the battery is connected while you’re working on the starter motor, there’s a risk of electrical sparks, a short circuit, or accidentally starting the starter.
These situations can damage electrical parts and even cause injury.
To safely disconnect the battery, locate the negative battery terminal.
This terminal is usually marked with a minus sign and connected to a black cable.
Using a wrench, loosen the nut holding the cable and gently remove the cable from the battery terminal.
Once the negative terminal is disconnected, the electrical circuit is broken and electricity cannot reach the starter motor while you’re working.
2. Locate the Starter Motor
The next step is to locate the starter motor inside the engine compartment or under the vehicle.
In most cars, the starter motor is located near where the engine connects to the transmission.
This location is known as the transmission bell housing and it houses the engine’s flywheel.
The starter motor is important to locate here because its small gear needs to connect to the flywheel to start the engine during startup.
The starter motor is usually a cylindrical metal part with electrical wires attached to it.
Depending on the car’s design, it may be easier to see it from underneath the car.
Identifying the correct part before beginning removal is crucial, as many electrical parts in the engine bay may look similar.
Consulting the vehicle’s repair manual or examining the wiring connected to the starter motor can help confirm its location.
3. Raise the Vehicle – If You Find It Necessary
In many vehicles, it’s easier to access the starter motor from underneath the car.
If so, safely raise the vehicle to create enough space for work.
A car jack is used to raise the vehicle off the ground, but it should only be used for lifting, not for supporting the vehicle during repairs.
After jacking up the car, place jack stands under the sturdy parts of the car’s frame.
Then, carefully lower the car onto the jack stands so they support the car’s weight.
Jack stands provide a strong support system and prevent the car from falling while you work underneath.
Taking the time to properly raise and secure the car makes the repair process safer.
4. Remove the Electrical Connections
Once the starter motor is clearly visible and easily accessible, remove the electrical connections connected to it.
The starter motor typically has a thick battery cable and one or more small wires connected to the starter solenoid.
These wires provide the electrical power and control signals necessary to operate the starter.
Using a wrench or socket, loosen the nuts connecting the cables to the starter terminals.
Carefully pull the wires away from the terminals and set them aside.
It’s helpful to remember or label where each wire connects so they can be reinserted correctly later.
Removing the electrical connections completely disconnects the starter motor from the vehicle’s electrical system and prepares it for removal.
5. Remove the Mounting Bolts
The starter motor is secured to the engine or transmission using sturdy mounting bolts.
These bolts hold the starter motor firmly in place so that its gears align properly with the engine’s flywheel.
To remove the starter motor, loosen these bolts and remove them using the appropriate-sized socket.
Using a ratchet and socket wrench, turn the bolts anti-clockwise to loosen them.
Some starter motors may have two bolts, while others may have three, depending on the vehicle’s design.
Because the starter motor can be heavy, it’s a good idea to support it with one hand while removing the last bolt.
This will prevent the motor from suddenly falling down after the bolt is removed.
6. Remove the Old Starter Motor
After removing the mounting bolts and electrical connections, the old starter motor can be removed from its mounting position.
Carefully remove the starter motor from the engine or transmission.
In some vehicles, you may need to gently twist or slightly shake the starter to remove surrounding parts.
Starter motors are typically made of metal and can be heavier than they appear, so it’s important to hold the unit firmly while removing it.
After removing it from the mounting area, the old starter motor can be removed from the engine compartment or under the vehicle.
This step completes the removal process and prepares the space for installing the new starter.
7. Compare the Old and New Starters
Before installing the replacement starter motor, it’s important to compare it to the old unit that was removed.
The new starter’s size, mounting points, electrical connectors and gear size should be the same as the original part.
This ensures that the new starter motor will fit properly and work correctly with the engine’s flywheel.
Carefully examine the bolt holes, electrical terminals and gear positions on both units.
Even minor differences can cause installation problems or prevent the starter from working properly.
Ensuring that the replacement part matches the original part helps prevent installation errors and ensures that the repair will perform as expected.
8. Install the New Starter Motor
After confirming that the replacement starter motor matches the original part, the new unit can be installed.
Carefully place the new starter motor in its mounting position near the transmission bell housing.
The starter motor must be properly aligned so that its gears engage properly with the engine flywheel.
Once the starter motor is installed, insert the mounting bolts through the starter into the engine or transmission mounting points.
Using a socket wrench, tighten the bolts until the starter motor is firmly secured.
Correct alignment and secure mounting are crucial because the starter motor must remain stable while generating strong rotational forces during engine startup.
9. Reconnect the Electrical Wires
Once the starter motor is securely mounted, the electrical connections that were removed earlier must be reconnected.
The battery cable and solenoid wire should be connected to the same terminals on the new starter motor as they were on the old one.
Place each wire on its correct terminal and tighten the retaining nut with a wrench.
It is important to ensure that these connections are tight and secure, as loose electrical connections can cause difficulty starting or reduced starter motor power.
Proper electrical connections help ensure that the starter motor receives the high current needed to crank the engine.
10. Reconnect the Battery
Once the starter motor and wiring are fully installed, the vehicle’s battery can be reconnected.
Return to the battery and reattach the negative battery cable that was removed at the beginning of the repair.
Place the cable on the negative terminal and tighten the nut until the connection is secure.
Reconnecting the battery restores power to the vehicle’s electrical system.
At this stage, all electrical parts, including the starter motor, should be ready to function normally again.
11. Test the Starter
The final step is to test the new starter motor to ensure that the installation was successful.
Sit in the driver’s seat and turn the ignition key or press the start button to start the engine.
If the starter motor is installed correctly, the engine should crank easily and start normally.
Look for any unusual noises when starting, such as grinding or clicking sounds.
The engine should start quickly and the starter motor should stop immediately after the engine is running.
If the engine starts normally and there are no unusual noises, the starter motor replacement has been completed successfully.
Common Tips to Install a Starter Motor In Perfect Way
Properly installing the starter motor is crucial, as it’s responsible for turning the engine when every vehicle starts.
Even a small installation error can cause trouble starting, electrical problems, or damage to the starter motor and flywheel.
The starter motor must receive strong electrical power from the battery and be properly installed so that its gears are properly aligned with the engine’s flywheel.
Dirty electrical connections, loose mounting bolts, or faulty wiring can damage the starter motor, even if it’s brand new.
Taking a few extra minutes to check important details during installation can significantly increase the starter motor’s reliability and lifespan.
Proper installation ensures the starter motor receives the correct electrical current, engages the flywheel smoothly and runs safely without causing excessive wear to other engine parts.
1. Clean Electrical Connections
Clean electrical connections are crucial for the starter motor to function properly.
To generate the strong mechanical force needed to crank the engine, the starter motor requires a large electrical current from the vehicle’s battery.
In many vehicles, the starter motor can draw several hundred amps of power for a short time when the engine starts.
If the electrical connections are dirty, rusted, or covered in grease, the flow of electricity can be reduced.
This creates electrical resistance, which can reduce power reaching the starter motor and cause slow cranking or starting failure.
Before installing a new starter motor, it’s a good idea to carefully inspect the battery cables and starter terminals.
Prolonged use can cause dirt, rust, or corrosion to accumulate on the metal connectors.
These deposits can prevent the smooth flow of electrical current.
Cleaning the metal surfaces with a wire brush or a clean cloth can help restore proper electrical contact.
Ensuring that the connectors are clean and free of corrosion ensures that the starter motor receives the full electrical power needed to start the engine.
2. Tighten the Bolts Properly
Properly tightening the starter motor mounting bolts is another important step during installation.
The starter motor must be securely attached to the engine or transmission housing so that its gears align properly with the flywheel.
The flywheel rotates at a very high speed when the engine starts and the starter motor must remain firmly in place when engaged.
If the mounting bolts are not properly tightened, the starter motor may slip slightly during operation.
Even slight movement can cause the gears to become misaligned, causing a grinding noise or wear on the flywheel teeth.
Over time, loose bolts can worsen the problem due to engine vibration.
Additionally, overtightening the bolts can strip the threads or damage the mounting surface.
To ensure that the bolts are tightened evenly and securely, it is best to use the correct sized socket or wrench.
Properly positioned mounting bolts help keep the starter motor stable and ensure smooth engagement with the engine during startup.
3. Check Battery Condition
The condition of the vehicle’s battery is crucial to how well the starter motor will perform.
If the battery is weak or not providing enough power, even a well-installed starter motor may not function properly.
The starter motor requires a strong electrical current to rotate the engine’s crankshaft, specially when the engine is cold or when the engine oil is thick.
If the battery is old, slightly discharged, or damaged, it may not provide the current the starter motor needs to operate properly.
This can cause the engine to crank slowly, make a clicking noise, or fail to start.
Before completing the installation, it’s helpful to check the battery’s condition by checking the terminals and ensuring that the battery is fully charged.
Clean battery terminals and a healthy battery help ensure the starter motor receives enough power to operate properly.
4. Check the Starter Wiring
Checking the starter wiring is another important step that can help prevent starting problems after installation.
The wiring connected to the starter motor carries both power from the battery and control signals from the ignition system.
These wires must be in good condition for the starter motor to function properly.
Over time, engine heat, vibration from driving, or contact with other metal parts can damage the wiring insulation.
If the insulation cracks or wears out, the wires inside can become exposed.
Poor wiring can cause electrical shorts, poor connections, or reduced power supply to the starter motor.
It’s important to carefully check the wiring before reconnecting it to the new starter motor.
Tighten any loose connectors and repair or replace any damaged wires if necessary.
Ensuring that the wiring is in good condition helps maintain a strong and reliable electrical connection to the starter system.
Common Mistakes to Avoid During Replacement of Starter Motor of Your Vehicle
Replacing a starter motor is a repair that can often be done with basic tools and care, but many people make minor mistakes during the process that can lead to serious problems later.
The starter motor is directly connected to the vehicle’s electrical system and must be perfectly aligned with the engine’s flywheel.
Because it handles both high electrical current and mechanical movement, even a minor installation error can prevent the engine from starting properly.
Some common mistakes include forgetting to disconnect the battery, installing a starter motor that doesn’t match the vehicle, leaving electrical connections loose, or overlooking faulty wiring.
These mistakes can cause problems such as electrical sparks, slow engine cranking, clicking noises, or failure to start.
Understanding and avoiding these common mistakes can make the repair safer, protect the vehicle’s electrical system and ensure that the new starter motor will perform reliably for a long time.
1. Not Disconnecting the Battery
One of the most common and dangerous mistakes people make when replacing a starter motor is forgetting to disconnect the car’s battery before beginning the repair.
The starter motor is connected directly to the battery by a thick cable that carries a very high electrical current.
When the driver turns the ignition key, the starter motor can draw several hundred amps of power from the battery to start the engine.
If the battery remains connected while removing or installing the starter motor, accidental contact with the electrical terminals can cause sparks or short circuits.
These electrical sparks can damage sensitive parts of the vehicle’s electrical system and cause burns or injury.
In some cases, the starter motor can be accidentally activated if wiring is touched incorrectly while the battery is connected.
This sudden movement can cause injury or damage to nearby parts.
Disconnecting the negative battery terminal breaks the electrical circuit and prevents power from reaching the starter system during repairs.
Taking this simple safety step protects both the repair person and the vehicle’s electrical components.
2. Installing the Wrong Starter Motor
Another common mistake is installing a starter motor that doesn’t match the vehicle’s engine or design.
Starter motors may look similar, but they are often designed specifically for specific engines and transmission systems.
Differences may include the size of the mounting bolts, the location of the electrical connectors, the number of teeth on the starter gear and the overall size of the motor housing.
If the wrong starter motor is installed, it may not fit properly or may not engage properly with the engine’s flywheel.
When the starter gear isn’t aligned correctly with the flywheel’s teeth, a grinding noise may occur during startup or the engine may not crank.
In some cases, installing the wrong starter motor can damage the flywheel, which can be costly to repair.
To avoid this problem, it’s always important to compare the replacement starter motor to the old one before installation.
Checking the bolt holes, gear positions and electrical terminals helps ensure that the new starter motor is the correct part for the vehicle.
3. Loose Electrical Connections
Loose electrical connections are another problem that can cause serious vehicle starting problems, even after installing a new starter motor.
The starter motor relies on a strong electrical current flow from the battery to generate enough power to start the engine.
If the battery cables or solenoid wires are not properly tightened, electrical current cannot flow smoothly through the connections.
When connections are loose, electrical resistance increases and the amount of power reaching the starter motor is reduced.
This can cause problems such as slow cranking, repeated clicking sounds, or intermittent starting, where the vehicle starts sometimes but not always.
Loose connections can also generate heat due to electrical resistance, which can damage wiring or terminals over time.
Ensuring that all wires are securely connected and properly tightened helps maintain a strong electrical connection and allows the starter motor to receive the full power it needs to function properly.
4. Ignoring Faulty Wiring
Ignoring faulty wiring is another mistake that can cause starter motor problems even after installing a new unit.
The wiring connected to the starter motor carries both power from the battery and control signals from the ignition system.
These wires are located in the engine compartment, where they are exposed to heat, vibration, moisture and dirt.
Over time, the insulation around the wires can become weak, broken, or worn.
If faulty wiring is not repaired, it can prevent the starter motor from receiving the proper electrical current needed to operate.
Broken or exposed wires can also create electrical shorts that can damage the starter motor, battery, or other electrical components of the vehicle.
Sometimes, the starter motor may appear to be faulty, but the real problem is faulty wiring that disrupts the electrical connections.
Carefully inspecting the wiring during the replacement process can help identify these problems quickly.
Repairing or replacing faulty wiring ensures that the starter motor receives a clean and reliable power supply, allowing the starting system to function properly.
Read More:
Know, Estimated Starter Motor Replacement Cost
Replacing a starter motor involves both the cost of the new part and the labor required to install it.
Understanding these costs can help vehicle owners plan their repairs.
The cost of a starter motor depends on the make, model and year of the vehicle, as well as whether the part is an Original Equipment Manufacturer (OEM) unit or an aftermarket replacement.
Labor costs also depend on the vehicle’s design, the ease of the starter motor and the mechanic or repair shop’s hourly charge.
Knowing the total cost of parts helps drivers make informed decisions, compare repair options and avoid unnecessary expenses.
Generally, investing in a high-quality starter motor and professional installation ensures reliable engine starting and reduces the likelihood of frequent repairs in the future.
1. Starter Motor Cost
Starter motor prices can vary significantly depending on the type and brand of the part.
For most standard vehicles, the cost of a new starter motor can range from reasonable to high, depending on its design, materials and electrical capacity.
Original Equipment Manufacturer (OEM) starters are designed specifically for the vehicle and typically cost more because they guarantee proper fit, compatibility and performance.
Aftermarket starter motors are often less expensive and, if they match the specifications of the original part, can offer better performance.
It is important to choose a starter motor that is compatible with the vehicle’s engine and transmission to ensure proper engagement with the flywheel and reliable operation.
2. Labor Cost
Labor cost is also an important factor in replacing a starter motor, depending on how easily the starter is accessible from the vehicle.
In many cars, the starter motor is located near the engine and transmission, sometimes in tight spaces that require lifting the vehicle or removing other parts.
Mechanics typically charge by the hour for labor, which can vary by shop and region.
Vehicles with more difficult engine access may require more labor time, increasing labor costs.
On average, labor can take one to two hours, but more complex vehicles or vehicles with high-performance engines may require longer.
Choosing a qualified mechanic ensures that the starter is installed safely and correctly, reducing the risk of future problems.
3. Total Replacement Cost
The total cost of replacing a starter motor is the sum of the price of the new starter and the labor cost of installation.
For standard vehicles, the total replacement cost can range from medium to high depending on the quality of the starter, the complexity of the vehicle and local labor rates.
Some vehicles may require additional parts, such as new electrical connectors or minor wiring repairs, which may increase the total cost slightly.
Planning for the full replacement cost helps vehicle owners budget appropriately and avoid unexpected expenses.
Investing in a quality starter motor and proper installation provides reliable starting and helps prevent future starting system problems.
When to Repair or Replace a Starter
Knowing when to repair or replace a starter motor can save time and money and ensure reliable starting.
The starter motor is made up of several parts, including the solenoid, brushes, armature and gears.
Some problems are minor and can be repaired without replacing the entire motor, while others require a safer and more economical replacement.
To make the right decision, it’s important to understand the cause of the starter problem, the condition of its parts and the cost and effort required to repair or replace it.
Minor repairs may extend the starter’s life for a while, but repeated problems or failure of major parts usually indicate that it needs to be replaced for reliable engine starting.
1. Minor Solenoid Problems
The starter solenoid is an electrical switch that controls the flow of current from the battery to the starter motor.
In some cases, the solenoid may malfunction slightly or intermittently, causing problems such as a single click or several sharp clicks when trying to start the engine.
Minor solenoid problems can sometimes be fixed by cleaning the contacts, lubricating the moving parts, or, if the solenoid is a separate component, replacing it.
Repairing the solenoid is often cheaper than replacing the entire starter motor and may restore proper starting if the rest of the motor is still in good condition.
However, it is important to ensure that the solenoid repair completely corrects the problem, as an incomplete repair can cause repeated starting problems.
2. Replacing Brushes
The brushes inside the starter motor are small pieces of carbon that transmit electricity to the motor’s armature.
Over time, these brushes wear down from constant friction and power use.
If the starter motor is functioning properly elsewhere, replacing faulty brushes can often restore normal operation without replacing the entire starter.
Replacing brushes is usually an easy repair for a mechanic and much cheaper than replacing the entire starter.
Regularly checking the brushes and cleaning the commutator can help extend the life of the starter motor and avoid unnecessary replacement costs.
3. Starter Failure
Starter failure occurs when essential parts, such as the armature, starter housing, or internal gears, become worn beyond repair.
Symptoms of a complete starter failure include the engine not cranking at all, a loud grinding noise, smoke, or the starter motor rotating without starting the engine.
In these situations, repair may not be practical or reliable because replacing individual parts can be difficult, time-consuming and less reliable.
In the event of a complete failure, installing a new starter motor is usually the best option, as it restores reliable starting performance and ensures the engine receives full power for proper cranking.
Choosing replacement over repair in the event of a complete failure can prevent recurring starting problems and damage to other engine components.
How to Maintain Starter Motor Working Life
Properly maintaining your starter motor can significantly extend its life and prevent unexpected starting problems.
The starter motor is a vital component that endures high electrical current and mechanical stress every time the engine is started.
Over time, wear and tear, poor electrical connections, or repeated stress can lead to premature failure.
By following a few essential maintenance practices, drivers can ensure their starter motor runs smoothly for many years.
Proper maintenance not only protects the starter motor but also improves the overall health of the engine, prevents costly repairs and increases vehicle reliability.
Paying attention to battery condition, electrical connections, starting habits and regular vehicle maintenance are all crucial to extending the life of the starter motor.
Now, even there’s research into the starter motor fault diagnosis that is demonstrated with the advanced monitoring techniques such as: fuzzy logic algorithms as it can effectively identify the specific start motor failures as it literally analyzes the current and voltage patterns as well, so this is really valuable for critical applications such as: emergency vehicles, where a malfunctioning starter motor actually prevents the engine from starting and also it compromises overall system safety as well.[¹]
1. Keep the Battery Healthy
A healthy and fully charged battery is essential for the starter motor to function properly.
The starter motor requires a lot of electrical current to crank the engine and a weak or slightly discharged battery can force the starter to overwork.
Repeatedly trying to start a vehicle with a weak battery can generate excessive heat inside the starter motor, accelerate wear of internal components and shorten the unit’s overall life.
Regularly checking the battery charge level, cleaning the battery terminals and replacing old or worn batteries ensures the starter motor has enough power to start the engine smoothly and reliably.
2. Keep Electrical Connections Clean
Clean electrical connections are crucial to maintaining proper current flow to the starter motor.
Dirt, rust, or grease on the battery terminals, starter terminals, or wiring can increase resistance and reduce the amount of power delivered to the motor.
Over time, this can cause the engine to crank slowly, cause clicking noises, or cause premature wear of starter motor parts.
Regularly checking and cleaning all electrical connections helps maintain proper electrical conductivity and keeps the starter motor functioning properly.
Using a wire brush or contact cleaner to remove rust and ensuring all connections are tight can significantly improve the starter’s performance and lifespan.
3. Avoid Frequent Starts
When the engine doesn’t start immediately, repeatedly trying to start puts excessive strain on the starter motor.
Each time the starter engages, it draws a lot of electrical current and generates heat inside the motor.
Repeatedly trying to start the engine without a short break can overheat the starter and damage internal components such as the brushes, armature winding and solenoid.
Pausing for a few seconds between start attempts gives the starter motor a chance to cool down and reduces the risk of overheating.
Developing this habit helps prevent unnecessary wear and tear on the starter motor and its premature failure.
4. Regular Vehicle Maintenance
Regular vehicle maintenance plays a vital role in extending the life of the starter motor.
Keeping the engine oil clean and at the correct level ensures smooth engine rotation, reducing the workload on the starter motor during cranking.
Regular inspections of the vehicle’s electrical system, battery and wiring can detect problems such as loose connections, poor insulation, or corrosion before they affect the starter motor.
Servicing the vehicle as recommended by the vehicle manufacturer, including checking engine mounts, belts and other connected parts, helps maintain optimal operating conditions.
A well-maintained vehicle provides a stable environment for the starter motor, reducing mechanical stress and ensuring reliable operation.
Conclusion – How to Replace a Starter Motor
Yes, without a doubt the starter motor is actually the heartbeat of your engine, as it keeps your vehicle run in a smooth way.
The starter motor is one of the most important components of the engine’s starting system, converting electrical energy from the battery into mechanical force to turn the engine.
Over time, wear and tear, electrical problems, or environmental factors such as dirt and oil buildup can reduce its performance or cause it to fail completely.
By understanding the signs of a bad starter, carefully with easy to perform replacement process and performing proper maintenance, vehicle owners can prevent unexpected failures and extend the life of their starter motor.
Choosing the right replacement part, ensuring proper electrical connections and keeping the battery healthy are all essential factors in guaranteeing smooth engine starts.
Regular checks, timely repairs and attention to detail during installation not only save money in the long run but also improve overall vehicle reliability and safety.
So, that’s it from this guide on How to Replace a Starter Motor, but the real thing is: you can still ask related queries in the comment box.
Frequently Asked Questions
FAQ 1: What is a starter motor and why is it important?
The starter motor is a small electric motor in your car that helps start the engine. When you turn the ignition key or press the start button, the starter motor draws power from the car’s battery and rotates the engine’s crankshaft. This movement automatically starts the engine. Without a working starter motor, the engine won’t crank and your car won’t start. It’s a vital part of your car’s starting system because it converts electrical energy into the mechanical motion needed to power the engine.
FAQ 2: How do I know if my starter motor is failing?
Signs of a starter motor failure include the engine not cranking at all when you turn the key, a clicking or grinding noise when starting, the starter turning without starting the engine, or a smoke or burning smell near the starter area. These problems occur because the starter motor may have worn brushes, a bad solenoid, damaged wiring, or internal mechanical issues. Recognizing these signs early can prevent vehicle stalling and help you take action before the motor fails completely.
FAQ 3: Should I have my starter motor repaired or replaced?
Whether to repair or replace the starter motor depends on the type of problem. Minor problems, such as worn brushes or a bad solenoid, can often be fixed without replacing the entire motor. If the starter motor is old, has damaged internal parts, or is completely worn out, replacing it is usually a safer and more reliable option. A complete replacement will improve vehicle performance and reduce the chance of future starting problems.
FAQ 4: How much does a starter motor replacement cost?
The cost of replacing a starter motor depends on the vehicle, the type of starter and labor charges. The cost of a new starter motor can range from reasonable to high, depending on whether it’s an Original Equipment Manufacturer (OEM) part or an aftermarket replacement. Labor costs depend on how easy it is to access the starter, the type of vehicle and the repair shop’s hourly rate. On average, the total replacement cost includes both parts and labor and investing in a good-quality starter motor and proper installation will ensure reliable engine starting.
FAQ 5: What tools and materials will I need to replace the starter motor?
To safely replace the starter motor, you’ll need a socket wrench set for removing mounting bolts, a ratchet with an extension for reaching tight spaces, a screwdriver for disconnecting wiring or covers, a jack and jack stands if you need to lift the vehicle, safety gloves and goggles for protection and, of course, a replacement starter motor. Using the right tools ensures the starter is safely removed and installed and prevents damage to other engine parts.
FAQ 6: Can I replace the starter motor myself?
Yes, anyone with basic mechanical knowledge and the right tools can replace the starter motor. Safety precautions are required, including disconnecting the battery, safely lifting the vehicle if necessary and properly handling electrical connections. With easy to do steps guide ensures the starter is installed correctly and works reliably. However, if you’re unsure, a professional mechanic is always a safer option.
FAQ 7: How can I maintain my starter motor to make it last longer?
To extend the life of the starter motor, keep the battery healthy, keep all electrical connections clean and tight, avoid repeatedly trying to start the engine if it doesn’t start immediately and perform regular vehicle maintenance. Checking the battery’s health, cleaning the terminals, checking the wiring and servicing the engine reduces stress on the starter motor and keeps it running smoothly for many years.
FAQ 8: What if I ignore a starter motor problem?
Ignoring a starter motor problem can cause it to fail completely, preventing you from starting your vehicle. Symptoms like clicking, grinding, or slow cranking can worsen over time. Electrical problems can also damage the battery or other parts of the starting system. Timely repair or replacement ensures reliable engine starting and prevents further costly damage to your vehicle.
References:
[1] A Fault Diagnosis of Engine Starting System Via Starter Motors Using Fuzzy Logic Algorithm
https://www.researchgate.net/publication/268398118_A_Fault_Diagnosis_of_Engine_Starting_System_Via_Starter_Motors_Using_Fuzzy_Logic_Algorithm

Hello Folks, Dean Shali here to help you out to solve the problems with your lovely vehicle, as i have lots of experience and knowledge about automotive industry as i woks directly with the customers and repair vehicles and i love to help the people to keep their cars safe and running smoothly.