Written By: Dean Shali
Fact Checked By: Sabré Cook
Reviewed By: Tamara Warren
Did you see rust in pipes of exhaust and already broken mufflers then these things actually reduces the fuel efficiency and not safe at all for us to keep going with them.
Literally, exhaust system is responsible for safely directing all the harmful gases away from the engine, even reduces the unwanted noise and improves the overall fuel efficiency.
But there’s components such as: muffler, catalytic converter and exhaust pipes that can rust, crack-up or loosen a bit that can cause loud noises, vibrations, even it decreases fuel economy and release the dangerous fumes inside the cabin as well.
That’s why you need to replace a faulty exhaust system in terms to protect your health and make sure to match the legal emission standards as well.
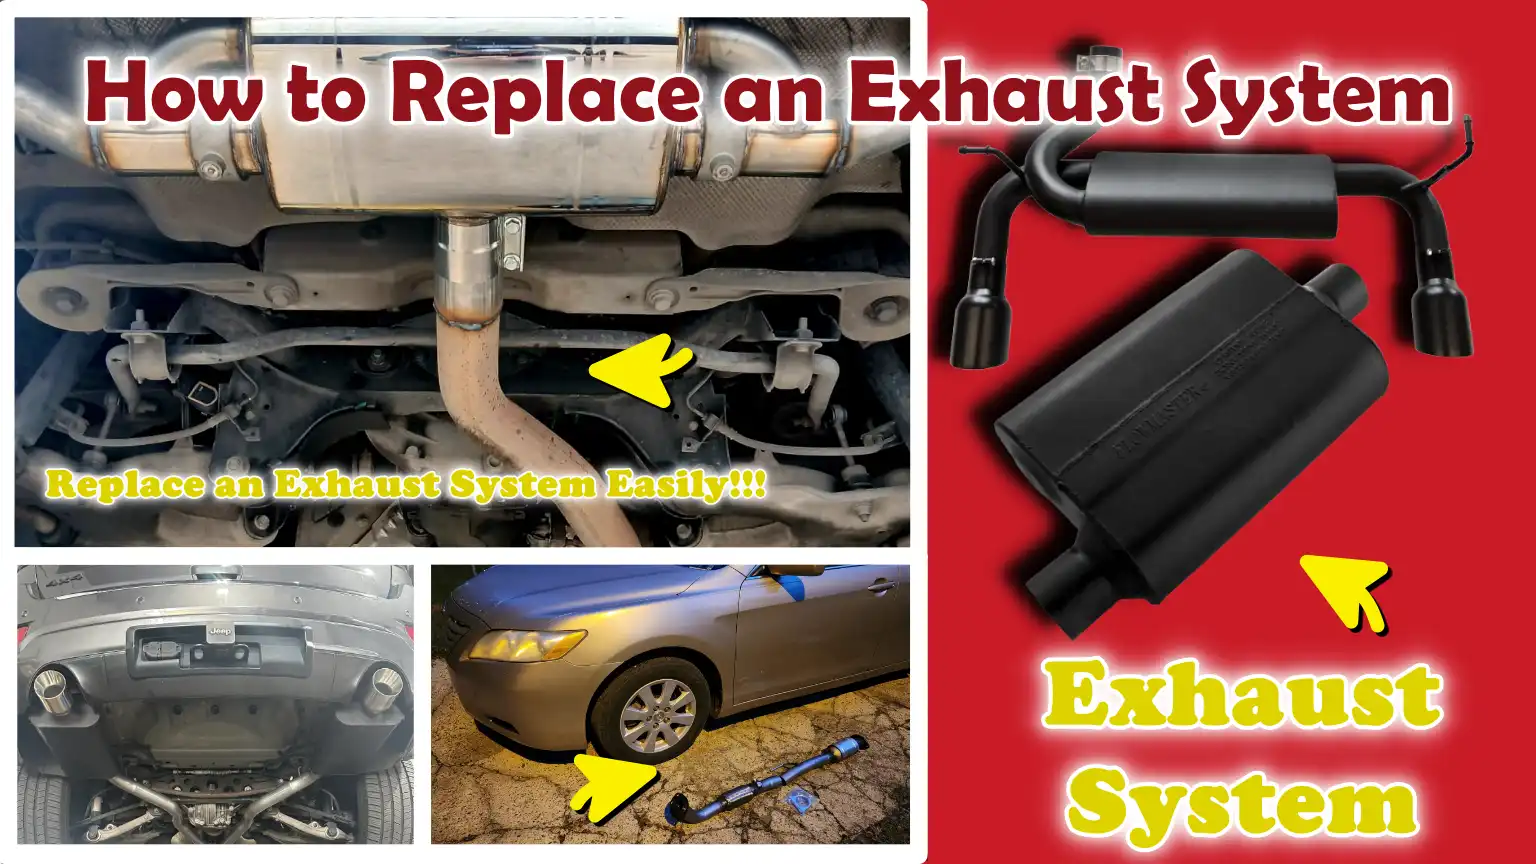
Now, we have listed fully working method on How to Replace an Exhaust System, so that you can understand from truly practical instructions, as even totally beginners can restore their car’s safety and efficiency from this guide.
At First, Understand the Exhaust System
The exhaust system is designed to safely expel harmful gases from the engine, reduce noise and enhance the vehicle’s overall performance.
When fuel combusts inside the engine, it releases gases such as: carbon monoxide, nitrogen oxides and hydrocarbons, which must be properly controlled and vented.
A properly functioning exhaust system not only helps the engine run smoothly but also protects passengers from hazardous fumes and ensures that the vehicle complies with emission standards.
Understanding each component helps you identify problems early and correctly replace faulty parts without causing further damage.
1. Exhaust Manifold
The exhaust manifold is the first component directly connected to the engine.
Its function is to collect hot exhaust gases from multiple cylinders and channel them into a single pipe.
It is typically constructed from durable metals such as: cast iron or stainless steel, as it must withstand extremely high temperatures.
If the manifold cracks or begins to leak gases, you may hear a ticking sound and notice a decline in engine performance, as the gases escape before passing through their intended path.
2. Catalytic Converter
The catalytic converter plays a crucial role in reducing harmful emissions.
Through a chemical process, it converts hazardous gases such as: carbon monoxide and nitrogen oxides, into less harmful substances, such as carbon dioxide and water vapor.
This component is essential for complying with environmental regulations and reducing air pollution.
If the catalytic converter fails, the vehicle’s acceleration may slow down, fuel efficiency may decrease and, due to unburnt fuel, the vehicle may emit a strong, foul odor resembling rotten eggs.
3. Muffler
The function of the muffler is to dampen the loud noise generated by the engine during the exhaust process.
It utilizes a series of chambers and perforated pipes to dissipate sound waves, thereby reducing the vehicle’s overall noise level.
If the muffler malfunctions, the vehicle begins to generate excessive noise, making it difficult to drive.
A faulty muffler often produces loud rumbling or rattling sounds and occasionally, distinct vibrations may also be felt inside the vehicle while it is in motion.
4. Tailpipe
The tailpipe is the final component of the exhaust system; it serves as an outlet through which exhaust gases are safely released into the atmosphere.
It directs exhaust fumes away from the vehicle and its occupants, thereby preventing harmful gases from entering the cabin.
If the tailpipe becomes damaged or obstructed, the proper flow of exhaust gases may be impeded; this can lead to issues related to “backpressure,” resulting in a decline in the engine’s overall efficiency and performance.
5. Oxygen Sensor
Oxygen sensors are small, yet critical, components of the exhaust system.
They monitor the oxygen levels within the exhaust gases and transmit this information to the Engine Control Unit (ECU).
Based on this data, the engine adjusts the air-fuel mixture to optimize performance and fuel efficiency.
A faulty oxygen sensor can lead to reduced fuel efficiency, increased exhaust emissions and may cause the “Check Engine” light to illuminate.
6. The Function of Each Component
Every component of the exhaust system works in unison to ensure that the engine operates correctly and safely.
The manifold collects exhaust gases, the catalytic converter purifies them, the muffler reduces noise, oxygen sensors optimize fuel efficiency and the tailpipe safely expels the gases.
If even a single component malfunctions, it can compromise the entire system, potentially leading to performance issues, increased pollution and safety hazards.
7. How a Faulty Exhaust System Affects Vehicle Performance
A defective exhaust system can have a severely negative impact on your vehicle.
Leaks or cracks can diminish engine power, as gases are unable to flow properly, and may also lead to increased fuel consumption.
Blockages within the system can create backpressure, forcing the engine to work harder and thereby reducing its overall efficiency.
Furthermore, harmful gases can seep into the vehicle’s cabin, posing a health risk to passengers.
Over time, neglecting exhaust-related issues can result in higher repair costs, a shortened vehicle lifespan and failure during emissions testing; therefore, timely replacement is crucial.
Tools
| Tool Name | Why It Is Needed | How To Use It |
|---|---|---|
| Socket and Wrench Set | The exhaust system is secured by bolts and clamps, which must be removed and subsequently reinstalled. | Select the correct socket size and attach it to a wrench; turn it anti-clockwise to loosen the bolt and clockwise to tighten it. |
| Jack and Jack Stands | To access the exhaust system, you require a safe workspace underneath the vehicle. | Use a jack to lift the car, then place jack stands beneath sturdy support points and lower the vehicle onto them for safety. |
| Penetrating Oil | Due to heat and moisture, exhaust bolts often corrode, making them difficult to remove. | Spray a penetrating lubricant onto the bolts and joints, wait a few minutes and then attempt to loosen them gently. |
| Exhaust Clamps and Gaskets | These components prevent leaks and securely hold the various sections of the exhaust system together. | Insert a gasket between the pipe joints, then secure it with a clamp and tighten it evenly. |
| Safety Gloves and Goggles | This protects you from sharp edges, rust particles and falling debris while working underneath the vehicle. | Wear gloves before handling parts and wear safety goggles to protect your eyes while working beneath the car. |
| Torque Wrench | This prevents overtightening or undertightening of bolts, either of which can lead to leaks or damage. | Set the required torque level; tighten the bolt until you hear a “click” sound from the wrench, indicating that the bolt has been tightened to the correct specifications. |
How to Make Sure Safety During Replacement of Exhaust System
When working on an exhaust system, paying special attention to safety is crucial, as you are exposed to high temperatures, heavy vehicle components and hazardous gases.
Taking the proper precautions not only protects you from injury but also ensures that the repair work is performed correctly and that no further damage is inflicted upon the vehicle.
Many accidents occurring during exhaust-related tasks stem from common mistakes such as: working on a hot engine, lacking proper ventilation, or improperly lifting the vehicle.
Understanding and adhering to these fundamental safety principles will enable you to complete the work with confidence and avoid serious hazards.
1. The Importance of Working on a Cold Engine
When the engine is running, the exhaust system becomes extremely hot; its temperature often reaches several hundred degrees.
Touching these components immediately after driving poses a significant risk of severe burns and injury.
It is always essential to allow the engine to cool down completely before commencing any work.
This process may take anywhere from 30 to 60 minutes, depending on how long the vehicle was driven.
A cold engine not only safeguards your hands and skin but also makes it easier to loosen bolts and handle components safely, as there is no risk of sudden heat exposure.
2. Ensuring Proper Ventilation When Working Around Exhaust Fumes
Exhaust fumes contain hazardous substances, such as carbon monoxide.
This gas is colorless and odorless and inhaling it in enclosed spaces can prove extremely dangerous.
Inhaling these fumes can lead to dizziness and headaches and in severe cases, it can even result in a life-threatening situation.
Always work in an open or well-ventilated area such as: outdoors or in a garage with the doors fully open.
Avoid keeping the engine running for extended periods while working.
If it becomes necessary to run the engine for diagnostic purposes, ensure a continuous flow of fresh air to prevent the accumulation of exhaust fumes.
3. Proper Use of Jack Stands and Vehicle Stabilization
Safely lifting the vehicle is one of the most critical steps when replacing an exhaust system.
Relying solely on a jack to support the vehicle is unsafe, as it could fail suddenly or slip at any moment.
Jack stands provide sturdy support and prevent the vehicle from falling while you are working underneath it.
Always place the jack stands on a strong, level section of the vehicle’s frame and ensure that the ground surface beneath is also level and solid.
Before going underneath the vehicle, gently rock it to verify that it is stable and will not shift from its position.
Taking this precaution significantly reduces the risk of serious injury.
4. Wearing Safety Gear, Gloves and Eye Protection
When handling exhaust components, you may face sharp metal edges, rust particles, dirt and falling debris.
Wearing safety gloves protects your hands from cuts, burns and irritation, while proper eye protection prevents dust or rust particles from entering your eyes.
Even a tiny particle can cause discomfort or injury; therefore, safety gear should never be overlooked.
Using the appropriate safety equipment ensures that you can work comfortably and focus fully on the task at hand without facing any unnecessary hazards.
How to Replace an Exhaust System – Easy Steps
How to Do Initial Preparation
The most critical aspect of replacing an exhaust system is proper preparation, as it lays the foundation for a safe and smooth repair process.
Many common issues such as: vehicle instability, missing tools, or damaged parts during installation, often stem from inadequate preparation.
Taking a few extra minutes to prepare properly can save you hours of frustration later on and significantly reduces the risk of injury or errors.
This step ensures that your workspace is safe, your vehicle is stable and you have everything ready before you begin the actual removal and installation process.
Park the Vehicle on Level Ground and Allow the Engine to Cool
Parking your vehicle on a level, solid surface is essential, as it ensures the vehicle remains stable when you lift it.
Uneven ground can cause the vehicle to shift or slip off the jack stands, creating a highly dangerous situation.
A level surface ensures proper balance and makes it easier to work safely underneath the vehicle.
Furthermore, it is crucial to allow the engine and exhaust system to cool down completely before beginning work.
Exhaust components can remain extremely hot long after the engine has been turned off and touching them too soon poses a serious risk of severe burns.
Allowing sufficient time for cooling not only ensures your safety but also makes handling bolts and components easier, avoiding complications associated with extreme heat.
Gather All Tools and Replacement Parts
Before you begin the job, it is essential to gather all the tools and new exhaust components you will need.
This includes items such as wrenches, sockets, clamps, gaskets and safety gear.
Having everything ready in one place prevents unnecessary delays and eliminates the risk of having to leave the job unfinished midway through.
It is also crucial to ensure that the replacement exhaust parts match your vehicle’s make and model, as incorrect parts can lead to poor fitment, leaks, or performance issues.
Keeping your tools organized and within easy reach allows you to work more efficiently and minimizes potential complications during the repair process.
How to Lift the Vehicle
Properly lifting the vehicle is a crucial step when replacing an exhaust system, as the majority of the work takes place underneath the car.
Any error made during this stage can result in serious injury or damage to the vehicle.
The objective is to raise the vehicle high enough to provide a comfortable workspace, while simultaneously ensuring that it remains completely stable.
Understanding the correct procedure for safely lifting the vehicle ensures that you can work with full confidence and avoid accidents caused by slipping or falling.
It is essential not to rush through this step, as your safety depends entirely on correctly lifting and supporting the vehicle.
Use a Jack and Jack Stands to Safely Lift the Vehicle
A car jack is used to lift the vehicle off the ground; however, when you are working underneath the vehicle, the jack should not be the sole means of support.
Once the vehicle has been raised, you must place jack stands beneath designated, sturdy points on the vehicle’s frame to safely support its weight.
This is critical because, over time, the internal pressure within the jack may decrease, or the jack itself may shift out of position, causing the vehicle to fall.
Always lift the vehicle slowly and place jack stands at equal distances on both sides to maintain balance.
Lifting from the correct points prevents damage to the vehicle’s body and ensures that the vehicle’s weight is safely distributed.
Check the Vehicle’s Stability Before Going Underneath
Before crawling underneath the vehicle, it is absolutely essential to verify that it is completely stable.
Even the slightest movement of the vehicle while you are underneath it can be extremely dangerous.
After positioning the jack stand, gently push against the side of the vehicle to verify whether it shifts or remains stationary.
If the vehicle moves even slightly, continue adjusting the jack stand until it feels completely stable and secure.
The ground surface must also be firm and non-slippery, as jack stands can sink into or tilt sideways on soft or uneven terrain.
Thoroughly verifying the vehicle’s stability creates a safe working environment and minimizes the risk of accidents during repairs.
How to Remove the Old Exhaust System
Removing the old exhaust system is the most critical part of the replacement process, as it allows you to safely extract damaged or worn-out components and create space for the new system.
Over time, exhaust components are exposed to heat, moisture and road grime, which often leads to rust, corrosion and seized joints.
Consequently, removing them can be far more challenging than it appears.
Exercising caution and patience during this stage helps prevent damage to surrounding components and ensures that the new exhaust system can be installed correctly, without any alignment issues or leaks.
Spray Penetrating Oil on Bolts and Hangers
Due to rust and constant exposure to heat, exhaust bolts and hangers often become severely seized.
Applying penetrating oil helps dissolve rust and reduce friction, thereby loosening these seized components.
It is essential to spray the oil on all visible bolts, nuts and rubber hanger mounts and to allow it to soak in for a few minutes.
This simple step makes removing the components significantly easier, without requiring excessive force, which otherwise could result in broken bolts or stripped threads.
Loosen and Remove Exhaust Clamps and Bolts
Once the penetrating oil has taken effect, the next step is to carefully loosen and remove all the clamps and bolts that hold the exhaust system together.
These fasteners connect the various components such as: pipes, mufflers and catalytic converters, to one another.
It is crucial to use tools of the correct size to avoid damaging the bolt heads.
Applying constant pressure while slowly rotating the component helps prevent sudden slippage.
If a bolt remains seized despite this, applying a little more penetrating oil and waiting a bit longer can make the removal process easier and safer.
Carefully Remove Old Exhaust Components
Once all the joints have been loosened, the exhaust components can be removed one by one.
These components may include the manifold section, catalytic converter, muffler and tailpipe.
It is essential to support each component while removing it, as some parts can be heavy or difficult to handle.
Removing the components in a controlled manner prevents them from falling and helps protect other parts of the vehicle from damage.
Paying close attention to how the components are interconnected can also prove helpful when installing the new system.
Inspect Exhaust Hangers and Replace If Damaged
Exhaust hangers are typically made of rubber and serve to keep the exhaust system securely in place while simultaneously dampening vibrations.
Over time, due to heat and constant movement, these hangers can crack, stretch, or wear out.
It is crucial to inspect their condition after removing the old exhaust system.
If they appear weak or damaged, replacing them is essential to ensure the new exhaust system remains securely in place and does not produce any rattling noises.
Proper hangers help maintain stability and extend the overall lifespan of the exhaust system.
How to Install the New Exhaust System
Installing a new exhaust system is a critical step that directly impacts your vehicle’s performance, safety and efficiency.
A properly installed system facilitates smooth exhaust flow, reduces noise and prevents the leakage of harmful gases.
Even minor errors during installation such as: loose connections or improper alignment, as it can lead to vibrations, leaks, or a decline in engine performance.
Working systematically and following a precise procedure helps ensure that every component fits correctly and functions exactly as intended.
This step is not merely about attaching parts; it is about creating a secure, properly aligned system that offers long-term durability.
Compare New Components with the Old System to Ensure a Proper Fit
Before installing anything, it is essential to compare the new exhaust components with the old ones.
This helps ensure that the size, shape and mounting points match your specific vehicle.
Even minor discrepancies can lead to fitting difficulties, leaks, or alignment issues.
Verifying this beforehand saves time and eliminates the need to subsequently remove and reinstall components.
It also confirms that all necessary parts such as: pipes, bends and connecting flanges, are correct and ready for installation.
Install Components in Reverse Order
The installation process is typically carried out in the reverse order of removal, starting from the front of the vehicle and working toward the rear.
This means first fitting the manifold connection, followed by the catalytic converter, then the muffler and finally, the tailpipe.
This sequence helps maintain proper alignment and ensures that each component connects to the next without any obstruction.
Installing the parts in the correct order also reduces the stress placed on the joints and makes it easier to adjust the system as you proceed.
Connect and Secure with New Gaskets and Clamps
Using new gaskets and clamps is essential for creating strong, leak-free connections between the exhaust components.
Gaskets act as seals between the joints, preventing gas leaks, while clamps firmly hold the pipes in place.
Old or worn-out gaskets can cause leaks, even if all other components have been installed correctly.
Carefully installing each gasket and tightening the clamps evenly ensures a secure fit and helps maintain the proper pressure and flow within the exhaust system.
Use the Correct Torque Settings for All Bolts
Tightening bolts to the correct level is crucial for both safety and performance.
If bolts are too loose, they may eventually lead to leaks, excessive noise, or component separation.
Conversely, if they are overtightened, their threads may strip, or the components themselves could crack.
By using a torque wrench, you can apply the precise amount of force specified for each joint.
Adhering to the correct torque settings ensures that all components remain securely fastened without sustaining damage, resulting in a reliable and long-lasting exhaust system.
How to Check for Proper Fit
Verifying the proper fit of the exhaust system is a critical step, as even a newly installed system can cause problems if it is not correctly aligned.
A well-fitted exhaust should hang securely beneath the vehicle, maintaining sufficient clearance to ensure it does not make contact with other components.
If the exhaust is not positioned correctly, it can lead to vibrations and rattling noises and the combined effects of heat and constant movement may even cause damage to surrounding parts.
Taking a moment to carefully inspect the fit ensures smooth system operation, minimizes wear and tear and guarantees that the system continues to function trouble-free for the long term.
Ensure the exhaust hangs correctly without touching the vehicle body.
The exhaust system is designed to hang slightly below the vehicle; this is achieved through the use of rubber hangers, which serve to absorb movement and vibrations.
It must not make contact with the vehicle body, suspension components, or fuel lines, as such contact can result in noise, component damage and the transfer of heat to sensitive areas.
Maintaining a small gap (clearance) between the exhaust pipes and the vehicle body ensures proper airflow and prevents adjacent components from overheating.
Checking this clearance is essential for maintaining a safe and quiet environment while driving.
Adjust alignment and tighten clamps as needed.
Once the positioning has been established, the next step is to fine-tune the alignment of the exhaust system, if necessary.
The pipes should connect easily and naturally, without any twisting or the need for forced fitting.
Improper alignment can place undue stress on the joints and eventually lead to exhaust leaks.
Once everything is correctly aligned, all clamps and joints should be tightened uniformly to securely fasten the system.
This ensures that the exhaust remains firmly in place while driving, preventing any movement that could generate noise or cause damage.
Proper alignment and secure tightening are essential for maintaining the system’s performance, safety and durability.
How to Test The New Exhaust System Correctly
Testing the exhaust system after installation is a crucial step, as it ensures that everything is functioning correctly and safely.
Even if all parts appear to be properly seated, minor issues such as: loose clamps, slight leaks, or misalignment, as it can still occur.
Testing allows you to detect these issues early on, before they escalate into serious or costly problems.
A properly functioning exhaust system should operate smoothly, quietly and without any irregularities, effectively expelling exhaust gases.
Spending a few minutes to thoroughly test the system improves performance, enhances fuel efficiency and makes for a safer driving experience.
Start the Engine and Check for Leaks
Once the installation is complete, start the engine and let it idle for a while.
Listen carefully for any unusual noises such as: hissing, popping, or loud ticking sounds, as these may indicate a leak within the system.
You should also pay attention to any strange odors emanating from the exhaust, particularly near the connection points, as this could mean that gases are escaping before reaching the tailpipe.
In some cases, you can detect escaping air by gently placing your hand near the joints (without touching any hot surfaces).
Identifying and fixing leaks at this stage is vital, as leaks can negatively impact engine efficiency and allow harmful gases to escape into areas where they should not be present.
Verify Proper Exhaust Flow and Operation Free of Rattles
After checking for leaks, observe how the exhaust gases exit the tailpipe.
The flow should be uniform and steady, free of any obstructions.
If the flow appears weak or irregular, it may indicate a blockage or improper installation.
Additionally, pay attention to any rattling or vibrating sounds emanating from beneath the vehicle.
Such noises often suggest that a component is loose or misaligned.
Repairing the system and tightening connections as needed will help resolve these issues.
Proper exhaust flow, along with a quiet, stable system, confirms that the installation was executed correctly and that the vehicle is safe to drive.
Know, Common Mistakes While Replacing Exhaust System
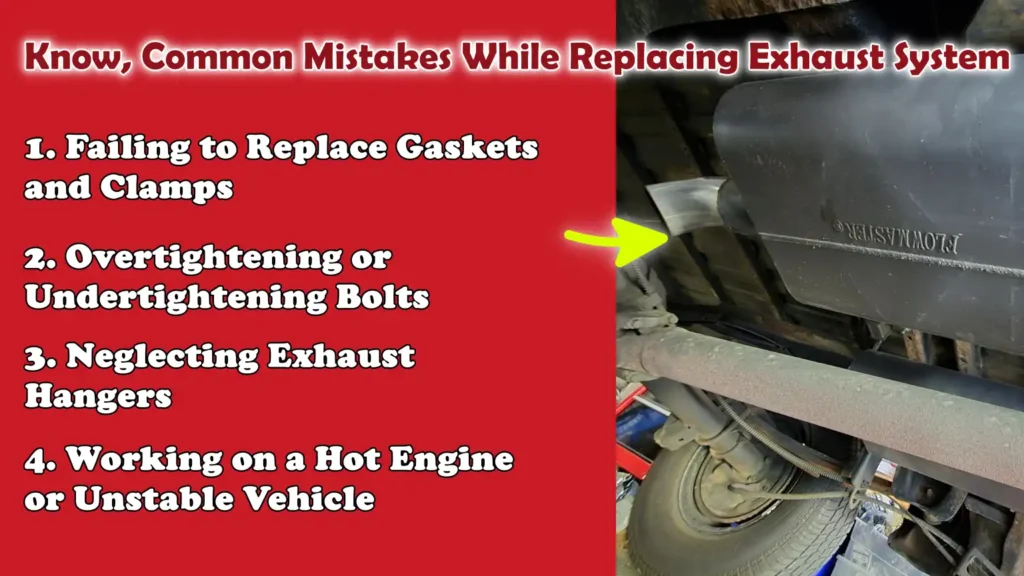
When replacing an exhaust system, minor errors can lead to major problems such as: leaks, excessive noise, poor performance, or even safety hazards.
Many of these issues do not manifest immediately; rather, they develop gradually due to improper installation or a failure to pay attention to critical details.
Understanding these common mistakes allows you to avoid costly repairs and ensures that your exhaust system functions correctly and safely.
Paying close attention during the installation process can make a significant difference in the overall durability and performance of the entire system.
Along with this, there’s studies about the modern exhaust systems that relies heavily on the catalytic converter technology to reduce the pollution, as studies also shows that the efficiency of these systems literally depends on the proper design and maintenance that means that replacing the worn-out exhaust parts to ensure the better chemical conversion of harmful gases and that improves environmental safety as well.[¹]
1. Failing to Replace Gaskets and Clamps
Gaskets and clamps play a crucial role in sealing and securing the exhaust system.
Over time, due to heat and pressure, old gaskets can become brittle, cracked, or worn out, rendering them ineffective at sealing the joints.
Reusing these old components can lead to exhaust leaks, resulting in increased noise and the emission of harmful gases.
Similarly, old clamps may fail to grip the pipes firmly, causing the joints to loosen.
Using new gaskets and clamps ensures a proper seal and secure connections, thereby maintaining optimal exhaust flow and preventing future issues.
2. Overtightening or Undertightening Bolts
Properly tightening bolts is essential for a reliable exhaust system.
If bolts are not tightened correctly, the joints may loosen over time, leading to leaks, vibrations and noise.
Conversely, overtightening bolts can strip their threads, cause the bolts to snap, or even crack exhaust components, particularly parts like the manifold or flanges.
Applying the correct amount of torque ensures that all components are securely fastened without sustaining any damage.
This balance is crucial for both safety and long-term performance.
3. Neglecting Exhaust Hangers
Exhaust hangers are designed to hold the system in place while simultaneously allowing for a degree of movement to absorb vibrations.
Neglecting damaged or worn-out hangers can cause the exhaust system to sag or move excessively.
This can lead to rattling noises, misalignment and even contact with other vehicle components, creating a risk of damage due to heat and friction.
Replacing weak or broken hangers ensures that the exhaust system remains properly positioned and stable, even while the vehicle is in motion.
4. Working on a Hot Engine or Unstable Vehicle
Working on a hot engine can be hazardous, as exhaust components can reach extremely high temperatures, posing a risk of severe burns.
Before commencing any work, it is always essential to allow sufficient time for the engine and exhaust system to cool down completely.
Furthermore, working underneath a vehicle that is not properly supported can be extremely dangerous.
Relying solely on a jack is unsafe; the vehicle must be securely supported on a stable surface using jack stands.
Adhering to these precautions helps prevent injuries and maintains a safe working environment throughout the entire repair process.
Read More:
- How to Fix Grinding Gears
- How to Replace a Clutch
- How to Diagnose Clutch Problems
- How to Change Transmission Fluid
How to Maintain New Exhaust System After Replacement
After replacing the exhaust system, proper maintenance is crucial to ensure its continued functionality and to extend its lifespan.
A new exhaust system can last for many years, but only if it receives regular care.
Heat, moisture, road salt and dust can gradually damage metal components over time, potentially leading to rust, leaks, or loose connections.
Simple inspections and careful driving habits can prevent these issues and save you from incurring expensive repair costs.
Regular maintenance also ensures that your vehicle continues to run smoothly, maintains fuel efficiency and keeps harmful emissions under control.
1. Regularly Check for Rust or Leaks
The exhaust system is constantly exposed to heat and moisture, which increases the likelihood of rust formation over time.
It is essential to regularly inspect the pipes, joints and connections for any signs of rust, small holes, or cracks.
Leaks may not always be visible, but they can often be identified by unusual noises or a faint odor of exhaust fumes.
Detecting rust or leaks early allows you to address minor issues before they escalate into serious problems, thereby preventing any negative impact on the vehicle’s performance or safety.
2. Avoid Driving Through Deep Water Immediately After Replacement
Driving through deep water immediately after installing a new exhaust system can cause the hot metal components to cool down rapidly.
This sudden change in temperature can place stress on the system or cause minor damage.
Rapid temperature fluctuations can weaken the metal over time, increasing the risk of cracks or corrosion.
It is best to allow the system to undergo a few normal heating and cooling cycles before exposing it to such conditions.
Exercising caution during the initial stages ensures that the exhaust system is properly seated in place and extends its overall lifespan.
3. Periodically inspect the clamps and bolts every few months.
Clamps and bolts hold the entire exhaust system together; however, due to vibrations and constant movement experienced while driving, they may loosen over time.
Regular inspection of these connections ensures that all components remain secure and properly seated.
Loose clamps can lead to rattling noises, exhaust leaks and diminished vehicle performance.
Tightening them as needed maintains a robust and stable system, thereby preventing minor issues from escalating into major problems.
Conclusion – How to Replace an Exhaust System
It is really important to install the exhaust system in perfect way with properly aligned so that it can work with the system quietly and protects both your engine and your health as well.
The function of an exhaust system extends beyond merely reducing noise; it also plays a crucial role in controlling harmful emissions, improving fuel efficiency and ensuring the proper functioning of your engine.
A faulty or improperly installed exhaust can lead to several serious issues, including diminished engine performance, increased fuel consumption and health risks associated with gas leaks.
Therefore, it is essential to dedicate the necessary time to replacing the exhaust correctly, utilizing the appropriate tools, adhering to safety protocols and ensuring that the exhaust is positioned with absolute precision.
From preparation and safely lifting the vehicle to removing, installing and finally inspecting the exhaust, paying close attention to every step ensures that every component of the system functions exactly as intended.
Seemingly minor details such as: using new gaskets, tightening bolts to the correct specifications and verifying that the exhaust is securely mounted, have a profound impact on both the longevity and performance of the exhaust system.
So, that’s it from this guide about How to Replace an Exhaust System, if you still got unsolved questions then just comment them down for more info.
Frequently Asked Questions
FAQ 1: What are the common signs that an exhaust system needs to be replaced?
If you pay attention, a failing exhaust system usually displays clear warning signs. One of the most common indicators is loud or unusual noises coming from underneath the car specifically sounds resembling roaring or rattling. You may also detect a strong odor of exhaust fumes inside or around the vehicle; this can be dangerous, as these fumes may contain harmful gases. Other signs include reduced fuel efficiency, sluggish acceleration and visible rust or holes in the exhaust pipe. If your car fails an emissions test, it is also a definitive sign that the exhaust system is not functioning correctly and may require replacement.
FAQ 2: Can I replace the exhaust system myself at home?
Yes, provided you have basic tools, sufficient workspace and adhere to proper safety protocols, you can replace the exhaust system yourself at home. Many people successfully complete this task on their own by carefully lifting the vehicle, removing the old components and installing the new parts one by one. However, this process requires patience and attention to detail particularly when dealing with rusted bolts and ensuring proper alignment. If you feel uncomfortable working underneath a vehicle or handling tools, it is safer to seek the assistance of a professional.
FAQ 3: How long does it take to replace an exhaust system?
The time required depends on your level of experience and the condition of the existing exhaust system. For someone with basic mechanical knowledge, the process typically takes between two and four hours. If the bolts are rusted or the components are difficult to remove, the job may take longer. A professional mechanic can often complete this task very quickly, as they possess the specialized tools and experience required for the job. However, to ensure that everything is installed correctly and safely, it is essential to take your time and not rush the process.
FAQ 4: Is it necessary to replace the entire exhaust system?
It is not always necessary to replace the entire exhaust system. Sometimes, only a single component such as: the muffler or a section of the piping may be defective and require replacement. However, if multiple components are worn out, corroded, or leaking, replacing the entire system may be a better option. This ensures improved performance, minimizes the need for future repairs and extends the overall lifespan of the system.
FAQ 5: What happens if I drive with a faulty exhaust system?
Driving with a faulty exhaust system can lead to several problems. It can diminish engine performance and fuel efficiency, as exhaust gases are unable to exit the system properly. It may also result in loud and unpleasant noises while driving. More importantly, it can allow harmful gases such as: carbon monoxide to enter the cabin, posing a serious health risk. Over time, ignoring this issue can lead to increased repair costs and potentially cause damage to other engine components.
FAQ 6: Should I replace the gaskets and clamps when installing an exhaust system?
Yes, it is highly recommended to replace the gaskets and clamps when installing a new exhaust system. Old gaskets may be hardened and worn out, creating a potential for leaks even after the new components have been properly installed. Similarly, clamps can lose their grip over time and fail to hold the pipes securely in place. Using new gaskets and clamps creates a secure seal, prevents leaks and ensures that the exhaust system operates more efficiently.
FAQ 7: Why is proper alignment of the exhaust system important?
Proper alignment ensures that all components of the exhaust system fit together correctly without any undue pressure or stress. If the system is not properly aligned, it can lead to vibrations, rattling noises and even damage to surrounding components. Over time, this can also result in leaks or uneven wear on the parts. A properly aligned exhaust system improves performance, reduces noise and extends the lifespan of its components.
FAQ 8: How often should I inspect my exhaust system after replacing it?
After replacing the exhaust system, it is a good idea to inspect it every few months. Regular inspections help you identify early signs of rust, loose bolts, or leaks. As the exhaust system is exposed to heat, moisture and varying road conditions, minor issues can develop over time. Regular checks ensure that everything remains secure and functions correctly, thereby preventing major problems down the road.
FAQ 9: Can a faulty exhaust system affect fuel efficiency?
Yes, a faulty exhaust system can reduce fuel efficiency. When exhaust flow is restricted whether due to leaks, blockages, or defective components, the engine has to work harder. This leads to increased fuel consumption and a decline in overall performance. Repairing or replacing the exhaust system restores proper airflow, enabling the engine to operate more efficiently and utilize fuel more effectively.
References:
[1] Catalytic Converters for Vehicle Exhaust: Fundamental Aspects and Technology Overview for Newcomers to the Field
https://www.researchgate.net/publication/351737596_Catalytic_Converters_for_Vehicle_Exhaust_Fundamental_Aspects_and_Technology_Overview_for_Newcomers_to_the_Field

Hello Folks, Dean Shali here to help you out to solve the problems with your lovely vehicle, as i have lots of experience and knowledge about automotive industry as i woks directly with the customers and repair vehicles and i love to help the people to keep their cars safe and running smoothly.